 Home
Home

 Artists
 Search
 Recent
 Random
 Posts
Posts
 DMs
DMs
 Tags
Tags
 Random
 Importer
 Import
 FAQ
FAQ
 Account
 Register
 Favorites
 Login
Login

Merch Behind the Scenes - Gyaru Plushies (Patreon)
Content
Hello again, Lovelies!
Are you ready for some more behind the scenes merch stuff? If you aren’t, you may come back later when you’re ready.
For those of you who stuck around, hello! I’m Eric, the Creative Director Merch Maker Person (official title pending) - I pitch the ideas, or I receive pitches and we all work together to make cool stuff happen!
Today we’re going to be looking at the Game Gyaru plush dolls - let’s get into it!
Step One: Concept -
Game Gyaru stuff is some of my favorite stuff to work on. It always turns out so cute, and that retro anime aesthetic is so comforting to me. With Game Gyaru merch, we have a lot of opportunities to make things that you might have found in a Suncoast Video or at your local Anime Convention, and we take those opportunities!
We wanted to make a Game Gyaru version of those cheap anime plushies you would’ve seen at those Anime Conventions, but…not cheap. So I reach out to some people who make plush dolls in the style - I gave them this image so they could understand the vibe:

I also sent them a bunch of Game Gyaru artwork and asked if they could simplify the design down. They said they would prefer us to provide the simplified artwork, which leads us to the next step -
Step Two: Artwork!
Adapting David Liu’s gorgeous artwork down to these little chibi guys takes a bunch of work! Here are my first versions from Procreate, where I leaned heavily on making shapes rather than drawing things freehand - big shapes are simple, and we want to stay simple!

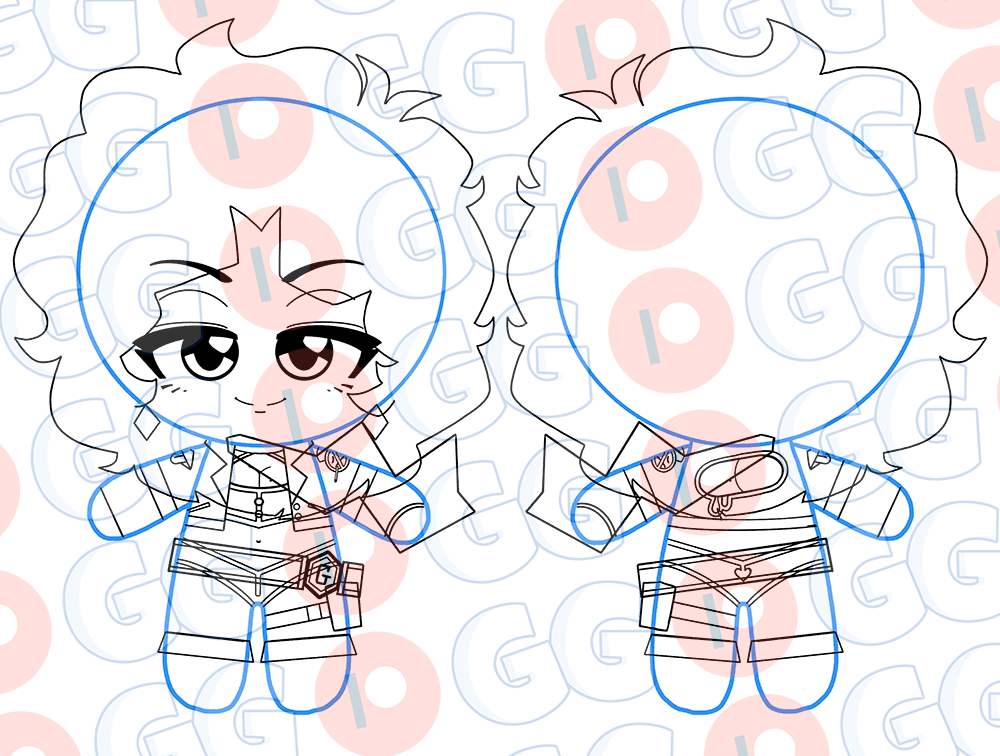
Remember, everything I draw will have to be embroidered. Keeping it simple, but really recognizable - that’s our sweet spot.
After a quick thumbs up from the team, I added color (double checking with the Pantone color book), a few more details, and separated out all of the different pieces that would need to be made along with notes for the manufacturer. Being as clear as possible in your initial files can save you some headaches down the line, so it’s important to think things through!


And after a few more notes, questions and answers we were off to the first prototype!
Step 3: Prototyping
Prototyping is always different depending on the product, and who you’re working with. Sometimes, you’re both on the exact same page and it goes great! Sometimes, it’s such a disaster that you just go elsewhere and hope for a better experience. This was neither of those things. There was a little bit of work to do, but I liked what I saw! Also this makes for the best content for these Patreon posts - kinda boring when I just go “And they did it exactly like we wanted them to on the first try! Yay!”
So! Here are the sample photos they sent along with notes I gave them:

We started with just Arina’s plush - this way they could nail down the overlapping details like how the belt and leg holster should look.
And the next round on Arina:

A few more little details hammered out here, and we’re ready to move on to Daniella and our first physical prototypes sent to us!


I had a few more notes, but this is the only one that matters. We wanted the butt cleavage for Daniella, we thought it would be cute on the doll! It was not.
The next prototype was the final!
Step 4: Packaging
With the product finalized, we still needed to add a little packaging - in this case, just a tag. But that still takes work! Here’s a screenshot of my workspace in Illustrator.

The front of the tag was easy - I pulled David’s artwork from our titty mousepads, cropped it into the neck up, and applied some pink & blue layers with “Hue” blend mode so make them monochrome.
You can see I struggled a little with what to put on the back of the tag. We settled on general information about them, and thank god because the other options were not good lol
We wrapped everything up in early April, and ordered them to arrive in time for their debut at Anime Expo in early July! You’ll be able to find us there again next year, and hopefully we’ll have some more cool new stuff like this to debut!
I hope you enjoyed this peek behind the scenes! I’ll be back again with more soon :)
‘Til next time!
-Eric