Home
Home

 Artists
 Search
 Recent
 Random
 Posts
Posts
 DMs
DMs
 Tags
Tags
 Random
 Importer
 Import
 FAQ
FAQ
 Account
 Register
 Favorites
 Login
Login

node collection v1.1 (Patreon)
Content
These are the node groups that I use in generally all of my projects.
https://www.patreon.com/posts/88643865
instructions: drag the .blend into your project and
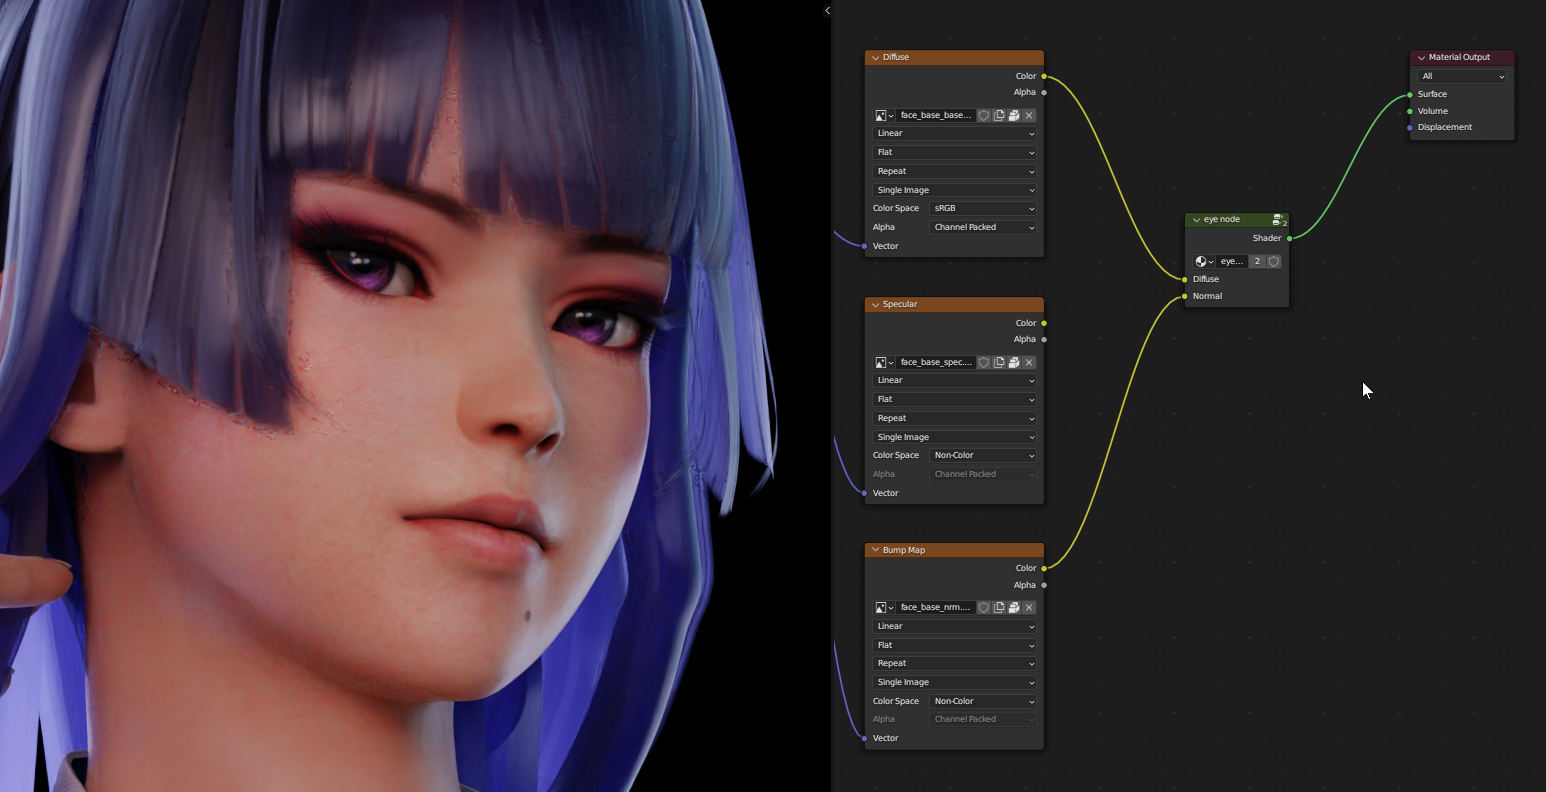
append>NodeTree> eye Node, Hair Node, Skin Node, Emission no light.001, & cloth Node. Or pick whichever one you need to use.
OR
you can just append Object>'Suzanne for NODES' and check the shader editor of the Suzanna object for all of the node groups (except for the comisiton hair fix) and then copy and paste them into other materials.
-the 'emission no light' node group is useful for better control of image planes that you plan to use as a background, or for your hdri. You can change the 'light emission' value to change how much light the image/hdri emits onto the world. The 'image brightness' value effects how bright the image of the sky appears.
EDIT: if you decide to use it for an image plane as a background and have lighting behind that image, make sure to go to Object Data>visibility>Ray Visibility>and turn off Shadow.
-eye, hair, and skin node setup was made by following radianteld's tutorial
https://www.deviantart.com/radianteld/journal/DOA-Skin-Shader-859101652
https://www.deviantart.com/radianteld/journal/DOA-Eye-Shaders-878918527
https://www.deviantart.com/radianteld/journal/DOA-Hair-Shader-850652087
-The composition hair fix group is only if you decide to use the hair shader with doa models. This will render with 2 slightly different denoising methods. One will include noise from the hair texture, the other one will fix that, but it will be missing some normal texturing. So it is best to combine the 2 renders together.
To use it, first go to the View Layer tab in the properties window and go to Passes>Data>turn on Denoising Data, then go to the compositing tab Add>Group>compositing hair fix and attach it as you see in the image.
Inside the group it will output 2 files, the top one will be the original with the noisy hair and the bottom is the fixed hair, without normal and albedo data. Combine the two images in a photo editor to get rid of the noisy hair.
-the cloth Node is for adding some texturing to clothes, I use this for most of my projects.Inside the group you can change the Value inside the Mapping to change size of the texturing. Lower number = larger texture.
============================================================
23/09/02
file created
23/10/30
added more instructions and images
added cloth Node group
added nyotengu example
Files