Home
Home

 Artists
 Search
 Recent
 Random
 Posts
Posts
 DMs
DMs
 Tags
Tags
 Random
 Importer
 Import
 FAQ
FAQ
 Account
 Register
 Favorites
 Login
Login

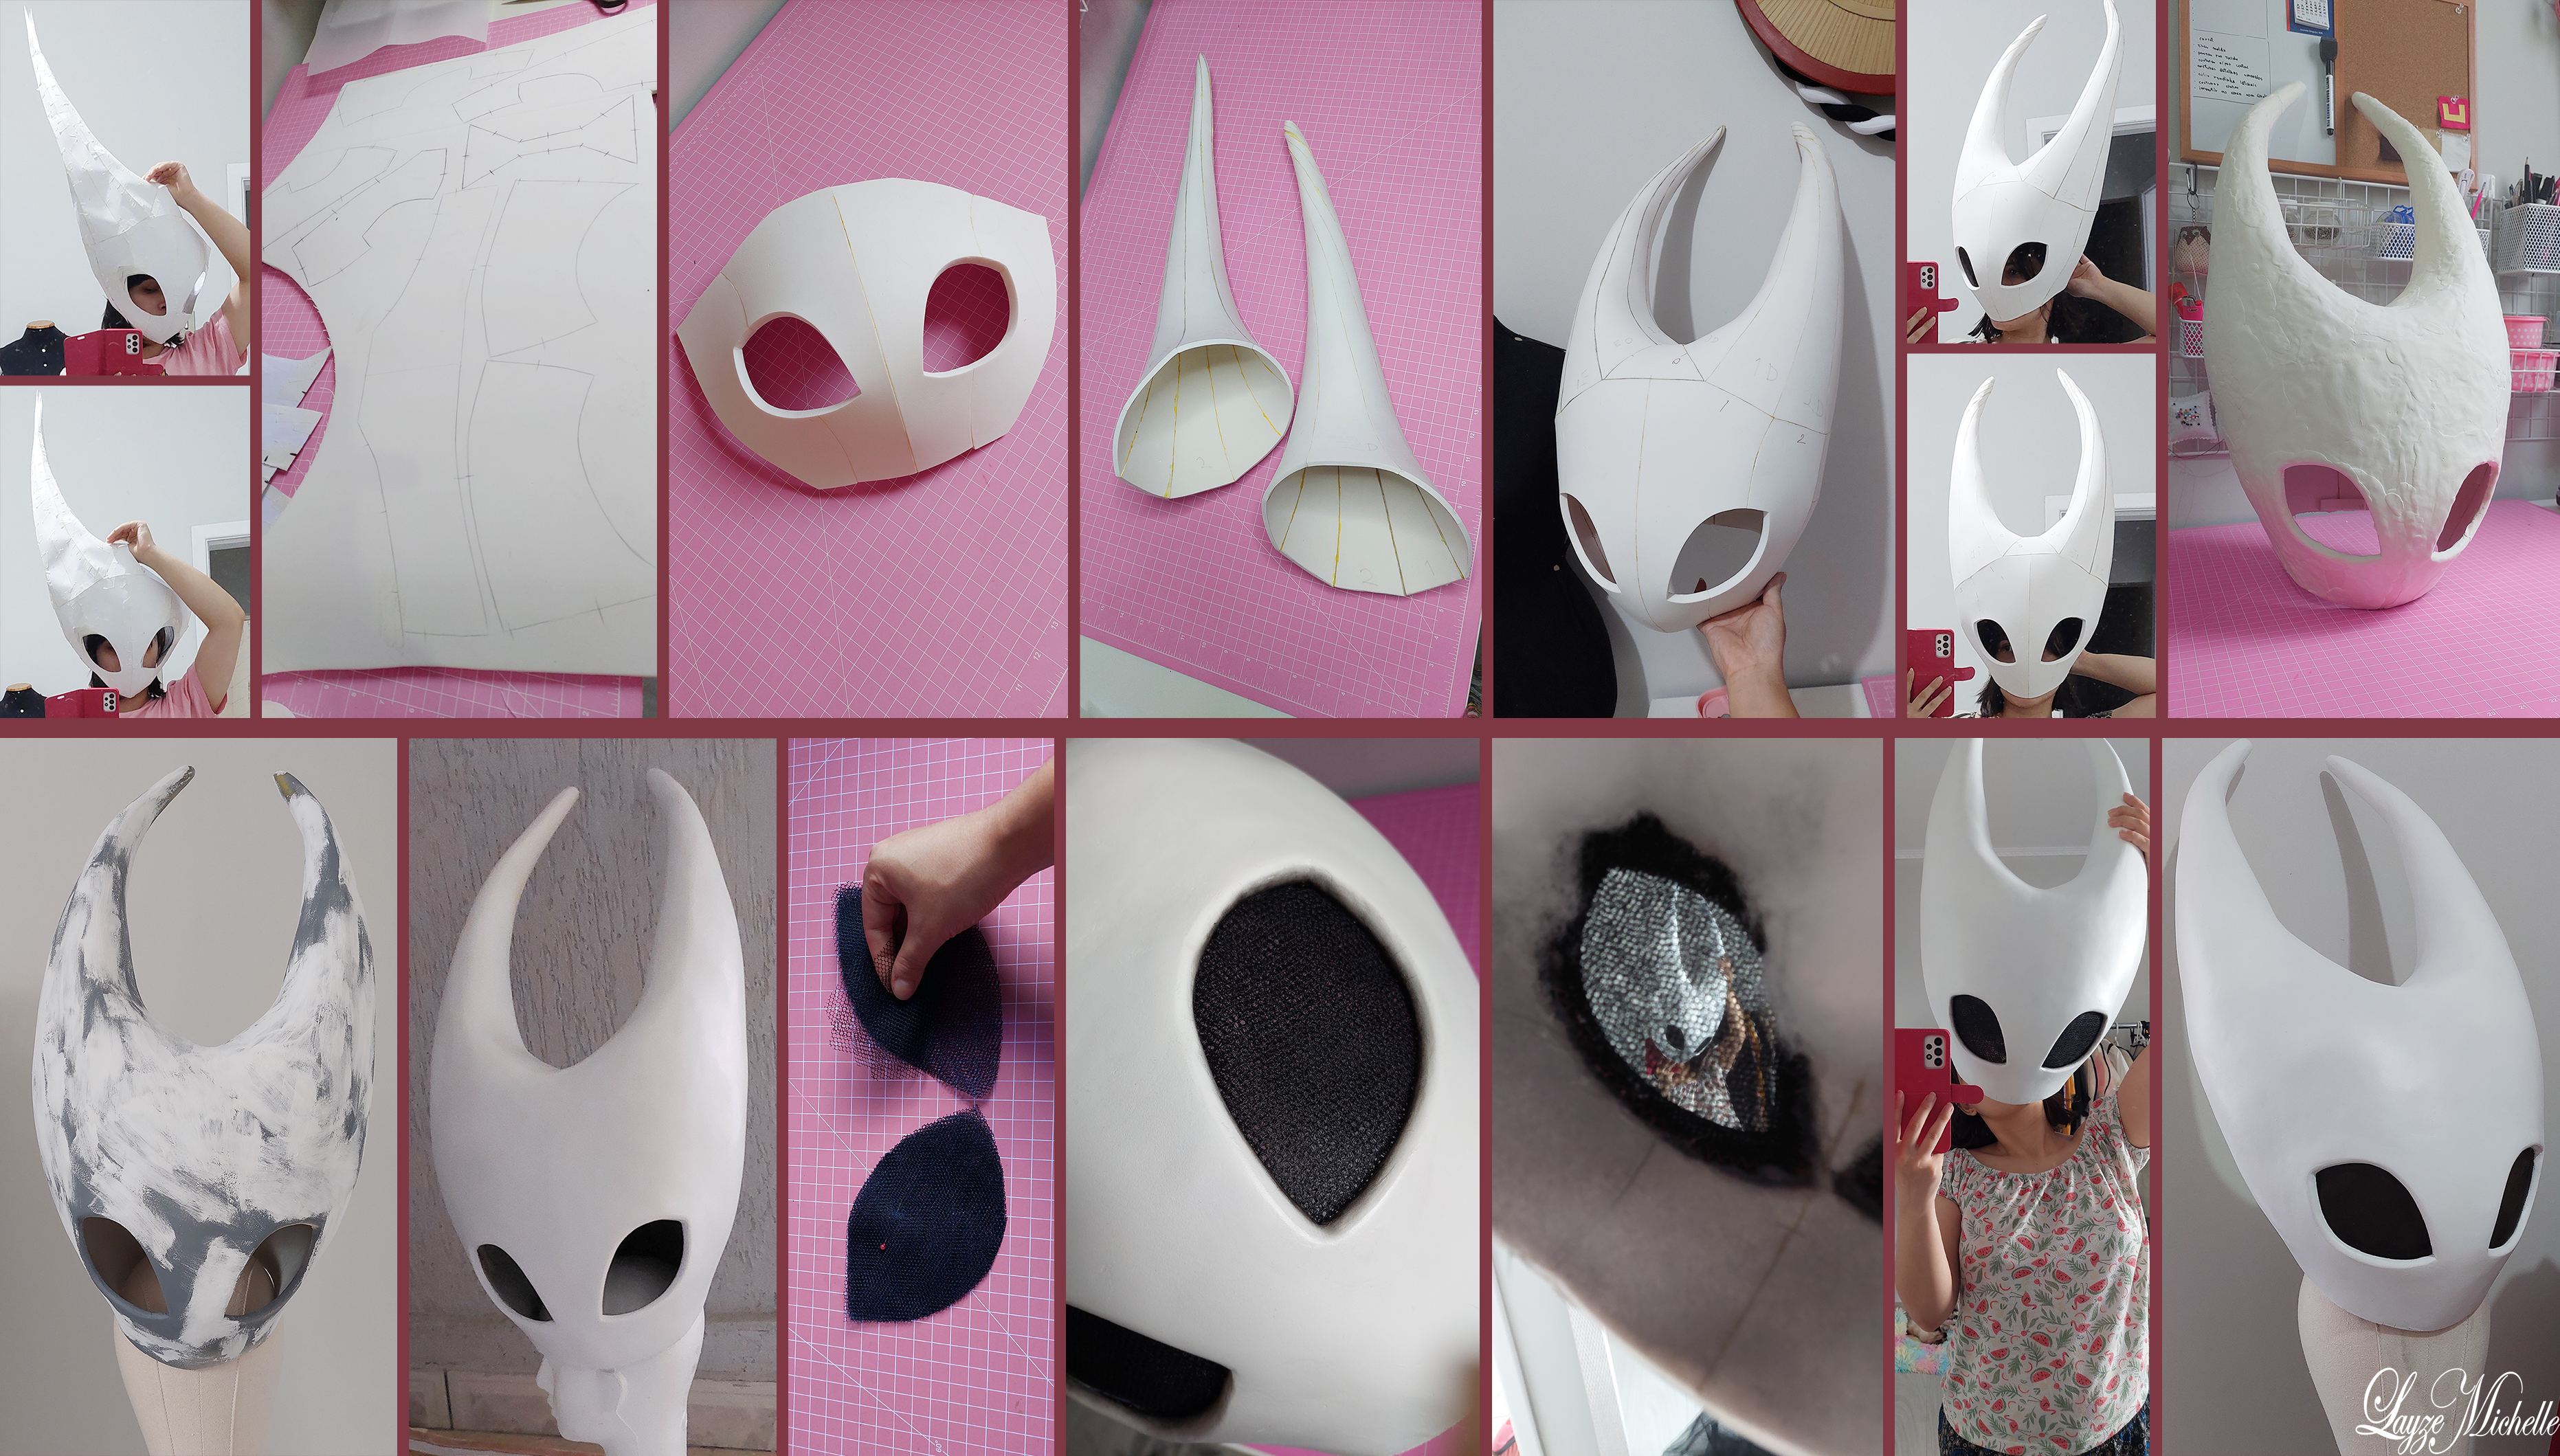
Hornet (Hollow Knight): Head (FULL WIP) (Patreon)
Published:
2022-03-14 17:21:35
Imported:
2023-06
Content
Helloooo!!
Today I came to bring you the Princess Hornet head!!😊
It took 3 days of work, first I made the mold on paper, passed it to 10mm E.V.A foam and molded it all with E.V.A foam clay, the same scheme I did with Terrako! https://www.patreon.com/posts/44217895
Then I sanded it, fixed some defects with spackling and painted it with white spray.
For the eye I used "stiff netting tulle", as the holes are big, I used 8 layers one on top of the other for those who see from the outside, not being able to see my eye, but inside, you can see perfectly!
What did you think??❤️
Files