Home
Home

 Artists
 Search
 Recent
 Random
 Posts
Posts
 DMs
DMs
 Tags
Tags
 Random
 Importer
 Import
 FAQ
FAQ
 Account
 Register
 Favorites
 Login
Login

Magic Freeze Tag - Shaders! (Patreon)
Content
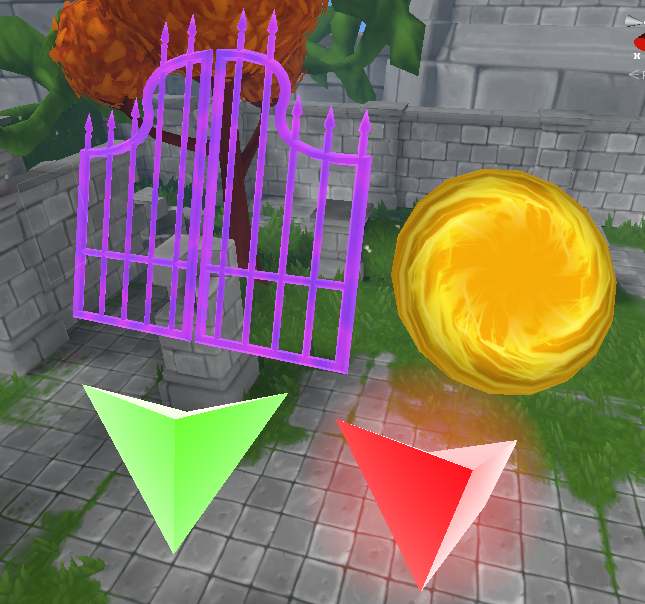
I chose to do a bright and cartoony style for Magic Freeze Tag. Most of the world is textured with hand-painted textures and baked lighting, but the magical obstacles have animated shader effects instead. Let me show you how I made them!
Shaders are basically custom material types that behave however you want. The basic shader I use on most surfaces is just a simple opaque, shadow-casting material that you can put a texture on. VRChat supplies this shader by default.

I also used a default shader (made by Unity) for the “transparent cutout” surfaces, like the layers of leaves around the hedges and trees. Basically I just wrap a “solid” version of the shape with a leafy “shell” that’s transparent and slightly bigger. The two materials/shaders are very similar, except the shell has holes in it. These holes are slightly less optimized on oculus quest, but using these cutout textures is okay in moderation. The real performance-killer is partially-transparent surfaces-- GPUs have more trouble with these surfaces because they have to blend colors on top of each other.

Writing shaders for worlds is a lot like writing shaders for avatars, but even better. On oculus quest, you can’t use custom shaders on your avatars, but you can totally use them in worlds. Just be careful about performance. You just have to do a few extra steps to make sure both platforms support your shader code. Otherwise, a shader might look fine on PC but be a pink “error” shader on quest, or vice versa.
I actually use a tool called Shader Forge to create my shaders. It’s a visual scripting-type system like the version of Udon that VRChat provides in the SDK. You can totally write shader code directly (with your keyboard and all that) but I like the visual version that Shader Forge has. Shaders can be kind of tricky to get right and Shader Forge makes sure you don’t make mistakes that end up with pink “error” shaders. Plus, shaders are visual by nature. It helps for me to be able to see the textures I’m working with while I’m writing the shader.
You can download Shader Forge for free online. You can just import the unity package into your vrchat project and open the shader editor whenever you want within Unity. If I remember correctly, I had to edit some of the Shader Forge code itself to get it to work with Unity 2018. If you want to try Shader Forge for yourself, but you can’t get it working, contact me on discord and I’ll help you set up the Unity Package.
I really recommend Shader Forge if you don’t know how to write shader code! Just like Udon Graph, I think Shader Forge is actually pretty easy to learn and is a great way to get into learning programming. You can follow along with these screenshots of shader graphs to get started!

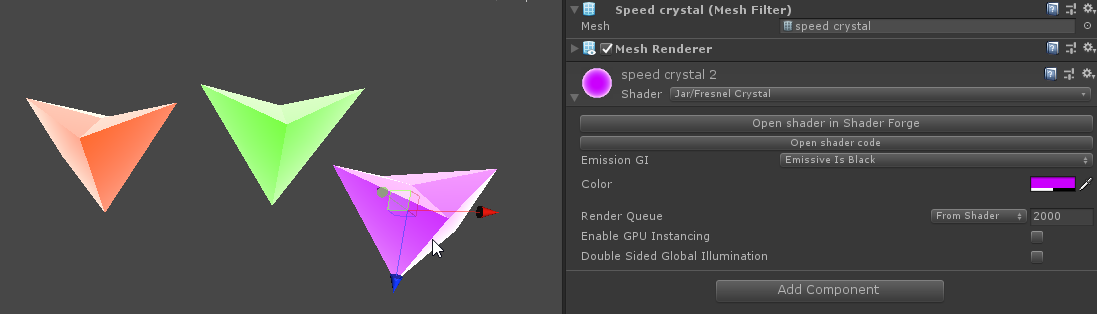
This is the shader I used on the green speed crystal powerup and the red indicator above the tagger players. The green boxes represent inputs; In this example, Color lets you change the color. The lines between boxes represent information, and the grey boxes represent math functions. All lines lead to the big box on the right, which represents the final result. You can also see a preview of the final result on the left side (for some reason it’s on the left and not the right, idk).
In this shader, you can set “Color” to whatever color you want. The RGB determines the color of the background, and the A (alpha) determines how bright the outline glows. Alpha is multiplied by 5 (to be a lot brighter than white, if you want), then applied to ONLY the edges (Fresnel) , then added on top of the background color. The final product is the emission color of the crystal. I don’t need to use any of the other settings like “opacity” or “refraction” or whatever else, since this material is just an unlit glowing surface.

The gates and the laser beams actually use the same shader… and it’s a bit more complicated. It basically has three things going on: First, it has a glowing fresnel outline effect just like the crystal, except this time I can change the color of the outline. Second, it has a scrolling texture. You might have seen this on the gate if you look closely. I can set how fast the texture scrolls horizontally and vertically. Finally, I can make it dissolve away by sliding a “cutoff” slider up and down. This is the same type of cutout effect used on the leaves, but this time I can boost its effectiveness up and down to get the cool fade effect the gates do.
Notice the “Time” block in the bottom right. This lets you use time in your shaders! I multiply it by one value for “U” (horizontal scrolling) and another value for “V” (vertical scrolling). The gates only scroll in one direction, so I set one of these to zero. You can change how a texture is applied on a surface (like sliding it in a certain direction, or scaling it, or rotating it) by taking the original coordinates (the green-red rainbow thing) and just adding the time using math. In this case I just add time. That works.
The Fresnel glow (the white ring effect) is similar to the fresnel used in the crystal shader, but I can change the “exponent” with a slider. This basically sets how “sharp” the outline is. Add the glow on top of the scrolling texture and you have the final color!

Finally, the alpha channel of the gate texture has a bunch of holes in it. If you want to add holes in things, drag a line from the texture channel to the “Opacity Clip” plug in the final box on the right. You can adjust exactly how generous the cutout effect by adding a slider value like I did here. If the slider is zero, the cutout barely applies at all and the gate doesn’t have any holes in it. But if you slide it up to 1, the holes are so big the gate basically disappears.

The portal shader is a little bit more simple than the gate shader. It’s just the scrolling effect. However, to get the texture to scroll in a spiral shape, I mapped the texture to the portal in a circular pattern. That way, shifting the texture diagonally appears to make the texture move in a spiral pattern. I could even make the portal spin in the other direction just by changing the Scroll U and Scroll V speed values.

I hope this post inspires you to go download Shader Forge and mess around with everything it can do! Using the graph editor thing you can do anything you can think of really, same with writing the raw code. It’s very powerful. Whether it’s a scrolling shader like the portal, or a dissolve shader like the gate, or whatever, feel free to share your creations on the discord server!
Files