Home
Home

 Artists
 Search
 Recent
 Random
 Posts
Posts
 DMs
DMs
 Tags
Tags
 Random
 Importer
 Import
 FAQ
FAQ
 Account
 Register
 Favorites
 Login
Login

Fujiyama Sankaku - Houshou Marine 3D Edition Making Process Part.4 (Patreon)
Content
As for the eye paint, I did not draw the pupil this time because the eyes were heart-shaped. However, I think it will be easier to draw lines next to the pupils if you draw them.
I think it is better to draw the pupil as a guide, even if it is just a dot (warning).
Also, this is what the professional painter said, but it is easier to get the image if you draw the lines with the mouth brown first as much as possible.
At any rate, the first step is to do the preliminary painting. The following process is worked with enamel paint. Also, the process of closing with lacquer clear is interspersed along the way.
As a preparation for eye painting, the face should be smooth with lacquer clear in advance. It is very important. If it is not smooth, it will be difficult to wipe off the enamel...
And this is what I painted first.

It looks good at first glance, but when reversed left to right, it becomes uncomfortable.

The angle of the right eyebrow is wrong. I would like to make the bounce of the eyelashes as symmetrical as possible, but the left eye is almost hidden, so I left it as it is this time.
So I corrected the angle and inverted the image again to check.

Looking at the horizontal guide pulled by the textile, it fits in just fine.

With this, I asked Takatori-san to check the preliminary drawing once, and since it looked fine, we closed it with clear and proceeded to the next step in the process.
This is my personal method of drafting, checking, and revising, so there is no need to copy it. I don't think there are many people who go into this much detail...in fact, some people don't even do the preliminary drawing in the first place.
Incidentally, the timing of spraying clear in the following process is not mentioned because it varies. I close with clear when I feel it is necessary to close with clear in the next process.

As usual, eyeliner is applied using an airbrush. A little bit of the undercoat has become less transparent this time, but if you want a solid gradient, you can make the outer corner of the eye and the inner corner of the eye so that the undercoat is transparent.
After tracing the underdrawing with a brownish color, add color to the eyes. To be honest, I didn't bother to do this with an airbrush.

Next, draw the hemisphere at the bottom of the pupil. After drawing the hemisphere, close it once with clear to make it easier to draw the outer hemisphere line.

Looking at it now, the hemisphere of the left eye (the red one) could have been centered more.

Draw lines around the pupils. When I looked at the illustration material, the yellow line was inside or outside, and I was not sure, so I looked at Max's figure and saw that it was inside. In addition, I drew the shadows of the eyes.
It is gray or blueish gray, depending on the work, but you can change it to suit your taste.
Incidentally, it is better to draw the eye shadows at an early stage. If you draw it in toward the end of the process, the clear layer will be too thick and it will look obviously floaty.

Check the angle of the display to determine the line of sight. If you make a mistake in the line of sight, you will have a hard time completing the work and the finished product, so be careful.

Make a dark area in the upper part of the eye.

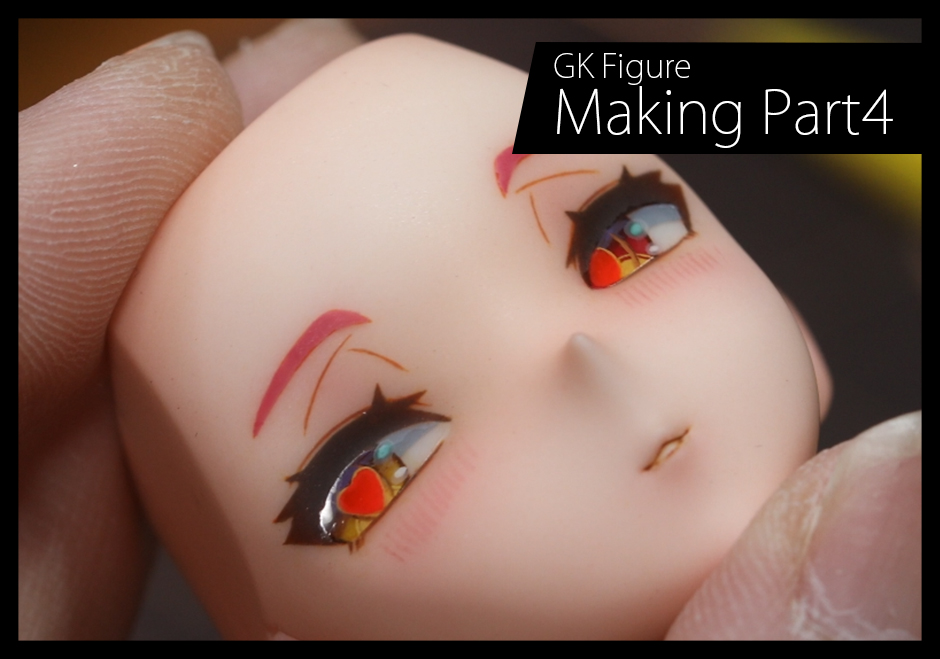
Once this is done, the next step is to draw the heart mark.
It is not easy to draw a heart by hand, so take your time and work carefully to make it look good. Use Gaia Fluorescent Red because the color will sink if you use a regular solid color.
Don't forget to put a thin highlight on the upper part of the eyes before drawing the heart.

Those fluorescent colors are dazzling! It is fun to draw hearts when they stand out this much.
The heart is surrounded by a yellow border, but this is also very hard to draw so try your best.

Finally, the highlight is drawn in.
The thin border around the highlight can be easily added after the highlight is drawn and closed with clear. Just mix enamel clear and white and add a little bit of the enamel clear and white around the perimeter.

Once this is done, spray clear to protect the eyes.
After this, the skin color is applied, but if there is any dust or smudging, the skin color will look dirty, so file it down with a #400 file or something.

Under the eyes or...

Carefully file the cheeks and other areas of interest. You just need to be careful not to scrape the eyes too vigorously....
After that, clear coat and return to smooth condition, then apply skin color from there.

Apply the skin tone, and while you are at it, draw in the eyebrows and the diagonal lines on the cheeks.
I used clear red for the cheek lines, but if I applied it as is, it would be too thick, so I diluted it a bit.
I used a Kimwipe to absorb the excess paint and adjust the color so that it is a bit grainy before painting.
Well, you can also break it up with enamel clear.
At this stage, the face still looks like it is being painted, but it is different when blush is applied to the cheeks, lips, ears, and chin area in clear red.

Personally, I think this reddening process is probably my favorite because it gives a sense of life to a face that feels like a doll.
The pupil is then masked and matted.

In the video, after matting, the eyes were polished with a #10000 file to make them smooth, but this was originally done before matting. I was so tired that I forgot to do it...
After matte finish, apply lacquer clear on the lip to make it shiny.

Once the eye painting is completed like that, it can be assembled and completed.

Files