Home
Home

 Artists
 Search
 Recent
 Random
 Posts
Posts
 DMs
DMs
 Tags
Tags
 Random
 Importer
 Import
 FAQ
FAQ
 Account
 Register
 Favorites
 Login
Login

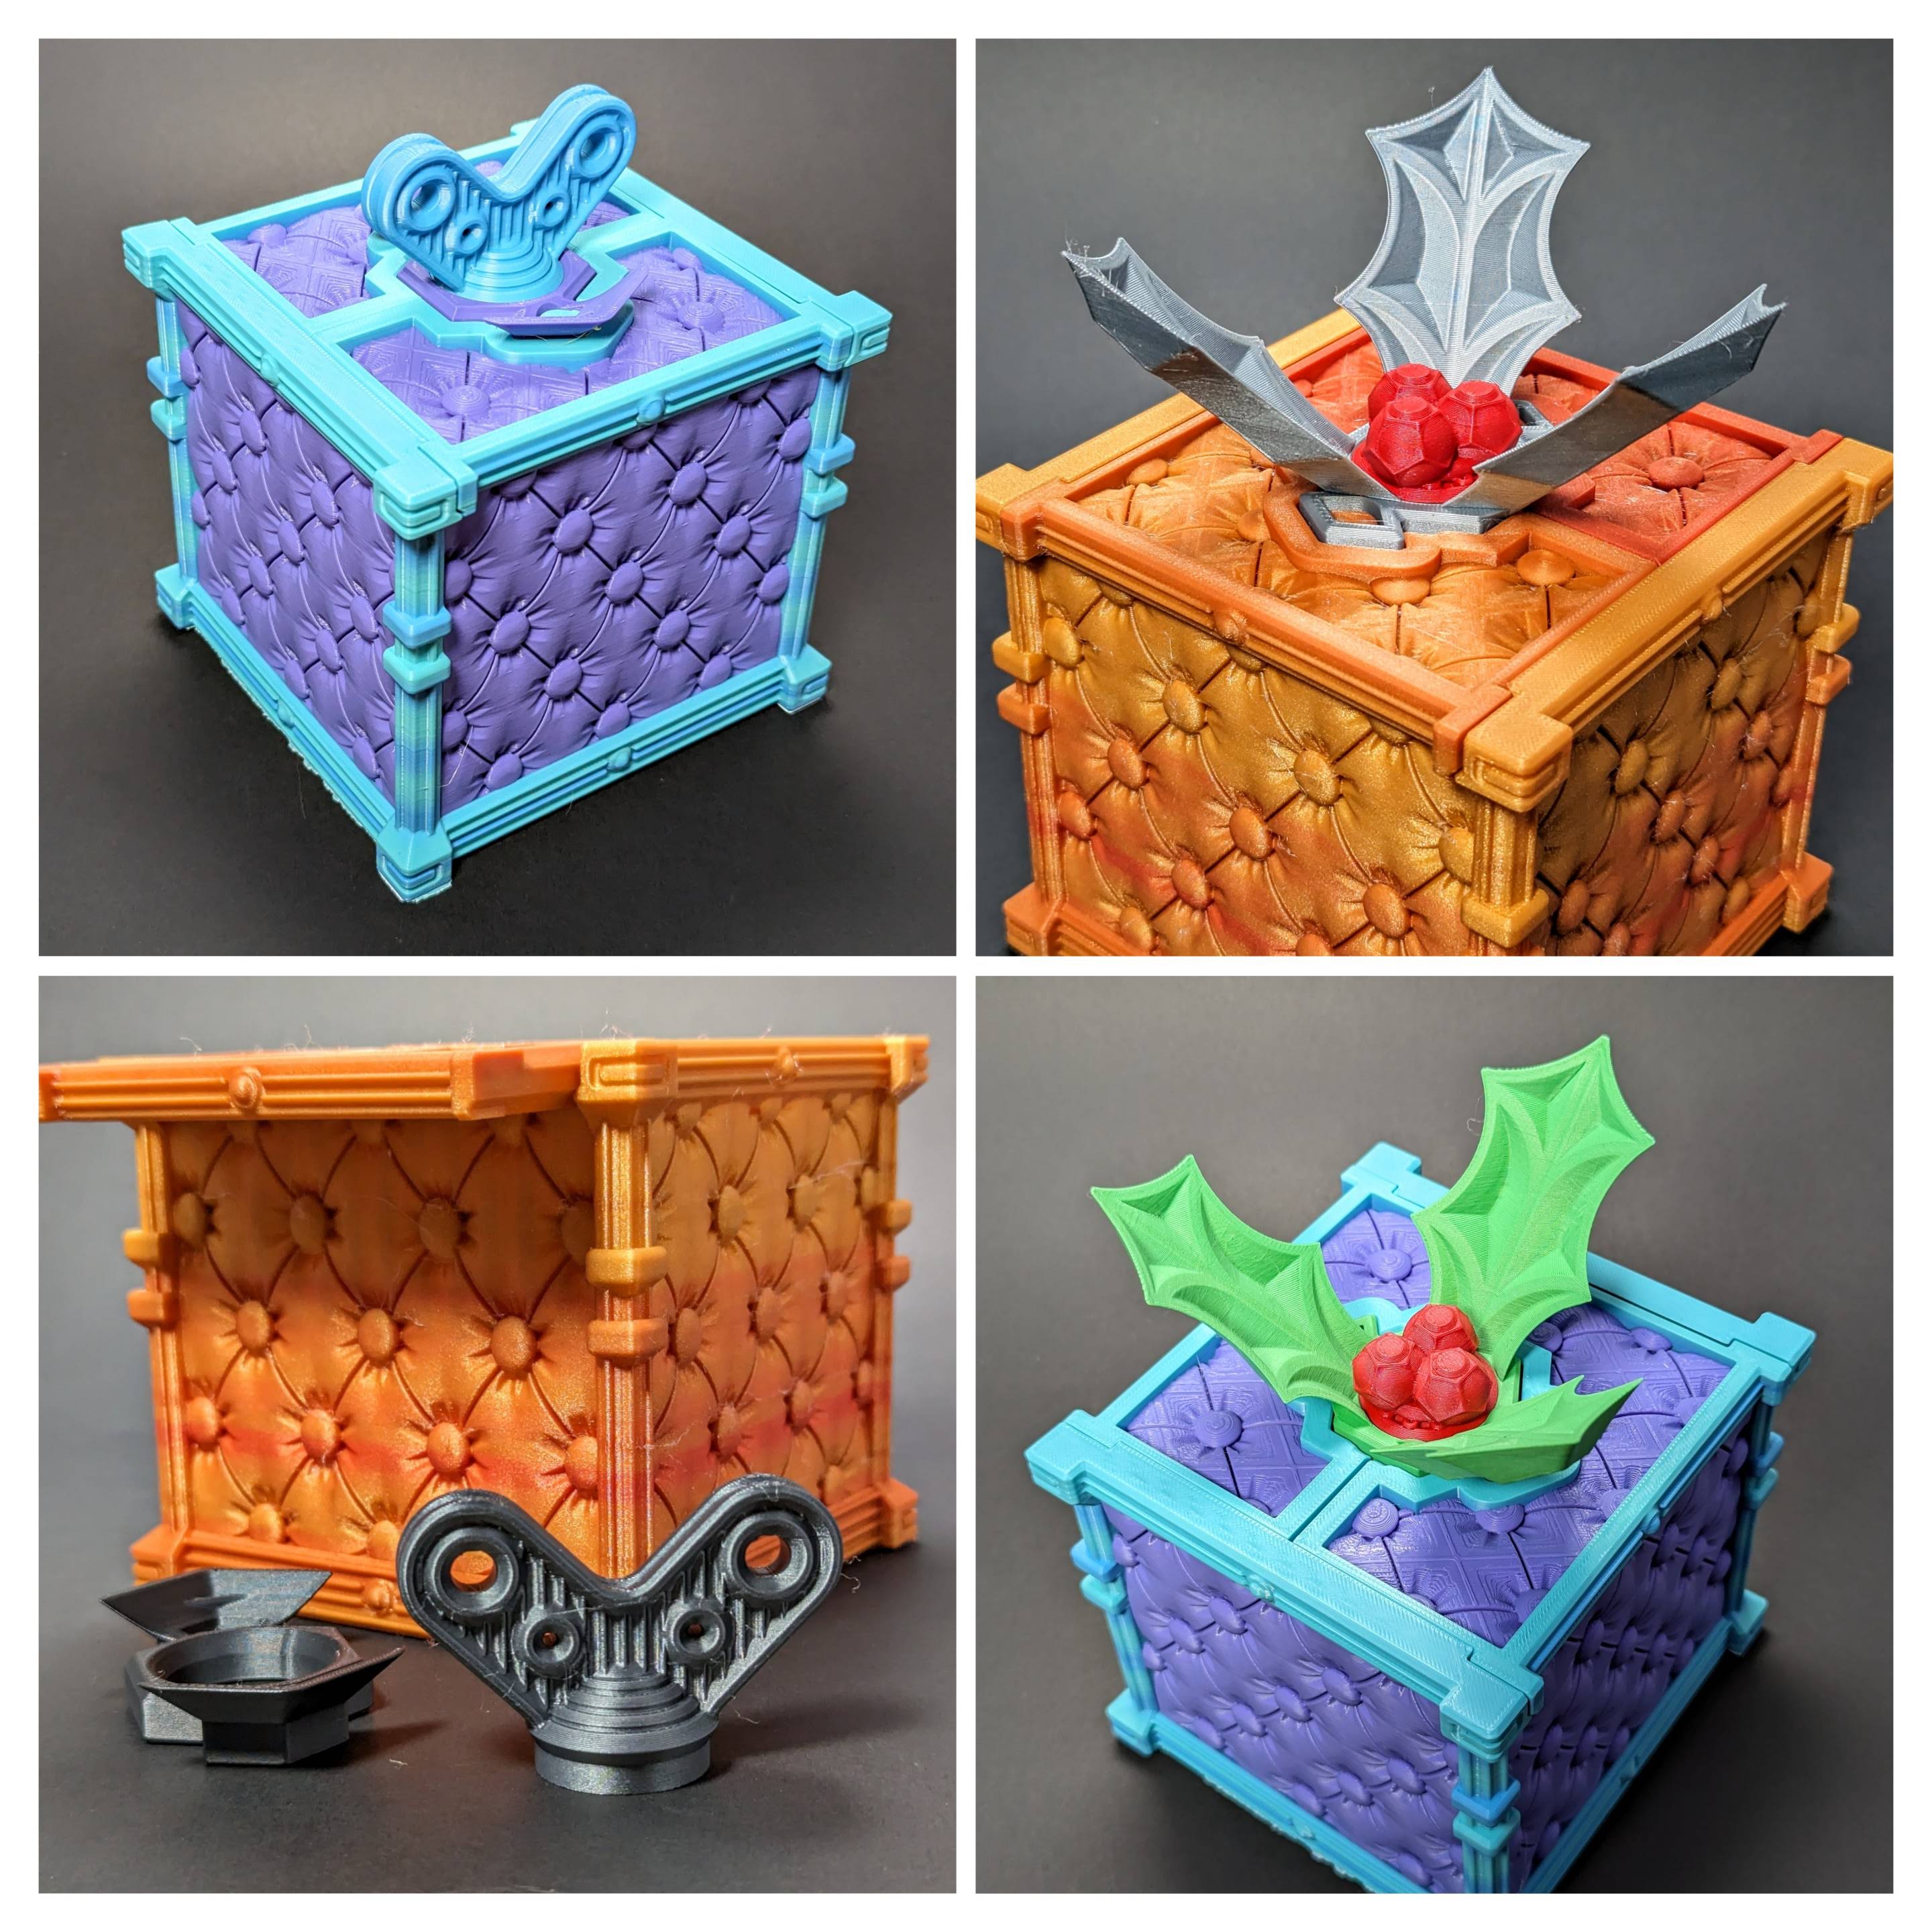
Peculiarity Box (with festive holly option!) (Patreon)
Content
Howdy, wonderful people!
Oh textures, where would we be without them! As you've probably guessed, I got caught up with the deep buttoning texture used in upholstery, and somehow that ended up as the primary feature of this model. The pattern here is of course fairly abstracted from the real thing, made up of a few key design elements, and it's always a fun process to identify what those bits of identity are that makes something recognisable. On this pattern it was the curves and creases that did it for me!
But what is this, anyway? Well, it's a box with a lid comprised of two panels that slide in from the sides. The panels are constrained by the edge of the box and can't slide further than they're meant to. A latch plate fits over the panels, and then a bolt holds it all securely.

Since it's still the festive season for a little while, there's a holly-leaved alternative latch plate and bolt!

Print Options!
So, there are three different sets of files for this model:
1) A single-material print that has the box body and lid panels as single files.
2) A multimaterial print version for Prusa MMU, Bambu AMS, Mosaic Palette, etc. You should probably print the assembly version instead.
3) An assembly version in which single material prints are fastened together!
The assembly version has a clear efficiency advantage in that it avoids the material and time waste overheads that come with multimaterial printing. The panels print lying flat and are bolted in place from the inside of the box (or the underside of the lid). There's a little tool provided to drive the bolts, too.
(You'll need twenty bolts, if I've counted correctly)
There is one disadvantage of printing the panels flat, though - it means it's trickier to get really neat curves on the pattern. Your best bet is to use adaptive layer heights and let the slicer apply some nice thin layers. You could of course print those panels on their flat sides if you were feeling adventurous!

Print Description
This is a multi-part print that is assembled after the fact, no matter which of the three approaches you take! The lid parts still need to fit together nicely. The tolerances are generous, but you'll still want to make sure your prints are nice and neat so that things move nicely!
Print Dimensions
The main box body occupies 118mm x 124mm on the print bed and is 109mm tall.
Supports Needed?
Not at all! Designed for straightforward printing!
Scalability
This one will probably scale quite well up or down, with the obvious caveat that the fit of the parts will loosen or tighten accordingly unless you scale the parts slightly differently to each other to accommodate.
Print Orientation
For the non-assembly versions, all parts print right-way-up.

For the assembly version it's the same as above, but the detail panels print inside-down, and the bolts print head-down.

File Location
You'll find this one at at 535 Peculiarity Box
Link to dropbox post: https://www.patreon.com/posts/31697592
Further Thoughts
You can of course just glue the panels on for the assembly version, and that's going to be nice and secure, but there's something satisfying about doing up all those bolts :)
Happy printing!
xoxo
Sven.
Files