Home
Home

 Artists
 Search
 Recent
 Random
 Posts
Posts
 DMs
DMs
 Tags
Tags
 Random
 Importer
 Import
 FAQ
FAQ
 Account
 Register
 Favorites
 Login
Login

Fractal Trees! (Patreon)
Content
I love big assemblies and I can not lie!
I also love fractals. Trees are the classic example of building something up recursively from individual components repeated at different scales, and that's what this model is all about!
Let's look at the parts.
This is Fractal Tree G. It's pretty rudimentary as far as trees go, just three curved bits that meet at a common base:

If we print two more of those, and then print Fractal Tree F, then screw the parts together, we get....

Print all that two more times and add a Fractal Tree E, and we have...

Print all that twice again and screw the sub-trees onto D, and things are starting to look very tree-like...

By the time we're attaching three of those onto Fractal Tree C it's all pretty sizeable...

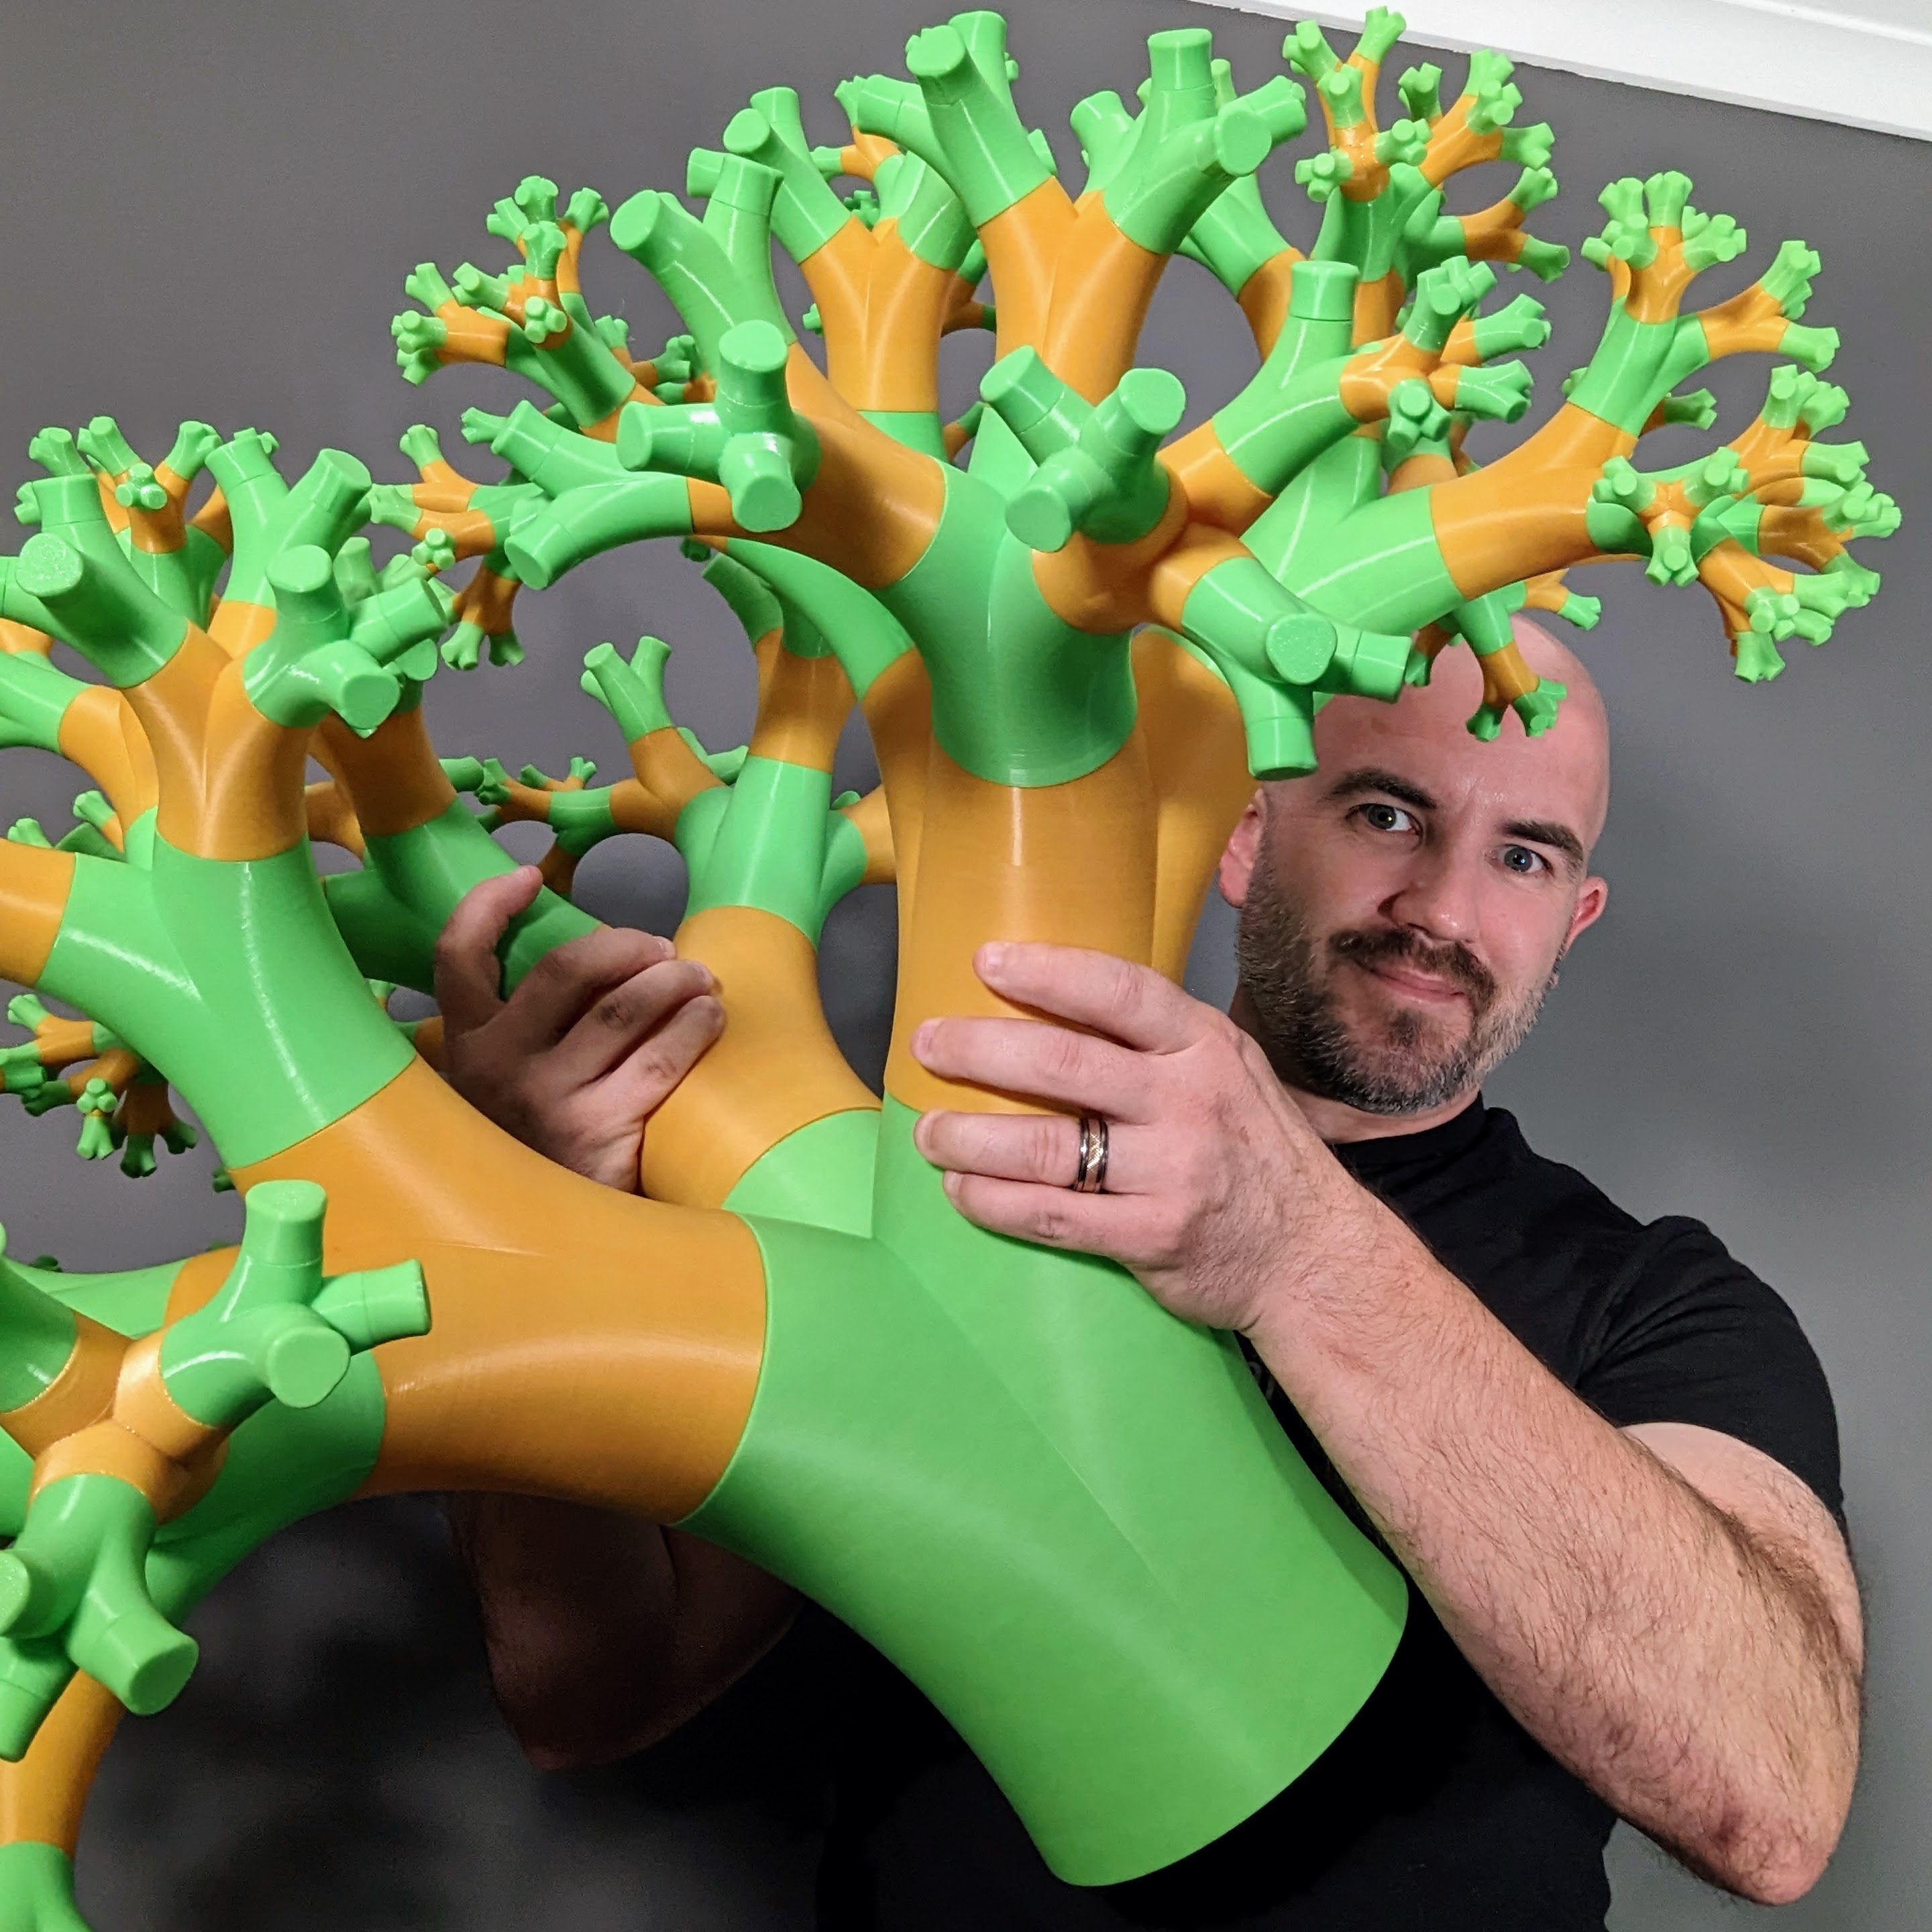
I'm going to skip Fractal Tree B because it's a pain to undo those from the trunk (aka Fractal Tree A) - more on that a bit later. You've already seen this picture at the start, but here it is again!

You'll notice, though, that my tree is not complete - there are pruned ends on some of the branches. This is mostly because I ran out of the filaments I was using and needed to stop there, but it does lead into Branch Caps: Each Fractal Tree model has a corresponding Branch Cap model that terminates the limb. There are a few reasons why this is useful:
1) Scale. The number of parts required grows exponentially depending on which level you treat as the trunk! So, being able to prune off a branch can mitigate that, somewhat.
2) Style. A selectively-grown fractal tree is somewhat more interesting than completely-populated one!
3) Collisions! Each piece of the tree has a consistent curve, and by the time you're using A as the trunk there are upper branches that will collide with each other in a way that will hamper assembly. You'll probably want to prune off some bits with end caps to manage this. Note that there will be collision moments during assembly even when using B as the trunk, but those should just get in the way temporarily while assembling parts. All these collisions are why I didn't undo the B pieces from A for photos.
Model name note: Branch Cap N will fit in place of Fractal Tree N.
Print Description
This is a regular mode print. Infill is the big question, since these are large volume, high-quantity pieces. I printed all mine at 3% infill, but I did need to check that the infill pattern fell usefully under the centre point of the model to ensure that there was adequate support for that part of the print.
Print Dimensions
Fractal Tree G is tiny.
Fractal Tree A is 226mm x 210mm and 250mm tall!
Supports Needed?
Not at all! Designed for straightforward printing!
Scalability
You could try to scale this, but you'll need to make sure you scale all parts consistently so that things still fit. The diameter of the end of each branch needs to be equal to the diameter of the base of the next connecting branch part.
Print Orientation
The Fractal Tree models print right-way-up and the Branch Caps print upside down, like so:

File Location
You'll find this one at at 605 Fractal Tree
Link to dropbox post: https://www.patreon.com/posts/31697592
Further Thoughts
Assembling this took far, far longer than expected! It reminded me of the big polyhedra I put together in the distant past, and which I keep meaning to revisit in some form...
Happy printing!
xoxo
Sven.
Files