Home
Home

 Artists
 Search
 Recent
 Random
 Posts
Posts
 DMs
DMs
 Tags
Tags
 Random
 Importer
 Import
 FAQ
FAQ
 Account
 Register
 Favorites
 Login
Login

Live by the Pliers, Die by the Pliers (a May recap!) (Patreon)
Content
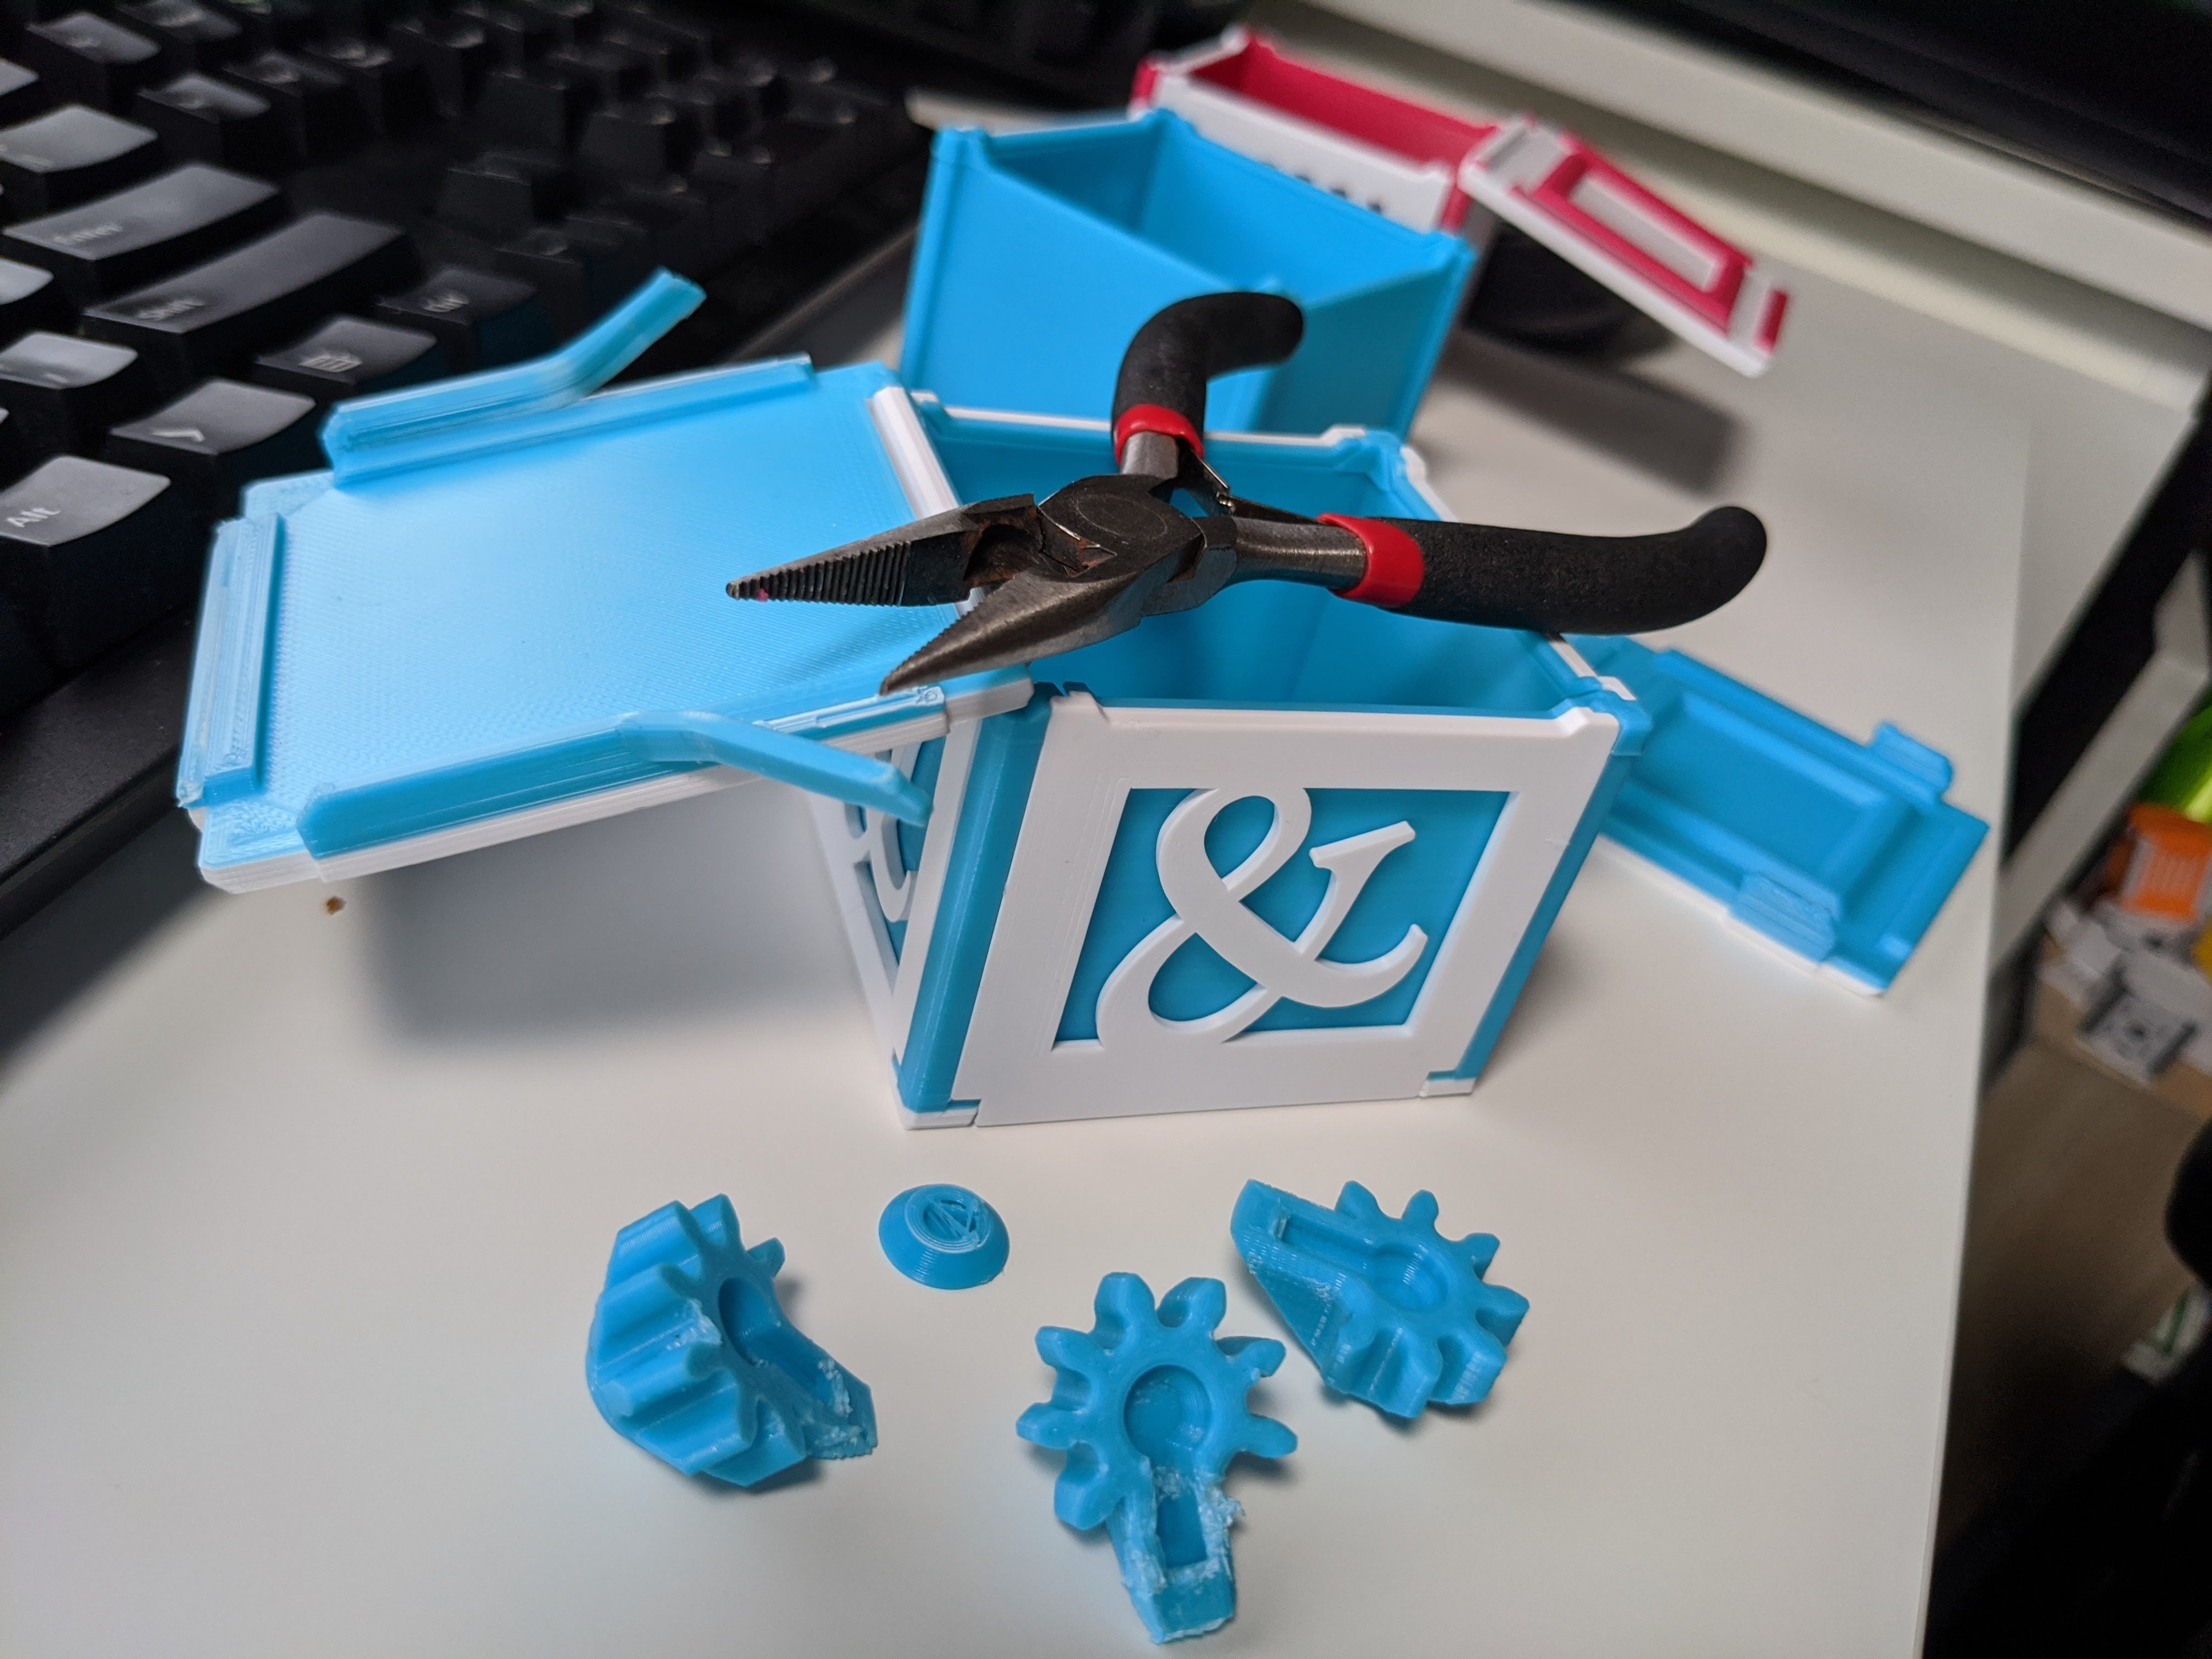
Howdy, wonderful people! Yep, pliers, tremendously useful when developing designs, especially ones with moving parts. Test prints take time, so when I wonder "hey, what if I only had two cogs there, rather than three?" out come the pliers, and hopefully I get some insights without waiting for yet another print to finish.
The pliers certainly had a workout this month...
Tearing up the locking cogs...
The example above of course was taken directly from the machine canister. The original design concept had six locking cogs around a much larger central cog (and in fact if you squint hard you can see how that developed from the miter cog assembly I was working with this time last month). That mangled blue print in the picture below shows the remains of that print after I tore most of the cogs out!
See, the thing was that the whole thing just wouldn't turn smoothly, and at first I figured there were just too many moving parts, hence the idea of removing some of them for experimentation. But, that wasn't the problem. It turned out to be an issue of the cogs being pushed sideways with more force than was being applied to turn them, causing the whole thing to jam up. A few experiments later, I'd found a combination of gears that worked nice and smoothly, though, and everything was happy after that.
Pulling a test print off the printer and having it simply not work properly is always disappointing, but being able to get some useful insights out of the test (often with the application of pliers) makes it all a more positive exercise.
The machine canister was another one I pictured crashing and burning as I iterated through failure after failure, but it was all worth it when it finally worked nicely! :D

Pulling apart crates
Those little facade crates were a lot of fun! So, I scaled them up. Aaaaand I just didn't get to a point where I liked the results. That first picture in this post shows some plier-based surgery on a test print where I was experimenting with different ways to hold the box closed.
There were two main problems. First, the whole lot was really prone to warping. That's something we can deal with a bit of care an attention, but still an annoyance. Second, the forces involved in holding the panels to the box really didn't work well with the forces holding the lid closed, and the whole thing was just a bit 'creakier' than I liked.
Below is a picture of the last version I worked with - no closing clasp, just a flip-top lid. I've posted both that version and the ampersand version in the first pic in the experiments folder, so feel free to poke at them - file locations are given below.

But wait, there's more!
Yep, that wasn't the only larger folding-side design I worked on and then abandoned! This one was much chunkier and incorporated a doubly-hinged side panel that (in theory) press-fits into the side of a hexagonal body. So, why the abandonment? More detachment! The overall design is really just too sensitive to adhesion issues, and being fairly wide and complex it's a recipe for frustration, as failures can easily happen hours into the print.
I test printed in sixths and it wasn't too tricky, but printing the entire thing led to endless failures, and I decided I couldn't inflict that on anyone else without due warning. So, it's posted now in the experiments folder, where all the most questionable designs go :) File location is listed below!

More Pi!
Making RPi cases was lots of fun, and had a surprising level of useful feedback! The current main point of feedback is "how about the Pi4B?" and the answer is sure thing, as soon as I manage to get my hands on one. Failing that, I might just have to design from the published specs and amend things based on people's test print experiences :)
Meanwhile, there's a new version of the Pi Zero case that exposes the GPIO pins. It's also thicker, because it allows for the pins to extend underneath the board, too. So, there's a little extra thickness to handle that.

File Locations
First thing - you'll notice that all the folders in dropbox now have a number before the name. This is purely for sorting, so that the newest stuff is at the top! Hopefully that'll make life easier in the short term! Note that the experiments folder is once again sorted to the very end.
So, the locations of the files mentioned in this post are:
Larger Facade Crate is under 999 ZZZ Experiments \ Larger Facade Crate
That chunky folding crate is at 999 ZZZ Experiments \ Folding Hex Side Crate
The new Pi Zero case with the GPIO access is at 826 Hinged Pi Zero W Cases, and it's the version with GPIO in the name.
Printing tips
Well, the Pi Zero case is as per the other cases, and shouldn't be too problematic.
The two experimental models print flat and are very sensitive to first layer problems, and may well cause issues even when your first layer seems good. Good luck :)
Other thoughts
I've really loved all the feedback I've had lately. Everything from comments on how models print on specific setups to photos of people's beautiful prints that put my own versions to shame. I'm really, really pleased that there are other people who like the kind of stuff that inspires me and it makes every moment of pulling apart bits of plastic with pliers worthwhile.
So, thank you so much for your ongoing support - it really means the world to me. Onward to June!
xoxo
Sven.
Files