Home
Home

 Artists
 Search
 Recent
 Random
 Posts
Posts
 DMs
DMs
 Tags
Tags
 Random
 Importer
 Import
 FAQ
FAQ
 Account
 Register
 Favorites
 Login
Login

Things I've learned while using EVA foam! (Patreon)
Content
As you guys may know, I'm a little cheap when it comes to cosplay. This means I can't afford sheets and sheets of worbla (most large armor sets like Sylvanas take about 3 jumbo sheets to make a costume similar to my Sylvanas, coming to about $243 for the worbla alone!), so I settle for the cheaper option: EVA and craft foam!Honestly, as a noob to this material, I don't feel like I should be one to write tutorials on how to use it, but I CAN tell you about what I've learned since I started using it about 3 years ago!
First off, buy Punished Props books. He explains pretty much everything to get you started! http://punishedprops.com/product-category/ref-mats/What I add here is things I've learned in addition or things I feel I should reiterate.First: Invest in some good tools!
For basic building, you need:
-- Razor blade and cutting board-- although EVA foam can be cut with scissors, it's really useful to cut your foam at an angle for corners to help them fit together! I started out using scissors and I will never go back to that!
-- Heat Gun-- I think this one is obvious. Using it as a partner to contact cement, heating foam into shape, and even hitting cuts in the EVA with heat will make it separate (the picture below shows that quite well-- the base piece has that cracked look, which is from cutting the EVA foam with a razor blade and then heating the cracks up so they separate!)
-- Contact cement-- I WILL NEVER USE HOT GLUE ON EVA AGAIN. Contact cement is where it's at! Just slop a thin layer on both sides of what you want glued together with a cheap foam brush, then hit it with a heat gun until it bubbles, and then watch it fuse together! Creates a nice clean edge that can be dremeled down, unlike hot glue, which gets goopy!
--Dremel-- ohhhhhh my gosh a dremel is necessary! From scraping off the bumpy backside, to fitting pieces together, to making curved edges, I spent most of my time with Sylvanas just dremeling EVERYTHING. Which means a lot of replacement sanding thingies. The edges you see below on my pauldrons are big chunks of EVA that have been dremeled down to have the curves necessary. Example of dremeling down edges can be seen in the second photo below!

 Wood burner/stencil cutter-- this handy little gadget is really only useful for small details, like the runes you see above, but I love little details like that! I got my stencil cutter at Joann's near all the acrylic paints!

Patterning:Working with EVA is similar to patternmaking in sewing-- I use a lot of darts to create shapes and curves. Best example is my Tracer bracers -- they needed a curved look that went from wrist-size, to large, to slightly smaller as they go up the arm: This is what they looked like before I contact cemented all the darts together:
After everything was heated and contact cemented into shape (which took a decent amount of finagling, I then dremeled the dart edges down to create a smooth curve. You can barely see them in the finished bracer!
For finishing, you want:
--Elmer's glue-- a mixture of elmers' glue and water fills all the little holes and imperfections EVA foam has before you plasti-dip! just paint a coat on and you're generally good to go! Just be sure to mix it with water so it thins out enough to not create a hard layer that can crack-- you want your foam to still be flexible.
--Plasti-Dip-- Plasti-dip is a must and you'll need a lot of it! It creates a plastic-y layer on your armor so it's durable but leaves a smooth surface! If you're too lazy for the elmer's glue layer, you can definitely just spray multiple layers of plasti-dip-- personally I'm really bad at spraying plasti-dip evenly. If you don't shake the bottle enough, you can end up with a bumpy finish, spray with the nozzle too close to the prop, and you'll end up with bubbles! This also happens if you spray too much! And then you have to leave a good half hour between layers, otherwise you can end up with a weird texture as well. In other words, I have found plasti-dip really finicky, but worth it in the end!
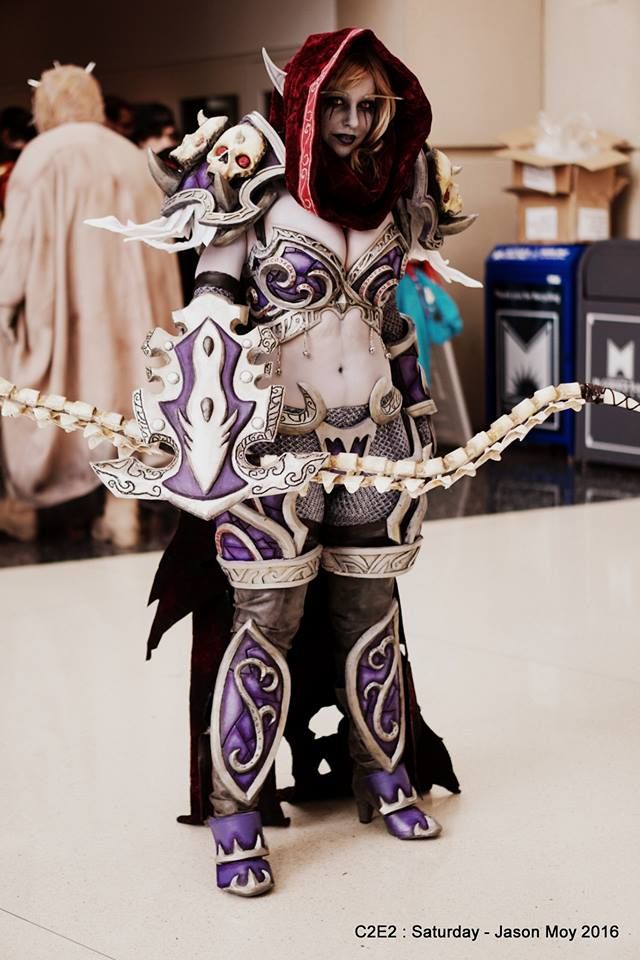
--replacement nozzles-- the nozzles on Plasti-dip cans spray in a straight line and get clogged easily. We (meaning Nick and I) are starting to experiment with replacing the nozzle from other spray paints we like that are used up as an attempt to get a better, more even spray with our Plasti-dip. So far it seems to be working!Painting: (first photo is purple spray paint plus matte finish. Second photo is taping off all purple to only reveal what needs to be silver. Third photo is hammered finish silver plus some dark purple added to areas to start creating dimension. Last photo is finished armor, after hours and hours of painting!)
--I feel that painting just takes practice. In photos, dimensions get reduced, so it's beneficial to over-exaggerate shadows and highlights no matter what. Obviously this is useful in World of Warcraft cosplays where the armor is cartoon-ish, but I've started using this technique in all of my cosplay, even painting fabrics to help create dimension in my work. Taking photos of your work from a distance with your phone will help decide what needs to be emphasized!
-- Paint pens for highlights and lowlights are great! See those little white lines and really dark blacks in the creases? Sharpie Paint pens!
I'm trying to think of other tips or tricks, and they're not coming to mind! So I'll add them to this post as I think of them!
Files