Home
Home

 Artists
 Search
 Recent
 Random
 Posts
Posts
 DMs
DMs
 Tags
Tags
 Random
 Importer
 Import
 FAQ
FAQ
 Account
 Register
 Favorites
 Login
Login

Dark Brotherhood Part 1-- the Bodysuit (Patreon)
Content
As you guys know, Skyrim is one of my favorite games of all time, and specifically the Dark Brotherhood quest line is near and dear to my heart <3

I've been wanting to make this cosplay since the beginning of time, but I'm actually glad I waited until I was more experienced at making multi-paneled bodysuits, even ones with a combination of stretch and non-stretch fabrics, before making this.
The Research
I luckily had leveled up a character in-game in the Dark Brotherhood gear:

Because nothing is a better reference than screenshots from in-game!
Looking at this, you'd assume everything is leather, right? Well, I knew a full bodysuit of leather, or even actual vinyl/pleather would be uncomfortable, warm, and would more than likely not fit my body correctly, nor would I be able to move! A skintight leather full-body suit with no stretch is quite unrealistic, so when I saw Yaya Han had a stretch pleather in her collection, I squee-ed! Finding a gunmetal gray pleather that I could give texture with black leather paint? Even better!
Gunmetal Stretch Faux Leather-- http://www.joann.com/cosplay-by-yaya-han-pleather-fabric-gunmetal/14749105.html#q=yaya+han&start=11 2 yards, with a 60% coupon (normally $19.99):
$16
And then, since I'm cheap, I bought marine vinyl from the upholstery section of Joann's for the red sections:
Marine Vinyl in Burgundy: http://www.joann.com/marine-vinyl/prd23669.html#q=upholstery+vinyl&prefn1=prod_type&sz=36&start=1&prefv1=Product 2 yards, at 50% off (normally $19.99):
$20
And then I knew I was going to have to line all of the marine vinyl to create the pretty finished edges, so I bought bottomweight as lining:
Bottomweight in Burgundy: http://www.joann.com/sew-classic-bottomweight-canvas-target-solids/prd26099.html#q=bottomweight&start=1 2 yards, on sale for $5.99/yard,
$12
So far, I've spent $48on fabric!
Now NONE of this looked right just the way it was. Dark Brotherhood outfits have a naturally worn leather look, and the vinyl I bought was too bright and red, but I was going to fix that :D
I cut each piece individually, and before sewing it, I weathered the pieces:


I used mostly the two paints you see on the right to weather the vinyl. Burnt Umber was dry brushed all over the center of the fabric to darken and muddy the red color, and the cocoa was used all along the edges to give it a worn look.
I weathered the vinyl pieces before sewing them because I wanted the stitching to be prominent on the vinyl, and figured if I painted it after sewing, it would make the stitches blend in.
Here's an in-game reference to the prominent off-white thread stitches, next to my costume piece:

I then took the vinyl pieces, made lining out of the bottomweight to match, and then sewed right sides together. Then I top-stiched with the off-white around the edges, to create a faux-vinyl look. I did this every vinyl piece, even the ones that have the backside against the bodysuit, so that all of the edges are finished in the same way! Very tedious work, but came out with the best results!
Now, it was time for the bodysuit. This was a part of the costume that could really have no mistakes in the tailoring, because if it didn't fit when I was finished, there was so way to adjust it. Thank goodness Yaya Han's Bodysuit pattern is beautifully tailored to begin with!
Yaya Han Bodysuit: http://cosplay.mccall.com/m7217-products-49904.php?page_id=5767On sale at Hancock Fabrics for
$1.99
Now for the tricky part. I took Yaya's pattern, as well as my own adjustments, and made a new pattern, fitting all of the excess seams where they needed to go:


After that, it was just a matter of serging everything together! I added the vinyl pieces as necessary before sewing it completely together:

I do try it on throughout the process to make sure I'm in the right direction:

The sewing of the bodysuit is done!!
Next is the details! We've got weathering of the gunmetal gray and rivets EVERYWHERE!!
For the rivets, once again, I was a cheapskate. I bought 2 packs of googly eyes of 2 different sizes, at 2.50 per pack, so $10 of googly eyes. I plasti-dipped them first, then spray-painted them with Rustoleum Hammered Silver:

Luckily, I have a mannequin that is much smaller than me in measurements, but still works just fine for what I need! This made applying the rivets and weathering the costume a lot easier! I applied the googly eyes with Gorilla-brand Super Glue (which stayed really well throughout the con!) and then dry-brushed some black around the edges of the rivets to make them look more sunken in:

Lastly, I painted on Black Angelus Leather paint to all of the gray, mostly around the seams, to create a more leathery, weathered, darker look. It helped create the dimension that's seen in-game:
Angelus Paint: http://www.amazon.com/Angelus-Leather-Paint-Flat-Black/dp/B0196TA1YA/ref=sr_1_4?ie=UTF8&qid=1459214716&sr=8-4&keywords=angelus+leather+paint+black --$7.29

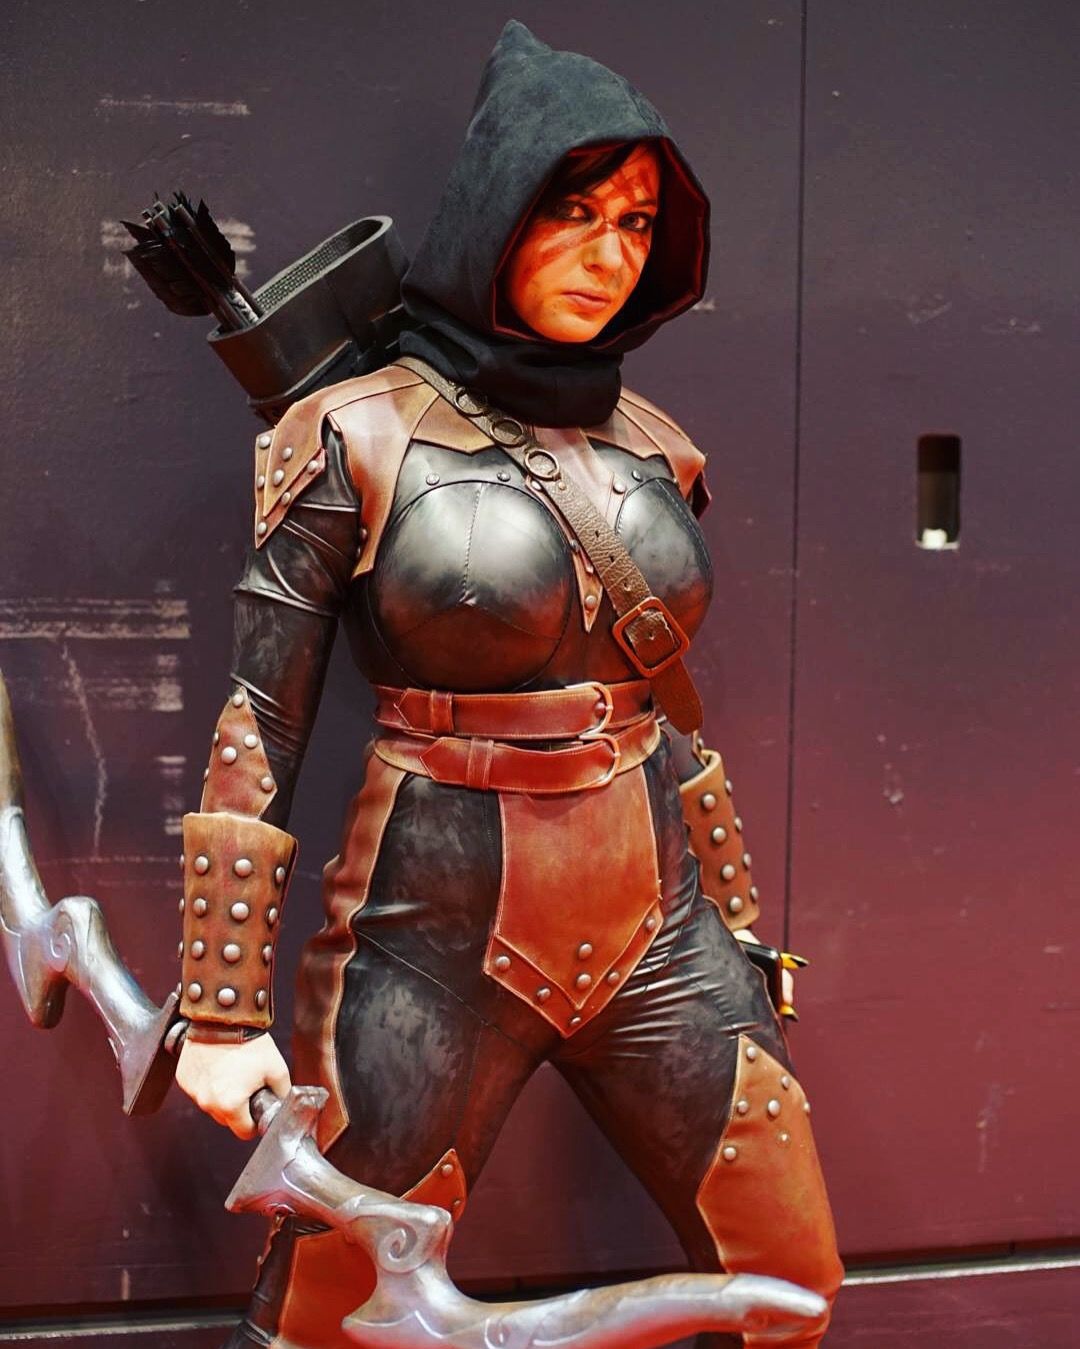
And, the finished look:

So far, I've spent $67 on materials. I already had the plasti-dip, Superglue, and Hammered Metal spray paint from past projects, and used so little of it that I haven't counted it in the cost!
I'll be talking about all of the accessories in my next Dark Brotherhood post, including the additions I made to my Nightingale Bow since my last post!
Files