Home
Home

 Artists
 Search
 Recent
 Random
 Posts
Posts
 DMs
DMs
 Tags
Tags
 Random
 Importer
 Import
 FAQ
FAQ
 Account
 Register
 Favorites
 Login
Login

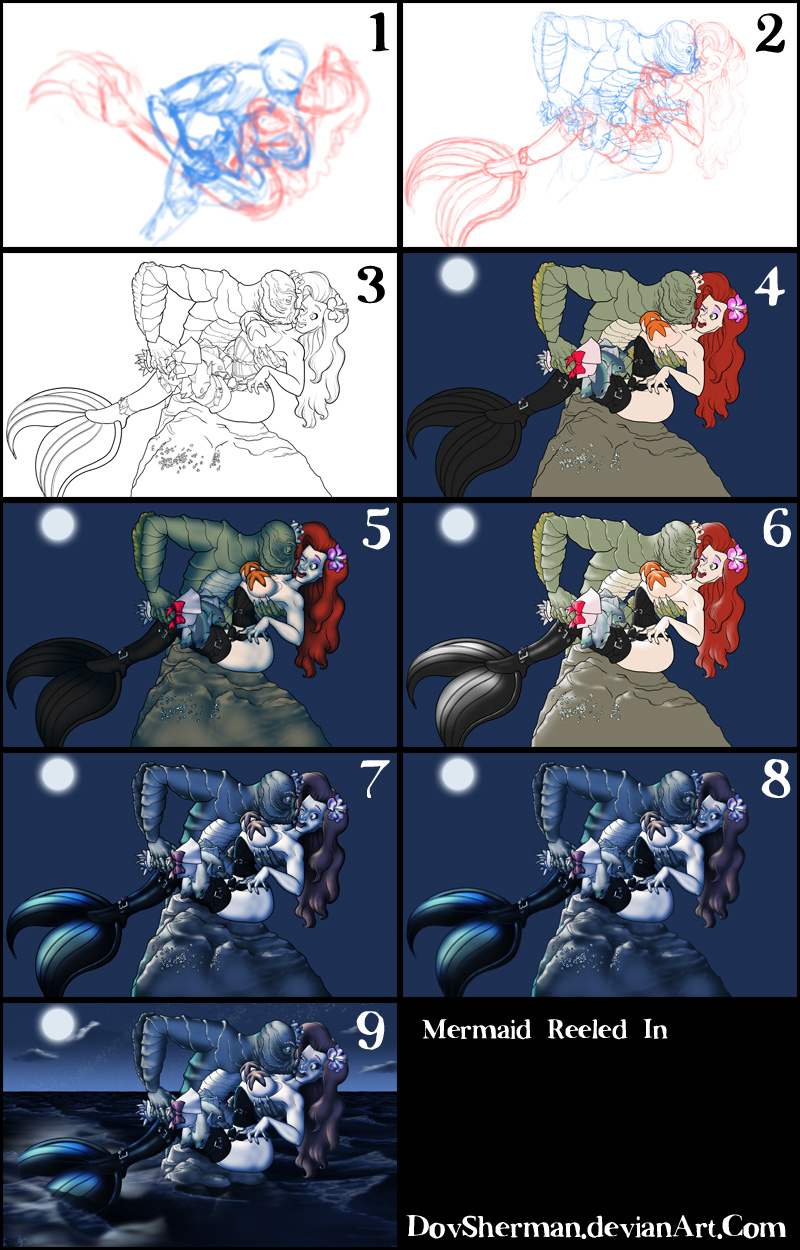
Mermaid Reeled In - Process (Patreon)
Content
2. Final sketch with thin pencils
3. Inking! (I re-used parts of the rock and flower from the previous mermaid image)
4. Color blocking and a simple moon to define the light source
5. Basic form shading. A solid layer of deep blue set to multiply, painted with a soft airbrush.
6. Moonlight. A solid layer of very light, pale blue (same as the moon) set to color dodge, painted with a soft brush, touched up with a soft airbrush, with some smudging to key places. The color dodge is what gives those areas such a vivid shine later, especially on the tail.
7. Night lighting. I used the mask from the moonlight layer to create a new folder, inverted the mask, then added a levels adjustment layer (to push the shadows darker) and a hue/saturation layer (to colorize everything not touched by direct moonlight to a dark blue, set to 80%).
8. Final character details. Because this is a night-setting, instead of coloring all the lines individually, I just made them all dark blue. Then I added eyelashes (also in dark blue) and blush.
9. I copied a section of the ocean from my previous mermaid picture, stretched it out for a calmer sea, added some clouds and stars. I put all the character stuff into a folder and added a mask, then I painted out the mask where the rock and mermaid tail go into the water, softening the edge of the mask with an airbrush for translucency. The water level is higher now because the tide came in.
Files