Home
Home

 Artists
 Search
 Recent
 Random
 Posts
Posts
 DMs
DMs
 Tags
Tags
 Random
 Importer
 Import
 FAQ
FAQ
 Account
 Register
 Favorites
 Login
Login

Auto-Tailor - page 13 - Process (Patreon)
Content
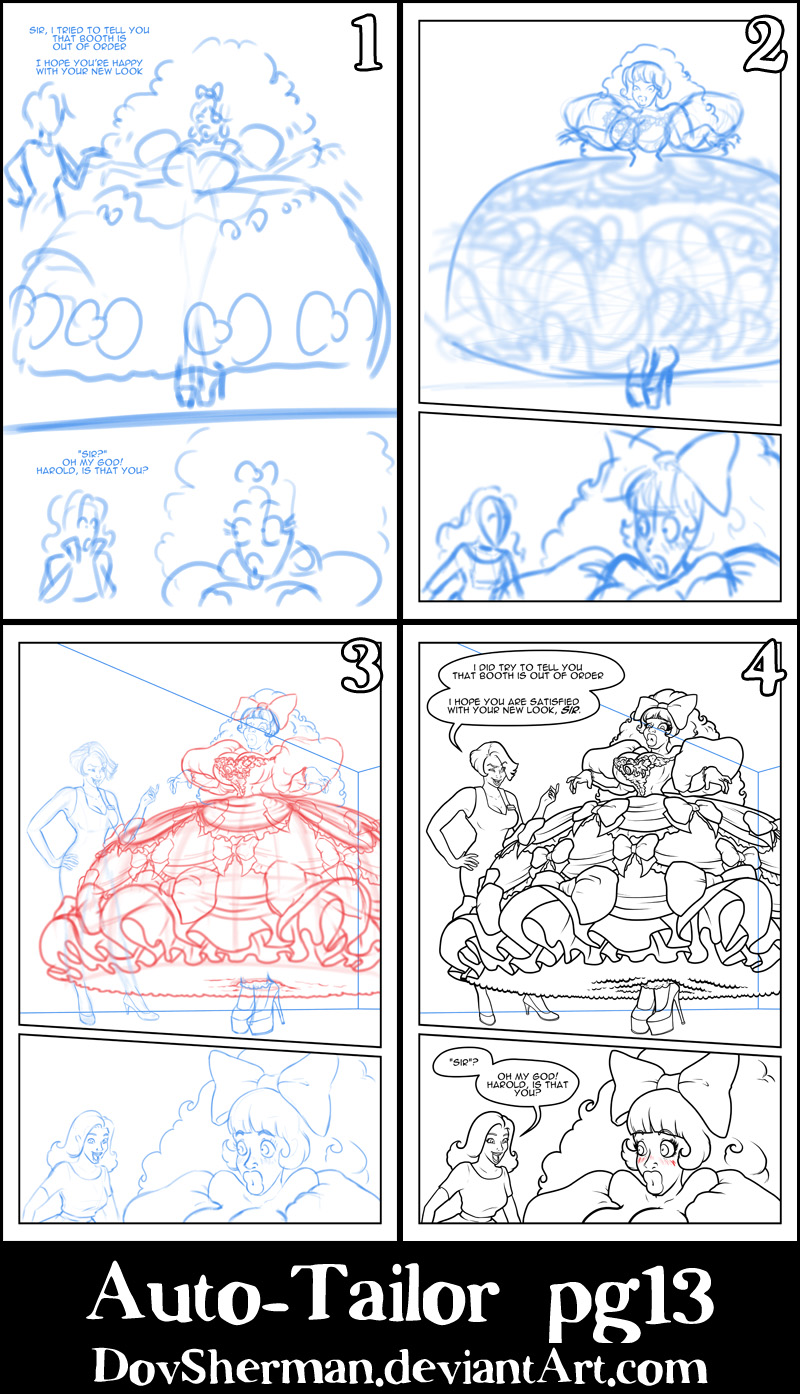
Since the colors and shading were done by my partner, Jade, I'm going to talk more about other aspects of my process in more detail.
1. I start with a rough thumbnail to plan out the page. There's only room for two panels here because I wanted one large panel to really showcase the completed look.
2. Now I go in and work out the final poses and proportions. I spent a lot of time getting the perspective right on the dress, planning the curve of the shape, and the angle of the curve of each row of bows and ruffles. To align those curves, I used the same approach I used with previous arrays of circles. I started with a circle, added a eight lines through the center (like slicing a pizza), distorted it a little bit to make it narrower at the top, then add a small mark about half the diameter below the circle. The mark allowed me to then scale the circle vertically up and down, then making them thinner to match the arc of the hoop skirt to get a view of the rows as they would appear at different heights.
3. Now I go back and work out all the fine details. This is when all those circle and line guides from the rouch sketch come in handy. The lines helped me match up the vertical curve on the outside of the skirt so I would know where to put the bows on each row and where to droop the bottom of each gather.
4. Then I ink everything, using a couple of different pens (one with a blunt tip, for outer edges, and one with a fine tip, for fine detail). Thicker lines in closer objects contrast with thinner lines in distant objects. I also used by custom bumpy line brush for the edge of the petticoats.
Files