Home
Home

 Artists
 Search
 Recent
 Random
 Posts
Posts
 DMs
DMs
 Tags
Tags
 Random
 Importer
 Import
 FAQ
FAQ
 Account
 Register
 Favorites
 Login
Login

Auto-Tailor - page 6 - Process (Patreon)
Content
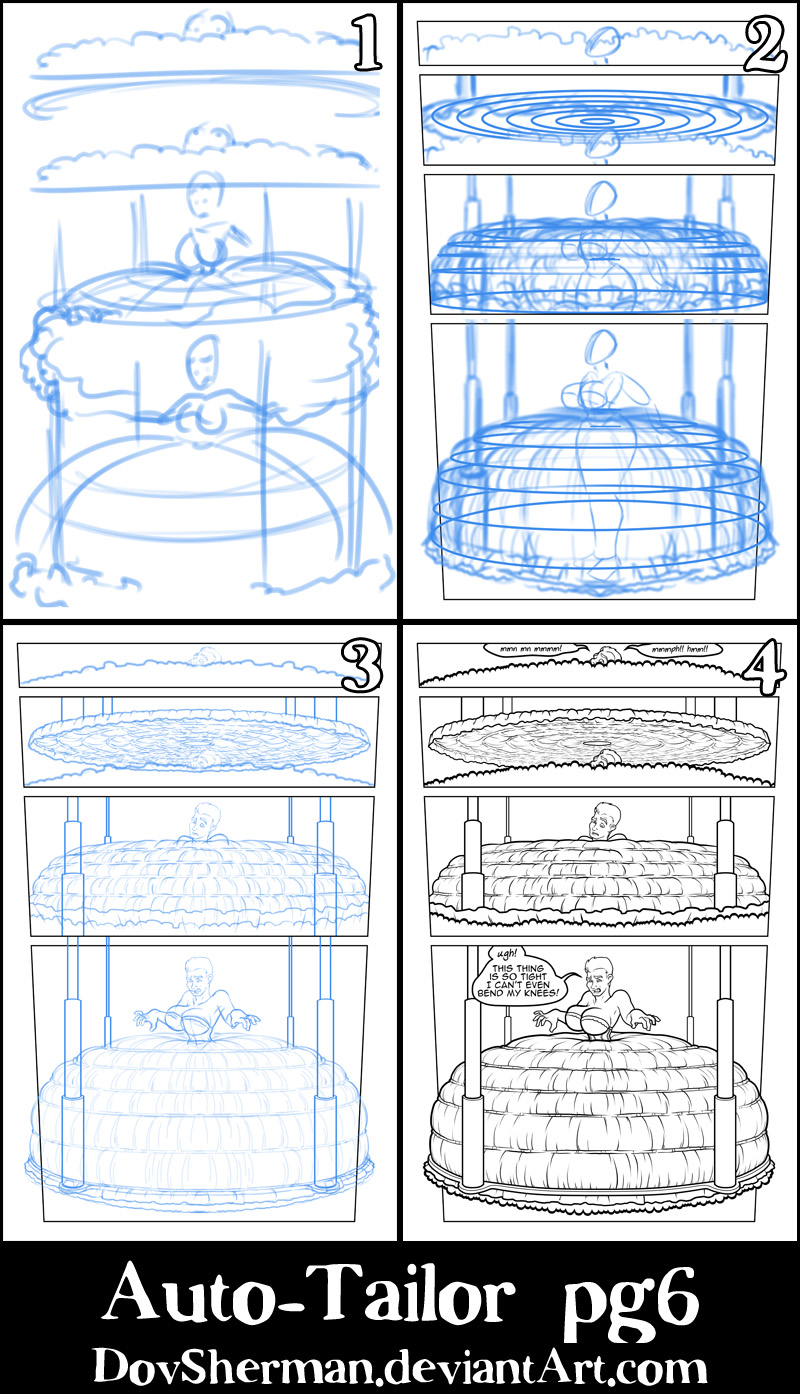
1. This page uses a four-panel vertical layout, showing the process from start to finish. Using shorter panels at the top and moving to larger panels at the bottom creates a sense of motion as if we are following the progress of the ring.
2. Now I finalize the proportions of the character and rough in the machine and hoop skirts. I jazzed up the panels by making the whole thing get narrower toward the bottom so that, when the whole hoop skirt is in place, it will go past the borders of the last panel. For the hoops of the hoop skirt, I used the same method I used for rings on the last page. I started with a circle, distorted it a little bit to make it narrower at the top, then add a small mark about half the diameter above the circle. The mark allowed me to then scale the circle vertically up and down, then making them thinner to match the arc of the hoop skirt to get a view of the hoops as they would appear at different heights
3. Now I go in and add the final pencil work, adding final details to the environment and drawing the character in full detail. I used a symmetry ruler to draw the hoop skirt, following the rough hoop sketch. The symmetry ruler guarantees that I'll keep the symmetry consistent in terms of the full shape and the angle of the bulging material.
4. Then I ink everything, using a couple of different pens (one with a blunt tip, for outer edges, and one with a fine tip, for fine detail). Of course, I can't use a symmetry ruler here because then it would look TOO symmetrical. But I used the symmetrical sketch to guide me as I drew new wringles and gathers in similar directions to the rougher sketch. On the flattened hoop skirt in panel 2, I used line width correction to thin the details as they get further away, enhancing the sense of depth.
Files