Home
Home

 Artists
 Search
 Recent
 Random
 Posts
Posts
 DMs
DMs
 Tags
Tags
 Random
 Importer
 Import
 FAQ
FAQ
 Account
 Register
 Favorites
 Login
Login

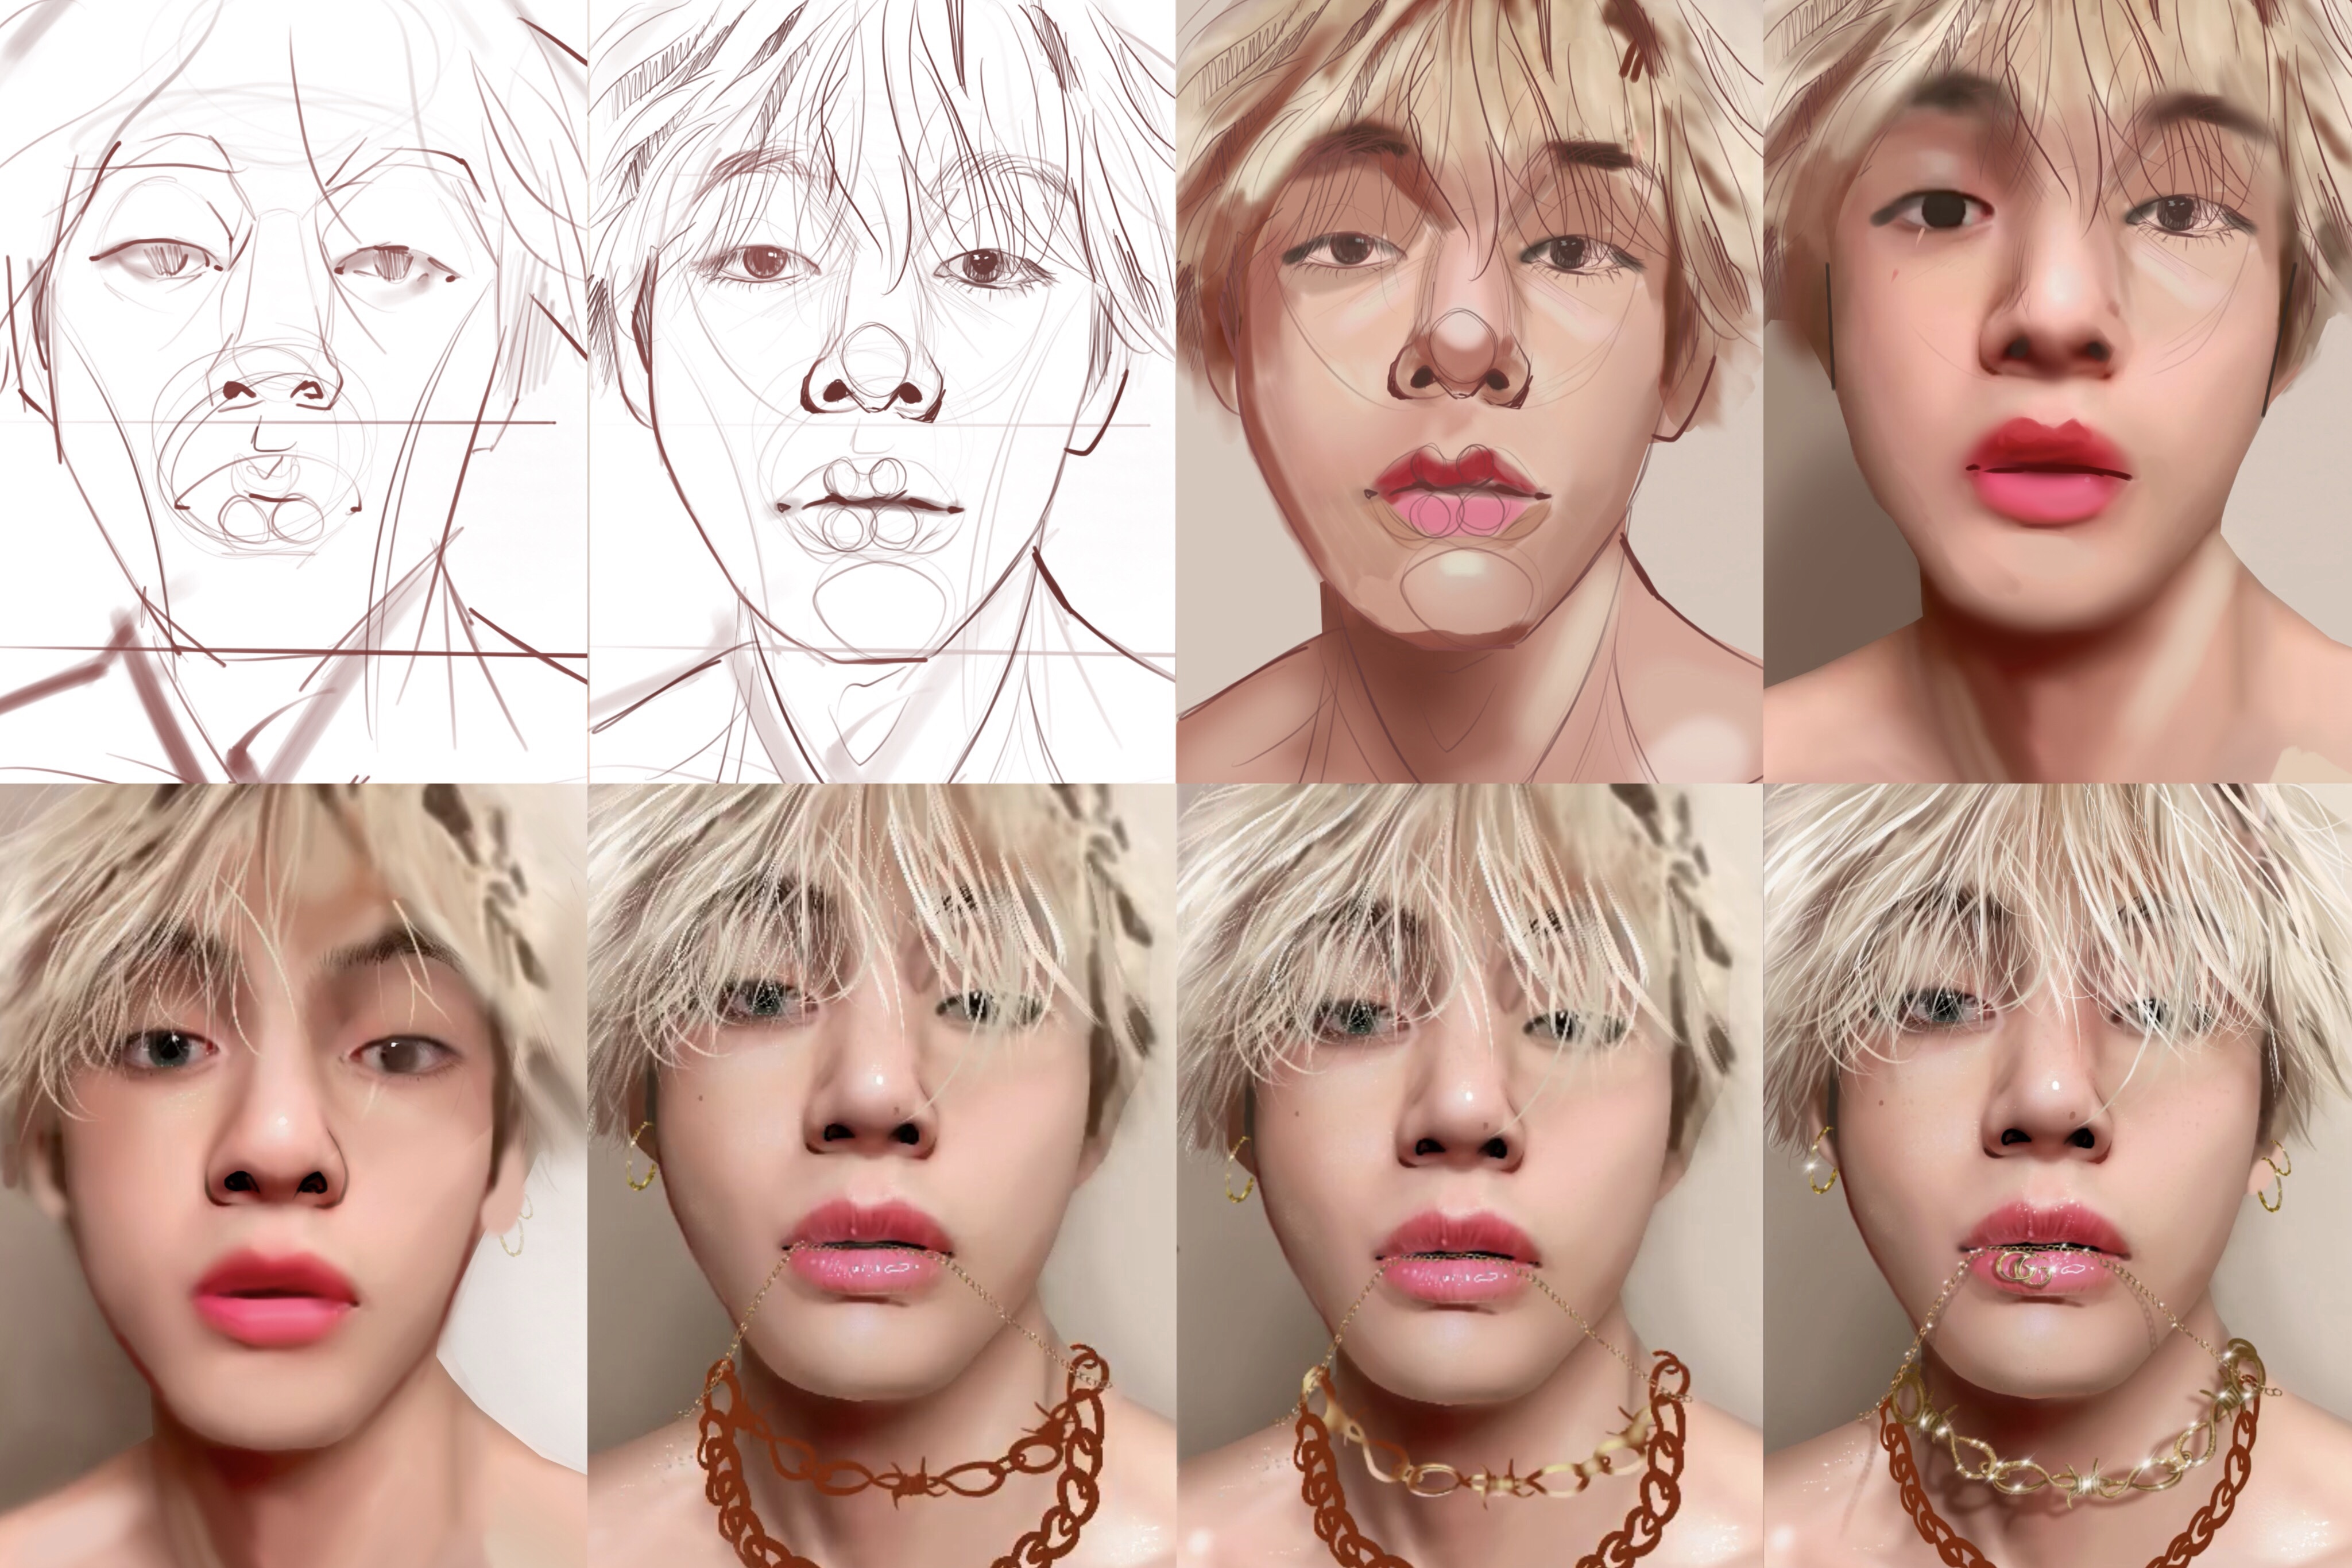
Taehyung Gucci Process (Patreon)
Content
1. I start by laying down the main face shapes 💜 I search for angles mostly I don’t wanna make it pretty I wanna make sure the principal volumes are accurate
2. Lower the opacity of the base and work in a more detailed sketch
3. Base colours are placed and in this stage I set down my darkest value 🤙🏻 i block the shadows and from there on I keep in mind no other value will be as dark as the one I just placed and this helps me balance values.
4. I start blending and going over the sketch.
More hues are added using mostly overlay layers 💜 in this case I went for a pink tone to cheeks to contrast with the blue and green shades I picked for the light tones. Because his left eye is mostly covered by hair I duplicated the right one (that was already rendered 😂) and flipped it. Using liquify I shaped it to the shape I wanted and blended over. This saved me a bit of time 👏🏼
5. Noticed my drawing needed more brightness to make Tae Tae contrast more with background so I used a curves filter to manage my brightness level without loosing the darkest tones. More highlights were added as I rendered lips and hair too.
6. I wanted to add more gold to the piece by adding necklaces but too keep a more balanced composition I had to add more canvas on the bottom that’s why from here on has less zoom 😂
I also noticed ears were a bit off so I erased some layers on them to go back to a more basic stage and rework them.
chains were colored my setting there basic form first and blocking the transparency .
7. Light appointments and reflections on the chains were a bit hard for me to get but I marked all the light parts first and shadows after. I used mostly a soft brush for hair.
8. Final textures in skin and chains were placed and my favorite part: add tons of sparkles 🌟
Files