 Home
Home

 Artists
 Search
 Recent
 Random
 Posts
Posts
 DMs
DMs
 Tags
Tags
 Random
 Importer
 Import
 FAQ
FAQ
 Account
 Register
 Favorites
 Login
Login

YL2 - Areola/Nipple customization, Bunny/Rhino 2.0, Internal dev tools (Patreon)
Content
Hi all!
We hope you are doing well!
This past month we've been hard at work creating automation systems to help us work more efficiently. We've also been busy integrating areola & nipple customization into the editor, as well as creating more content for the character editor.
YL2 Batch Tools
When working on a project of this size and complexity, certain tasks can become quite repetitive and tedious to perform, especially as we iterate on the content. There's also a lot room for errors, which may not always be detected until way later (if at all). Keeping track of everything that can go wrong is not only extremely time-consuming, but also itself a task prone to human errors. This is why we have invested a large portion of last month's time into creating systems to automate as much of these tasks as possible. We are happy to share with you our internal batch processing tool - YL2 Batch Tools!
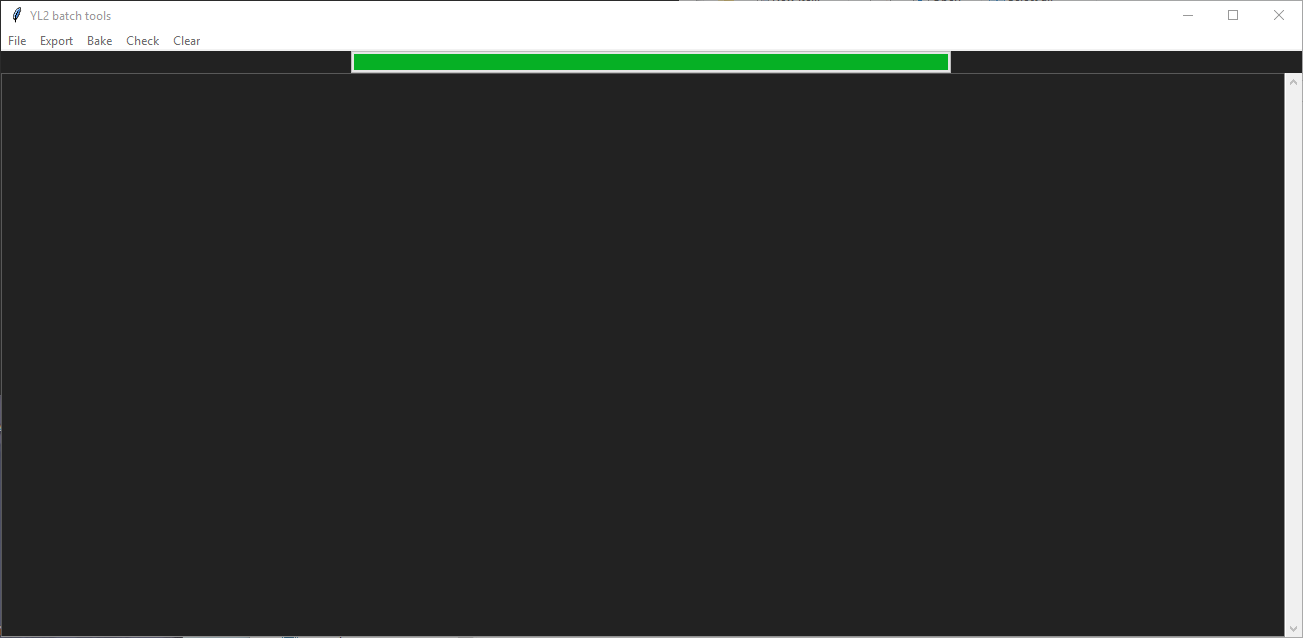
YL2 Batch tools is a small internal app developed in Python using tkinter. This tool has a bunch of nifty little operations that help us stay focused on actually creating content rather than spending time doing tedious tasks. I always liked to compare it to a compiler, but instead of compiling code, it checks assets and notifies us of any errors. For a moment I was thinking of giving it the name "Dogson Compiler", since it's mainly something Dogson uses when working on content for the character editor (pretty much the same way programmers use compilers to check for errors in their code), but I chose to go with the perhaps more sane name "YL2 Batch Tools".
So with all that said, let's see what it is able to do!
Here's what the app looks like:
One of the first things we wanted to automate was map baking. Before, when we used to do this manually, we had to export the shape we wanted to bake from blender, then bring it into something like Marmoset or Knald, and then finally perform the bake together with a high poly model. Now, we simply just press a button to export the shapes from blender. Then we can just use the bake menu command to bake textures for the exported shapes. Using a naming convention, high poly assets are paired with low poly export before being funneled into a CLI texture baker (in our case sbs automation toolkit). If assets are missing to perform this task, then we are notified about it.
Creating maps for parts used to be even more tedious to do manually than body types. This is because we noticed that baking each part individually wouldn't produce good results - we actually have to merge them with the body mesh before the bake, so that light rays are properly affected by the body during the baking process. Otherwise there would be a noticeable seam between the part and the body. So before YL2 Batch Tools, we had to go into the blend file, remove unwanted placeholder polygon faces in the body, import the part, merge it with the body mesh, and then export. Then of course we had to bring all this into a baker together with a high poly model to actually bake the textures. Imagine doing this for 20 different parts! And now imagine there was an error somewhere in the process, or that we want to change the baker parameters for all bakes, or have made changes to the body that will require a rebake, forcing us to redo it for all parts. What a nightmare! Luckily, with YL2 Batch Tools, all of this is automated.
(Exporting body types for baking.)
(By shift clicking a row, the folder in which the file resides is opened.)
(Exporting parts.)
(By ctrl clicking a row, the file is opened in the default program for that file type. Here we see the scalie feet part, which has been merged together with the body and thus is ready for baking.)
(Naturally, this works for body types too. Any string containing a file path.)
(Baking textures for body types.)
As mentioned earlier, YL2 Batch Tools is also able to check assets for errors. As you might have noticed, some errors have already been displayed in the previous images, if the batch tools were unable to perform a task due to certain data missing or items not fitting etc. But we also have an entire section dedicated to making thorough checks on the assets.
(There are quite a lot of errors since this app requires certain data to be present in the blend files to automate some tasks, which we used to perform manually before. We simply haven't gotten around to doing it yet for everything. This recording is quite old too.)
The batch tools make sure that the parts and body fit together, not only in their base shapes but also in each individual body type. Furthermore, it makes sure all body types exist in all parts that exist in the body. It also checks that our custom UV setup required for our seamless tech to work is properly set up. There are also tests for the body - making sure it mirrors and has all the required shapes.
The tool also allows you to mark lines as "done", so when using the clear command, they will be removed but the other errors kept:
You can also check specific parts, which comes in very handy when focusing work on fixing errors for a certain part:
Using this tool, Dogson is able to work much more independently and wont require my supervision to make sure everything works as intended.
Areola & Nipple customization
Last year, we showed off a system for projecting areolas and nipples into a mesh. The benefits of projection for our specific scenario are many - something we gave a through explanation of in an earlier update. In short, using projection, we gain more freedom in how we can author body types while avoiding distortion that otherwise would arise if we instead relied on blend shapes for nipples.
Now, we have finally integrated this tech into the editor, making it accessible in the interface:
(Sculpting a nipple using curve editor.)
https://gyazo.com/81c974076782e34d6fb755f4af58ae05
(Playing around with the normal scale slider for the projection.)
https://gyazo.com/223d9f0116089933ac6f9795255ad301
(Adjusting vertex offset using height slider.)
https://gyazo.com/6e7e6ea16da7e6055ddfdc943c9c7821
(It's possible to offset the projection using the offset sliders.)
https://gyazo.com/7d5a49518a042562e1f891a37c042651
The problem with our earlier implementation
Previously, we used something we called "fold projection" to essentially project the appearance of a fold inside a nipple. The nipple, in this case, having been sculpted using the areola nipple curve projection. This fold was based off a high poly model of a fold that had been baked into a height and normal map and then projected into the nipple. However, having baked maps in this fashion meant there were areas in the maps where adjacent pixels would have vastly different values. This would cause the quality to suffer.
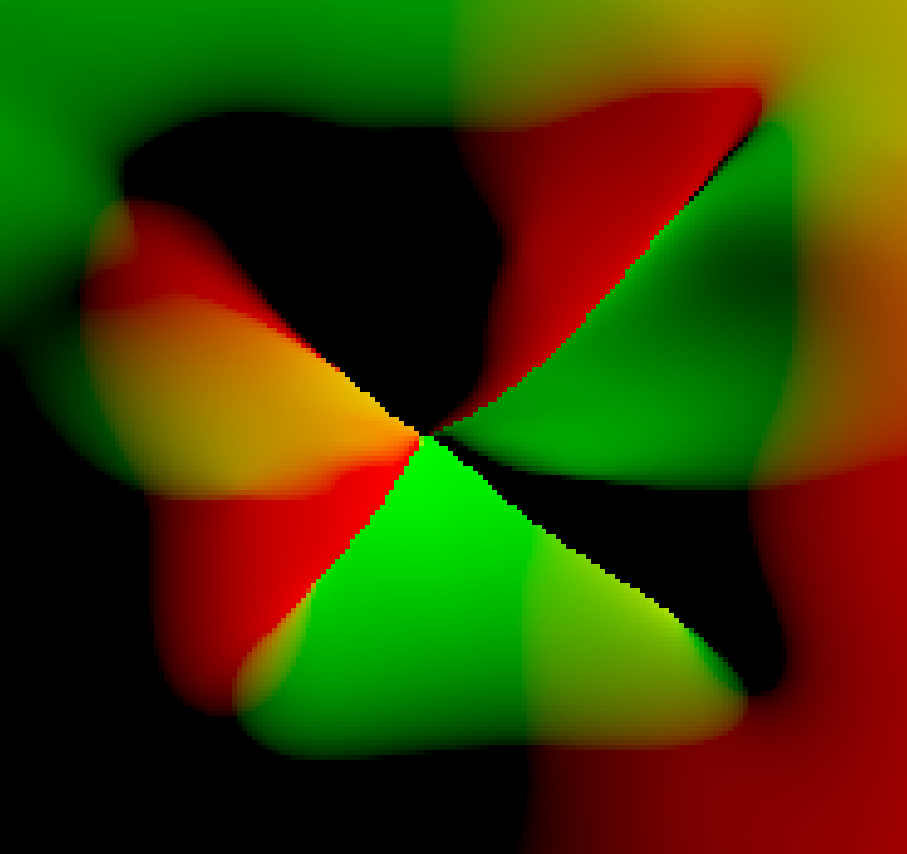
(An object space normal map baked from the viewpoint of a baker camera. This method causes undesirable areas in the map where adjacent pixels have vastly different values.)
(Here's what that map looks like on a model.)
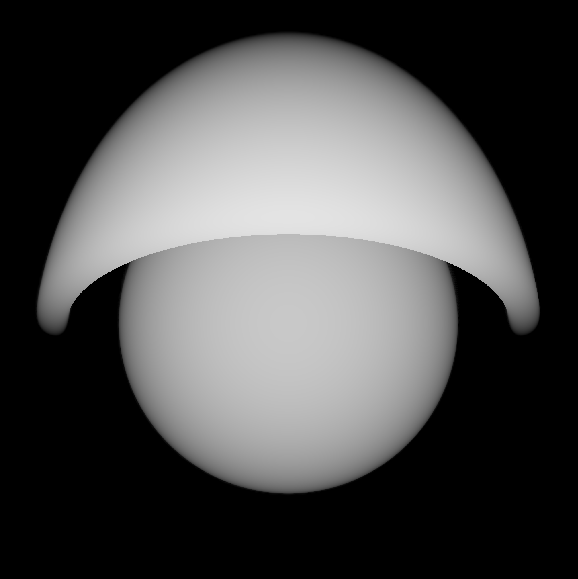
Height mapping has inherent limitations meaning we would be limited in what kind of nipples we'd be able to create using it. This limitation can be made very clear using the example below:

(An example abstract shape of a sphere inside a larger carved sphere.)
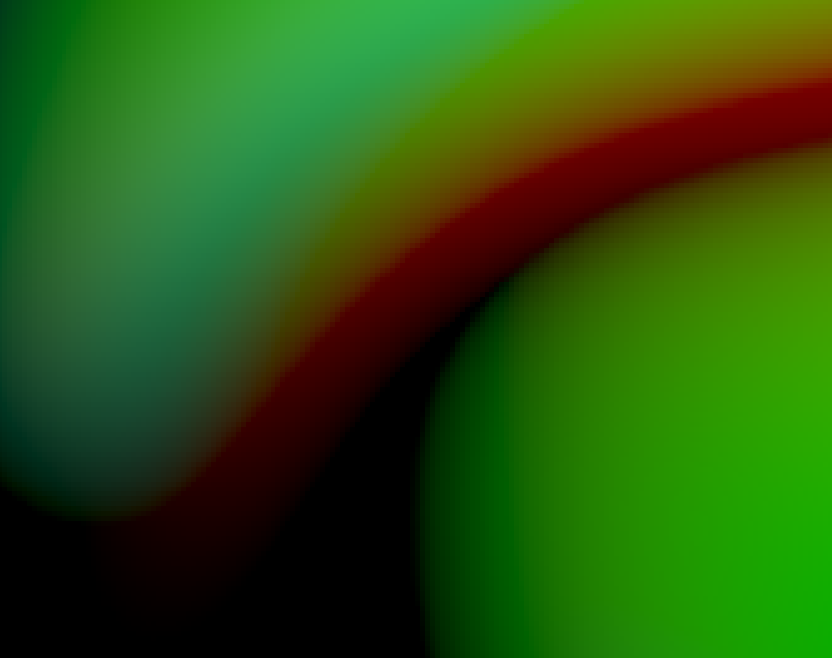
If we were to bake a height map out of this, from the shape to a flat plane, then that texture would look something like this:
(Baked height map of the abstract shape onto a plane.)
However, as you might have realized, this texture has the same problem as the fold projection did - pixels next to eachother may have vastly different values.
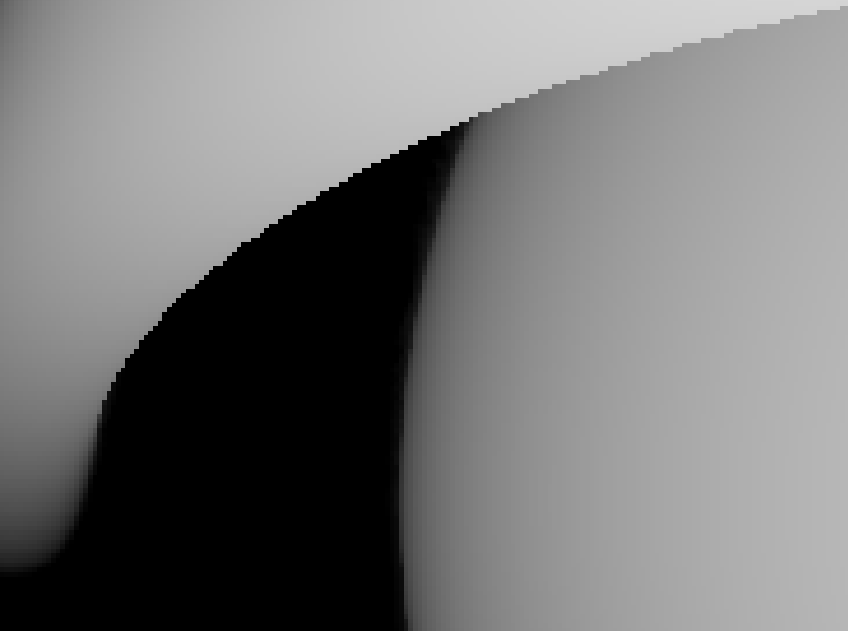
(Adjacent pixels can have vastly different values, which is undesirable.)
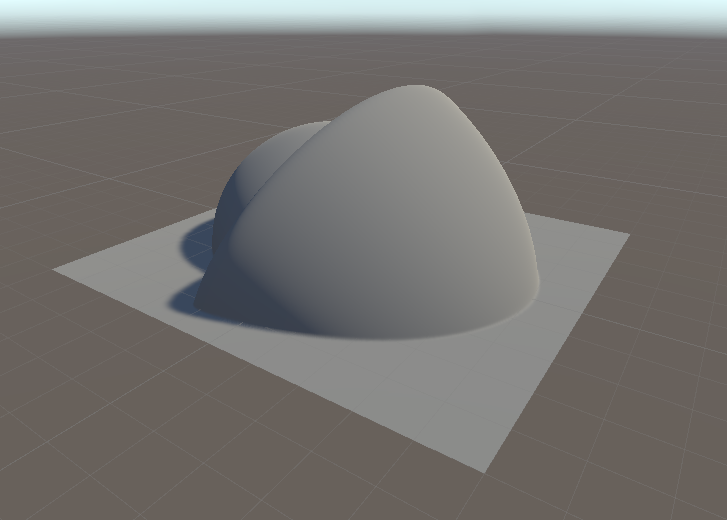
Also, because of the inherent limitations of a height map, it is utterly impossible to recreate the self occluding shape displayed above using solely this height map.
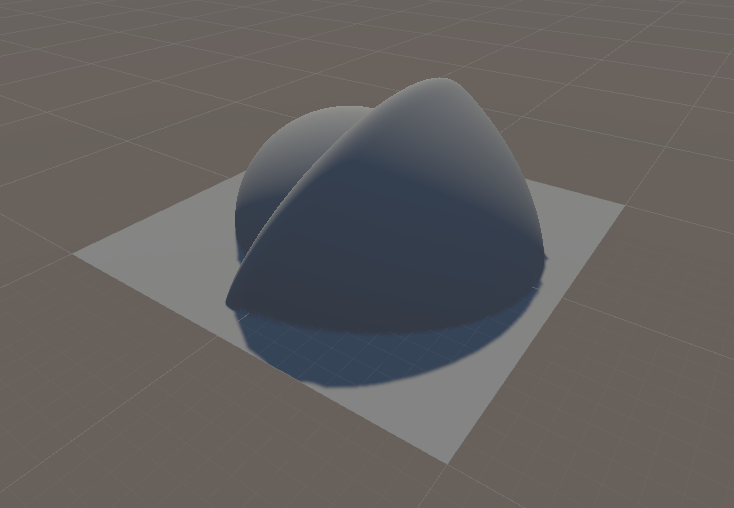
While the shape would look fine from behind using this height map on a tessellated plane:
The self occluding areas would be utterly lost and completely broken:
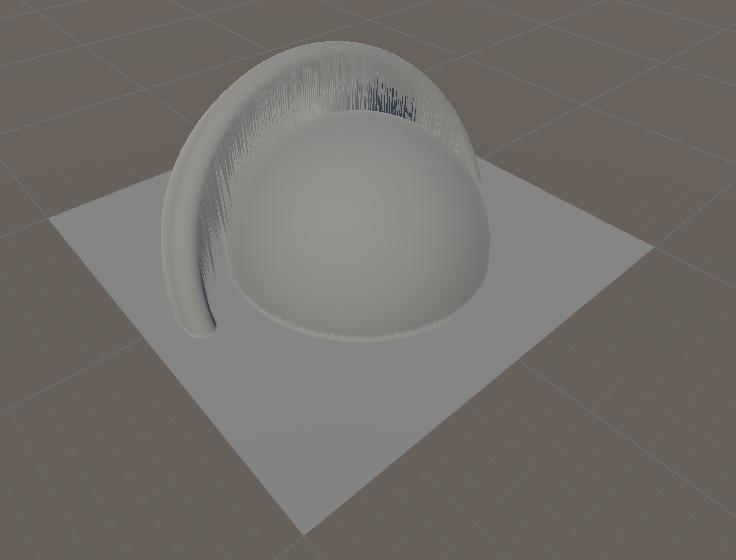
(The area inside the carved sphere is lost and the object is distorted.)
Which is not very surprising, since no data about the inside of the shape is encoded into the texture.
Relying on these types of maps baked in this fashion never really sat well with me, and I always wanted to see if there was a better way to accomplish these things. Another issue I had with our original approach was that the only way to create a nipple was through curve sculpting, but getting something that looks nice can be quite challenging, and even then the tech is limited since curve sculpting can only offset vertices in the normal direction of the vertex. I think it would be beneficial to have pre-sculpted nipples as assets that can be selected by the user and projected into the mesh instead. Furthermore, everything in curve sculpting is a perfect circular shape, but nipples can be irregular. All of these facts made me want to try something different...
Vector displacement mapping
Vector displacement mapping (VDM) is a tech that has been around for many years, but so far is rarely adopted in games and other realtime apps. Unlike height maps, which only store 1 dimensional values, VDMs store 3 dimensional values and are able to have almost any shape encoded into them. It's essentially a 3D model encoded into a texture, that can then be projected into another model. In a way they're similar to normal maps, which also store 3 dimensional vectors. However, unlike normal maps, a vector value (a pixel) in a VDM doesn't need to be normalized (have a magnitude of 1), but instead contain floating point values that accurately represents a vector offset in space. Because of this, VDMs are absolutely huge resources (96 bits per pixel rather than 24 or 32), which is probably part of the reason why they are so rarely used. However, as long as you don't have VDM textures that are too big or used too extensively, things should be fine...
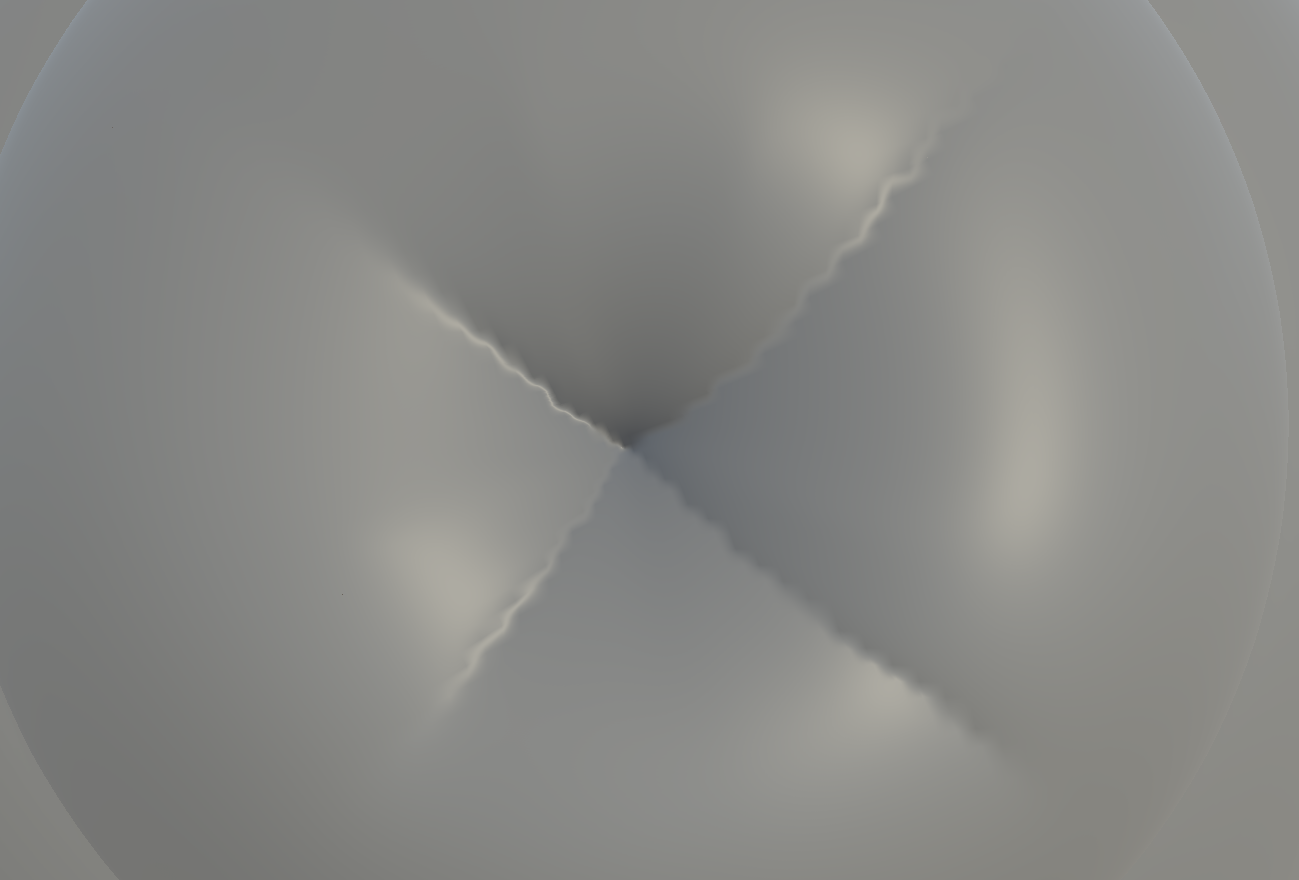
Here's what the shape above looks like expressed in a VDM for a flat plane:
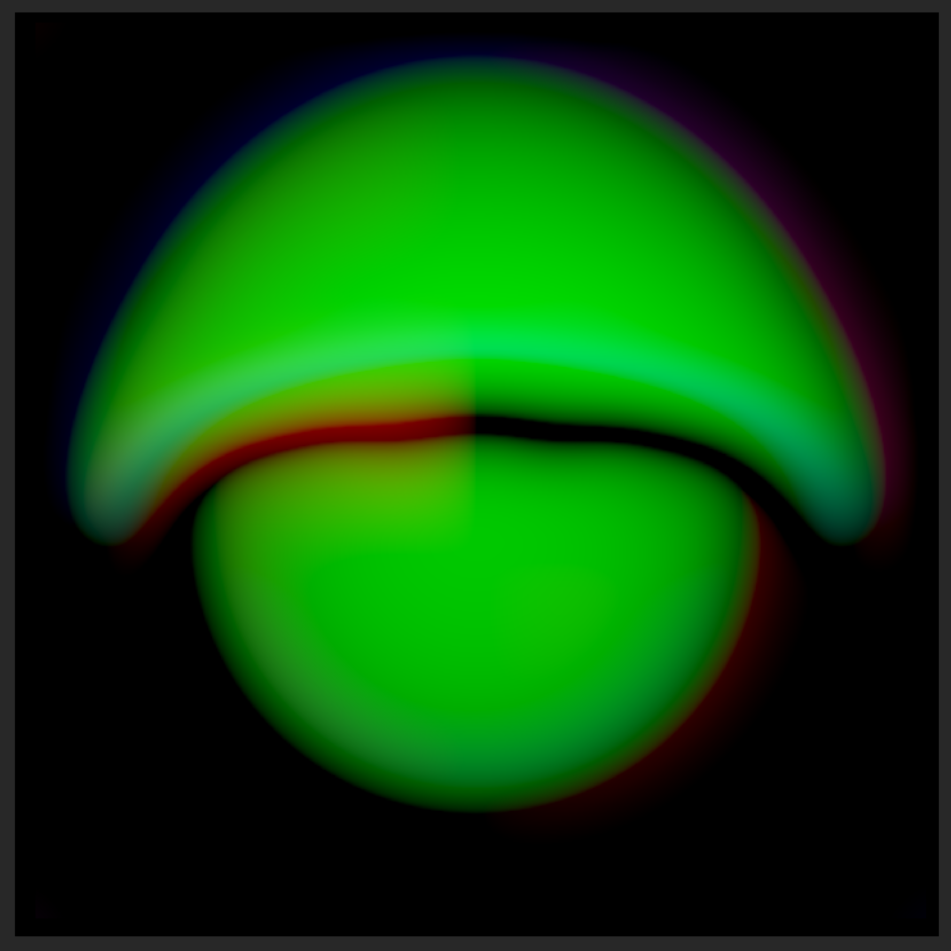
It is much smoother than the height map:
Here's what the same flat tessellated plane would look like using a VDM:

It's essentially the same object!
And just to prove it's actually a VDM projection and not the source model, here's proof:
(Projecting the carved sphere + sphere VDM onto a plane.)
https://gyazo.com/dcc40ce1cb4f76575d6180f35f60d0b2
(What it looks like in wireframe.)
https://gyazo.com/0ed5e53ffa2863fc2a61da8a22151dc6
(How it works - Step 1: VDM texture is projected on to model.)
https://gyazo.com/9e839661bb5f6ded95dace449dc46108
(How it works - Step 2: Projected VDM texture is interpreted and vertices are offset according to the vector values in the map.)
https://gyazo.com/f4e93917c8c35159a30f01a53f795637
(Here's what the same deformation looks like in wireframe mode.)
https://gyazo.com/1d7536b85e6f2b7225a8ec0c5c43a9af
By utilizing VDM technology, we are essentially free to sculpt any nipple shape we can think of, and that shape can then be projected into our models.
Results
We have adapted our original curve sculpting implementation to work with VDMs, and now it's accessible in the editor. Here's a demonstration:
(Setting a VDM map to use for the nipple projection.)
https://gyazo.com/6d9bae3ba33f3e3090e3e3892c8afda8

(The VDM projection can be rotated.)
https://gyazo.com/6c4ad945d71ae5b73b472bb4f9063d04
(The VDM projection can be scaled.)
https://gyazo.com/d61612c6e7119cf3bf9747f9c70ad245
(Like the curve projection, the VDM projection is affected by the offset sliders.)
https://gyazo.com/3fd1c794bcf249cc85c0e2d1e048e05d
(Curve sculpting works together with VDM. Offsets are combined into a single floating point vector texture.)
https://gyazo.com/7409d29b693b9c9cf0c218ef7466a0e0
(Some final tweaking of curve and VDM projections, working together to form areola and nipple.)
https://gyazo.com/3020a62a4b75b0a22023126d10bd1c9b
Getting VDMs to work in Unity has been a huge challenge for us. VDMs are much more delicate than height maps, since they contain 3 dimensional values which need to be both baked and interpreted correctly, rather than just having 1 value representing offset in vertex normal direction. This is challenging because different softwares use different coordinate systems. We had a ton of trouble using existing tools to get a map that worked inside Unity, so eventually we ended up creating custom shaders inside Blender to translate baked maps from Zbrush into ones for Unity. All of these softwares have different coordinate systems. We also had a lot of troubles with distortion that would arise depending on what type of topology the VDMs were baked on, which required a lot of experimentation. It was a major headache, but I think we finally have something that works acceptably for us.
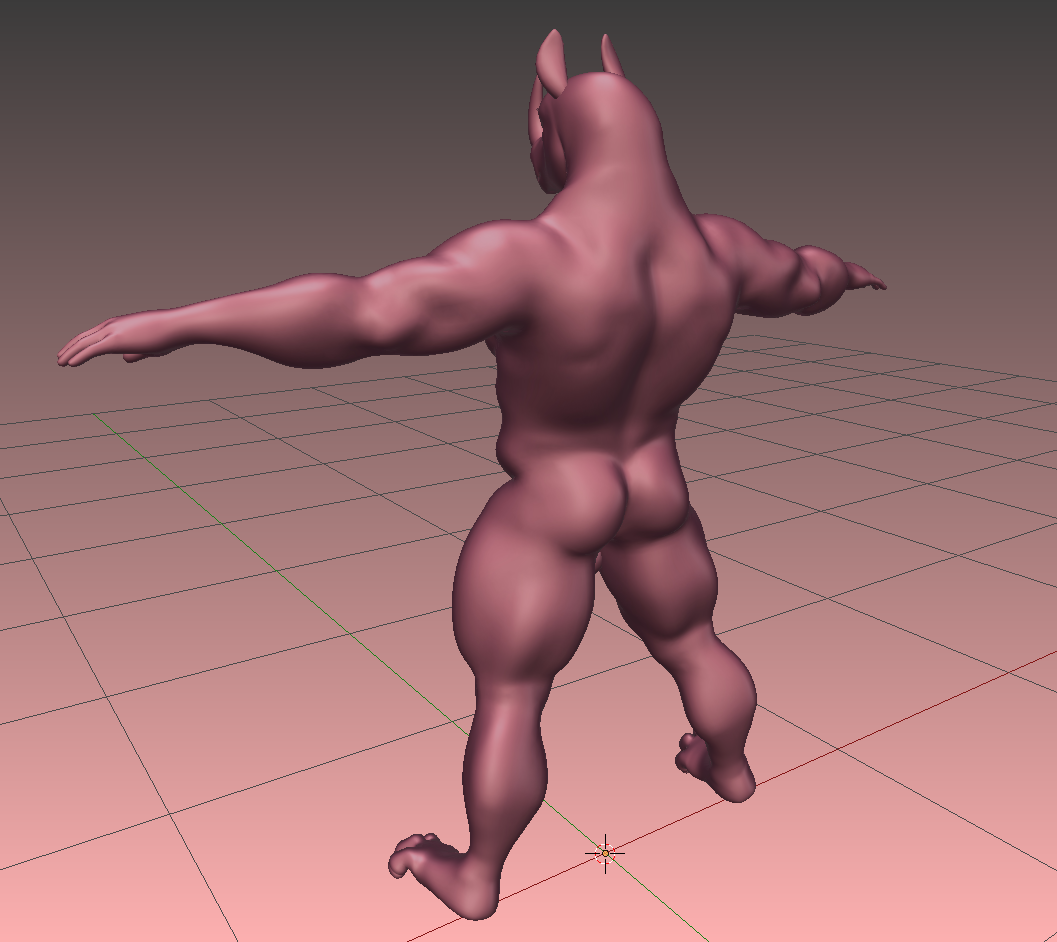
Familiar faces - A dear reunion
When the character editor ships, we intend to include it with a couple of example characters that you can learn from, and what better candidates are there than those from the original cast of Yiffalicious? For the first release, we are working towards including new versions of our iconic Bunny and Rhino characters. There will be other species available as well for the first release.
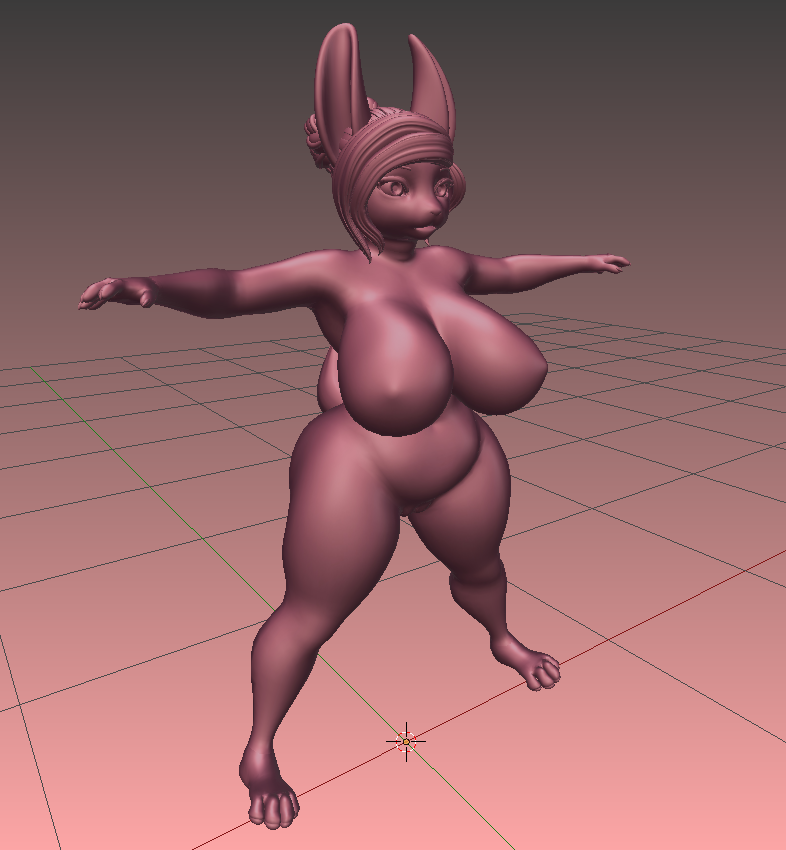
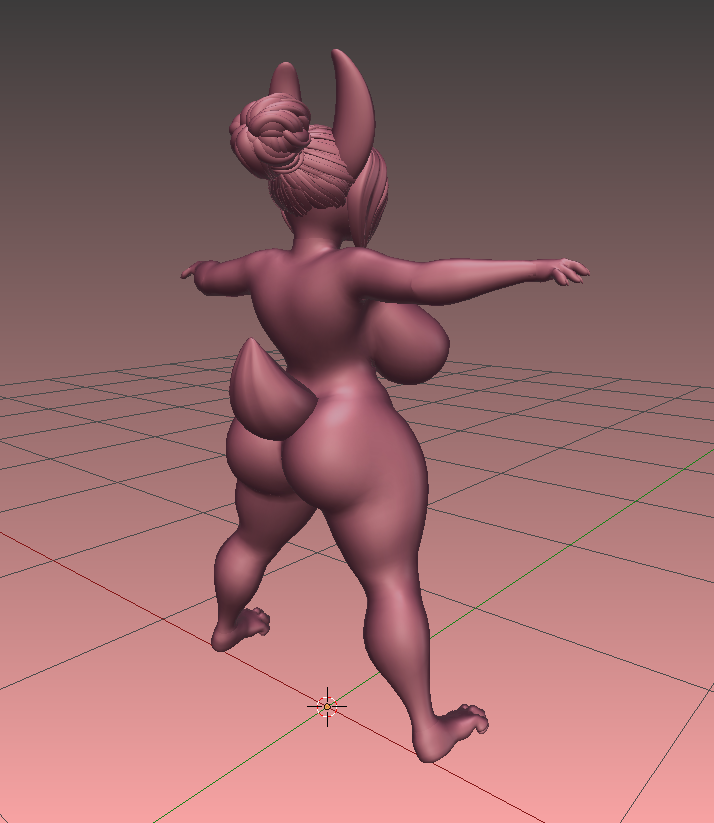
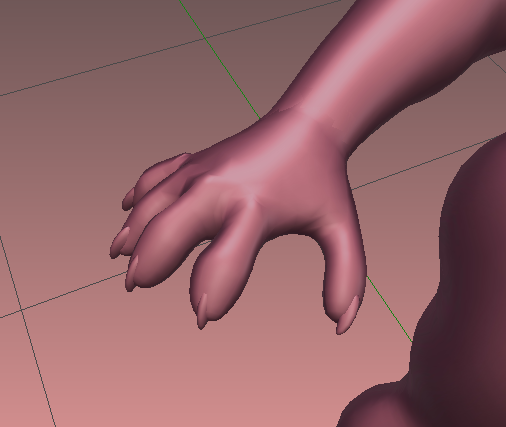
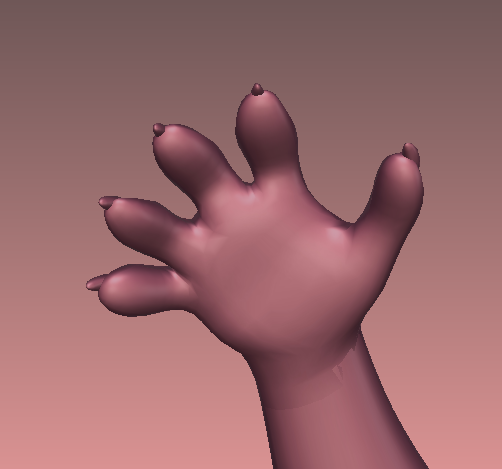
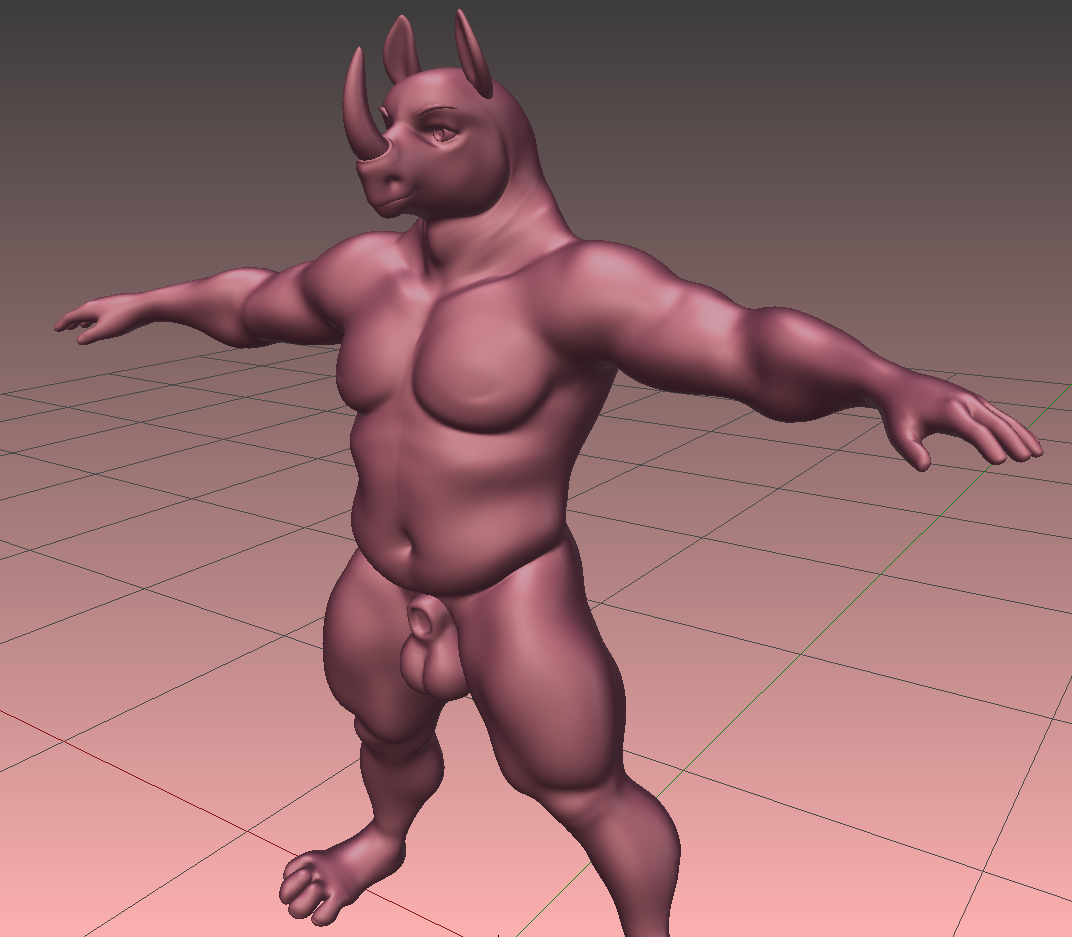
(Note - feet are placeholders.)
Summary
After our research and development regarding soft body systems, we've returned to working on the character editor. Areola and nipple customization is now available in the editor. New implementations of Bunny and Rhino are being worked on as well.
We've also been working on internal development tools to streamline more of our pipeline.
