Home
Home

 Artists
 Search
 Recent
 Random
 Posts
Posts
 DMs
DMs
 Tags
Tags
 Random
 Importer
 Import
 FAQ
FAQ
 Account
 Register
 Favorites
 Login
Login

Y axis full revision - tensioner - motor - rail - 2024 (Patreon)
Content
------------------------
DOWNLOAD HERE (shop area)
------------------------
tested it with 4248mm motor, 1.4amp, stealthchop disabled, and was able to print a benchy at 300~400mm/s with 30K acceleration, quality isn't pristine, but at least you know the ceiling is high. (I had one skip when I tried to push it to 32K acceleration, otherwise everything else is at 30K).
The hull outer permiter and other overhang have the speed reduced to 40~80mm/s.
if you have printed things from the recent previous post from last month
the big thing that changed is the bed rail mount
the tensioner slider (old will work)
and the wheel tensioner (rail tensioner is the same as before)
motor mount is the same
the tensioner nob now uses an m4 bolt instead.
added a bunch of renders, and belt ends
I'll delete the old post as everything is now combined here
-----
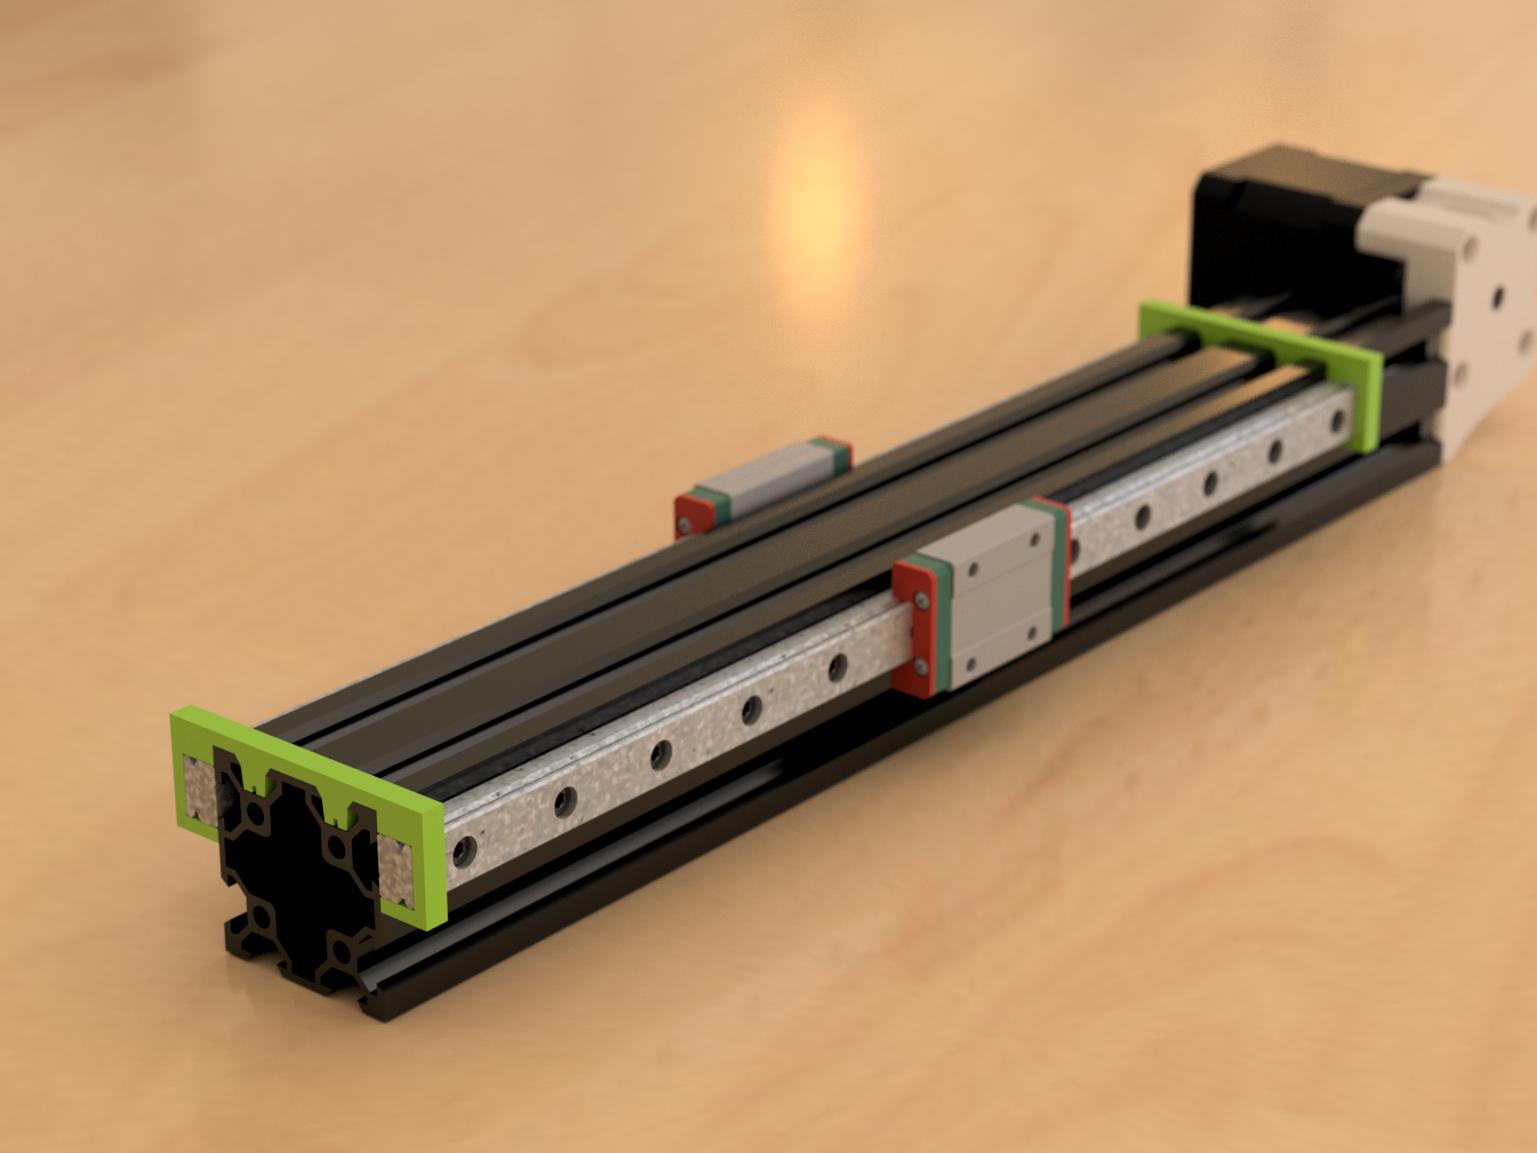
This is a fully redesigned Y axis setup.
I have made a wheel version of it, but the rail setup is the perfected one.
This will allow any nema 17 motor up to 48mm long on the Y axis.
The rail model was designed so that the belt is parallel to itself and perfectly flat for better precision, as the slightly triangular shape of the belt Amy not have a perfectly linear movement reducing precision.
---------------------
- Hardware needed -
---------------------
---------------------
Tensioner: (rail or wheel model)
- you will need a longer GT2 belt (you will need 800~900 mm worth of belt), I included printable belt ends (one heat insert and one m3x8 for each one)
- The Y extrusion front lower two holes must be threaded to M5 type (ender3v2 already is)
- GT2 20T toothed pulley (https://amzn.to/3WGl7LE) with 5mm or 4mm bore, made for 6mm belt (should be about 8.5mm wide)
- M5x16 or M4x16 depending on the pulley bore size
- M4x20 (installed on the slider to then screw into the hand tensioning wheel)
- M4 nut for the hand tensioning wheel (use a soldering iron to push it in)
---------------------
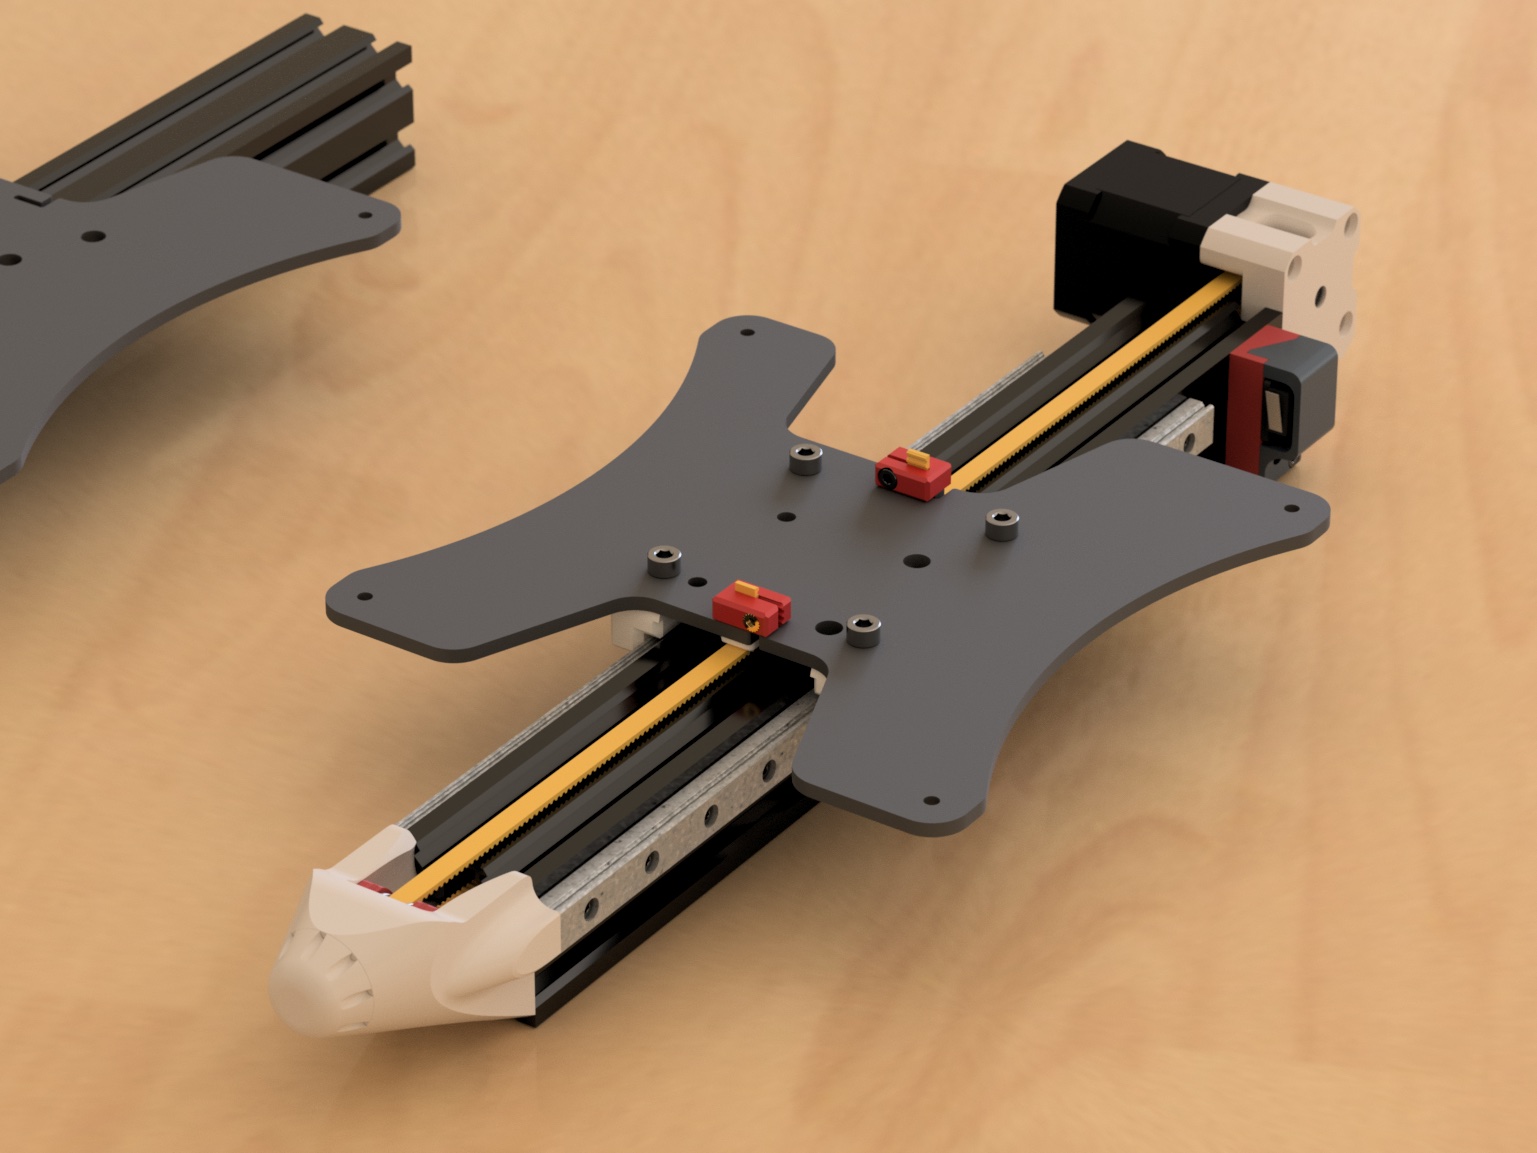
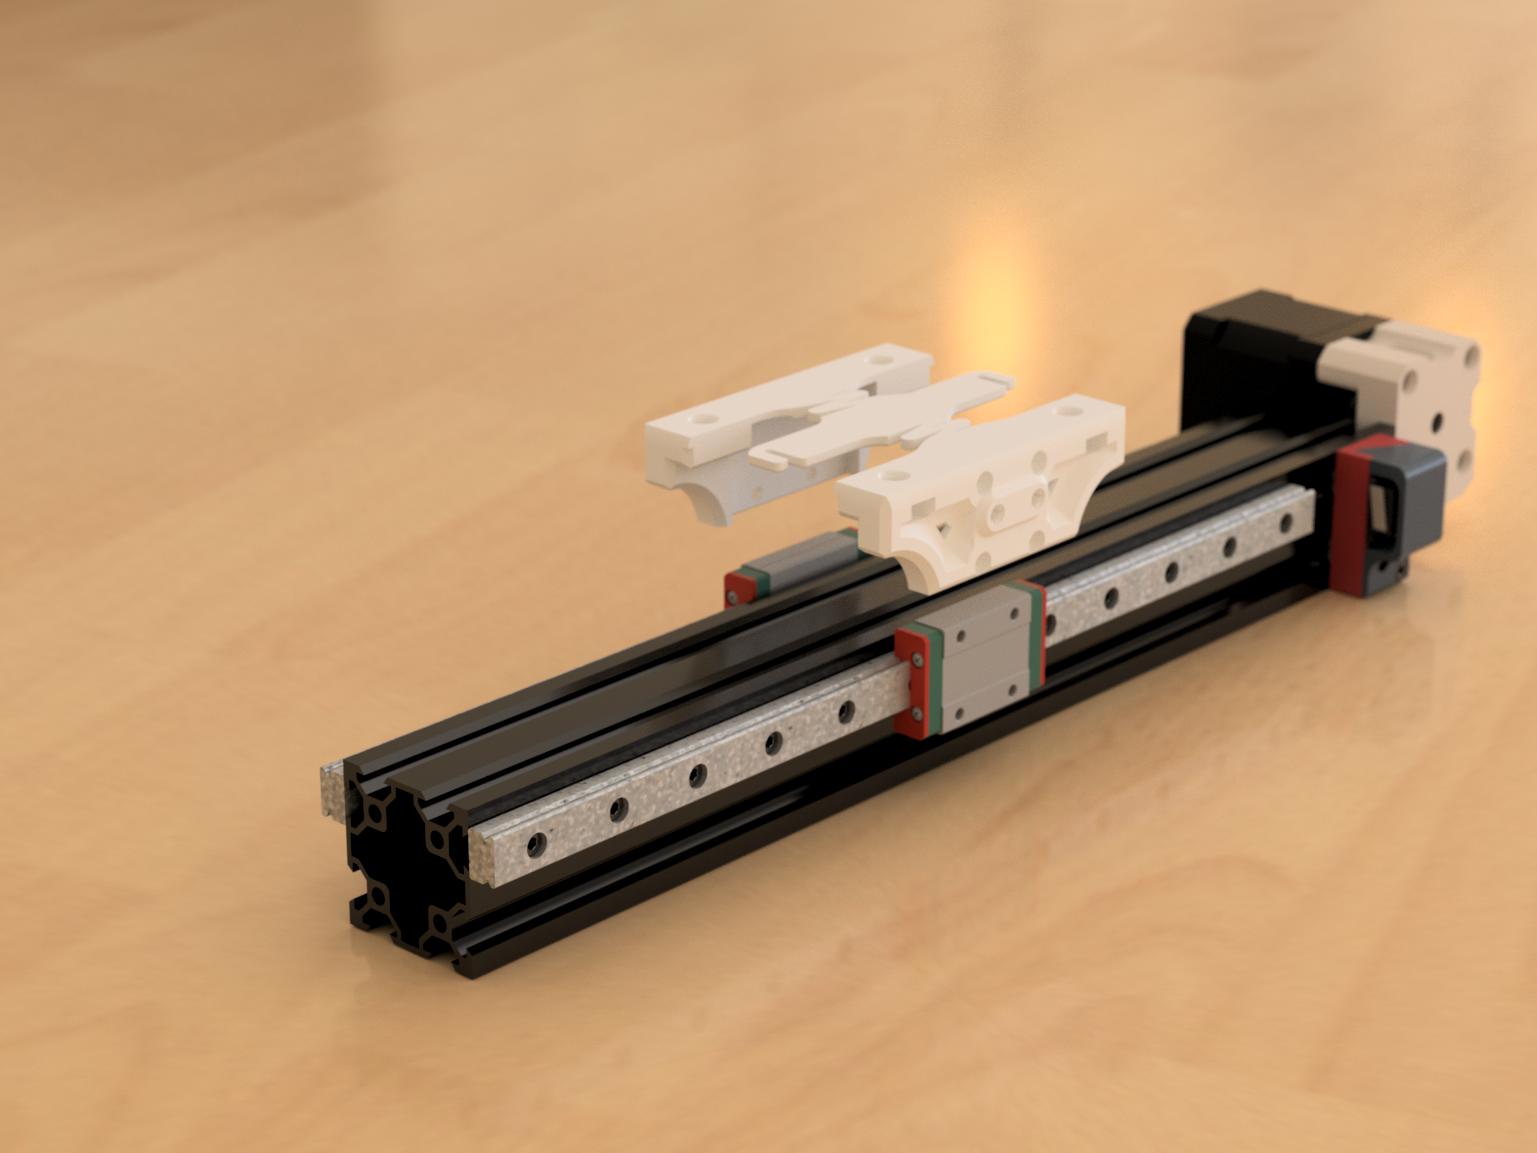
Rail Bed mount:
- two 300mm MGN12H rail (installed them to be flush with the front edge of the extrusion, against the tensioner)
- 24 M3x8 to install the rails
- 24 M3 t-nuts to install the rails
- 8 M3x6 to mount the printed rail mount to the rail carriage
- four M5x12 to secure the bed platform to the printed rail mount (those are shorted than stock M5)
- four M5 lock nut (you can reuse the stock locknuts)
Optional:
- Two M3x6 and two M3 heat inserts (M3 x 4mm L x 4.5mm or 5mm OD) if you want to mount an adxl345 generic type or any that will fit on a 15mm screw spacing
---------------------
Motor mount (works on both rail or wheel setup):
- Four m3x8 to mount the motor
- two M5x12 (socket head only, button head won't fit) or longer to mount the printed motor mount to the extrusion
- GT2 20t, 5mm bore, timing belt pulley for 6mm belt (https://amzn.to/3WIxTtc)
- optional F695 Flanged Ball Bearing (https://amzn.to/4dyd2ia)
---------------------
Endstop: (works on both rail or wheel setup)
- two M3x8
- two M3 tnuts
- stock Y endstop PCB switch, and stock self tapping screws (M3x6 should work too with a bit of force)
- optionally M3x6 and M3 heat inserts (the cover stays in place without this)
Install is pretty strait forward, I included a lot of renders.
But here are a few notes
Tensioner:
Don't over tighten the M5 screw acting as an axle for the pulley, pull needs to spin feely and the M5 screw won't go anywhere
For the hand wheel, use a soldering iron to install the M4 nut, install 80% of the way then press it down on a heat resistant surface to push the rest in and be perfectly flat and flush
Rail bed mount:
A lot of testing has been done and the unique design is to allow a simple install, and allow a bit of freedom from the left and right side to avoid binding once tightened. Make sure the rails are installed as parallel as possible, I included some rail alignment helper.
When installing the bet platform securing, secure all four of the M5 at 4th same time at first (a small turn on each one after the other), then when close to being tight, tighten the M5 screws on left side first where the whole on the aluminum plate are smaller, then the right side which has a larger hole, the screw should set itself naturally where it needs to be.
Rail alignment helper, print at least two, installed on each end, press down on the helper pieces from the top while securing the rail.
Rails lubrication: don't make the mistake that I and many have done, which is to put too much grease, there should be enough just to lay a thin tiny greasy film, but no more, and not grease visible, so while everything now with a greasy cloth and remove any excess. For non stainless steel rail, remember to also grease the rail itself to avoid rust.
The grease that is on the rail when you get it deliver is not meant to be used, its' shipping grease to avoid rust, you need to clean that first with IPA, then re-grease everything with appropriate grease (if you are in the US, you can get this https://amzn.to/4alWfw5, you can also find it a Lowes and likely HomeDepot for a single tube which is enough, I do recommend small syringes to be less messy)
Files