Home
Home

 Artists
 Search
 Recent
 Random
 Posts
Posts
 DMs
DMs
 Tags
Tags
 Random
 Importer
 Import
 FAQ
FAQ
 Account
 Register
 Favorites
 Login
Login

$10 BTS Reward: Diana A (Patreon)
Content
Sorry for not gettng this up last night! Here's the step by step process for the new Diana Saez pinup that went up yesterday.
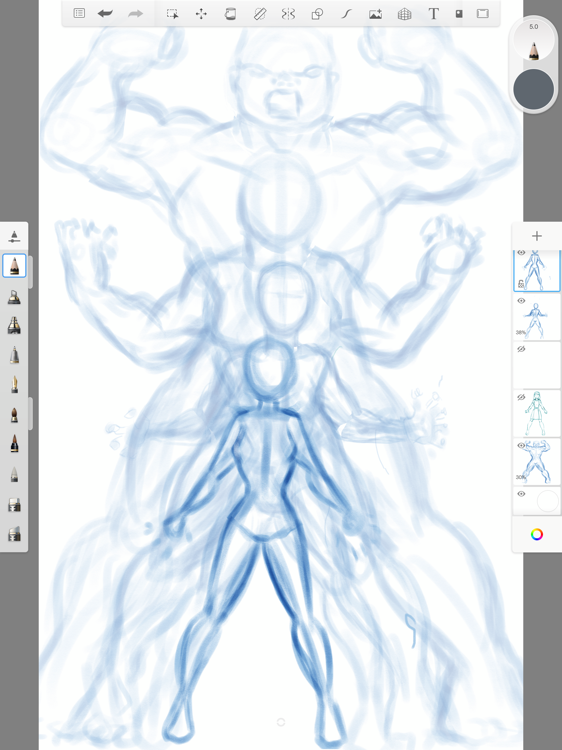
ABOVE: The four pinups are supposed to be part of a larger piece showcasing a classic Hulk out style transformation. As Ms. Giant, Diana defaults to about twice her normal height (but can grow up to 100 feet for limited periods of time). I laid out all four steps on separate layers so I can make sure they'll all work as a coherent piece.
BELOW: I pencilled in the details on the first stage--Diana in her normal form. I then hid the other layers and exported this image from Autodesk Sketchbook to Clip Studio Paint for inking and coloring.
Clip Studio's got a nifty feature where you can change a layer to non photo blue or any other color. For the stand alone versions of each stage, I want the character to fill the frame more so I also expanded the image to a larger size. Once I have all four complete I'll resize the earlier stages to scale with the final one of Ms. Giant.

Inks! Notice the change to Diana's face. The original sketch shows Diana with a shocked look on her face and a snarling Ms. Giant, in keeping with the feel of the Hulk pieces that inspired it. But after sketching them I realized that wasn't really reflective of Ms. G's personality in either form, at least as I imagine her. She's actually one of the most upbeat characters in my stable, so I changed her expression to reflect that. Here she's got a "boy are you in for a shock" smirk.

Next we add the flats.

And then the rendering. Normally this layer is reserved for basic shading that gives the character form. The blush and eye shadow would normally have been on a "special layer" but they were such small details it was easier to just add them in with the shading.

Finally, since this is supposed to be a more finished piece, I added color to the lines. This image also includes the highlights that overrun the inks to stand out more, like on her eyes and jewelry.

Finally a backdrop that gives an impression of motion. I show all my layers here as well. The difference between this and the final piece shown yesterday is the "growing" effect which is basically duplicates of the figure stretched and blurred. Two behind her, and one in front with a glowing effect. I'm not sure how much of that I will add to the combined version, but if I do, I may use one copy of the current stage and another color of the next stage to enhance the transition. Let me know if you have questions!

Let me know if you have any questions or comments!
Files