Home
Home

 Artists
 Search
 Recent
 Random
 Posts
Posts
 DMs
DMs
 Tags
Tags
 Random
 Importer
 Import
 FAQ
FAQ
 Account
 Register
 Favorites
 Login
Login

Art Explained: Furry Easy Patterning (Patreon)
Content
This time on Art Explained, I want to go through how I do most of my fur pattern shading.
Disclaimer: I don't think this is the best way to do it, but it works for me so i'm sharing. One day i'll crack the technique shown in this timelapse (that I also shared last time) of doing monochrome shading and drawing colour on top.
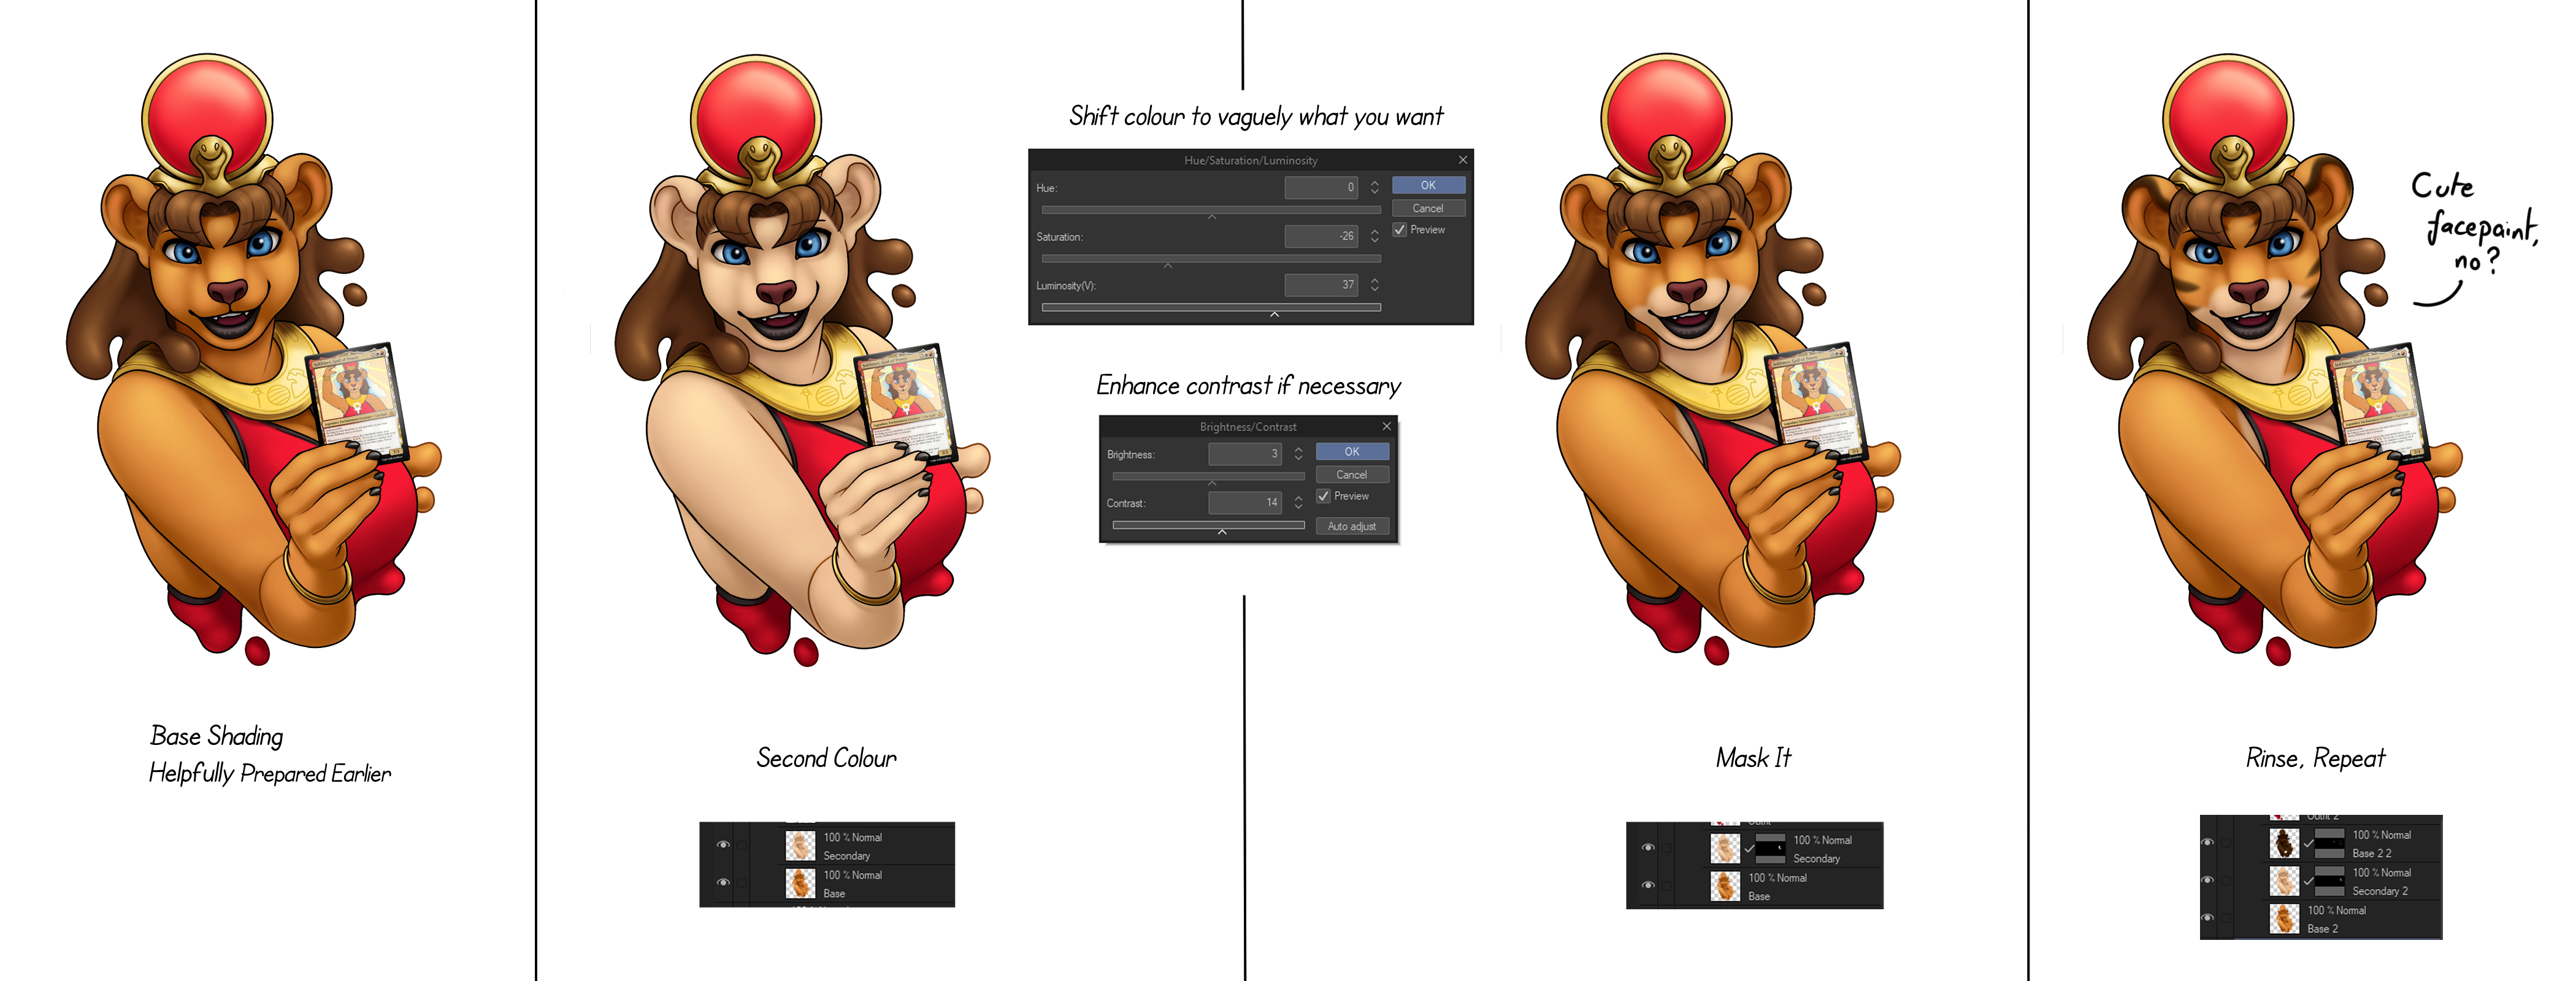
However, I find this technique to be pretty quick and pretty successful. Here's the basic steps, using a recent drawing of ya gal Sekhmet :)
1. Do the base shading
Arguably the hardest part, you've gotta do the shading for your base fur, in a lioness' case we're going for a nice golden colour.
2. Duplicate, Hue Shift
Duplicate your base layer, and then shift its hue, saturation and lightness. I then use the Brightness/Contrast sliders to re-add the light/dark depth lost by that process.
I've got an inkling that the Level Correction or Color Balance menus could be used instead - the point here is that we're preserving where the curves of the shading are.
3. Mask The Layer
Now, using a layer mask, you can hide all of this secondary colour, and then use a soft brush to draw it back in where you want it to be. For Sekhmet, i want my lighter colour to be on her muzzle and chest.
4. More? More!
This process can be repeated for each different colour of fur. Duplicate the base layer again, hue shift it, and mask it out.
Side note: this technique is also super useful for transformation, showing shifting skin or clothing like in this dragoness TF - adding scales is as simple as using a harder brush in the layer mask.
If you read these posts (and actually enjoy them) let me know. If you don't enjoy them, but by chance have read this far, i still would like that feedback! I'm running low on ideas for this series and ultimately it exists to give the $3 tier more value and it'd be good to appraise that value.
Files