Home
Home

 Artists
 Search
 Recent
 Random
 Posts
Posts
 DMs
DMs
 Tags
Tags
 Random
 Importer
 Import
 FAQ
FAQ
 Account
 Register
 Favorites
 Login
Login

' Mountains Are My Throne ' A GShade Preset (Patreon)
Downloads
Content
(Outdoor photos taken with V1 version of this gshade preset)
(You can also check this guide to make your game experience better :) )
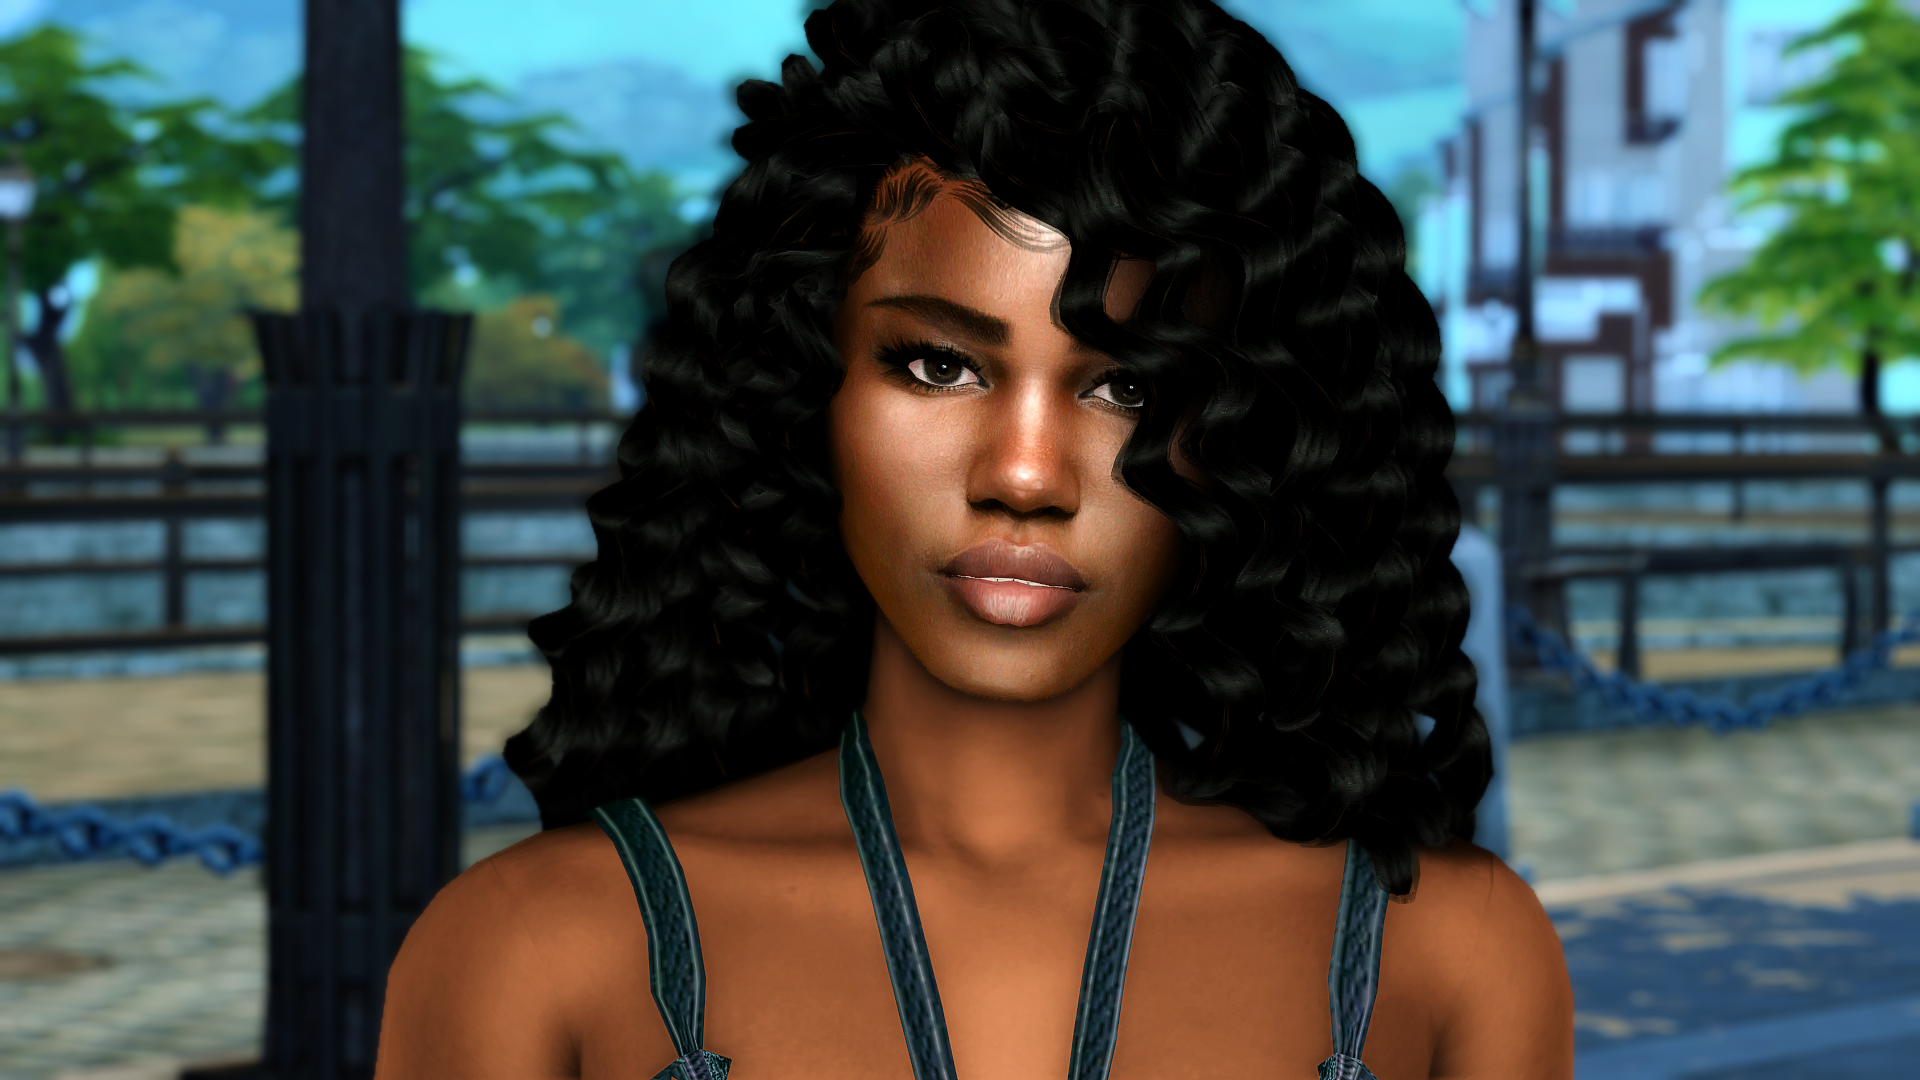
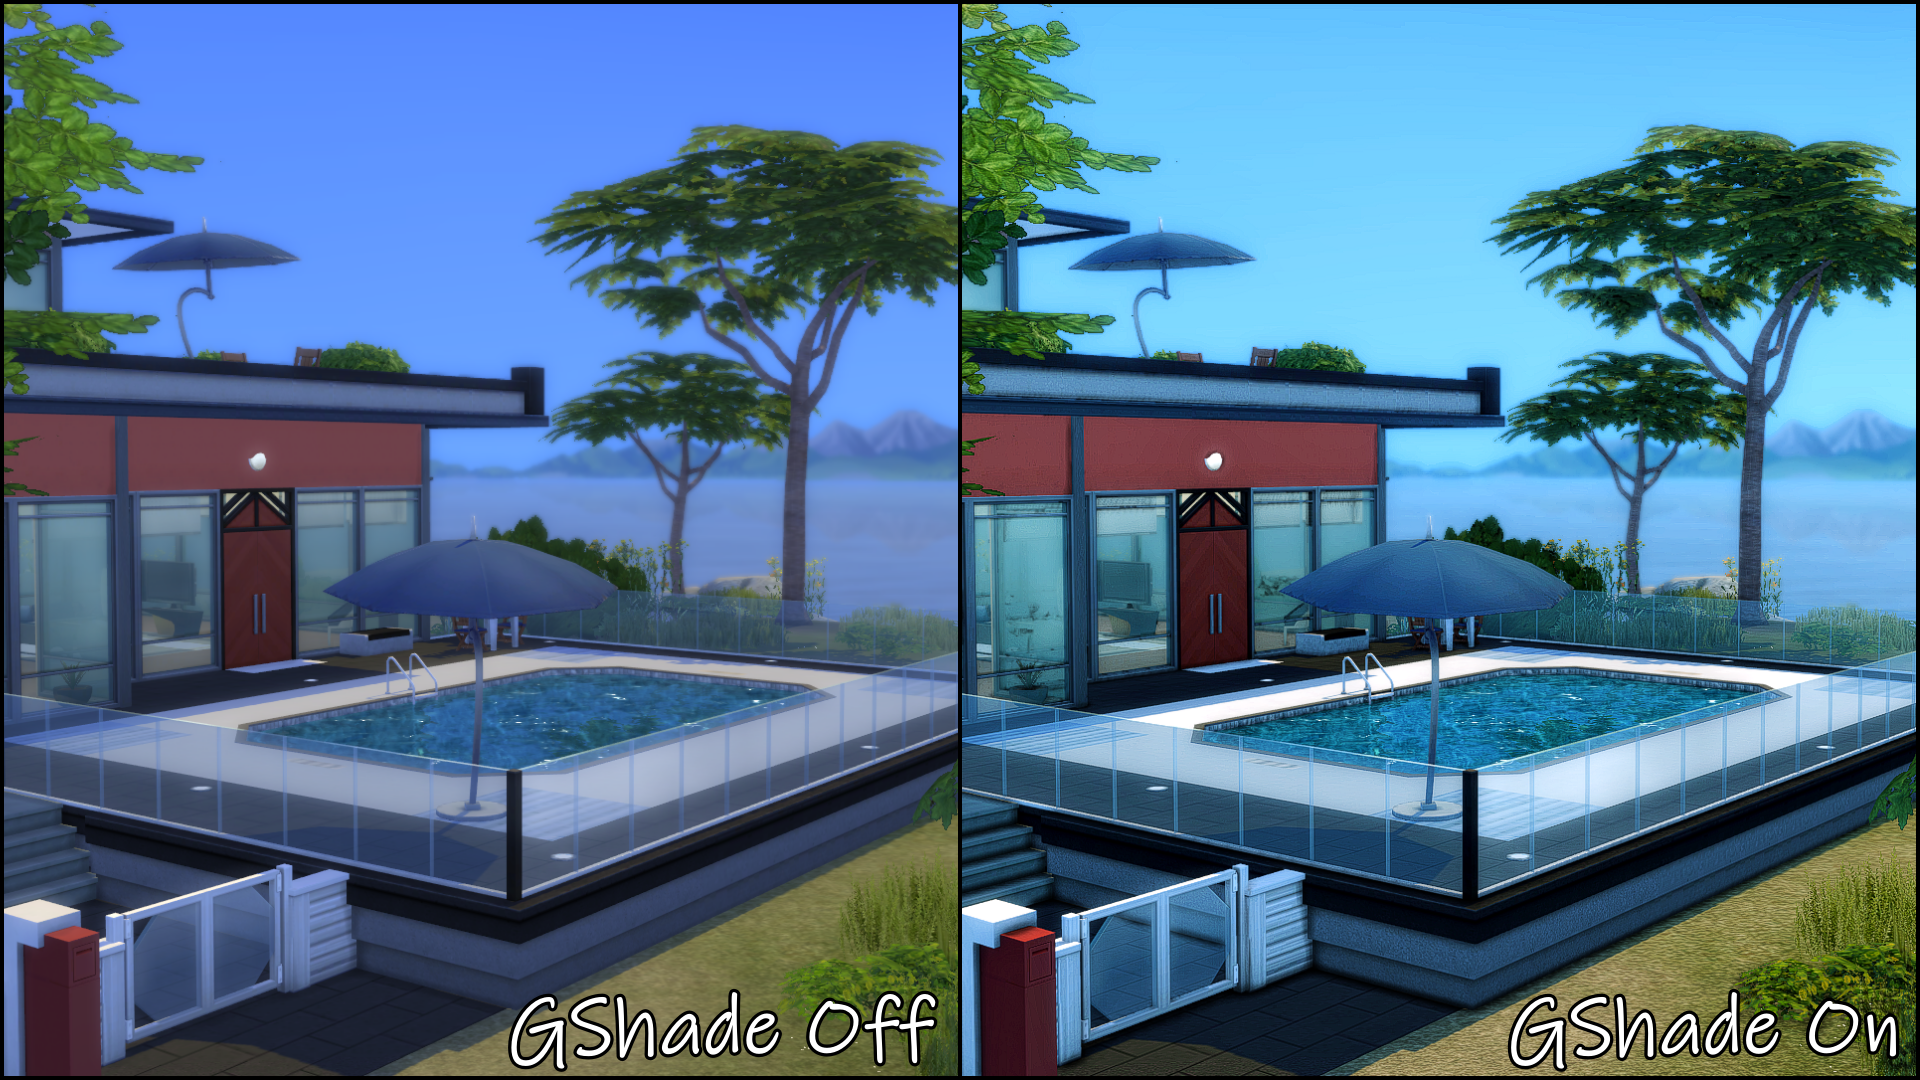
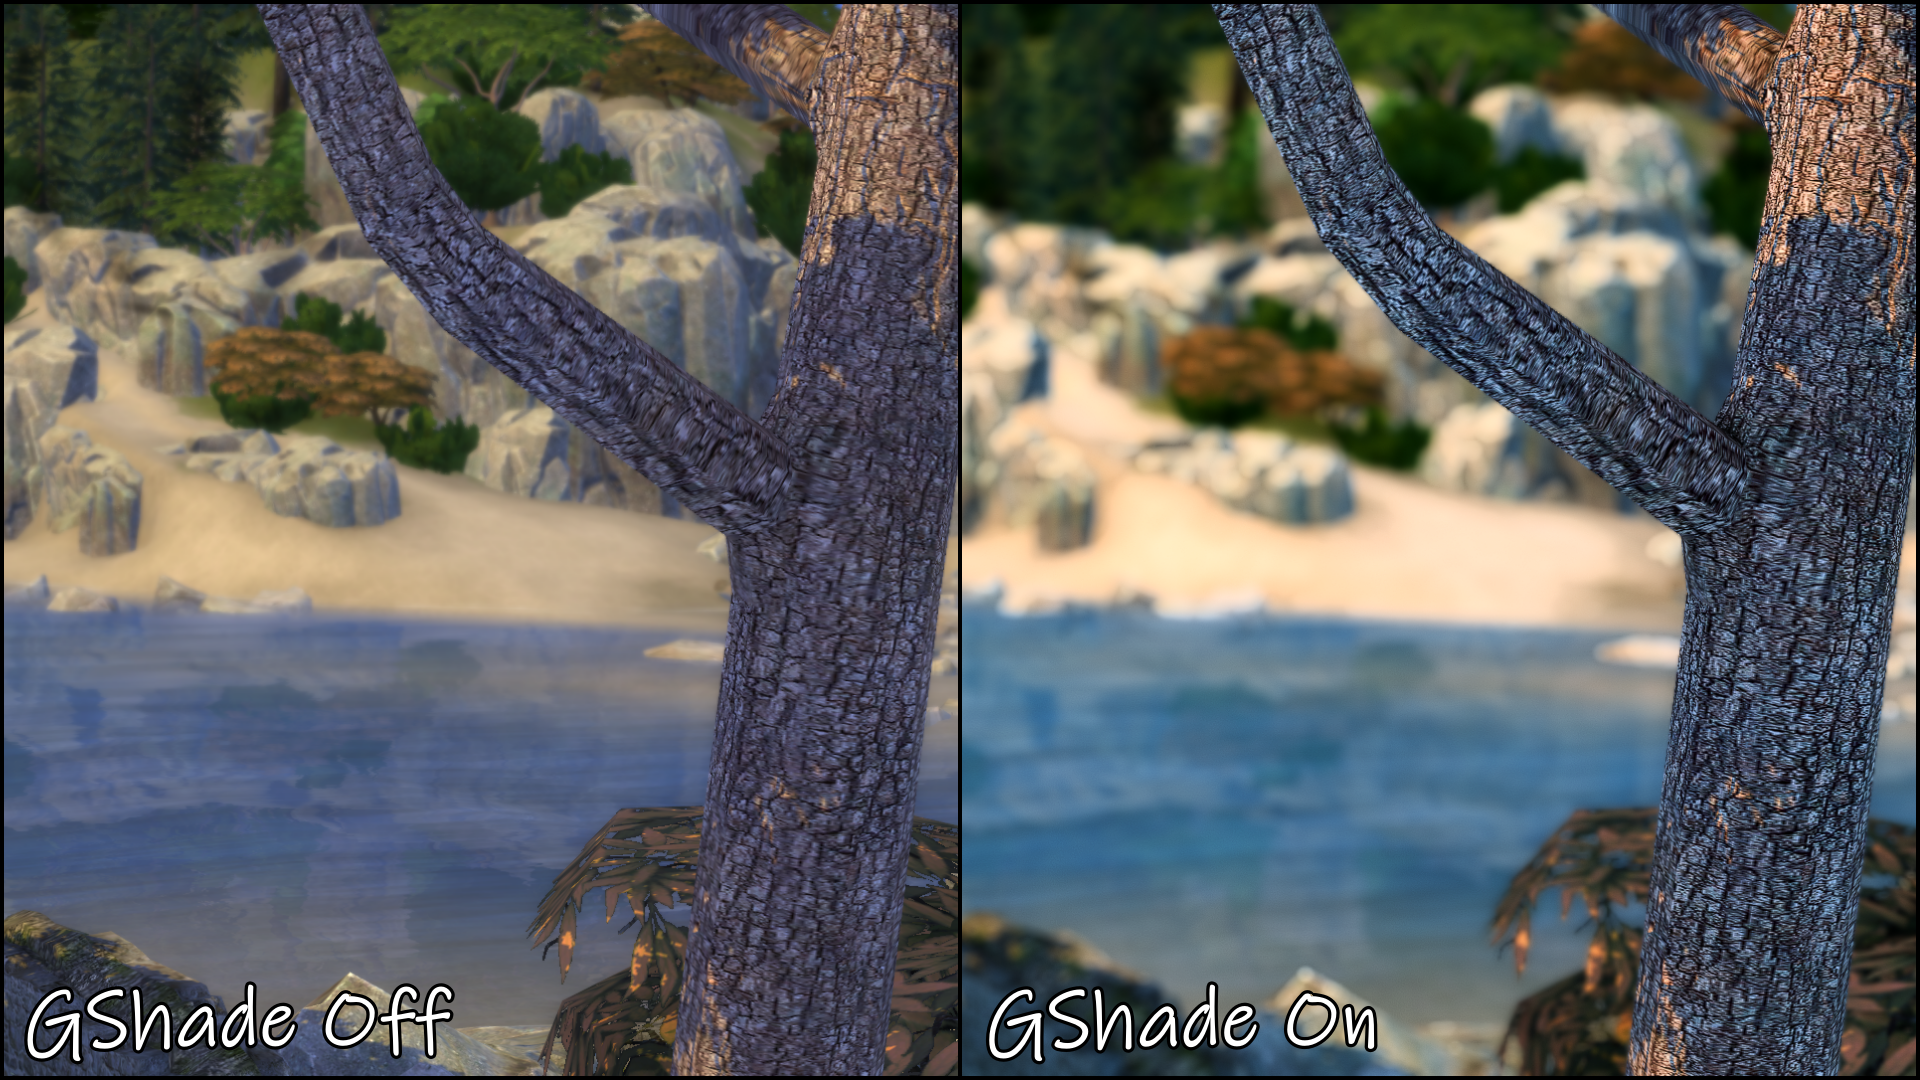
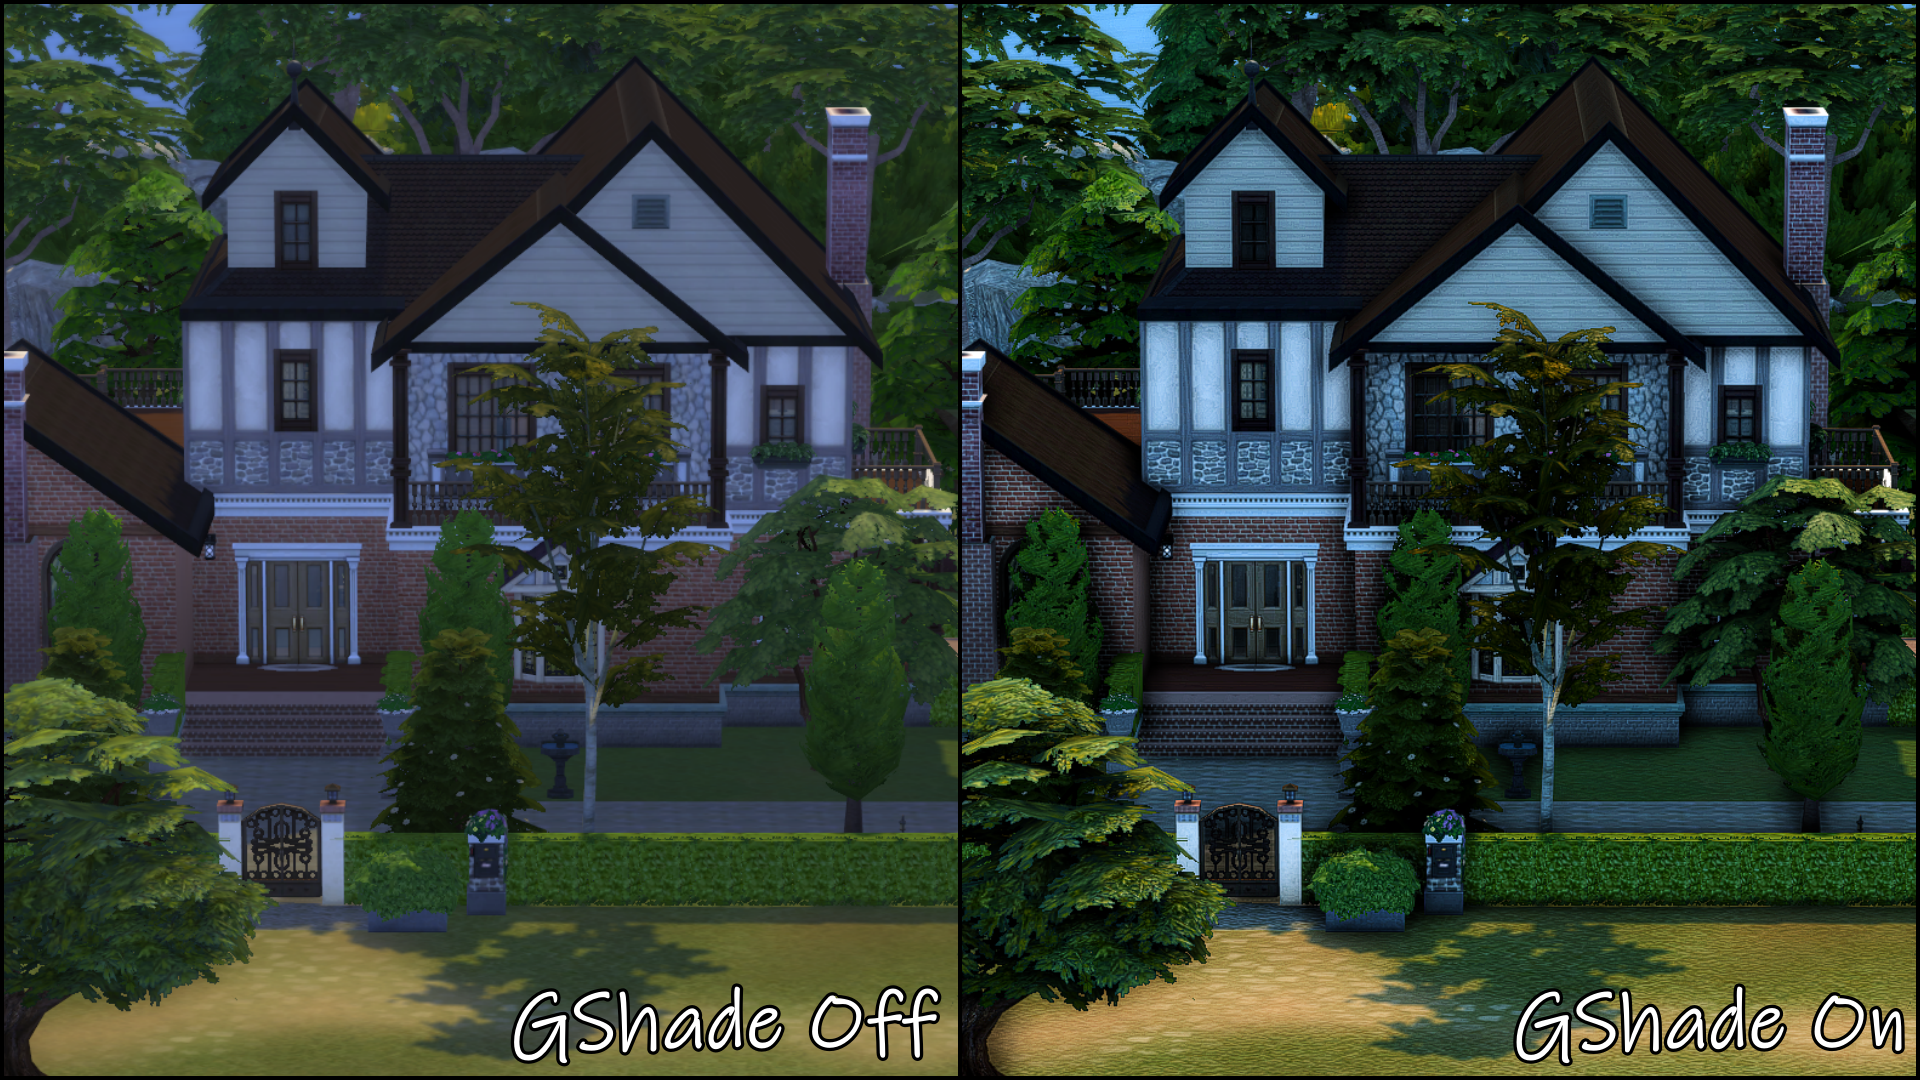
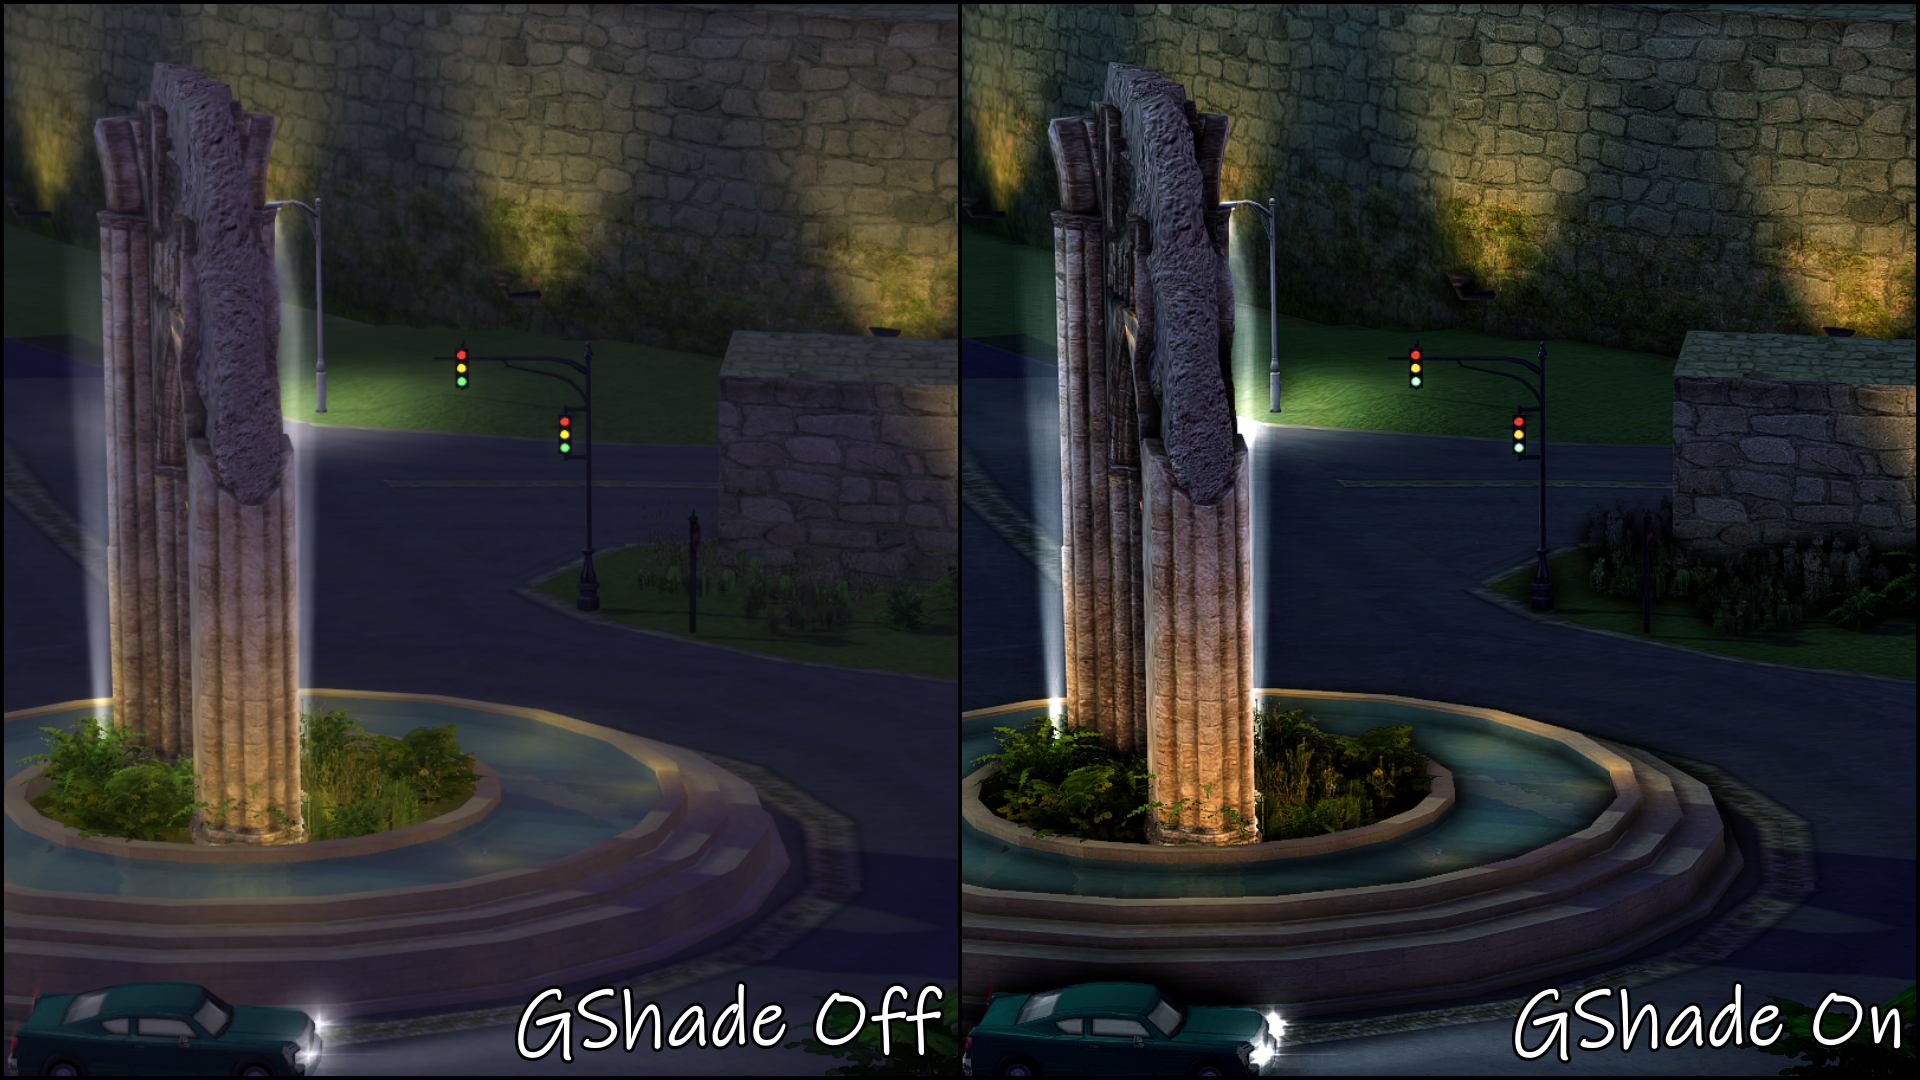
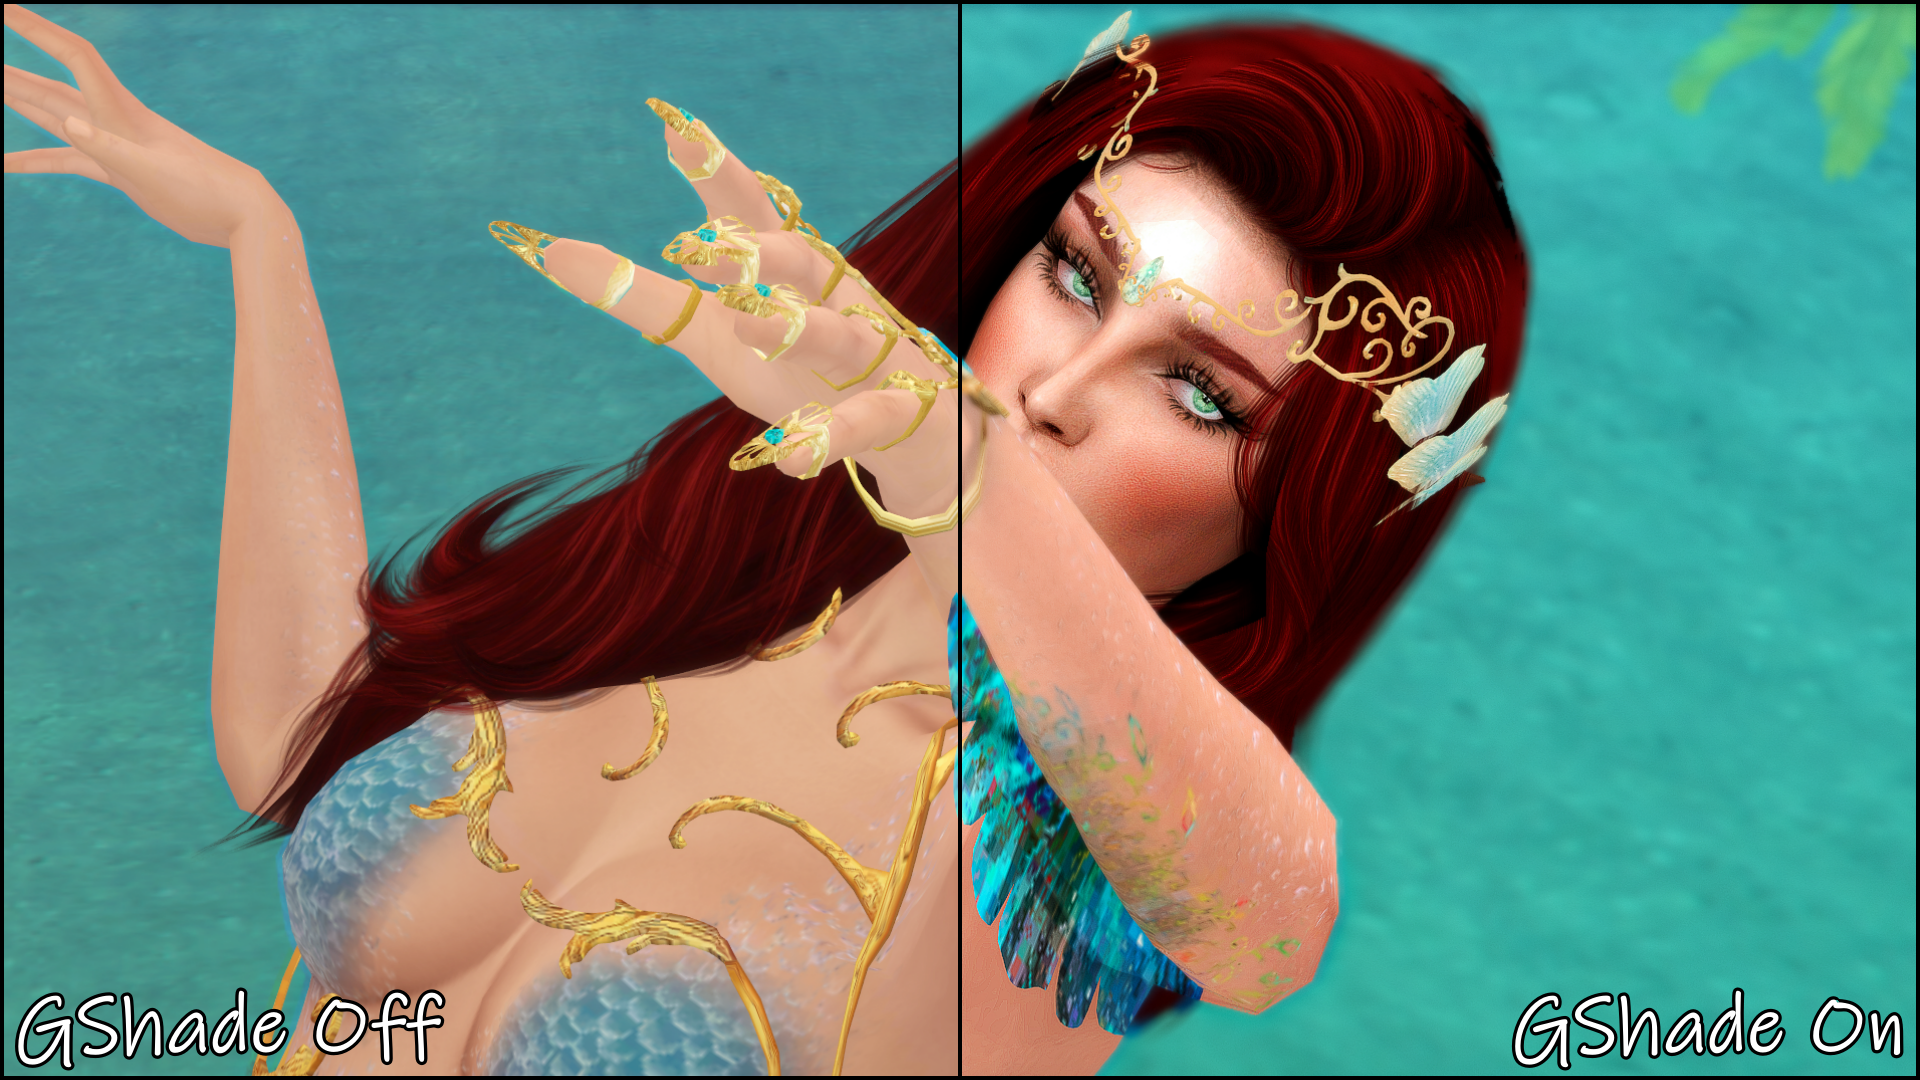
This GShade preset is aiming to catch more accurate shadow colors, lighting in general and more realism on playable Sim characters. Adding more pleasing tones -warmth in general- on skins, while not suffocating the CCs' texture is game changing. Added clarity and sharpen for advanced visuals. MXAO gives shadows more depth. Colors are more vivid than they have ever been! Not just darker skin tones but also lighter skin tones are looking way better.
However, there are some ups and downs about this preset. As you can see at the last 3 slides, i created 4 different versions of this preset. Because it's kinda impossible to have a single preset that is working perfect and flawlessly accurate on all kind of skin tones. So, i made some variations of it and leave it to your own personal taste. You can switch between presets with one click, play around with it to make it fit better to your taste etc.
Some notes (IMPORTANT):
🔴 Different lightings, different worlds, different seasons and different times of the day causes different effects on the preset (as it does in any other preset, naturally). Just wanted to point out the obvious, to avoid any miscommunication.
🔴 Turn off Cinematic DOF during gameplay. It's only for blurring the background. It causes lots of FPS drop. If you use it only for photoshooting, it does wonders. So, turning it off while gameplay is amazing for FPS boost!
🔴 During CAS screen, Mountains Are My Throne preset is not working well. By that i mean, due to different CAS lighting, it's not pleasing to eye. So, use this preset for gameplay or photoshoot.
🔴 This preset is created for mainly outdoors and photoshooting. Inside of the house lighting might be turn-off. However, if the lighting is good, it actually does wonders.
🔴 You should check out the "DELC_Sharpen" and "NLM_Sharp" yourself. Using both of them might be too sharp for your eyes. So, try to turn one off, then the other. Maybe you want both turned off. As said, try yourself :)
-INSTALLING GUIDE-
🔴 Download GShade from the official website.
🔴 After that, open the installer and find your game launch path. If you are using Origin, it should be something like this: C > Program Files (or x86) > Origin Games > The Sims 4 > Game > Bin (In here, you'll see TS4 launcher icon, not the origin.) Chose TS4 launcher. If you use Steam, you need the path for the launcher icon from Steam path yourself.
🔴 After that, chose your system (32 or 64 bit). To learn (if you don't know), click windows icon on your screen and type "dxdiag". There you should see it on the Operating System line.
🔴 Now, chose the game's Graphics API. TS4 uses DX9. So, chose DX9.
🔴 Now it's time for Hooking line. Chose "normal mode".
🔴 Last part is "Optional" part. Leave it as it is. Also, don't forget to check "Enable Desktop Reminder".
🔴 Below "optional" part, you'll see some other games and files. Don't check any of them because you don't need them.
🔴 Now, click install button and let it finish installing. When the installing done, it will ask you where to save your screenshots. Chose yourself a saving path. (Default GShade photography key is Shift + P)
🔴 Now, this is the easiest part. Go to your launcher folder again. C > Program Files (or x86) > Origin Games > The Sims 4 > Game > Bin. Here, you'll see two folders named gshade-shaders and gshade presets. If you don't have "gshade presets" folder, create a new folder here and name it exactly as gshade presets .
🔴 Download all (or the one you wish) the presets you will see down below of this post. Put these presets into your gshade presets folder.
🔴 Finally, go to gshade-shaders folder. There, you'll see 2 folders names Shaders and Textures. I also uploaded Shaders and Textures (see below, rar file named shaders-textures). Download it and in the rar file, you'll see shaders and textures folders. Put them into your gshade-shaders folder. Shaders goes into Shaders, Textures goes into Textures. When it asks you with pop up, chose "REPLACE". DO NOT mix these or it will conflict and won't work. Normally, i wouldn't upload these shaders and textures. However, it's way too complicated for me to figure out which is downloaded where from ghub.
🔴 When you start the game, a notice will pop-up for "Guide" and you can basically click next next and next :P After that, don't forget to click finish (at the very bottom). Then, click reload.
🔴 This is all! Now, you successfully installed GShade for The Sims 4! Launch your game and Press Shift + F2 to activate GShade panel. Chose whichever preset you'd like to from the bar at the top. Shift + 3 enables/disables GShade.
Note: If the GShade can't find the presets path, you can find it manually from the settings tab, after you go in game and press Shift + F2.
-
Hope you enjoy! :) ♥
Files