Home
Home

 Artists
 Search
 Recent
 Random
 Posts
Posts
 DMs
DMs
 Tags
Tags
 Random
 Importer
 Import
 FAQ
FAQ
 Account
 Register
 Favorites
 Login
Login

Princess Zelda (SSBU): Shoulder pads (Assembly) (FULL WIP 1) (Patreon)
Content
Hi Patrons !!
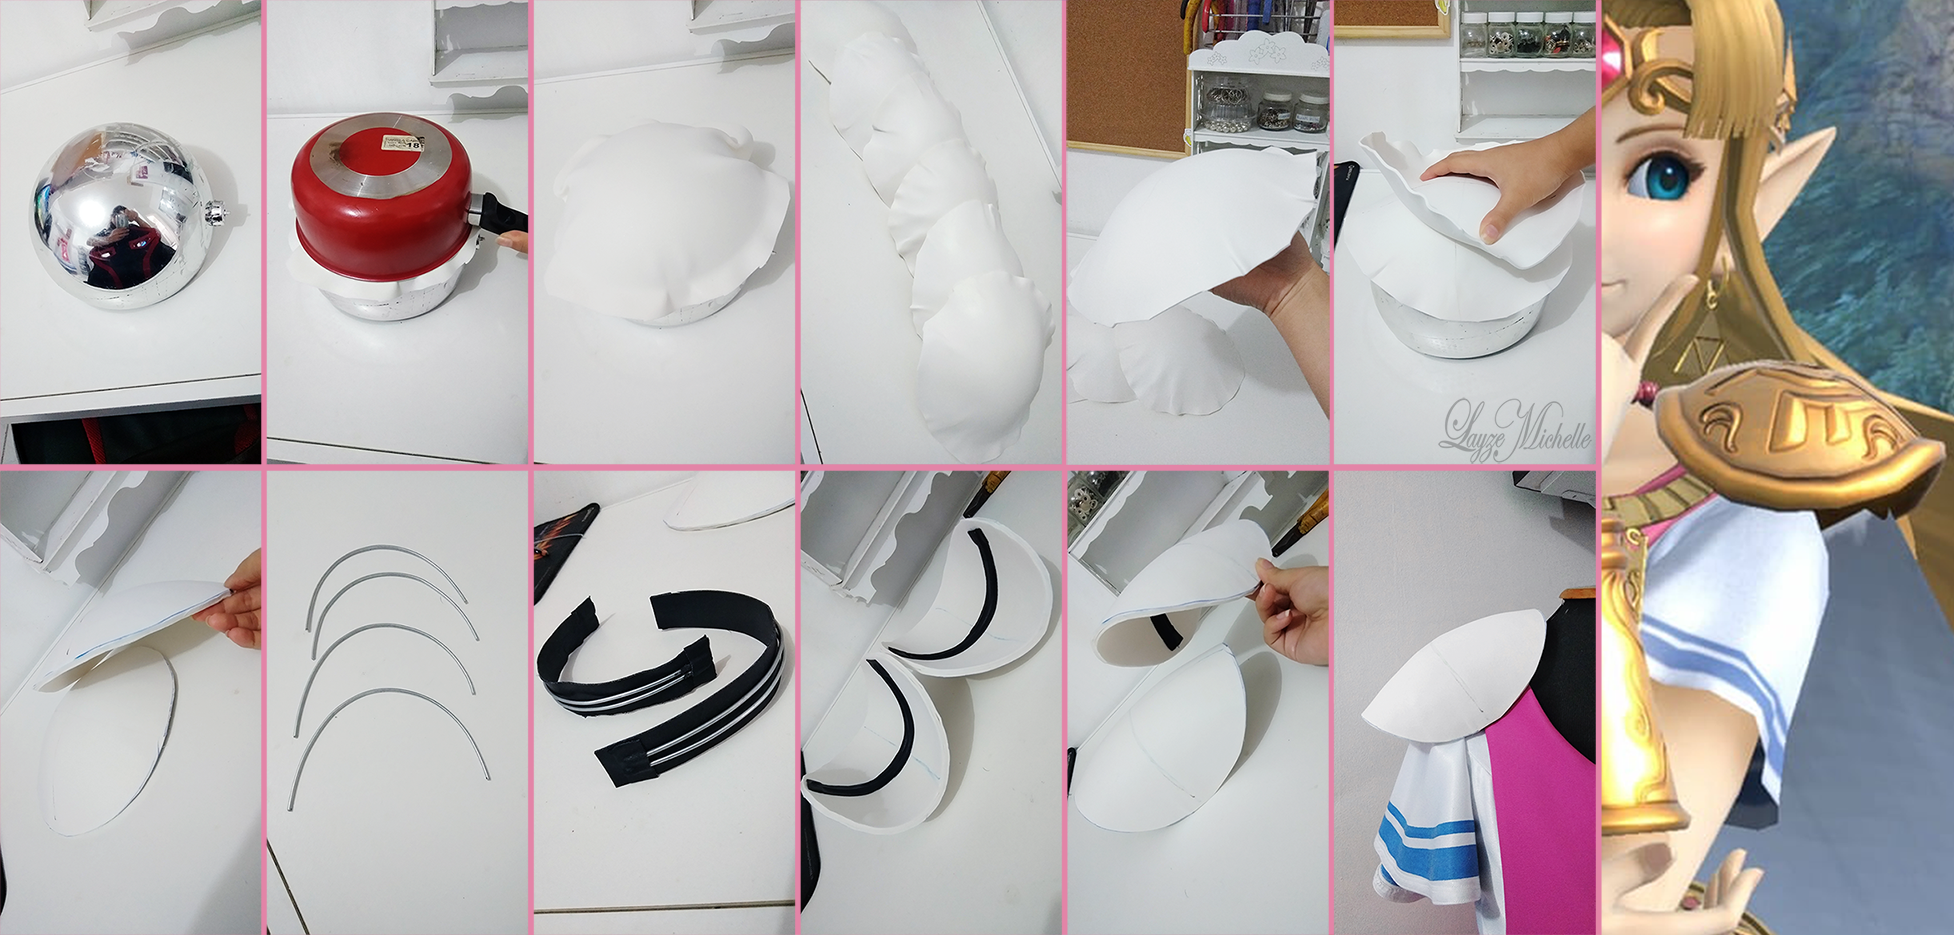
Today I will show you a very old secret that I always do in all my Zeldas shoulders!
The curvature!
This method is very good as you do not have to cut the E.V.A and leave connection marks on the piece that should be smooth!!
Well, the secret is to use a thin E.V.A foam and not a thick one, you will need to make at least 6 curved boards to put them together later!
I used a large Christmas ball as the base for my bend, I heat the E.V.A with a heat blower and I trap it with a pan, yes, a large pan where the Christmas ball can fit inside! XD
The process has to be done very fast because it is all about time because it can cool and ruin your E.V.A!
After it cools down, I arrange the "wrinkles" one by one in my hand with the heat blower very patiently!
Then to connect them, the secret is to choose the two more beautiful boards as the main base of the top (for two shoulders) and turn it inside out to stick to another board, if you stick it without doing it, it may happen to gather air bubbles and it will ruin your work!
Also, there is another thing, do not use contact glue!! Ideally use "superbonder" or school white glue! <3
Once the boards are connected, for the inside, I cut two wires for each shoulder in the size of the curvature that I want the shoulder to have and I fix them with worbla on the shoulder and VOALÁ, it is round!!
It looks small, but with the details in the center and edge, it will be a little bigger and with a more curved look since the edge has a high relief!
Hope you enjoyed it and it helps you somehow! 💖🤗
Files