Home
Home

 Artists
 Search
 Recent
 Random
 Posts
Posts
 DMs
DMs
 Tags
Tags
 Random
 Importer
 Import
 FAQ
FAQ
 Account
 Register
 Favorites
 Login
Login

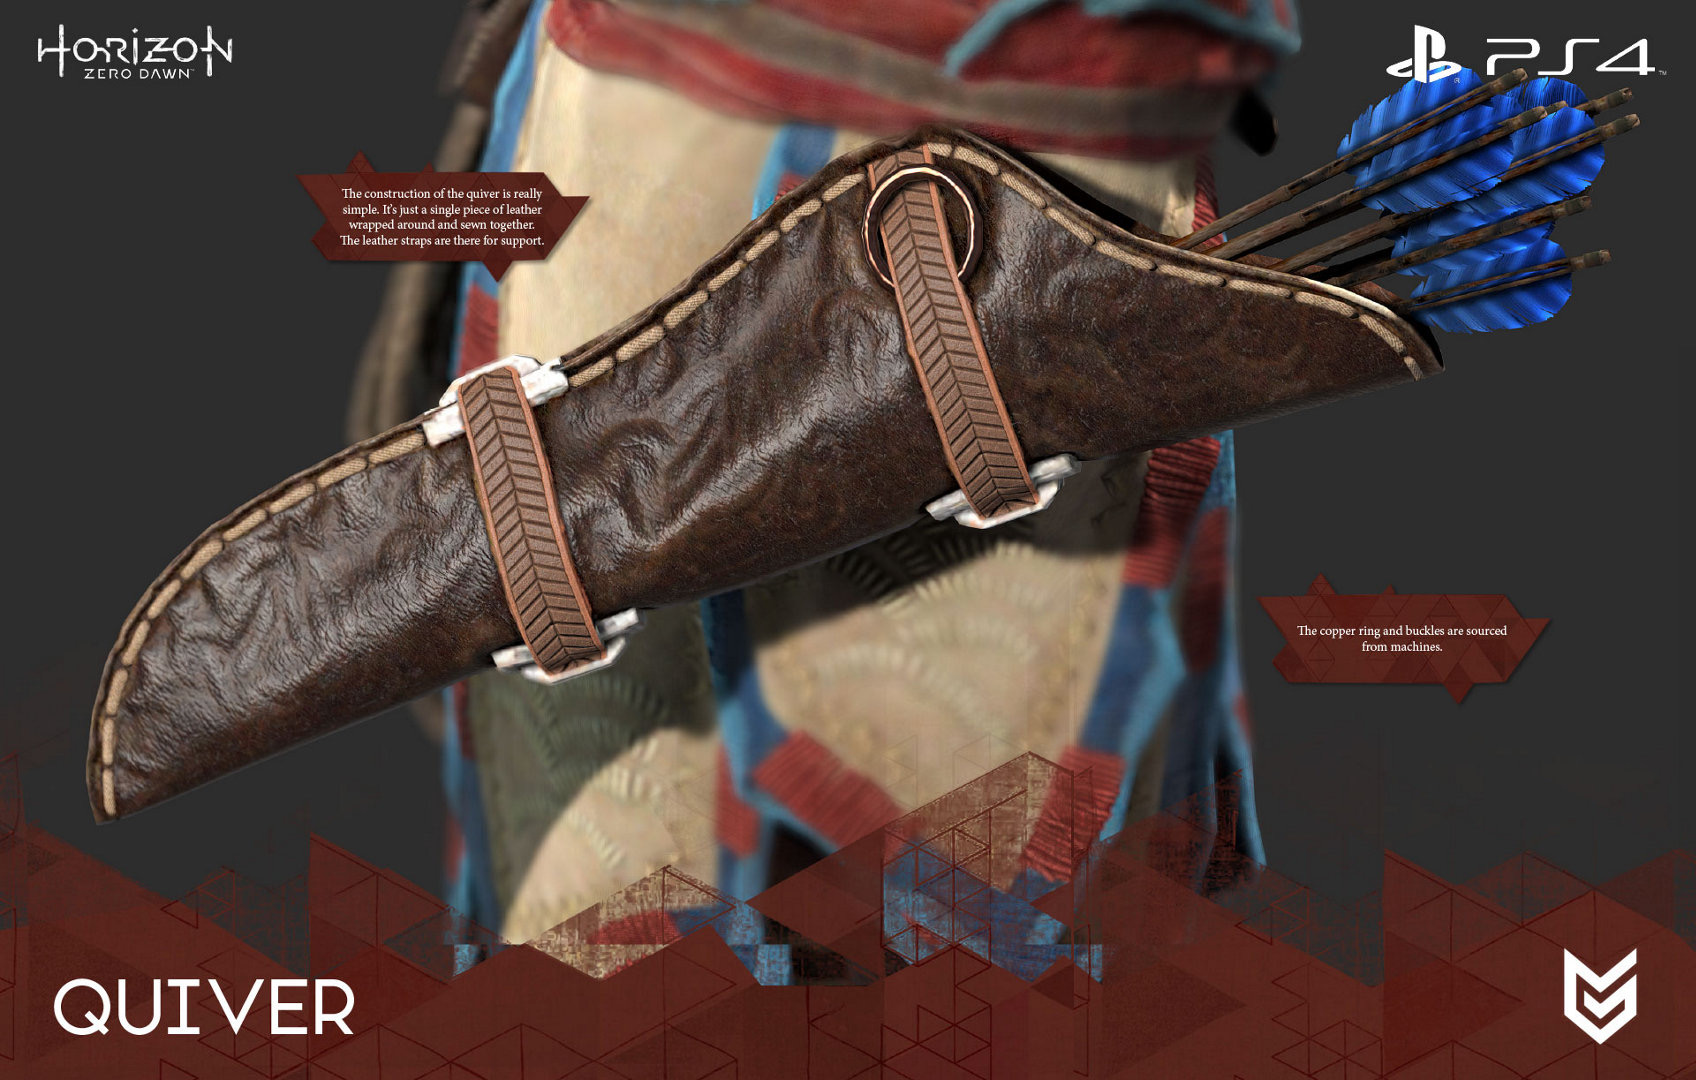
Aloy's Quiver from HZD (Patreon)
Content
Happy December Everyone,
I thought I'd start off the month with a step-by-step photo album of my quiver build for my Aloy cosplay. Since this cosplay has a ton of leather work and detailed pieces, I thought I would document the process. Hopefully these albums will be of some help to anyone interested in handcrafting their own equipment or costume pieces. I will be using many of these pieces for archery as well as other outfits and costumes so I've made them as sturdy and utilitarian as possible.
Lets start with the breakdown. I'll begin from the images at the top going from left to right.
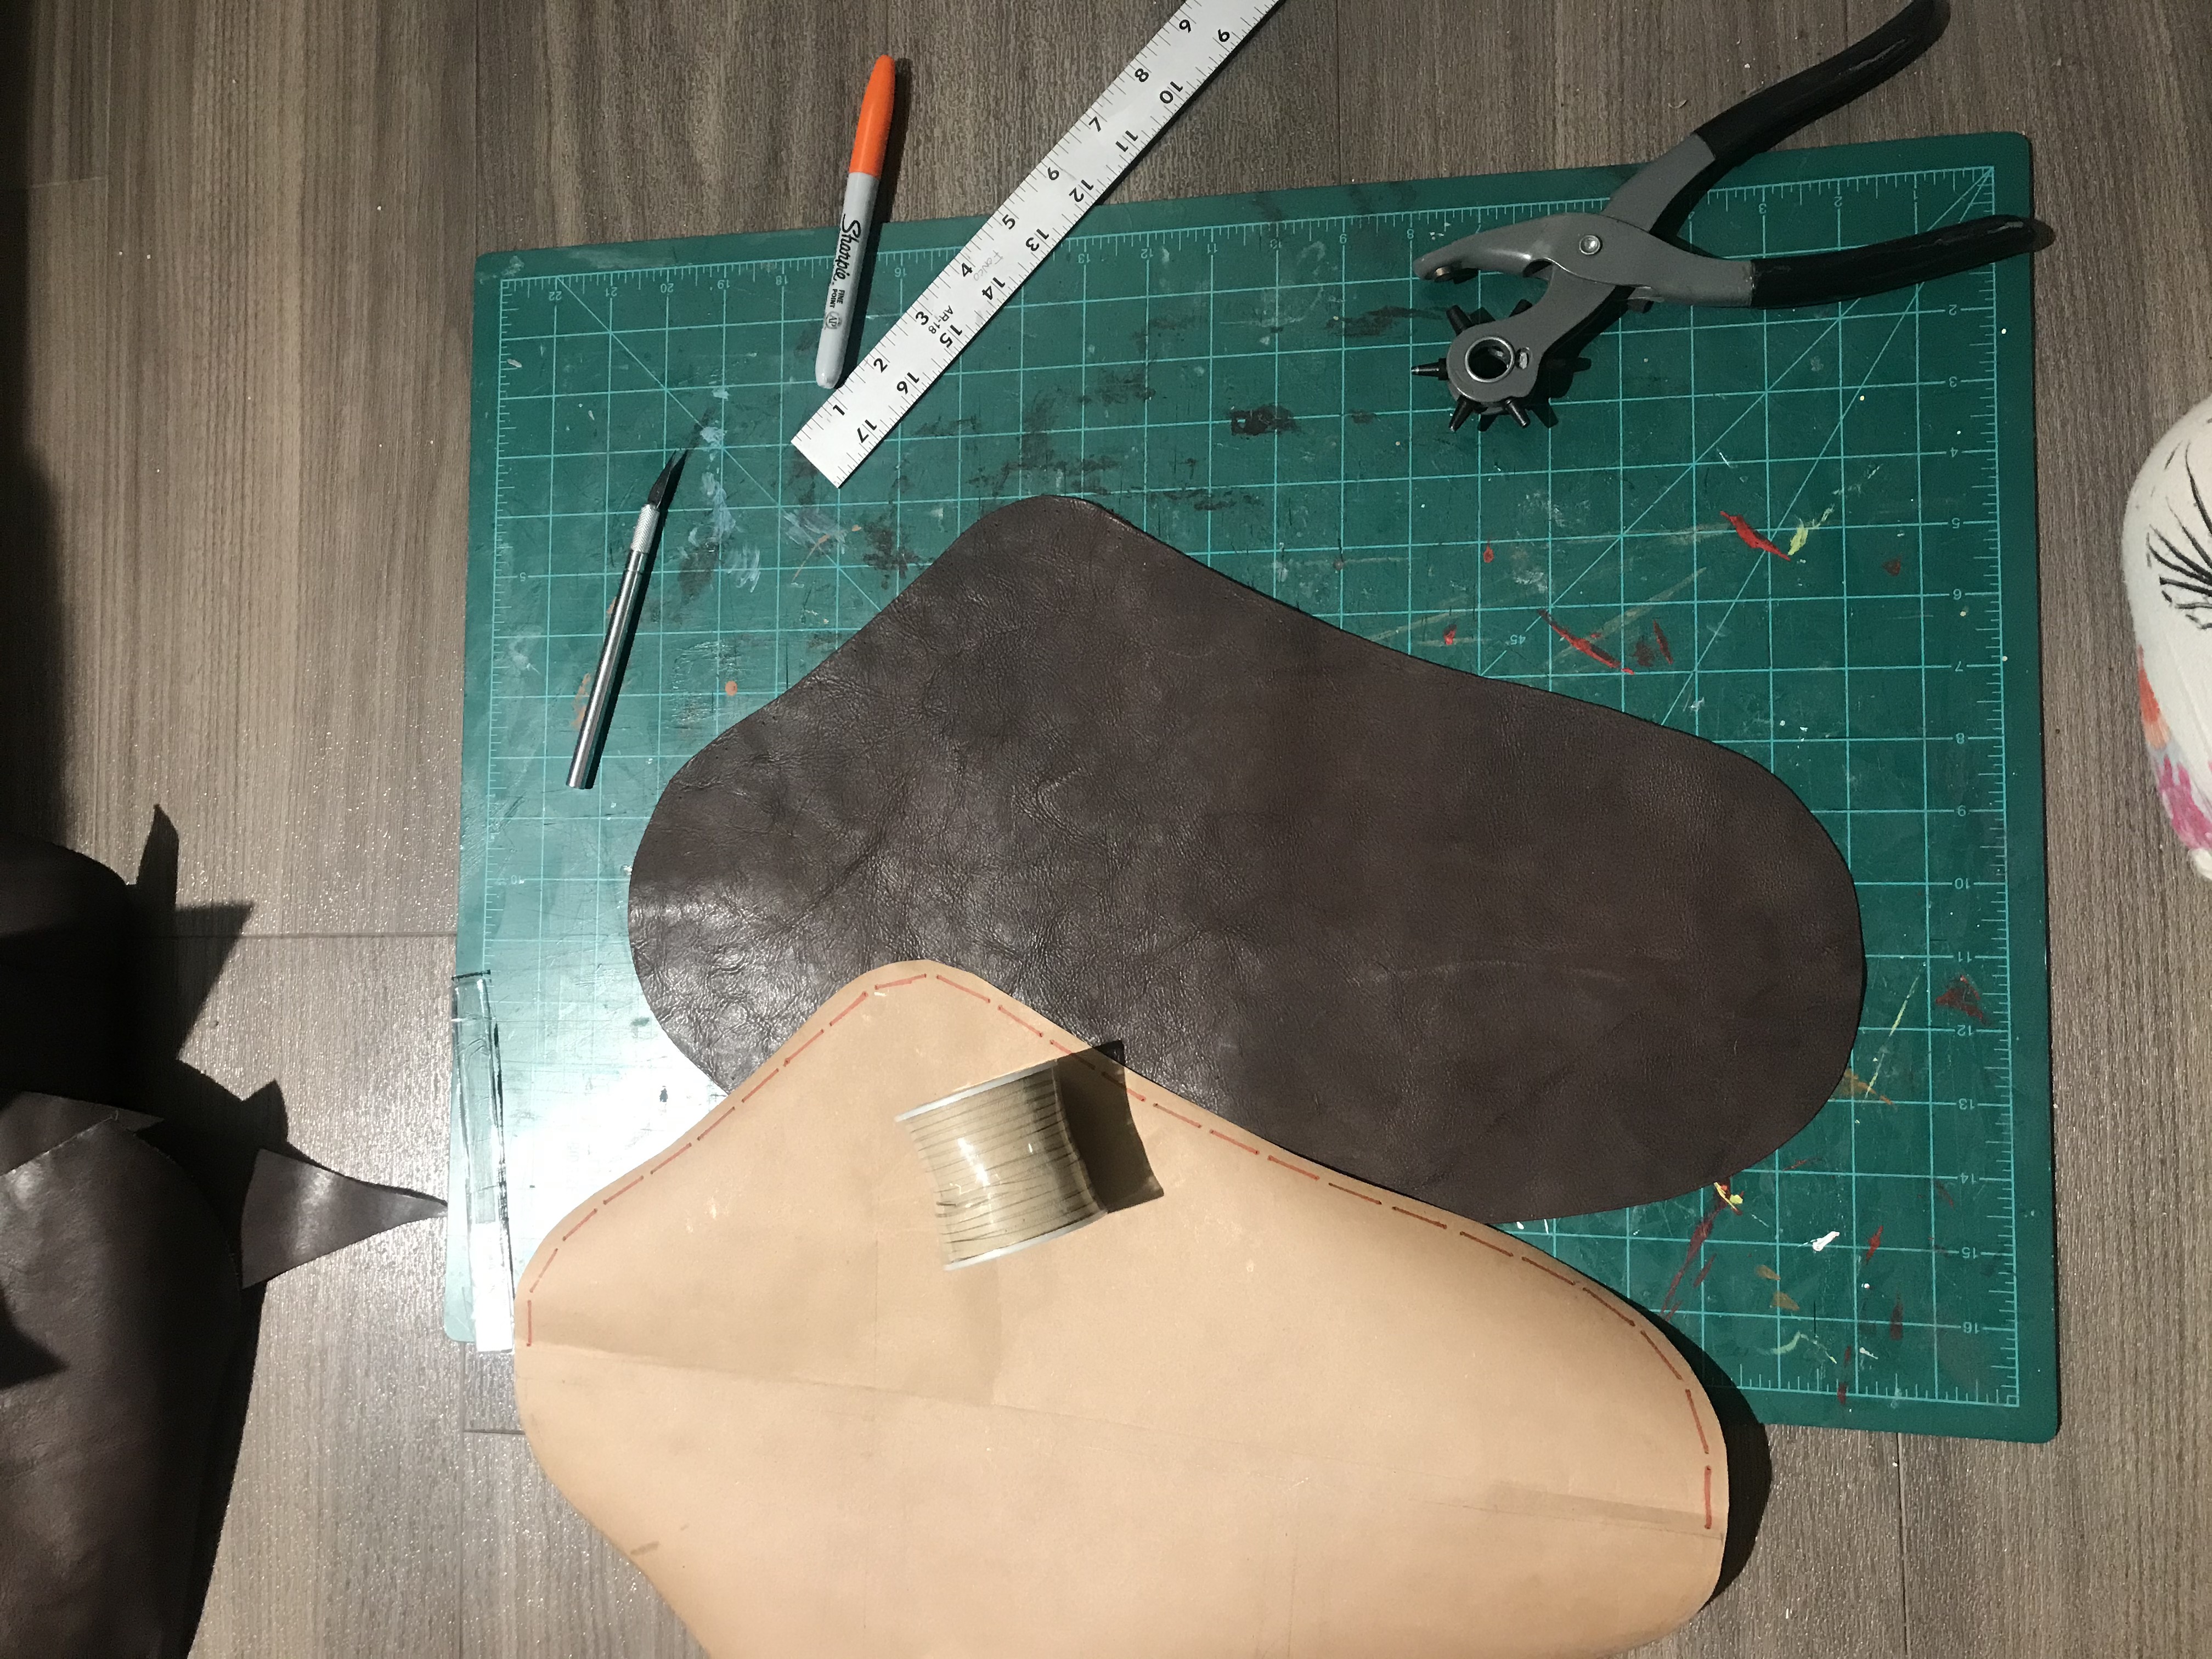
1. Materials are all natural 1-2mm apparel leather, one 1 inch belt blank, a bronze ring, black leather dye, olive oil, and lacing from Tandy Leather (I wanted authenticity and durability so I did not use vegan materials. BUT vinyl faux leather and plastic chording can be substituted although the weight and drape of these materials will not be the same and may require extra treatments such as painting and sanding).
2. Use butcher paper to draw out a pattern. First, use a ruler to draw a singe line indicating the length of your quiver. it should be just a few inches shorter than the arrows you'll be putting inside (make sure the arrow fletchings have enough room to stick out the end). Then draw a line perpendicular to your center line about 1/3 the way down from the top. This will indicate the place where the width of your quiver is the widest (the curve at the opening where the metal ring sits). Use the + guideline you've just made to draw the shape of your quiver and then cut the pattern out. Hint: you may draw only one side then fold the paper on the center line and cut the pattern out.
3. Lay out your leather sheet, backside facing up. Use a pencil to trace the outline of the pattern onto the leather. Cut out the shape.
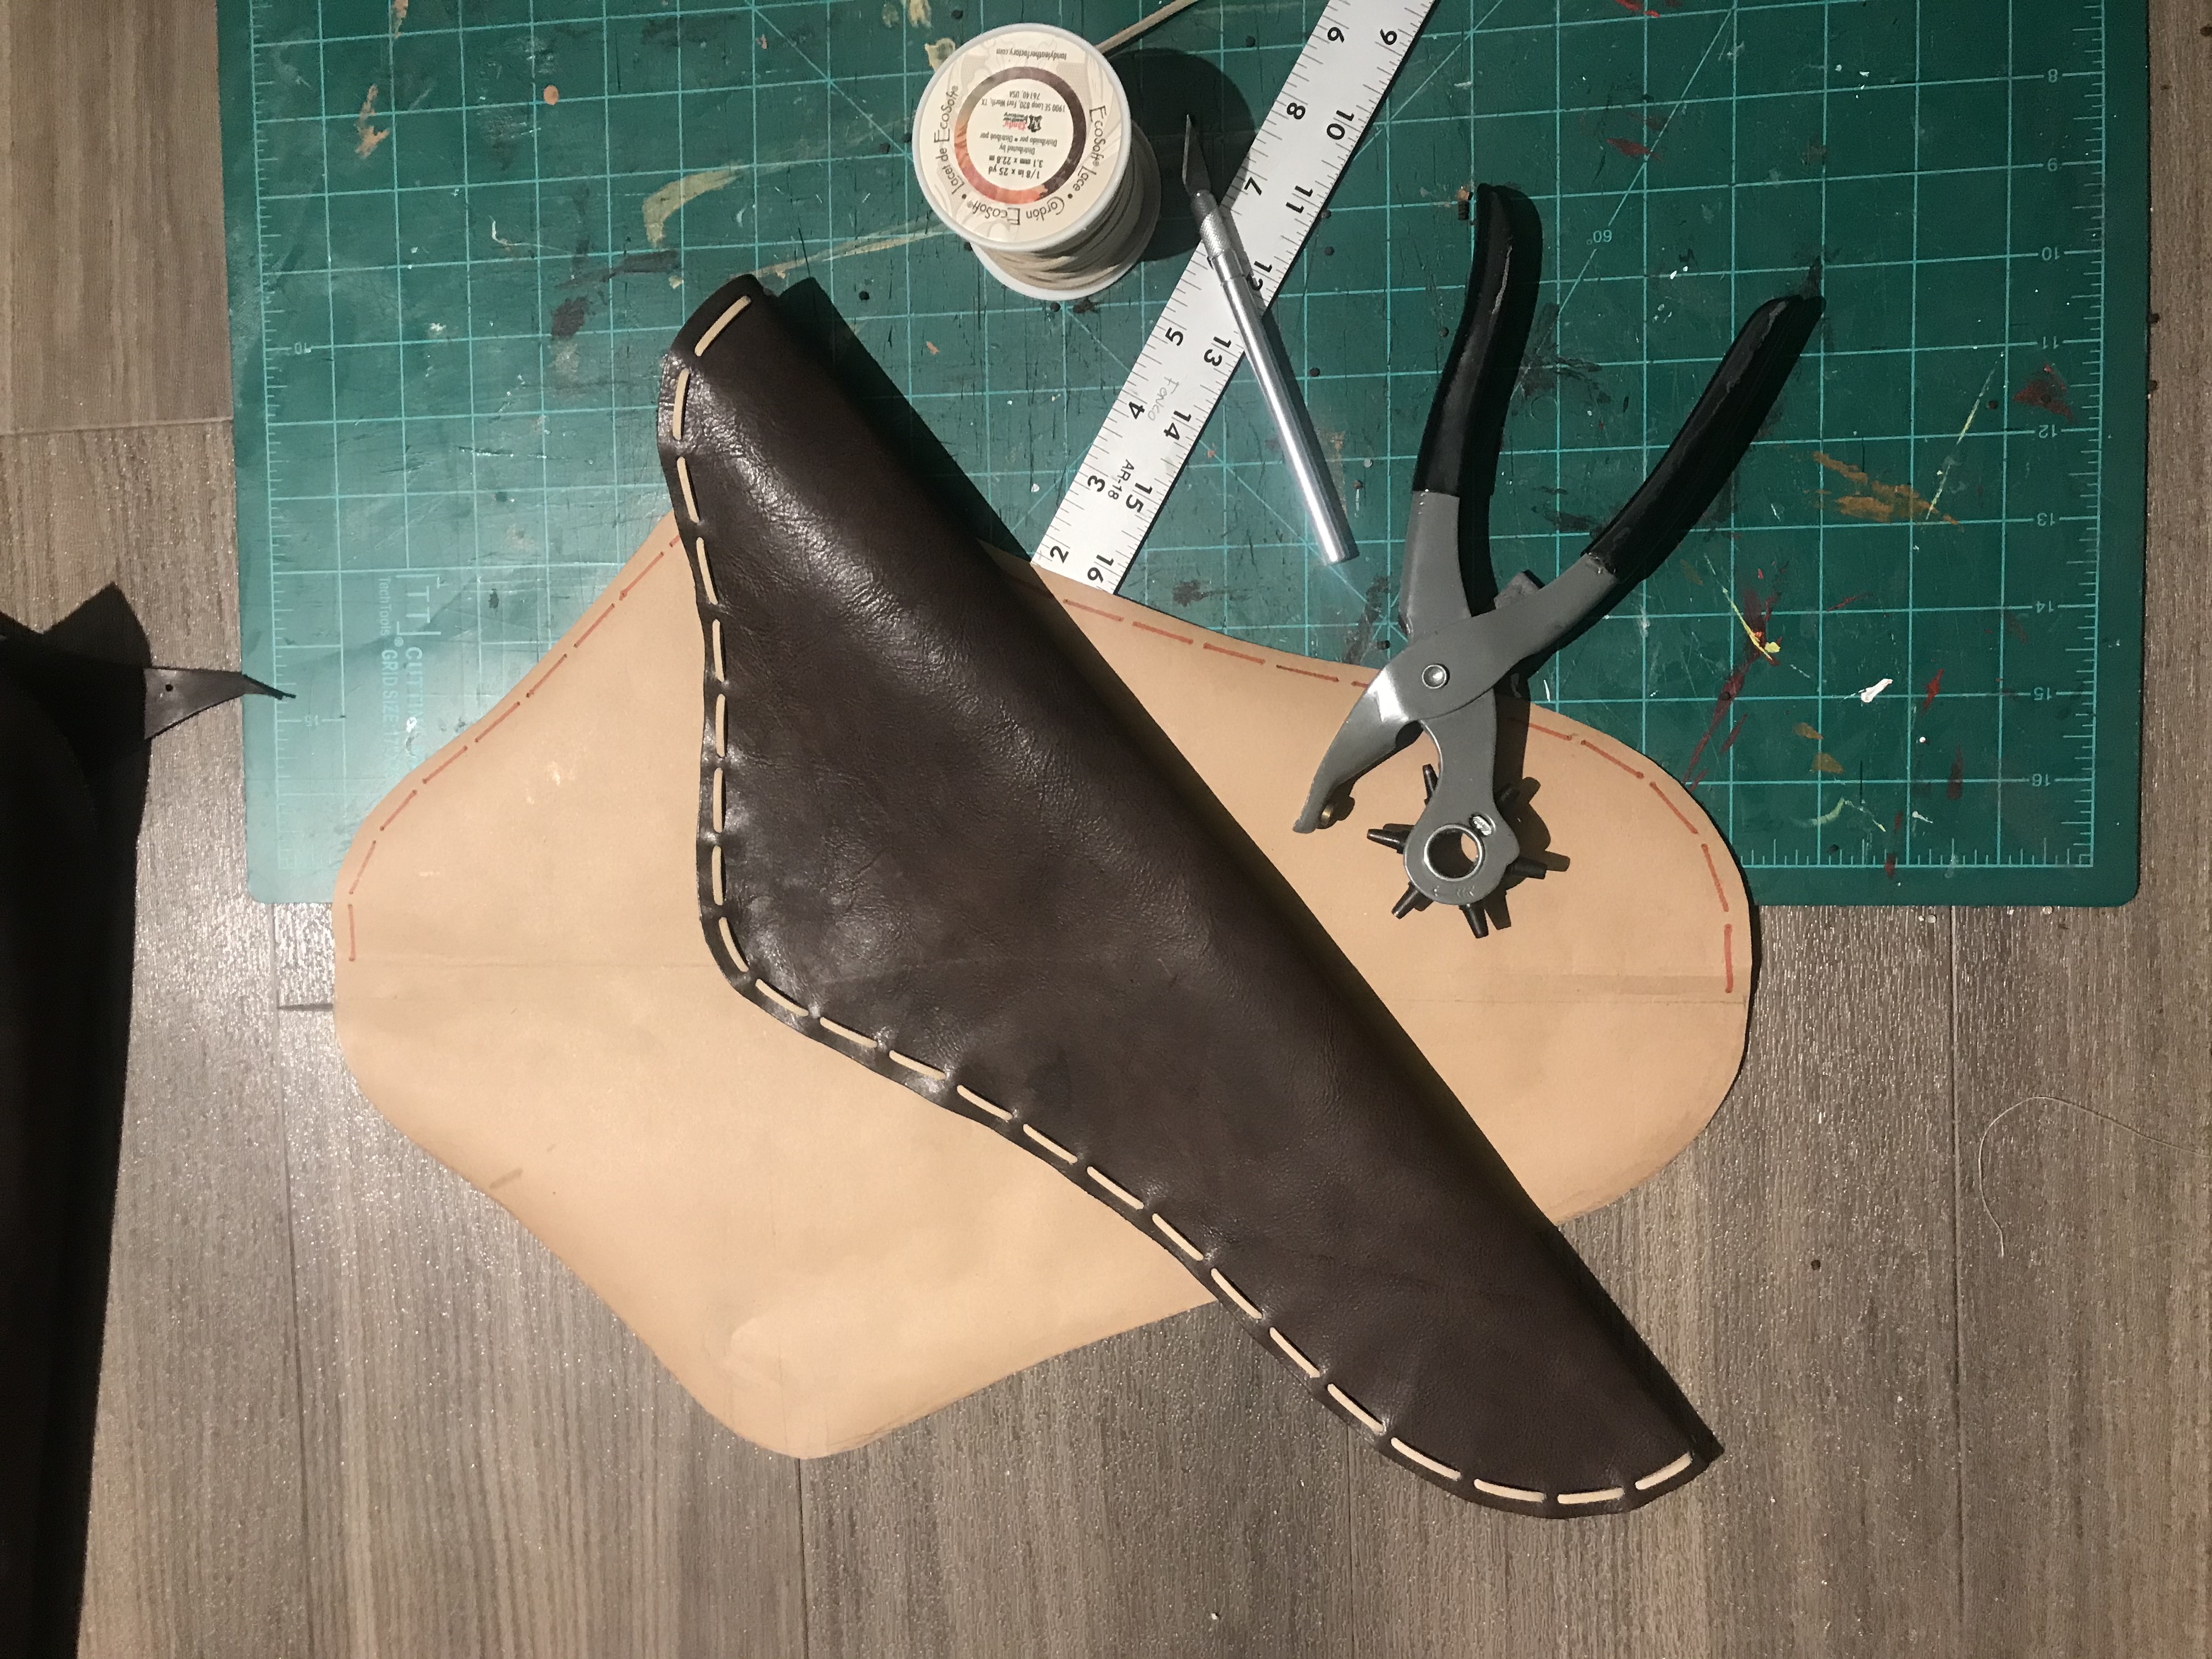
4. Use a leather hole punch to make holes for the lacings. Use a ruler to measure the length of the stitches and the spaces between. My stitches are 3/4in long with a 1cm space in between. Be sure to draw this out on the back of your quiver in pencil before punching the holes. leave at least 1-2cm of leather on the edges for glueing later.
4.5. Use light colored leather lace to thread it through the holes.
5. Use Barge rubber cement on the outer edges of the leather (use laces to guide you) to glue quiver together. DO NOT GLUE PAST WIDEST POINT. You still want the quiver to have an opening for the arrows.
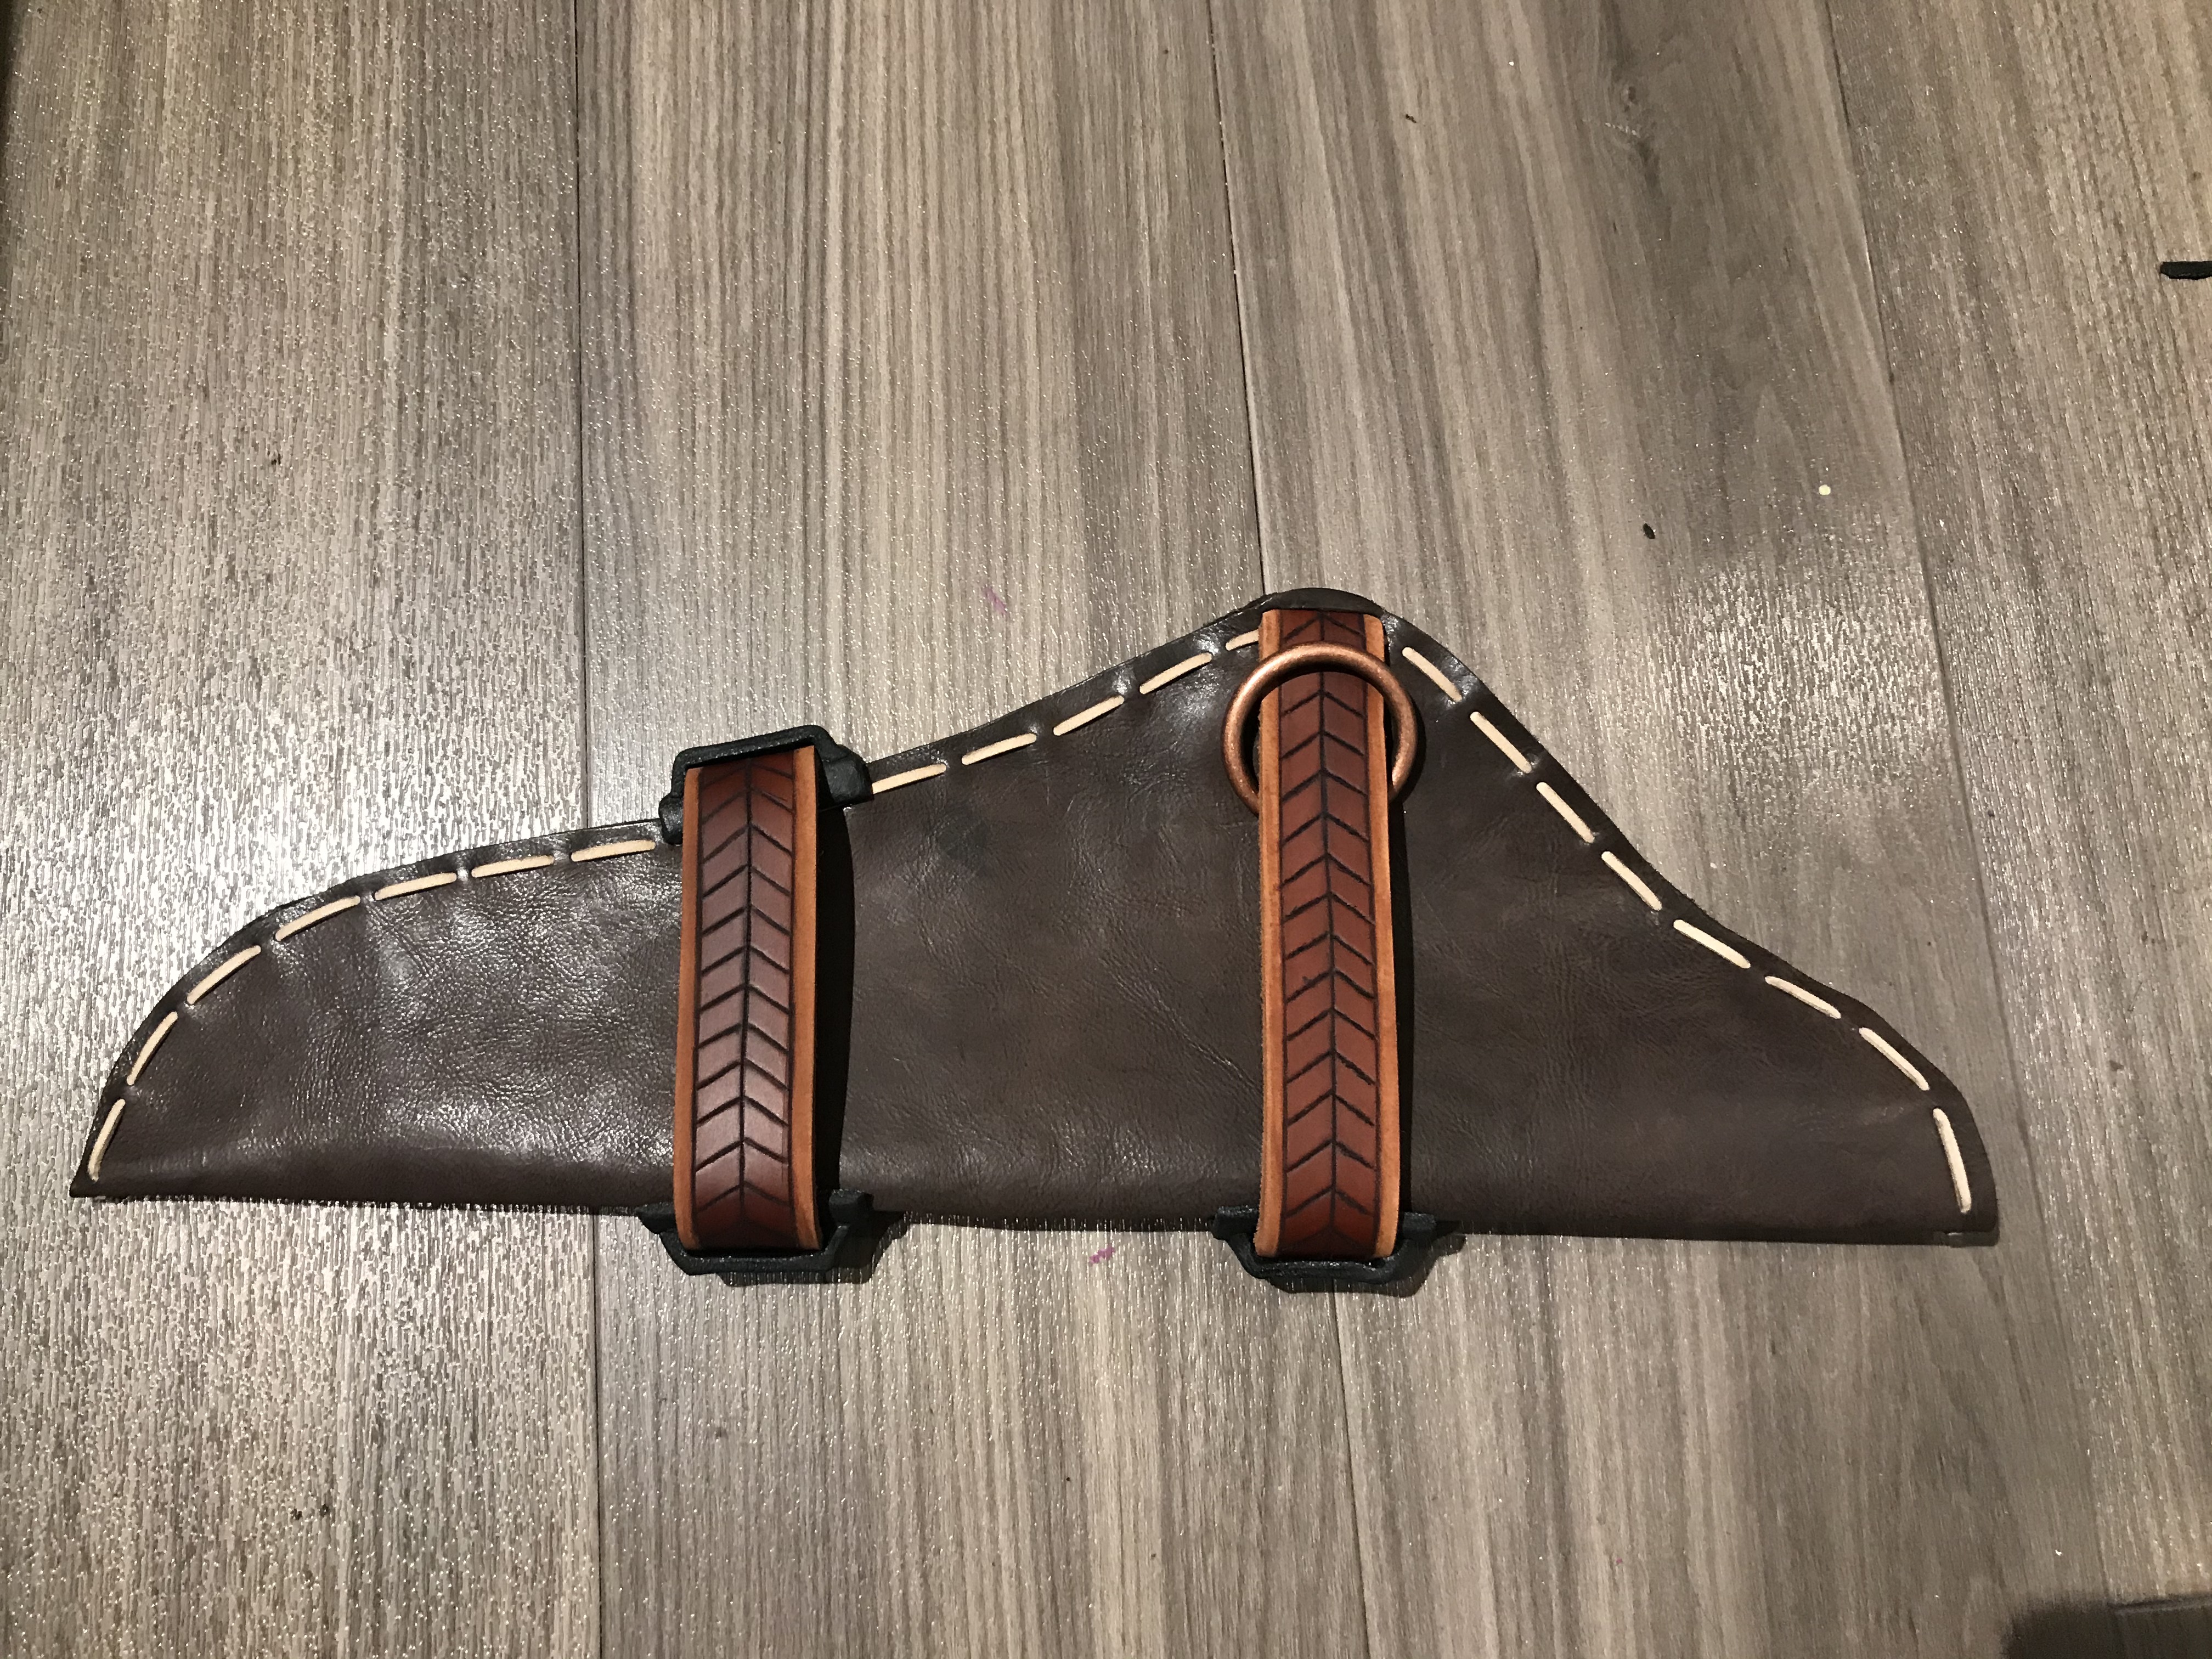
6. Take the belt blank and soak it in a water bath. Once the leather is soaked through and pliable, use a ruler and stylus (I used a ballpoint pen) to etch the feather/arrow design. The grooves should be relatively deep.
7. brush olive oil on the middle part of the belt to darken the leather. Be careful not to let it bleed onto the sides.
8. Brush the grooves made with the stylus over with black leather dye. Wipe up excess with a paper towel as you go. After the belt fully dries, segment it into 2 pieces- one for the widest part of the quiver and one for the end (1/3 up from the bottom).
9. Use Worbla to create the 3 machine parts that affix the leather belt pieces to the quiver. Be sure to leave enough room in the loops for the belt to pass through. Paint the parts over in white and then use a watered down black acrylic wash to weather them. Seal the parts in gesso or clear primer.
10. Glue the machine parts to the quiver where the belts will sit. String the belts through the machine parts along with the bronze ring. Sew the ring in place, stitching the leather beneath the belts to hide the thread. Affix the belts on the back side of the quiver using the hole punch and leftover lacings.
THEE QUIVER IS COMPLETE!
Files