Home
Home

 Artists
 Search
 Recent
 Random
 Posts
Posts
 DMs
DMs
 Tags
Tags
 Random
 Importer
 Import
 FAQ
FAQ
 Account
 Register
 Favorites
 Login
Login

Jolyne Wig Breakdown (Patreon)
Content
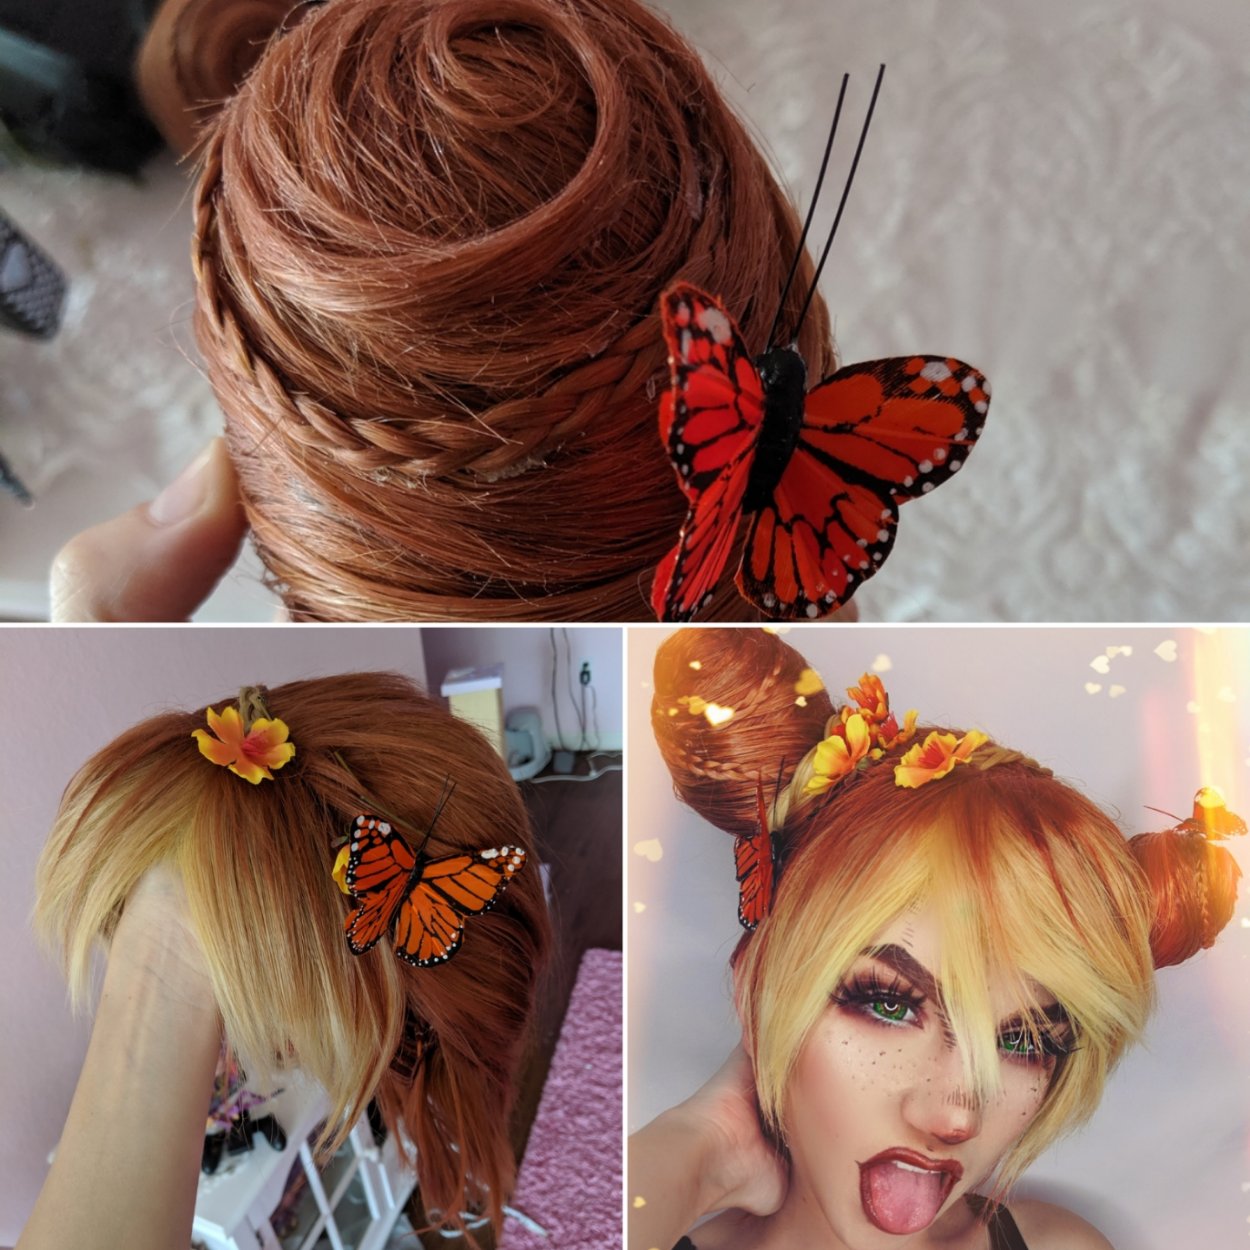
Jolyne wig breakdown
SO this wig was a pretty huge project to take on in just a week and TO BE HONEST it's not completely done…. It needs the braid in the back which is sitting on my coffee table but I got hit with Thanksgiving rush at work and then this crazy flu I'm currently dying from. But I'll walk you through everything up until that!
I started with a raggedy old blonde wig that had been cut and dyed a hundred times before. Y'all know I like to recycled as much as physically possible for cosplay. I NEVER throw out a wig. It can always be restored or transformed or harvested for wefts. I used a combination of red, brown, and yellow dye to achieve an Auburn color. As always, I used Rit synthetic polydye in a stainless steel pot ONLY for dying wigs and fabrics with just under boiling water and a pinch of salt. I add splashed of the dye and test out the color with spare pieces of hair, ideally from the same wig I'm about to dye, rinsing them in a bowl (also for dying only) next to the stove top until I like the color I get. Once I like the color, I saturate the wig with water then carefully dunk it into the dye pot and swirl it around, making sure the dye gets to every part of the wig evenly. This is especially important for thick wigs or arda wigs that have teasing at the base. After about a minute of swirling the wig around, I carefully lift the wig out with tongs ((FOR. DYING. ONLY. People, dye is toxic. I mean it when I saw you can't use any of this stuff for cooking again) and dunk it into the bowl of water. After that, I rinse the wig in my stainless steel sink until it runs completely clear. Do not pour dye water directly down the sink. You should dilute the dye with lots of water and a bit of detergent then pour it outside. Ocne the wig is dried, it's gonna be a frizzy knotted wrinkled mess from the heat it was dyed in. The easiest way to restore it will be with a handheld steamer and a fine tooth comb. It takes like one minute and boom, your wig and flat and smooth again.
For Jolyne's bangs, I cut the bang portion of another wig out and hot glued it to the base wig. My base wig was a lace front but I still cut out about as much of the lace as I had cut out for the bangs. I used isopropyl alcohol and a small amount of red brown and orange acrylic paint to acrylic wash a gradient into the bangs for a rooted affect. I did this bye dipping a paintbrush into the mixture and patting it into the base of each layer of wefts and then combing it down. I start from the bottom layer of wefts and move up, covering the previous layers with a towel I don't mind getting stained so that the paint from the new later downs mess up the ones below it. Then I combed some of the Auburn hair down into the bangs and boom the bangs were done.
For the buns, I did what I have seen most sailor moon cosplayers do and covered styrofoam eggs in pieces of hair. I dyed spare long blonde wefts I had to match the base wig and used tacky glue to glue the fibers onto the eggs one piece at a time, wrapping it around the egg. Finding a good pattern for laying on the hair took a lot of patience and trial and error. It was a long sticky process. Finally, I made braids using a mix of blonde fibers and some Auburn fibers to glue to the base of the buns and one small one that I got glue to Jolyne's bangs that leads back into the right bun. The buns I kept separate from the base wig to be pinned on because I figured this would be easier for transport and maintenance than if I were to glue the buns on.
I'm not sure if I missed anything, but if you have any questions, please let me know in the comments below!!!
Files