 Home
Home

 Artists
 Search
 Recent
 Random
 Posts
Posts
 DMs
DMs
 Tags
Tags
 Random
 Importer
 Import
 FAQ
FAQ
 Account
 Register
 Favorites
 Login
Login

KS Updates, Dark Eldar Updates, and MOAR! BTS #98 (Patreon)
Content
WOAH!
I never know how to start these things. Let's get into it shall we? Let's talk Dark Eldar. Since I updated you guys last some progress has been made.

Every model received a maroon basecoat. Then, if the model was ending up yellow, I gave it a zenithal coat with white ink, followed by a yellow ink filter and then a magenta filter for the shadows for larger stuff (vehicles, talos).


If the model was ending up white, instead of skipping straight to the white zenithal spritz, I first had an intermediate layer of brown-green, and then white. Because there's no yellow to obscure possible airbrush fuzz, I thought it would be good to take a more stepped approach.

Some units in my army will be metallic yellow so with a maroon undercoat, I used bright silver as a zenithal undercoat instead of white. Next, I'll apply Tamiya Clear Yellow to have it be nice and shiny. I really struggled with applying Vallejo Metal Color with an airbrush. Not sure why, but it was really gunking up the works.

For the bases with a maroon undercoat I applied orange & yellow from the front to have a nice gradient from front to back. Despite having different progressions of color in the army, I'm trying to utilize as much color "interplay" as possible so I'm not having to use a ton of different colors. Next up is to finish the metallic yellow which shouldn't take more than 15 minutes, and then super glue all the models to their bases for the beginning of brush work which will take a very long time. I'm thinking about looking over all the details on the models and deciding ahead of time how they should be painted so I don't have to think about it while I'm painting.
Some things I learned while airbrushing for ~6hrs/day for several days in a row is that compressors get really hot and the heat causes condensation. You can address this via emptying your moisture trap, but what I found was a better, more permanent solution, was to have a little fan blowing on the compressor at all times. It exhausts enough heat so that the moisture is never a problem. As far as dry tip goes, white ink is a literal god send. For a moment, I used Vallejo Air White and it was such a joke. It clogged my brush within minutes whereas white ink never caused me any problems. Future colored inks like the yellow sort of did, but after using some thinner the problem was resolved almost entirely. The last thing I learned was that airbrush particles get EVERYWHERE. My wife was wiping off the top of the laundry machines and discovered there was magenta paint...in a different room! I also discovered some on top of my coffee table. Because of this, I put up screens to sequester off my painting area and also put felt down on the my desk to better capture the particles. I don't often airbrush this much, so a permanent solution is not necessary.
OK, moving on. I ran a small basing seminar at a park a week or two ago for a bunch of people who weren't familiar with the hobby.

They got a pewter figure from another vendor there and then came to me to make a base for it and then went and played a game with it. The local park office reached out to me to do this and it was a pretty sweet opportunity.


Some people familiar with the channel showed up and we had a lot of good conversations! All in all, some 50-60 people made bases for their minis. In other merch related news...

I have a lot of designs that were for limited edition t-shirts. I really like them and wanted to re-use them in a different way. I reached out to a local letter-press printer who actually prints The Duchess belly-wraps and he did these posters up for me. They will be limited edition (200 a piece) and I'll sell them sometime soon. I'm super happy with how they turned out! The detail captured is really amazing.

Last time I made a post, Jon was over painting one of my wood elves for a digital course. He finished The Warrior up nicely and is now preparing the script for the course and will come back a different time to shoot that portion.
I had a little live stream the last couple of Fridays and was working on this Cursed City character. Really enjoying the color palette.

Lastly, the most exciting part of this post...


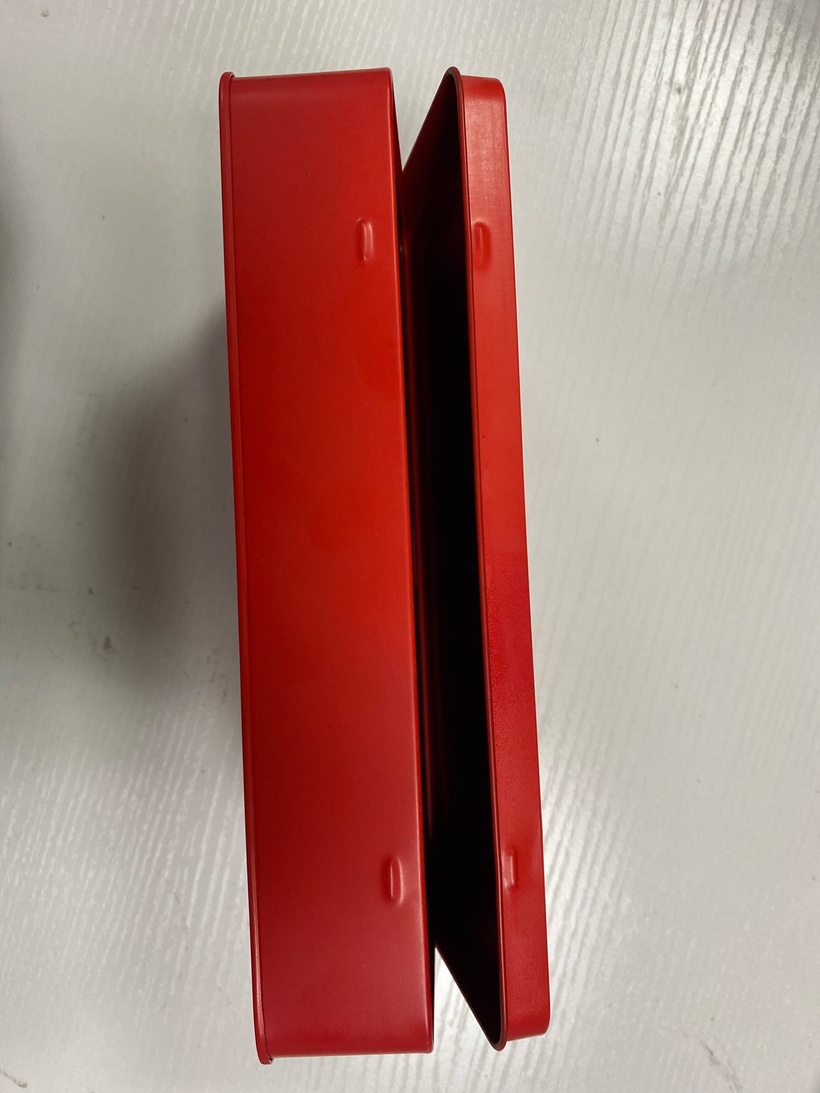


I got final pictures of the brush boxes for the kick starter! The black box is a single layer brush box whereas the red box is a double layer (that's why the top layer has little finger holes in it). They look SOO GOOD. The black box with the red foam interior reminds me of the old school GW carrying cases that came with red foam. Very excited. I should be getting my samples sometime soon so I can send them out to people for reviews/sponsorships. That's all for now. PAINT MORE MINIS \m/