Home
Home

 Artists
 Search
 Recent
 Random
 Posts
Posts
 DMs
DMs
 Tags
Tags
 Random
 Importer
 Import
 FAQ
FAQ
 Account
 Register
 Favorites
 Login
Login

[High-Res Art | NSFW | Comm | WIP] Pinned Down Love StepProgress (Patreon)
Published:
2021-07-28 14:30:40
Edited:
2021-12-02 01:04:24
Imported:
2022-07
Videos
-
Pinned_down_love_30.mp4 -
Pinned_down_love_60.mp4 -
Pinned_down_love_Full.mp4
Downloads
Content
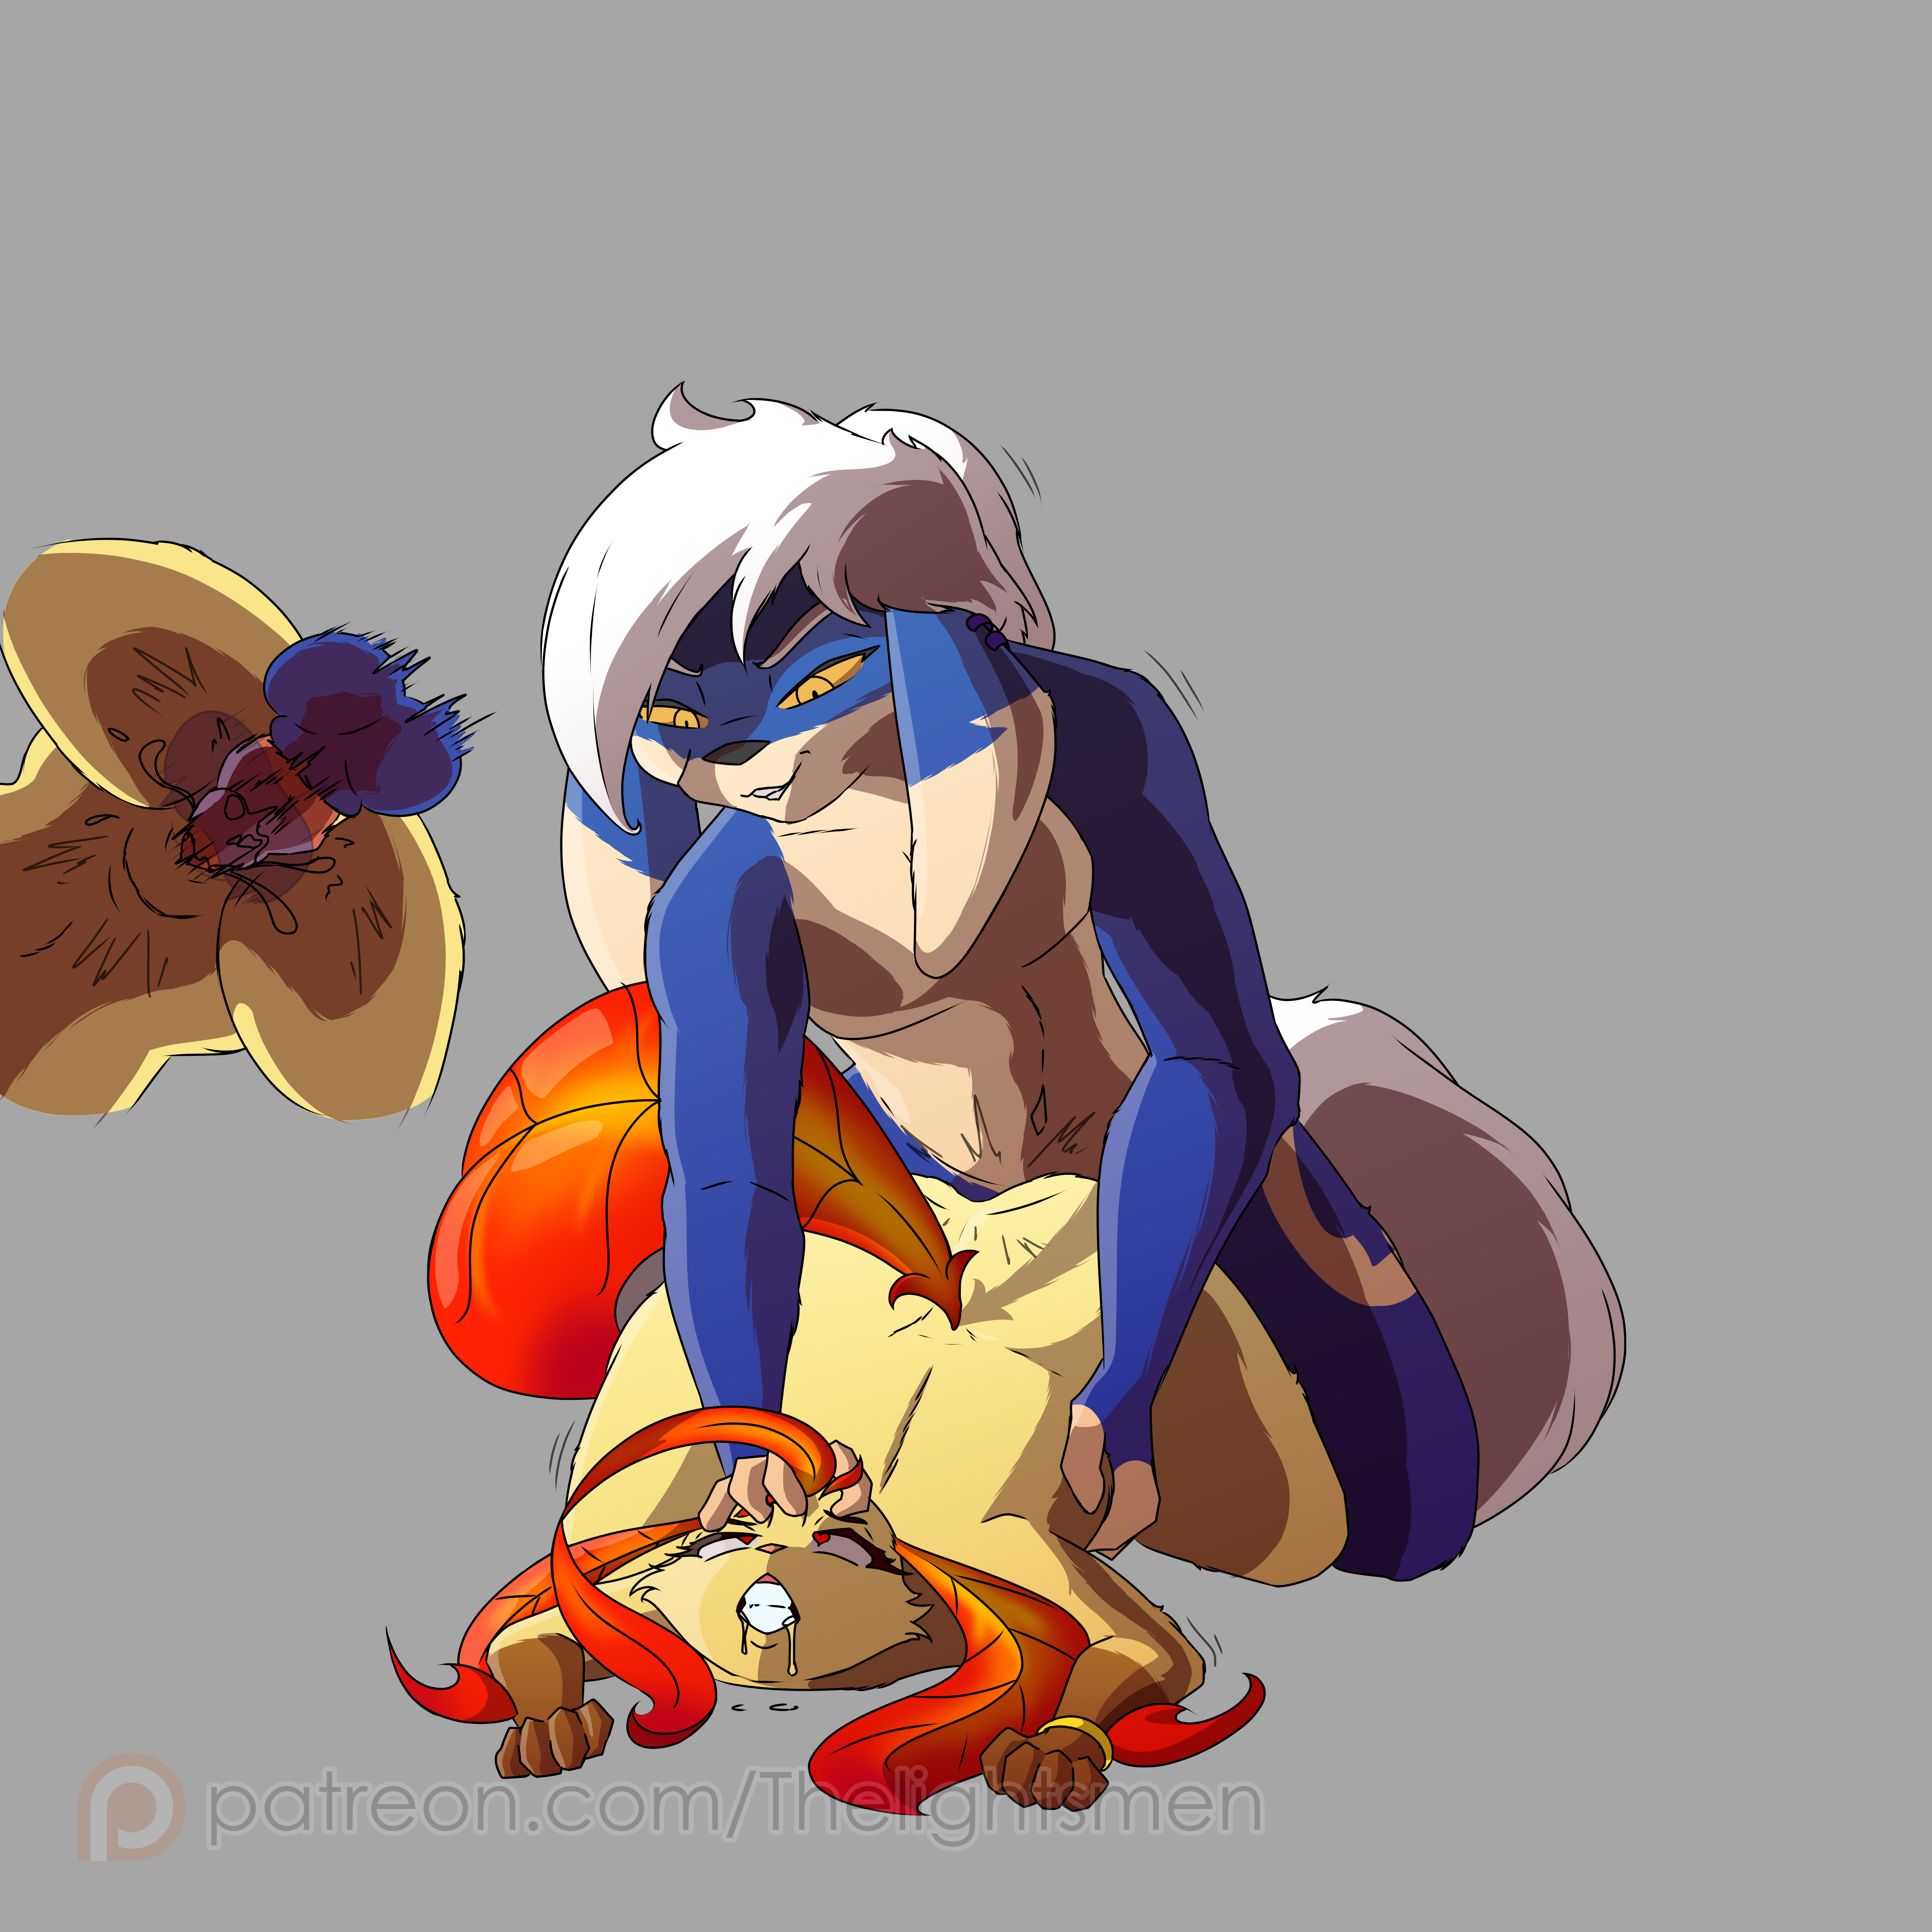
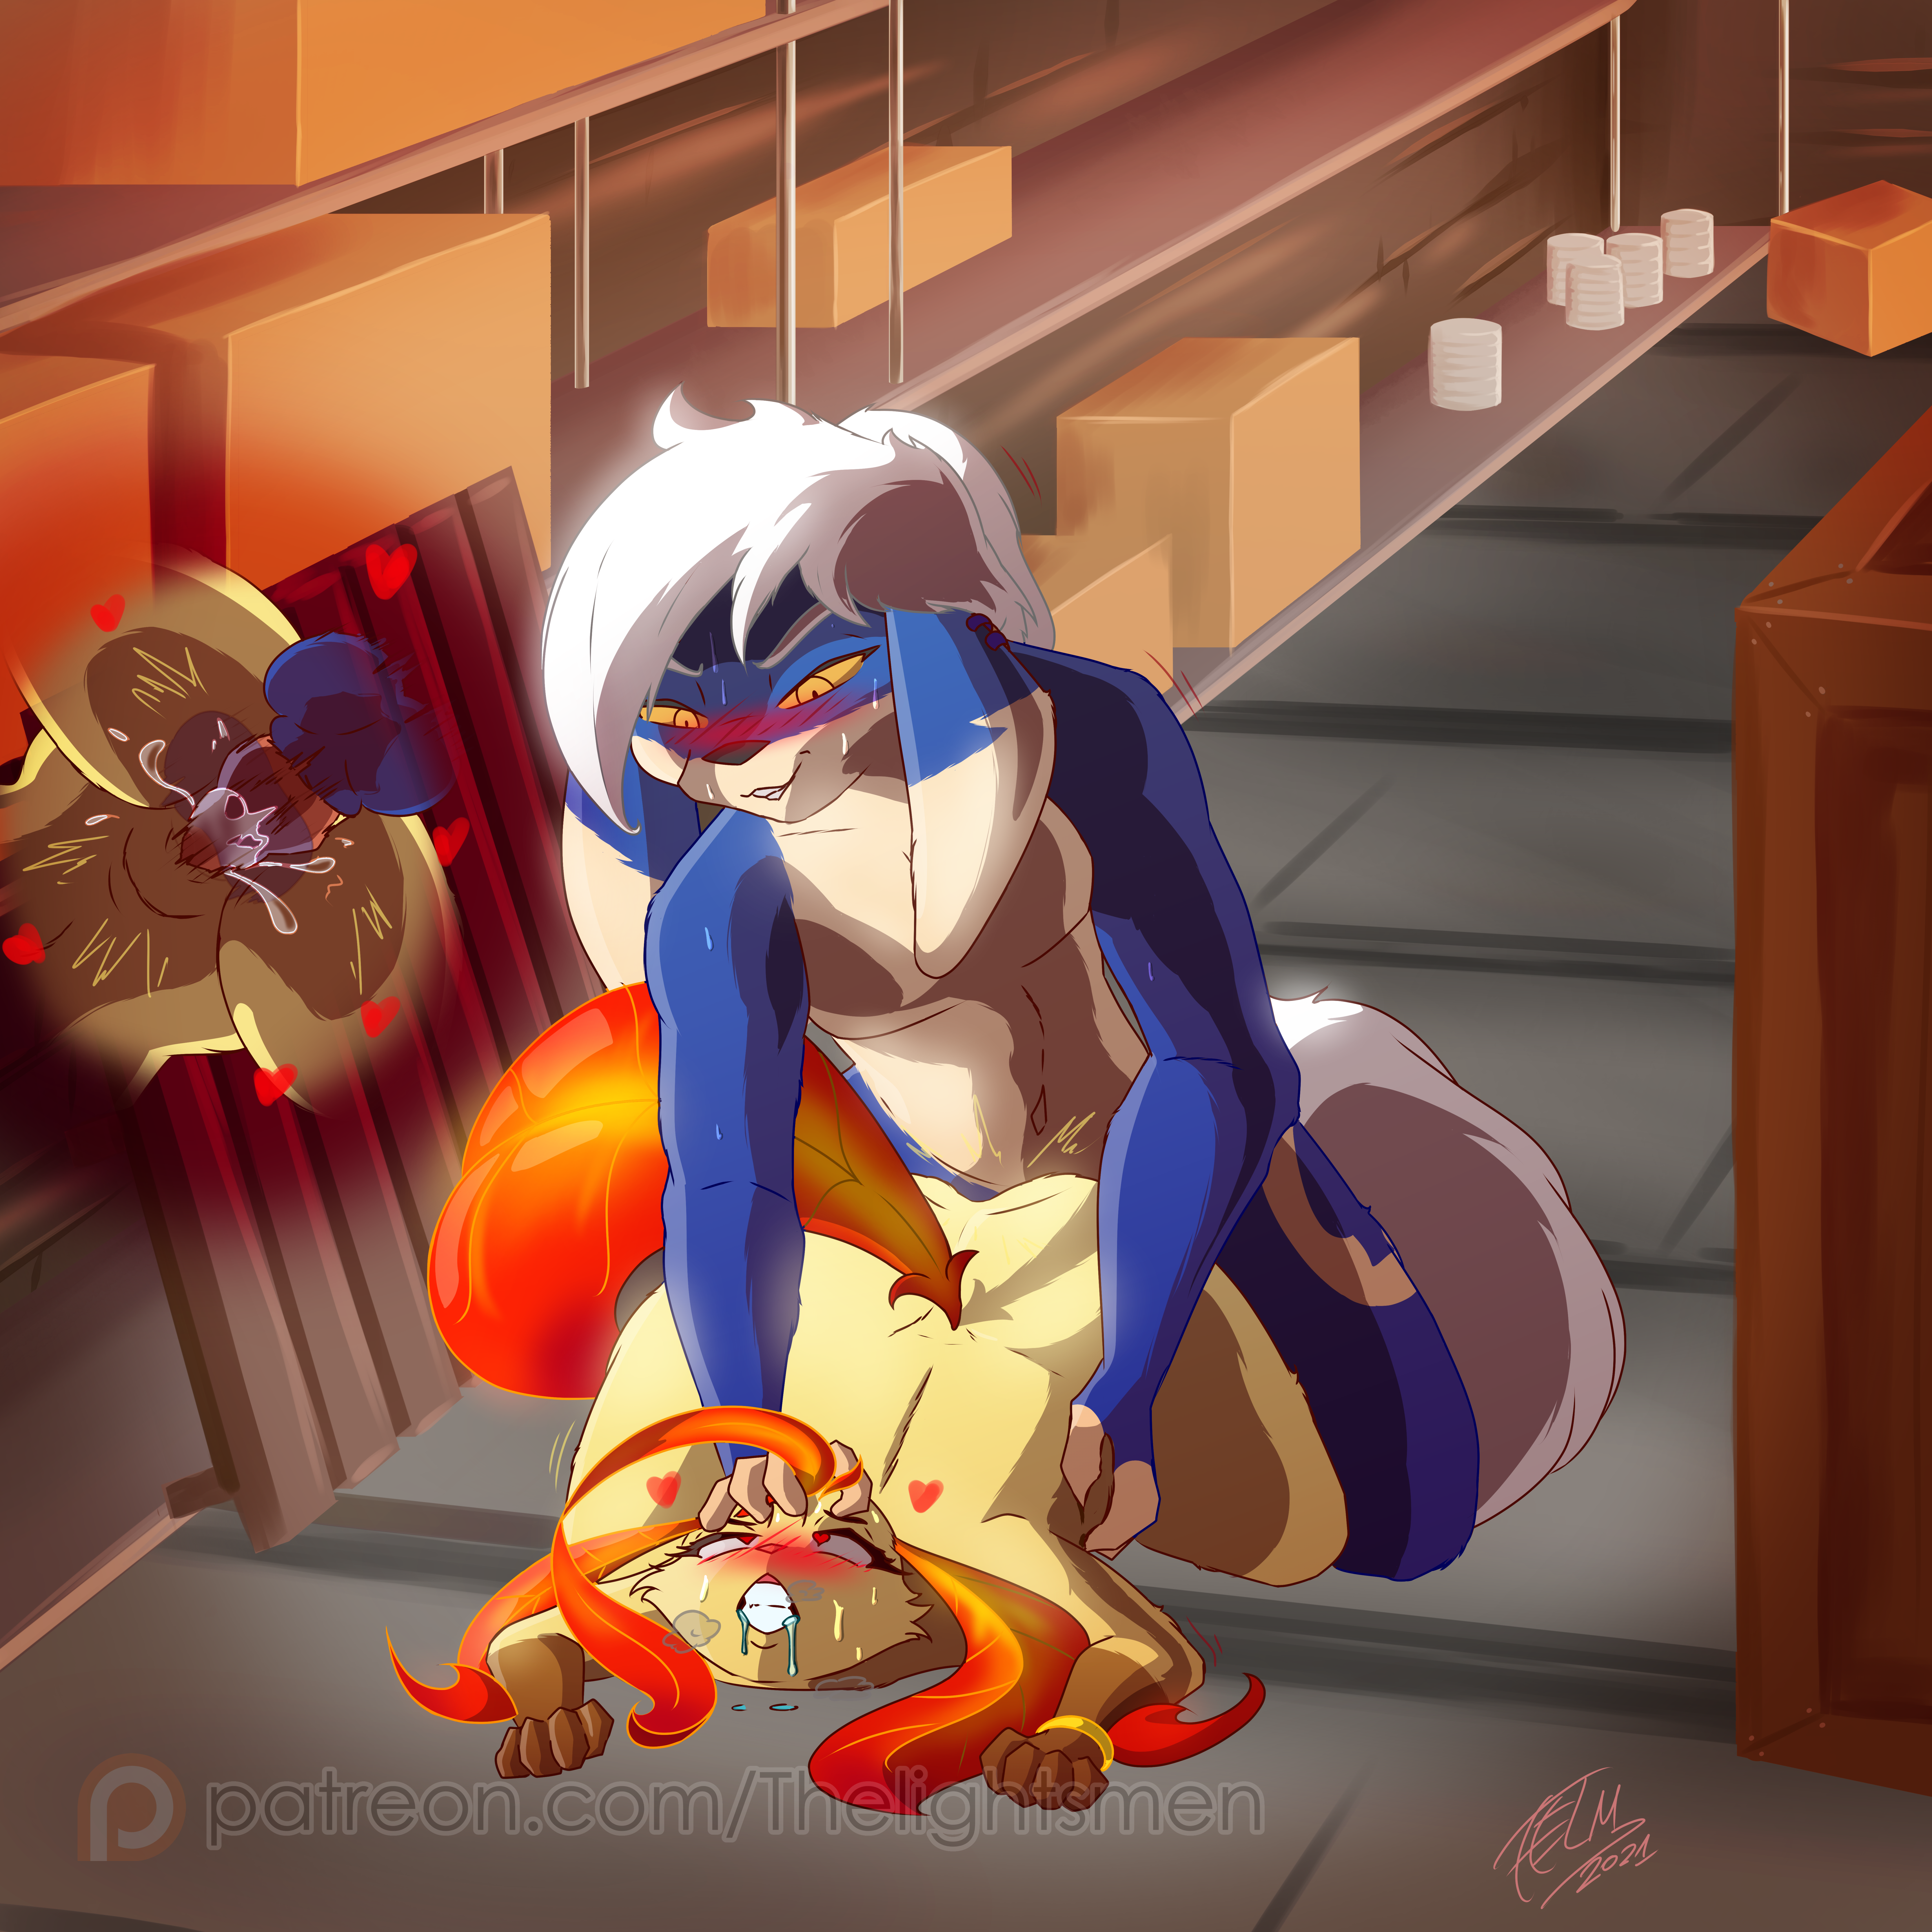
Final version post
All the steps taken to create the lastest commission for Leaf!
Check out all timelapse videos in the attachments below!
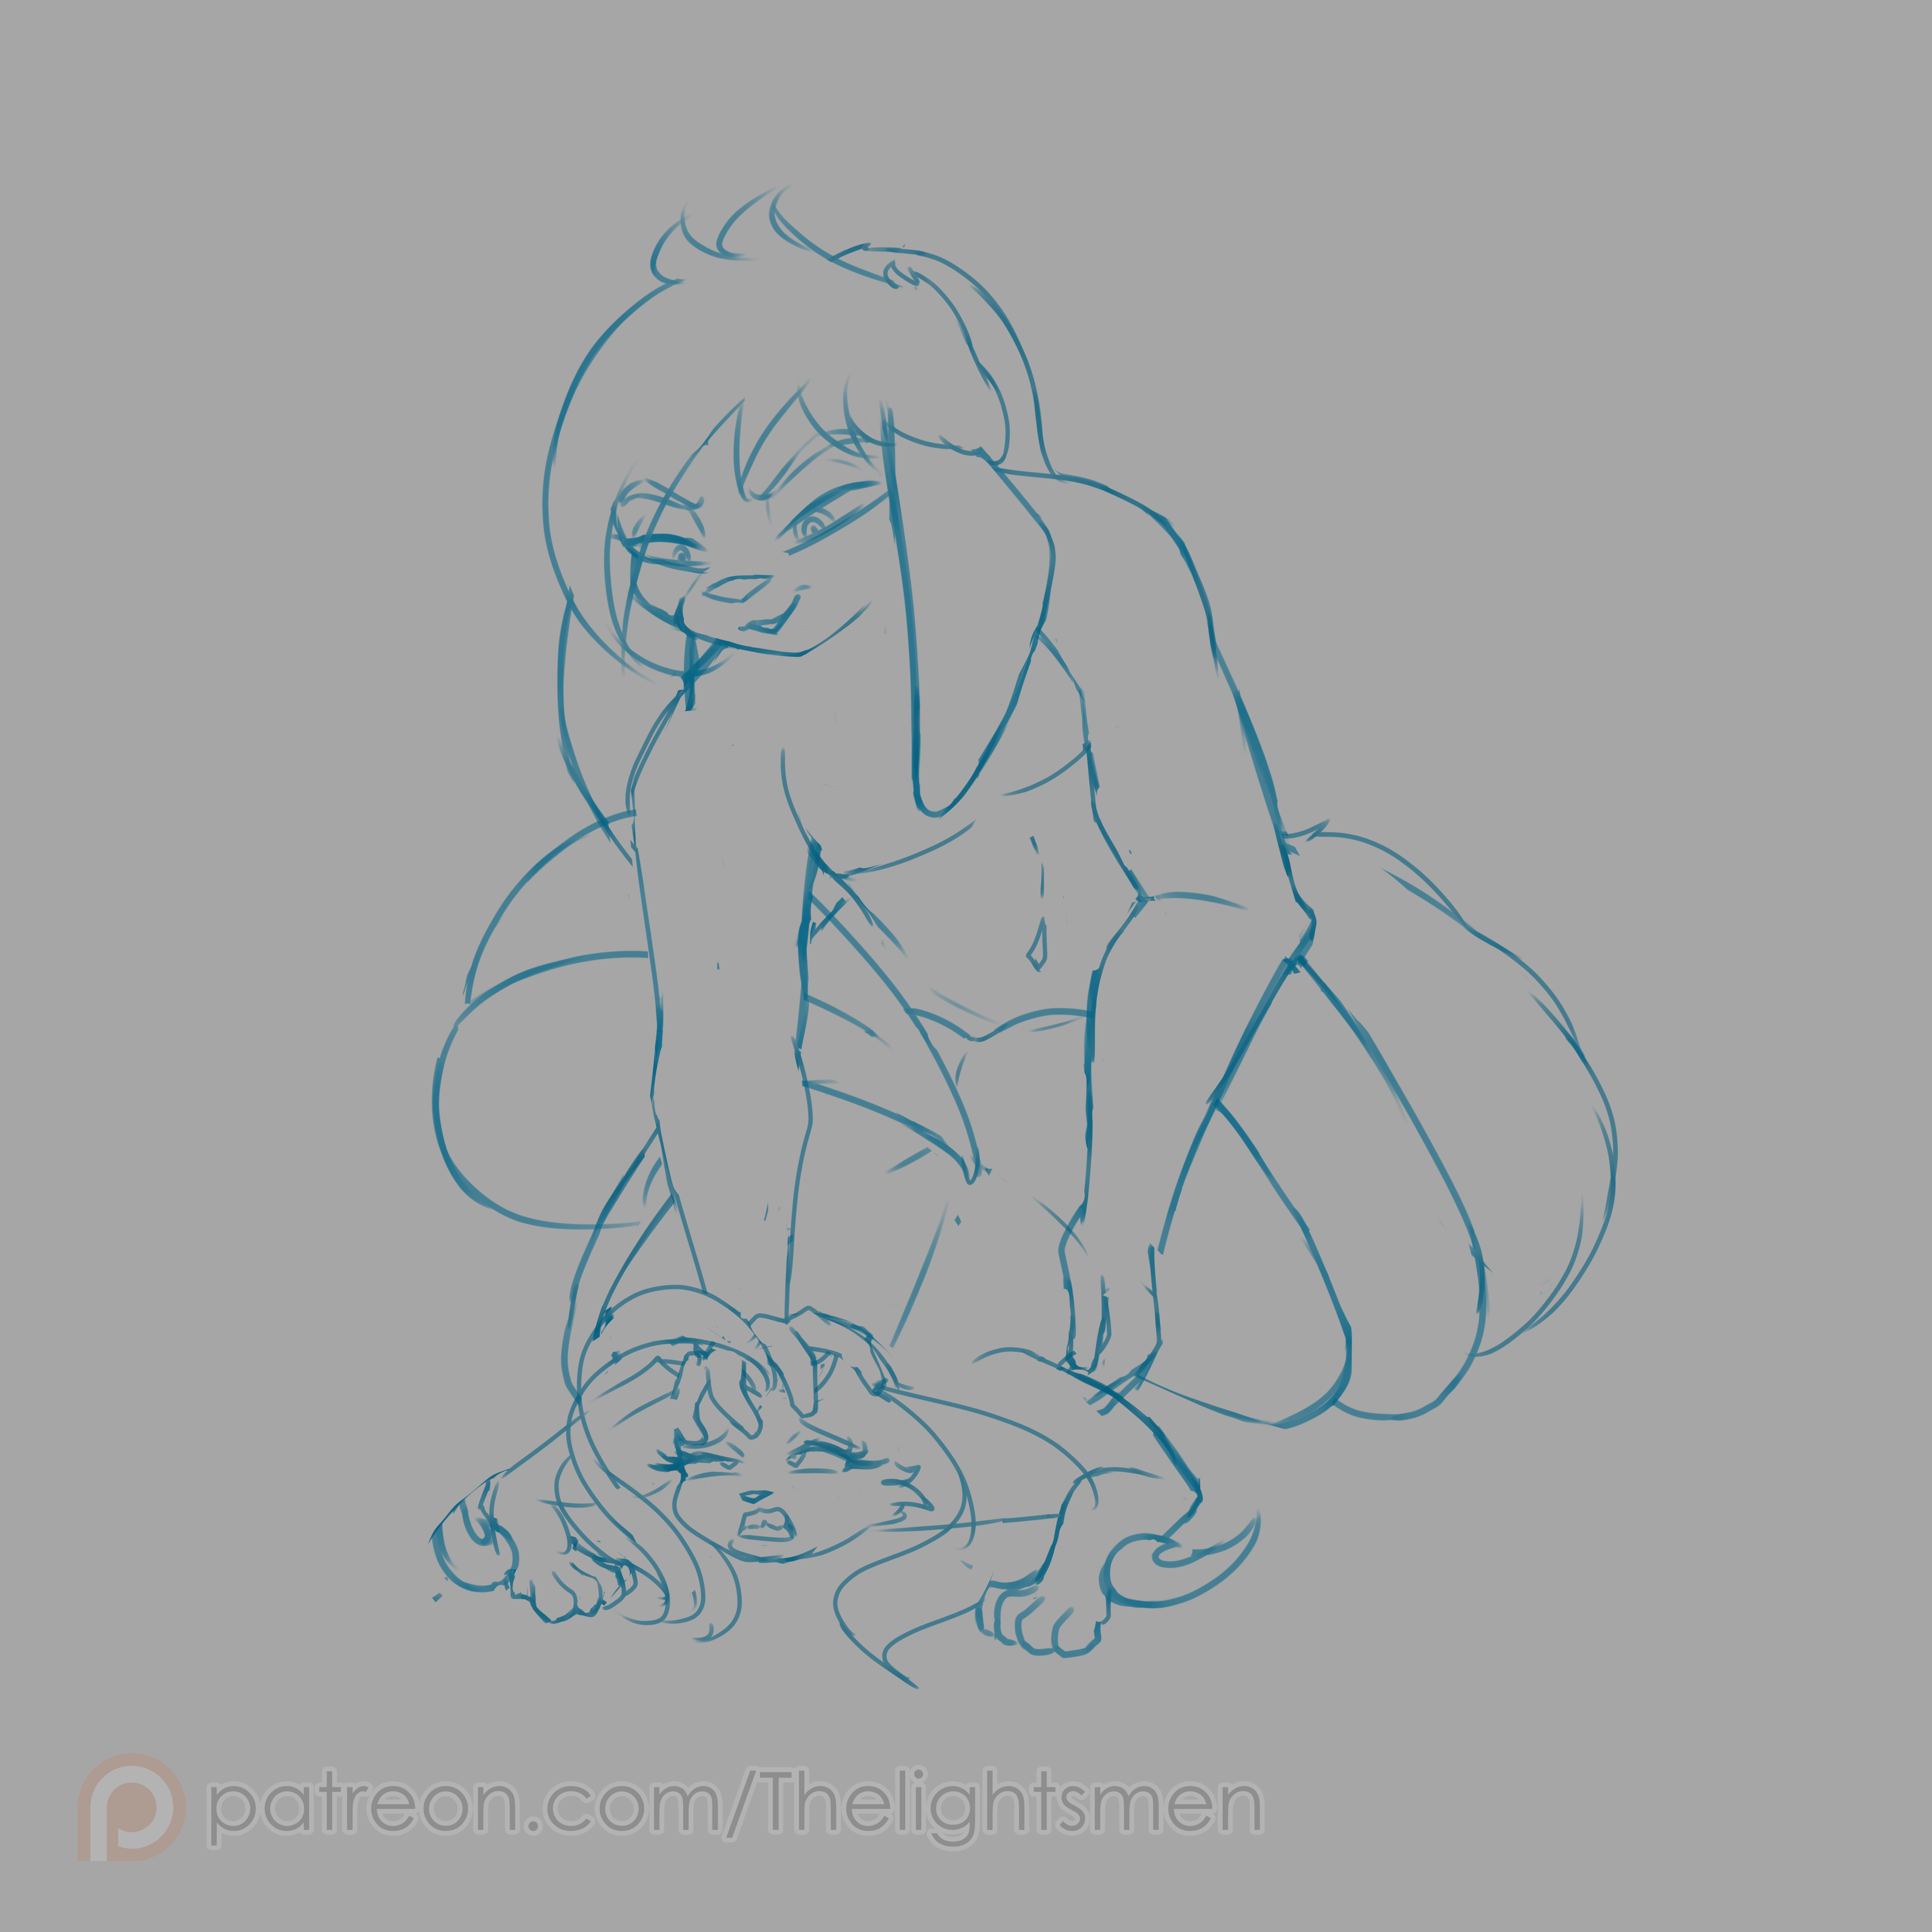
- 1- Early sketch: The original rough sketch was very similar to the final version but it still felt like it was missing something.
- 2- Sketch tweaks 1: The first revision fixed some proportion issues, added details and deleted extra lines.
- 3- Sketch tweaks 2: On the 2nd revision I changed the face to something more fitting for the context it was for, but it was still having some issues here and there.
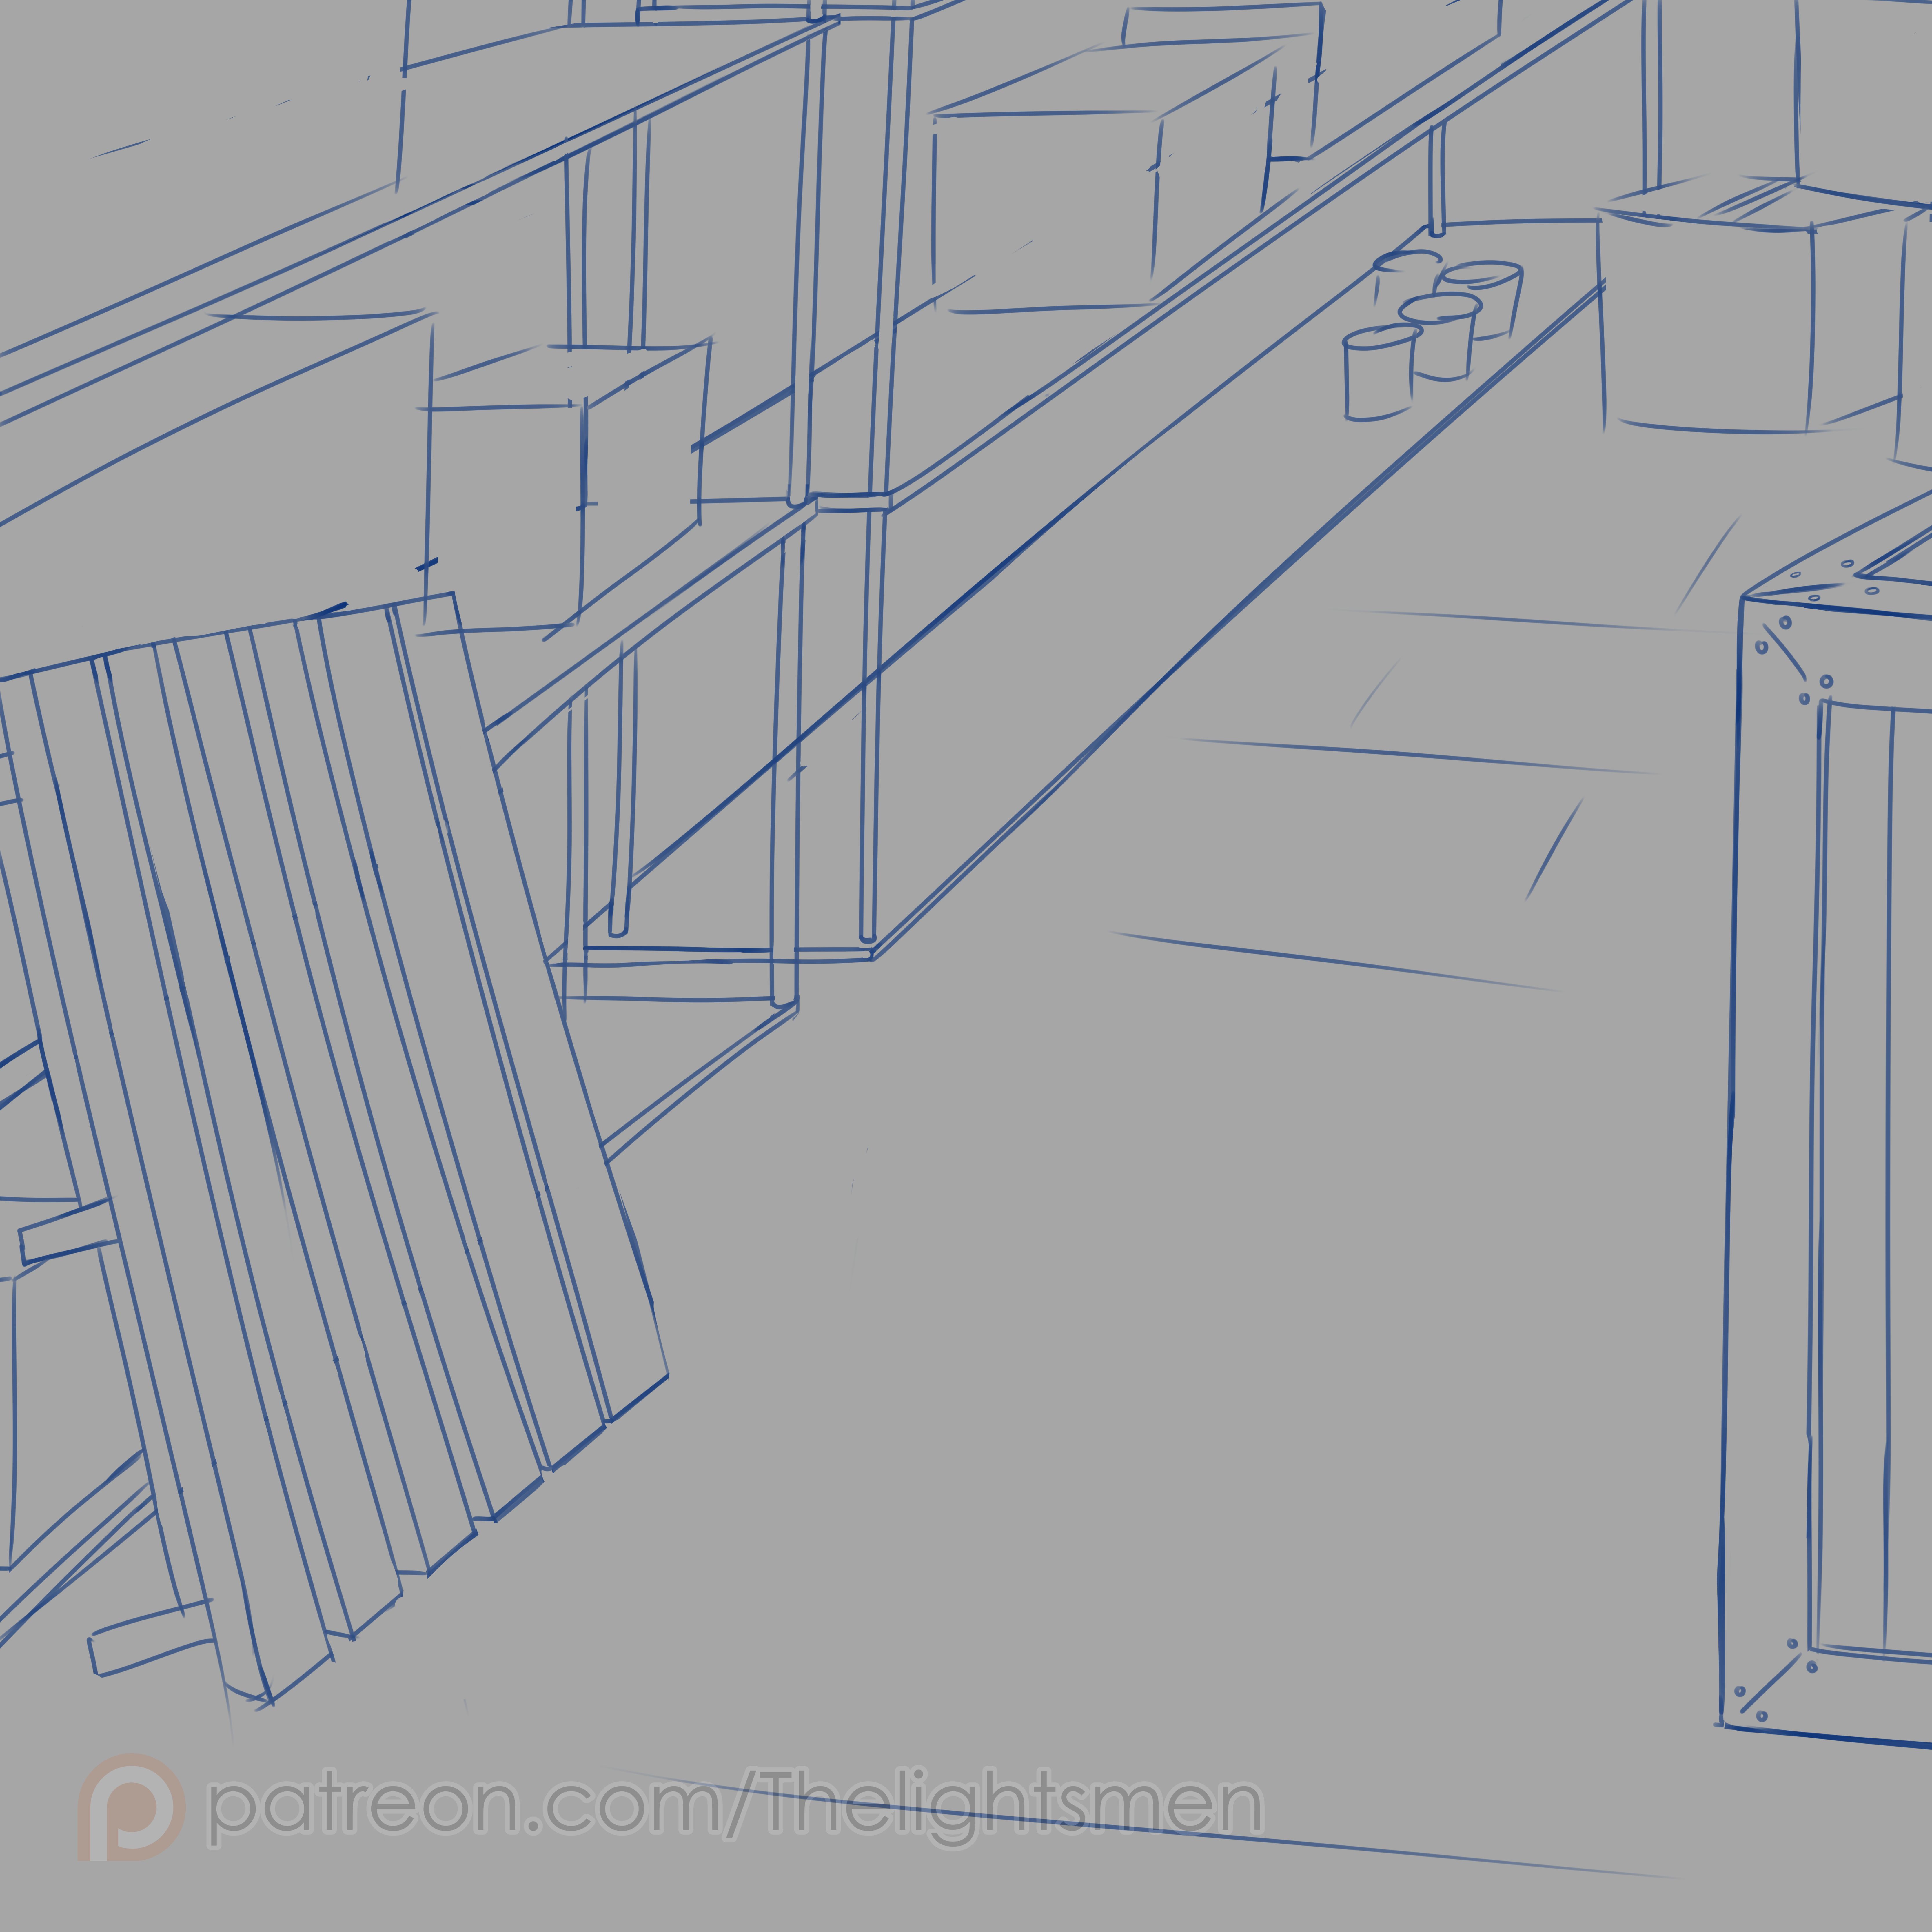
- 4- Rough BG sketch: At this stage I started sketching the bg according to what was asked, but it was still kinda weird in terms of perspective.
- 5- Final char. sketch: On the 3rd and final revision I finally found the best face for this gal, rough, sweaty, and passionate. *chef kiss* perfect.
I also included some dialogue and even an extra panel since I liked it so much!
Of course this was all aproved before working on it. - 6- Final BG sketch: As for the BG, I redrew the sketch in a new layer more according to the position of the characters.
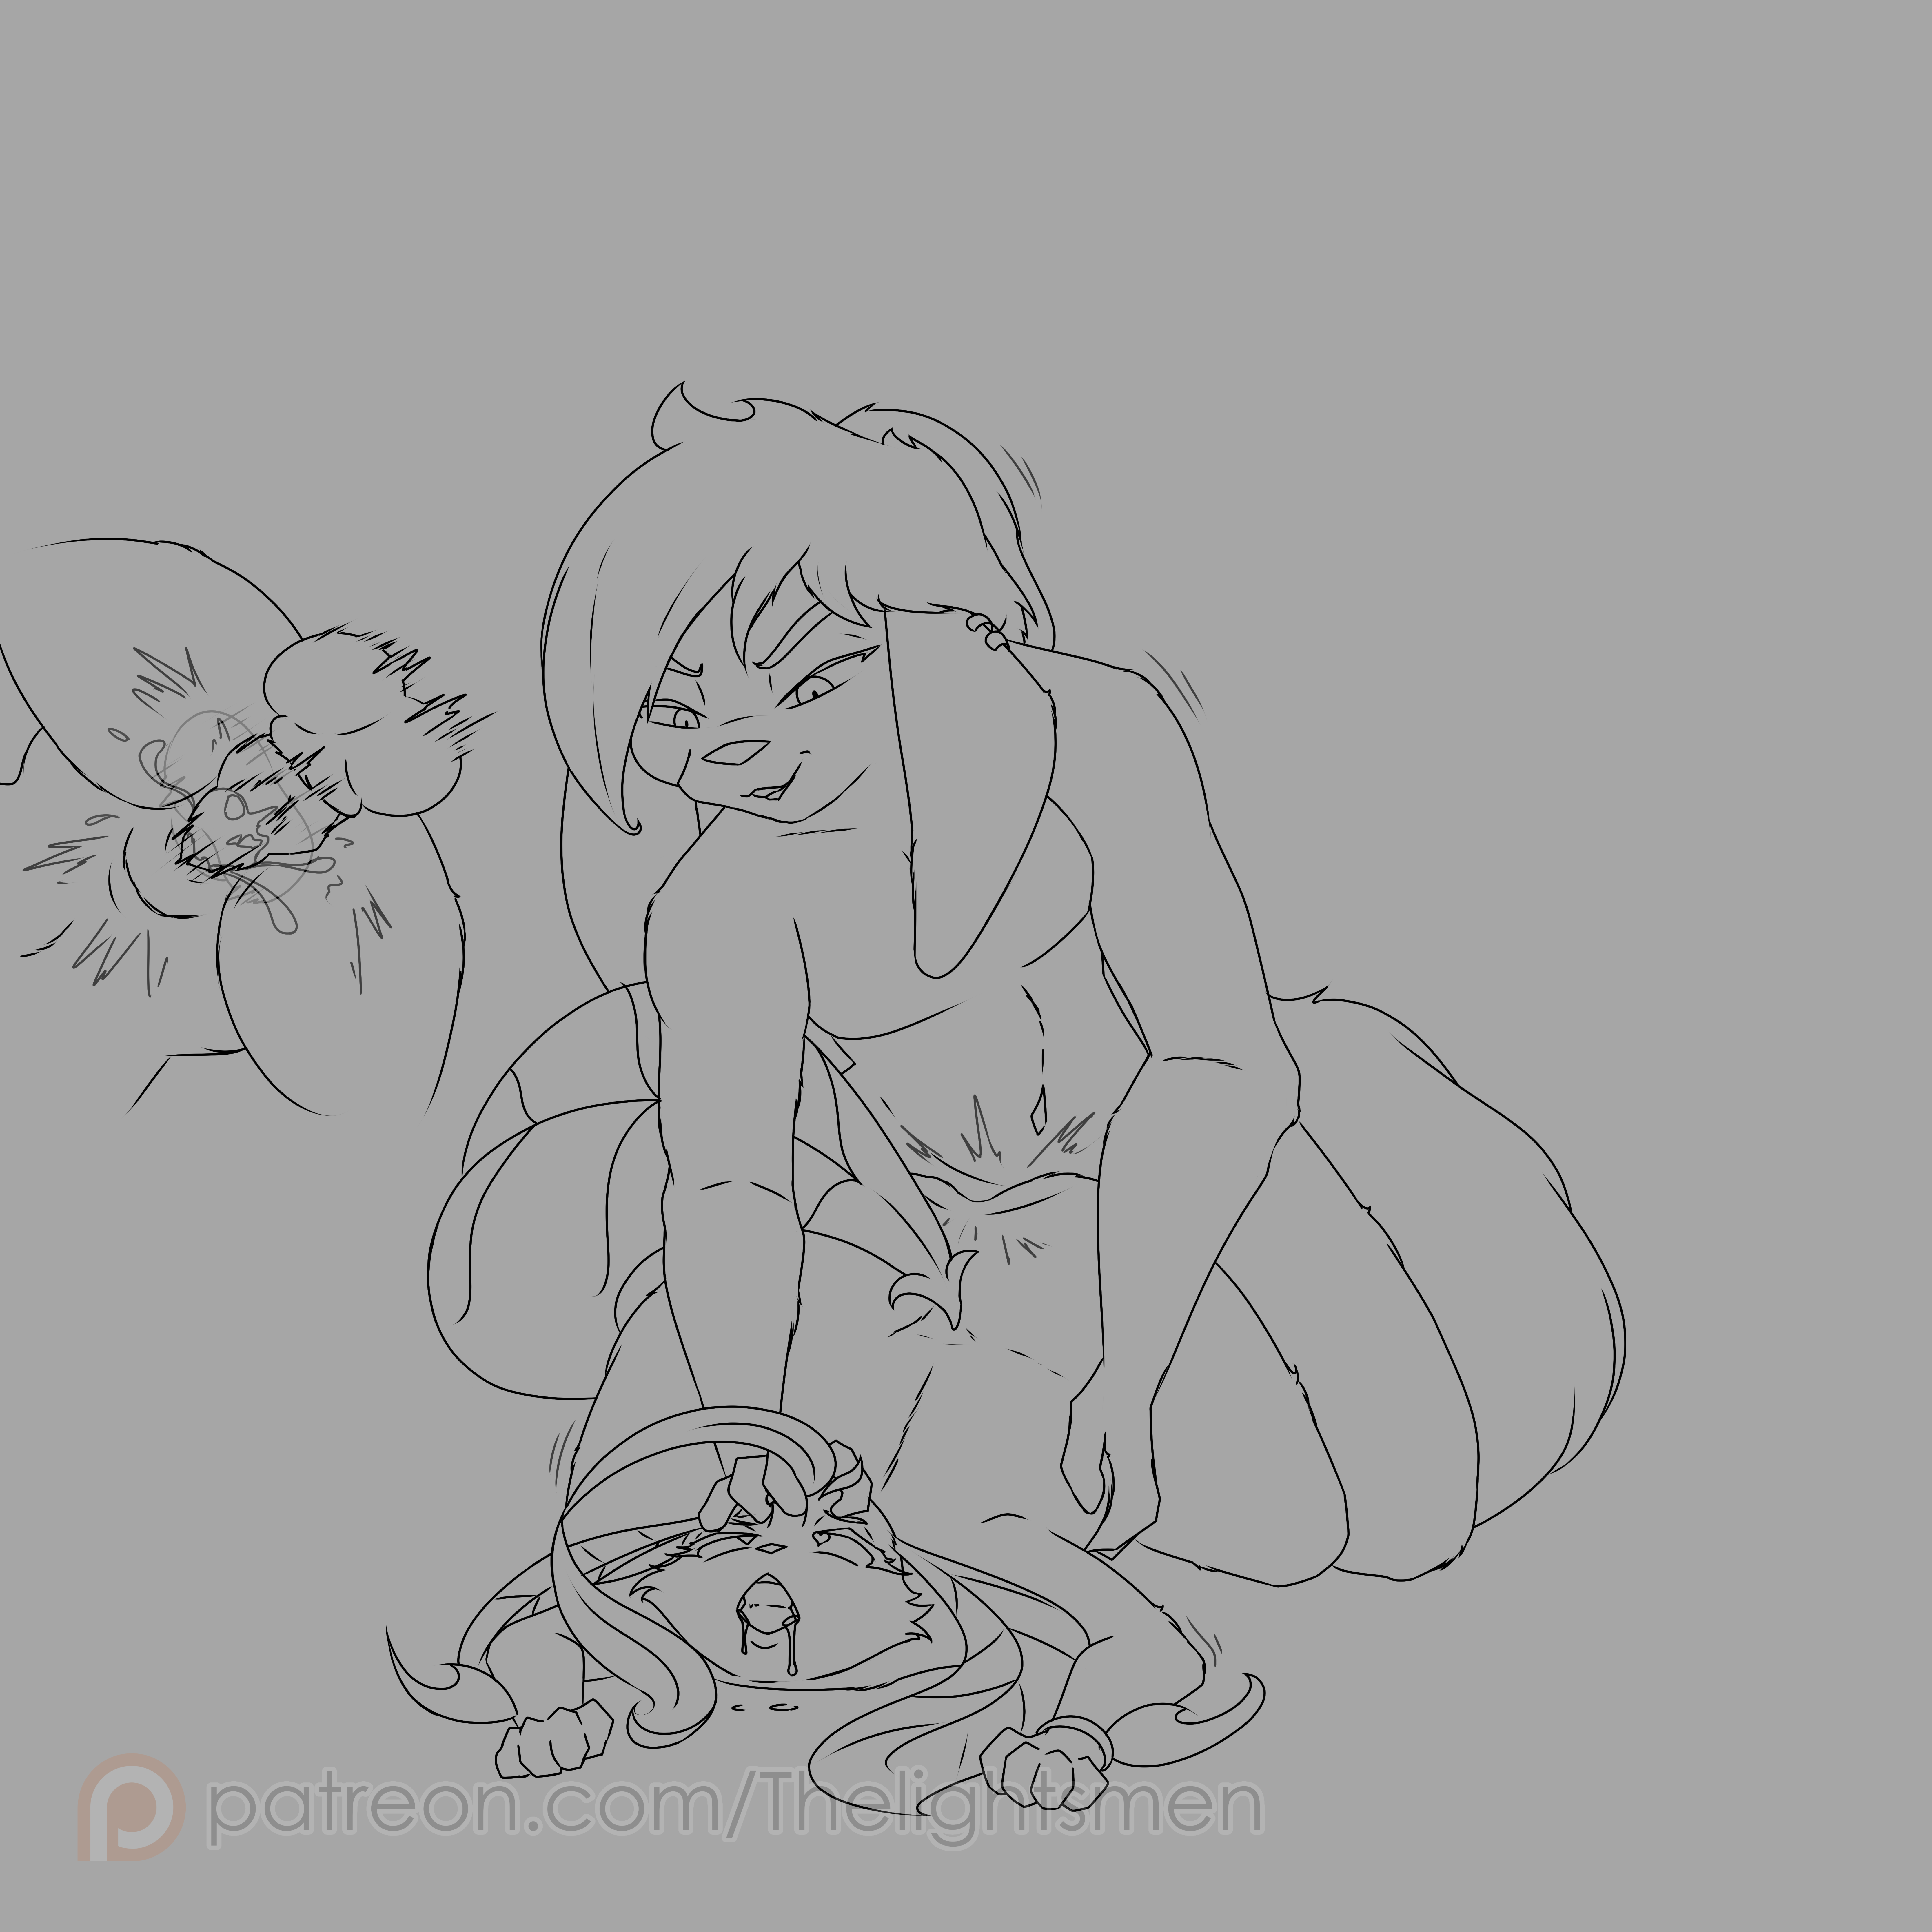
- 7- Lineart: Added proper clean lineart with the necessary details.
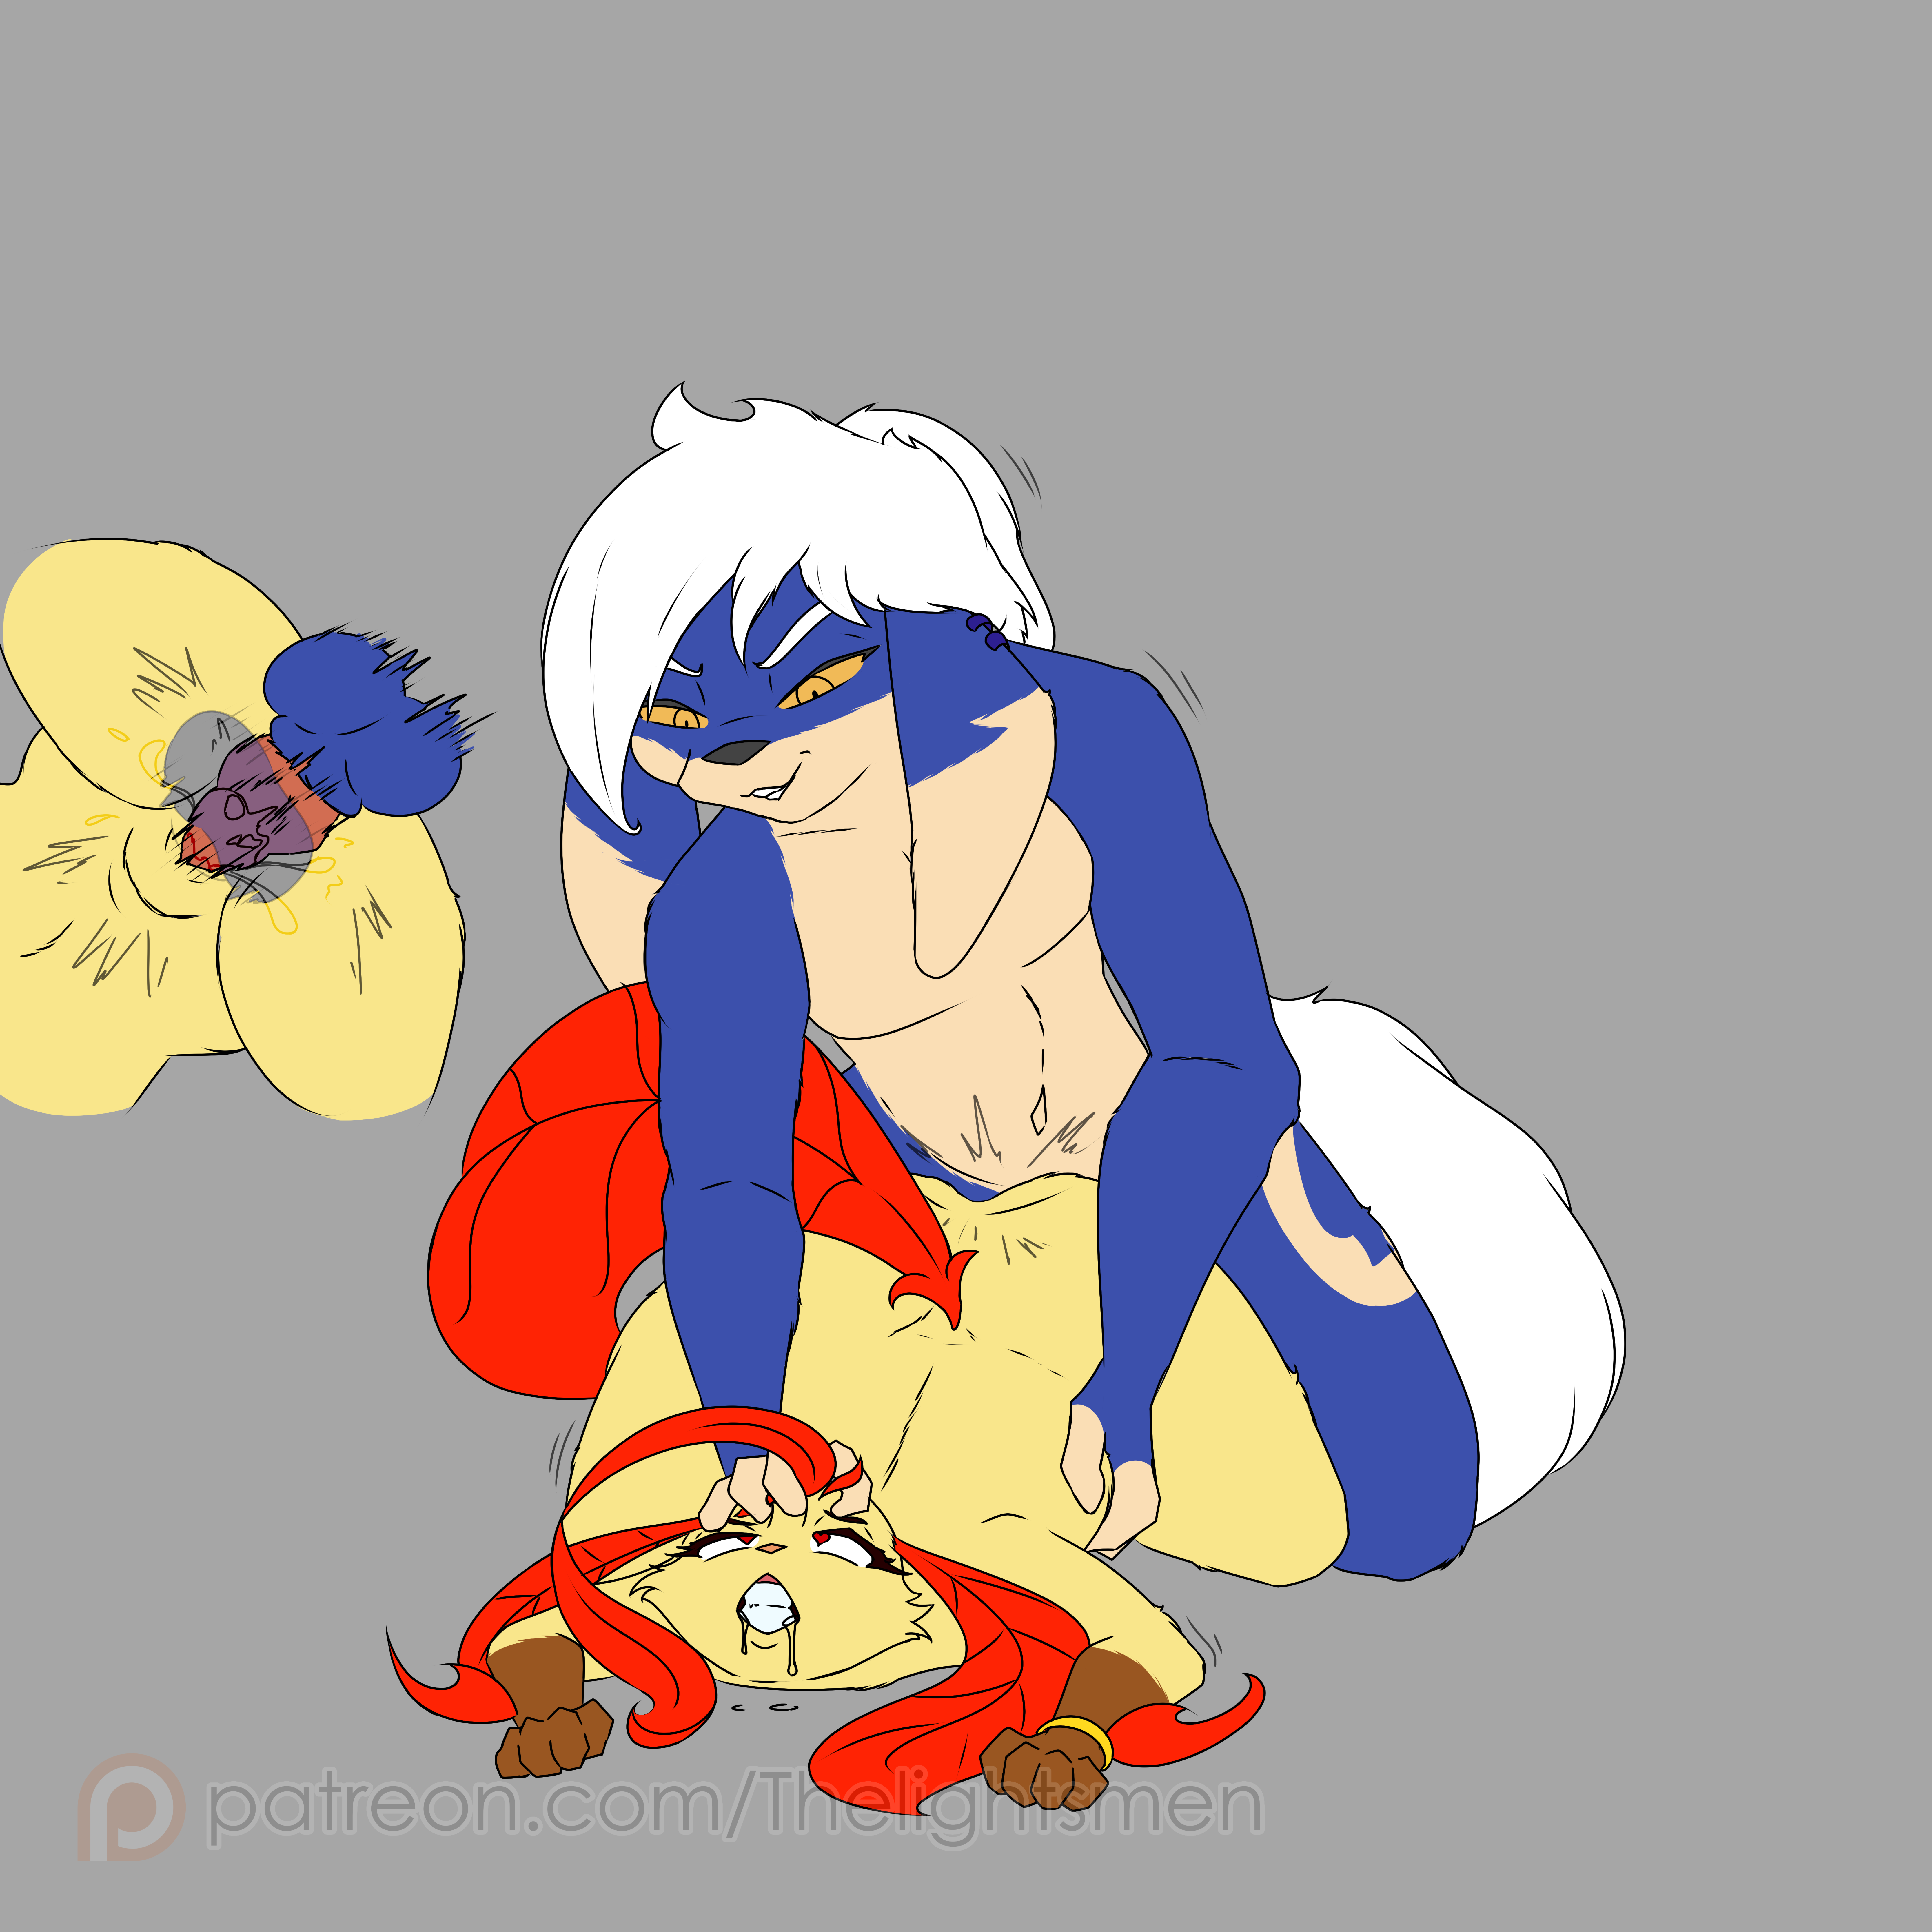
- 8- Flat colors: Then added all flat colors based off the refsheets given.
- 9- Gradients: Then added some extra color gradients to give some more depth to all the basic colors, and using some of them to finish the designs properly.
- 10- Shading: Then as always, I add 2 layers for shadows (on multiply setting) and 1 layer for highlights (on clear), all colored with tones that blend in better with the colors.
- 11- BG bases: Now for the bg, I draw the bases for all elements in it in separate layers in flat sharp colors.
- 12- BG details: Then, I move in with the details and everything to make the bg look somewhat finished, I don't bother too much with the details since it's not the focus of the pic.
- 13- BG + Char integration: Put both characters and bg together to start working on the environment shadows.
- 14- Extra details + linecolor: I add some extra layers featuring some extra details such as sweat and drool, while also coloring the lines and giving some style to the extra panel floating on the left
- 15- Color/lightning effects: Then, I add some extra layers with some color correction, as well as glow effects as I always do.
- 16- Depth of Field: This time, I decided to try something called depth of field, which basically is a more blurred bg that is meant to emphasize the main characters appearing in it (to make this I made a copy of all the bg in one layer, then used gaussian blur on it, and deleted part of it for the more close to the viewer)
- 17- Speech bubbles: Last but not least, I included some stylized speech bubbles as included in the sketch ;)
And that's it! This comm is one of my personal favorites just for that ahegao face down there, It took me more than 10+ hrs of work to get this done but I think it was worth it!
Files