Home
Home

 Artists
 Search
 Recent
 Random
 Posts
Posts
 DMs
DMs
 Tags
Tags
 Random
 Importer
 Import
 FAQ
FAQ
 Account
 Register
 Favorites
 Login
Login

[High-Res Art | Reward | WIP] Friend Fishing StepProcess (Patreon)
Published:
2021-03-16 12:25:52
Edited:
2021-12-02 01:21:28
Imported:
2022-07
Content
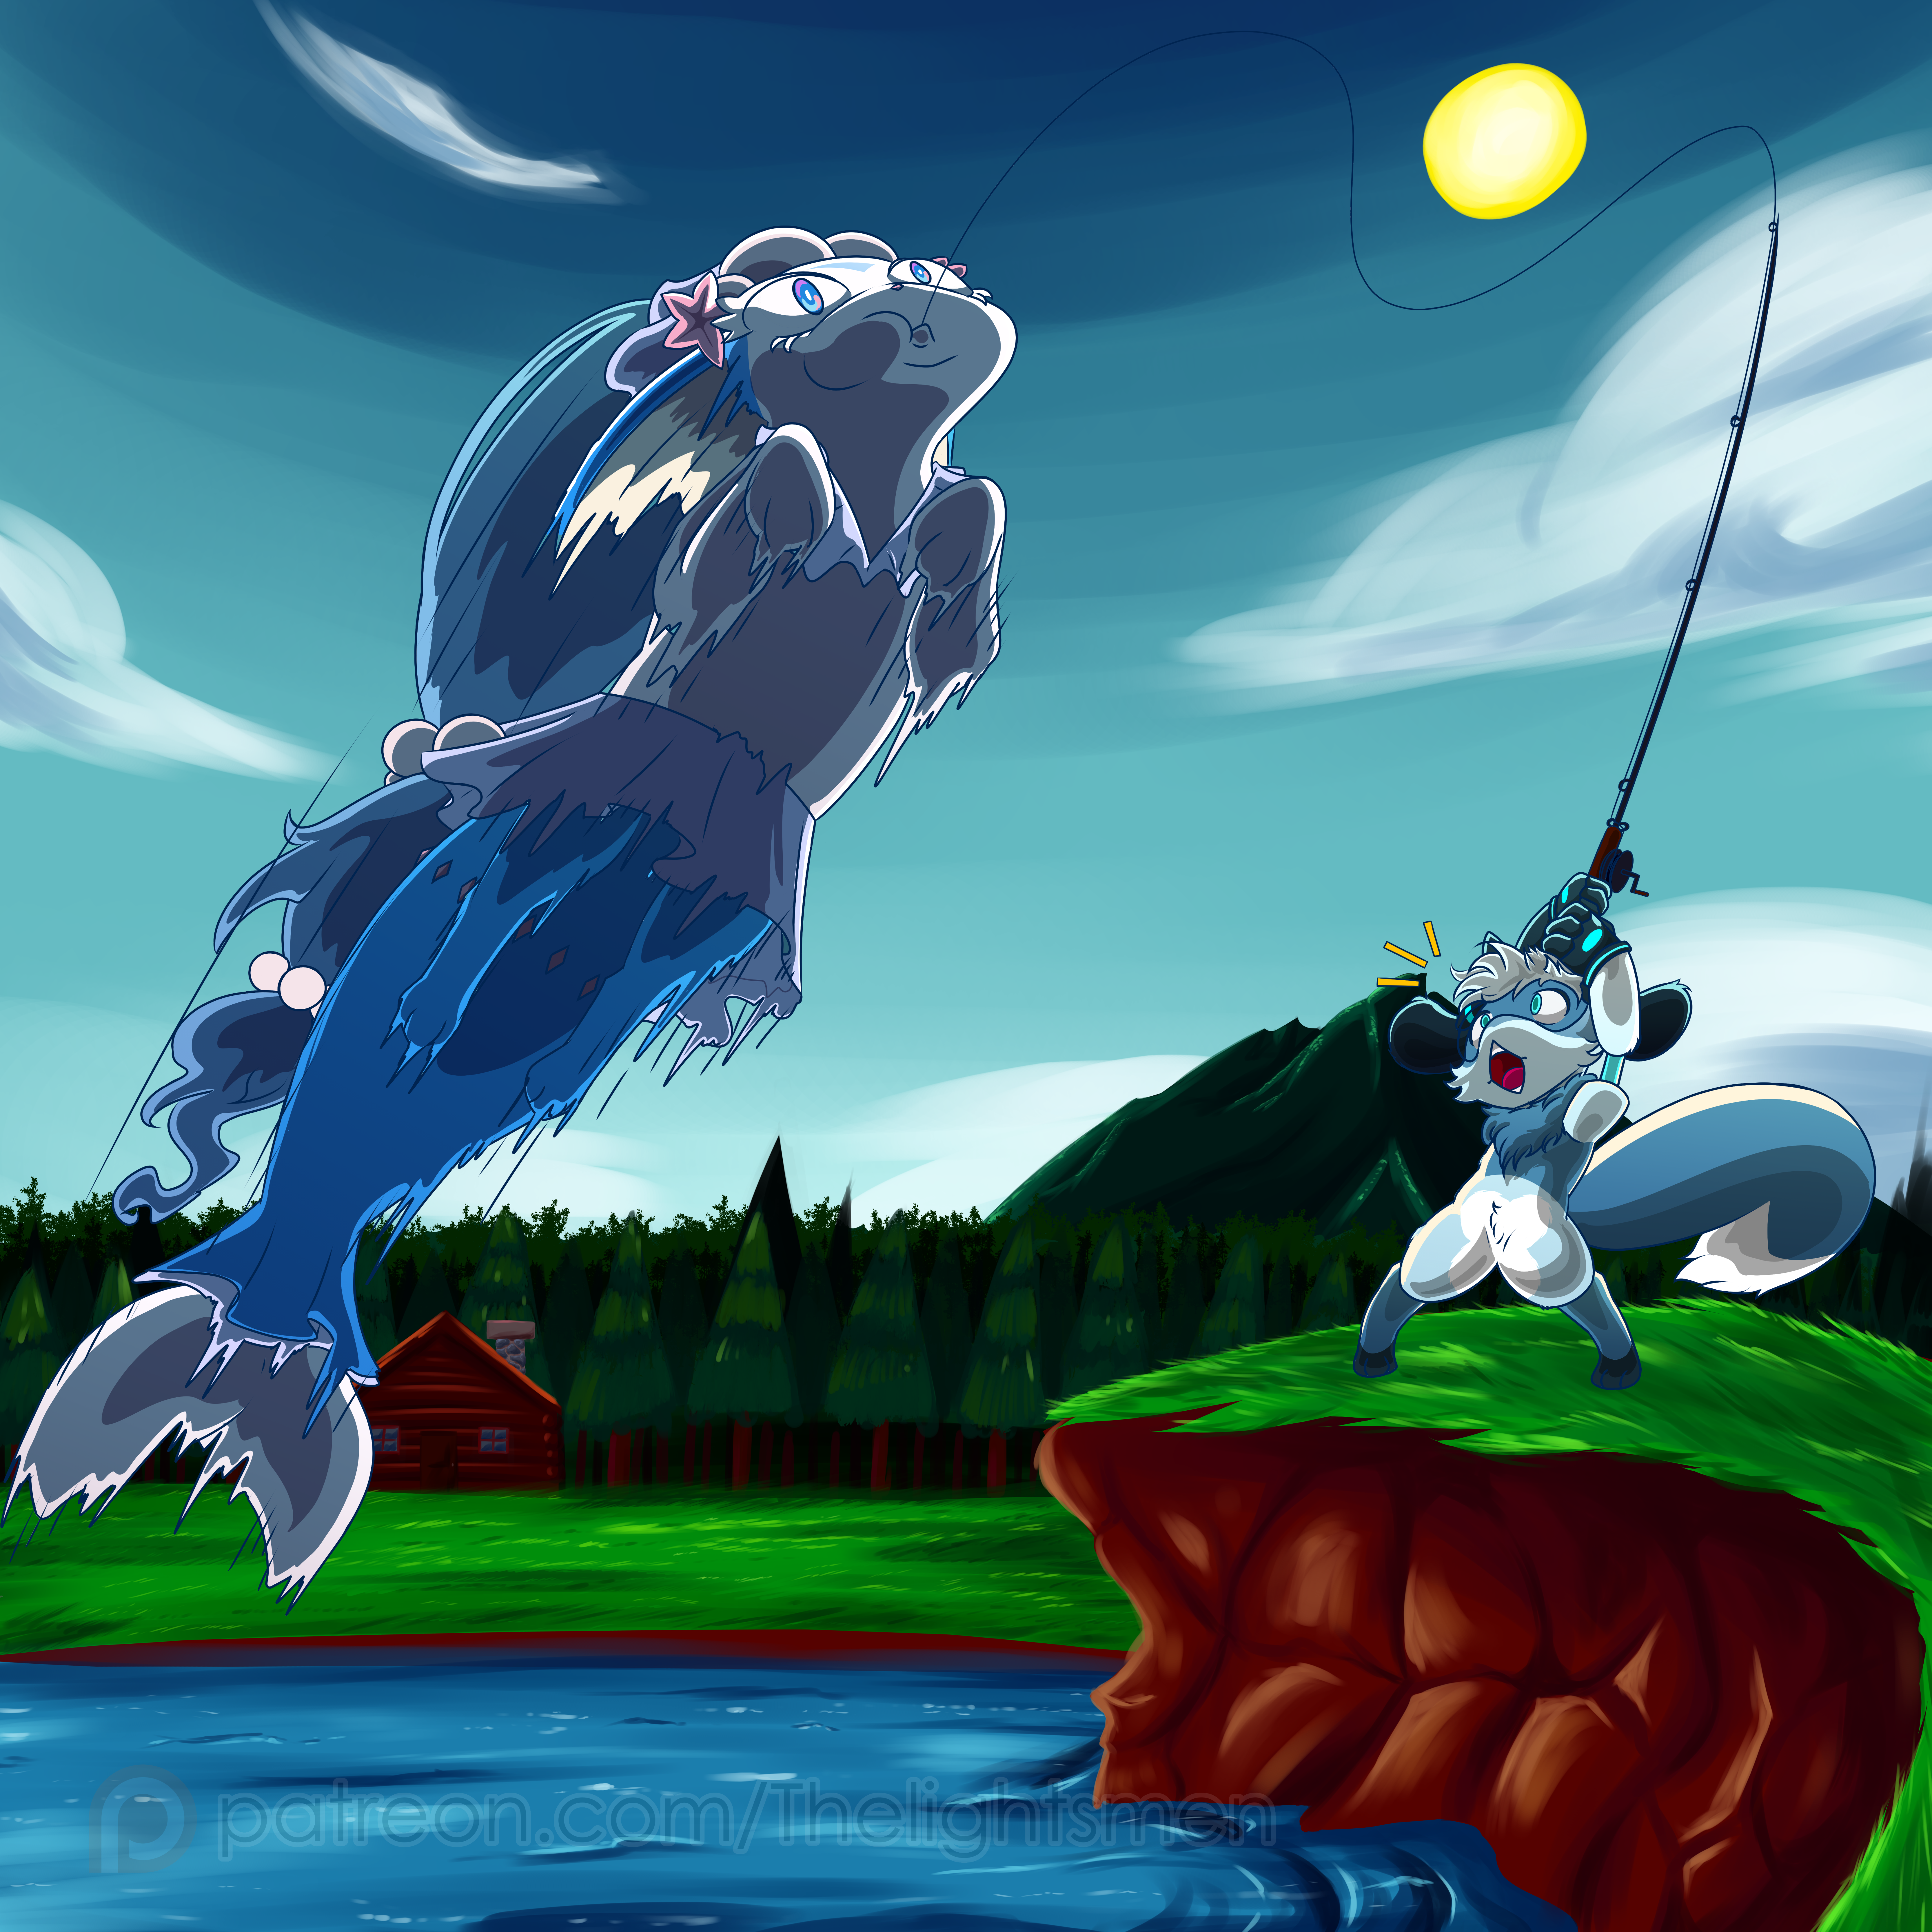
Final version
Here are all the steps taken to create the lastest reward for Aura the Riolu!
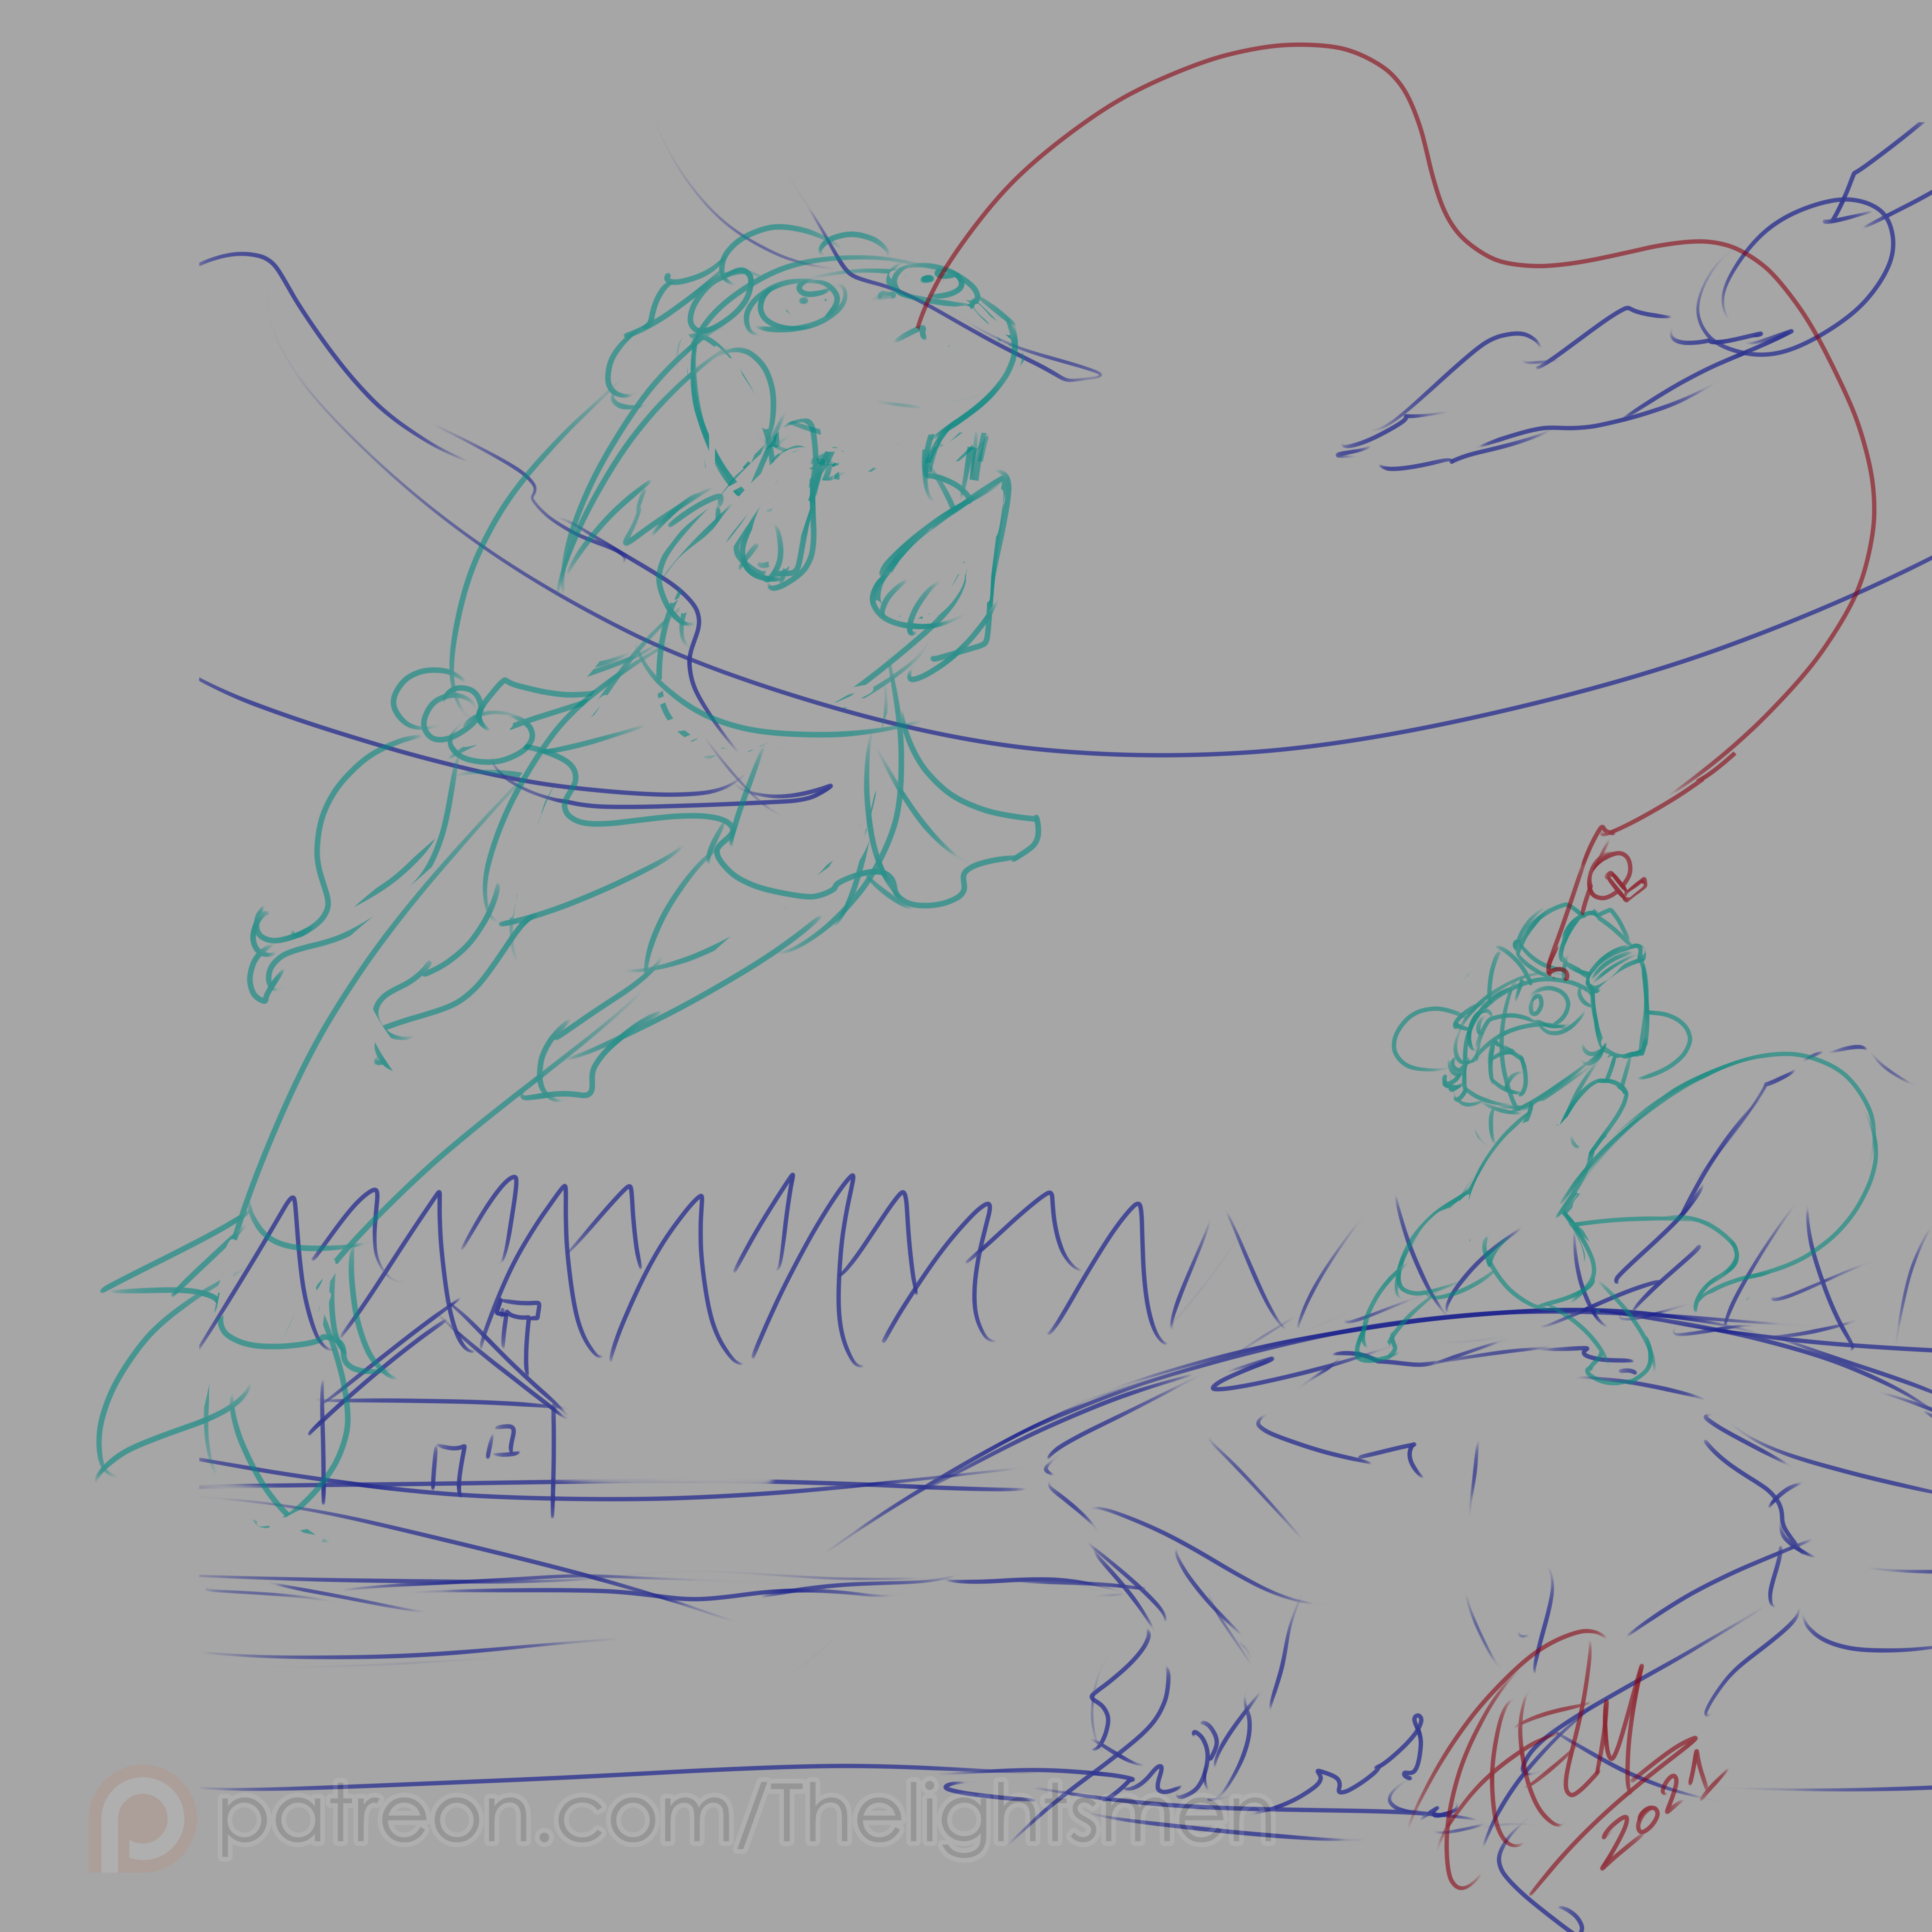
- 1- Sketch: As always, I sketch out a rough draft to get the overall setup of the pic ready, fortunately the patreon was pleased with it from the get go so I didn't have to redo anything during this stage!
- 2- Character Lineart: I add all the lines + details and fully polishing their designs with all their proper garments, it's noted that in this stage I added an extra layer mask where I blur and add much more movement to the left character.
- 3- Base colors: Then I add the very basic colors to the most straight forward sections of the characters.
- 4- Full colors + gradients: Then I move on and in another set of layers I add all the remaining colors that are blended into their designs, and then more layers with extra gradients for all the main colors, featuring some shade and some lightning.
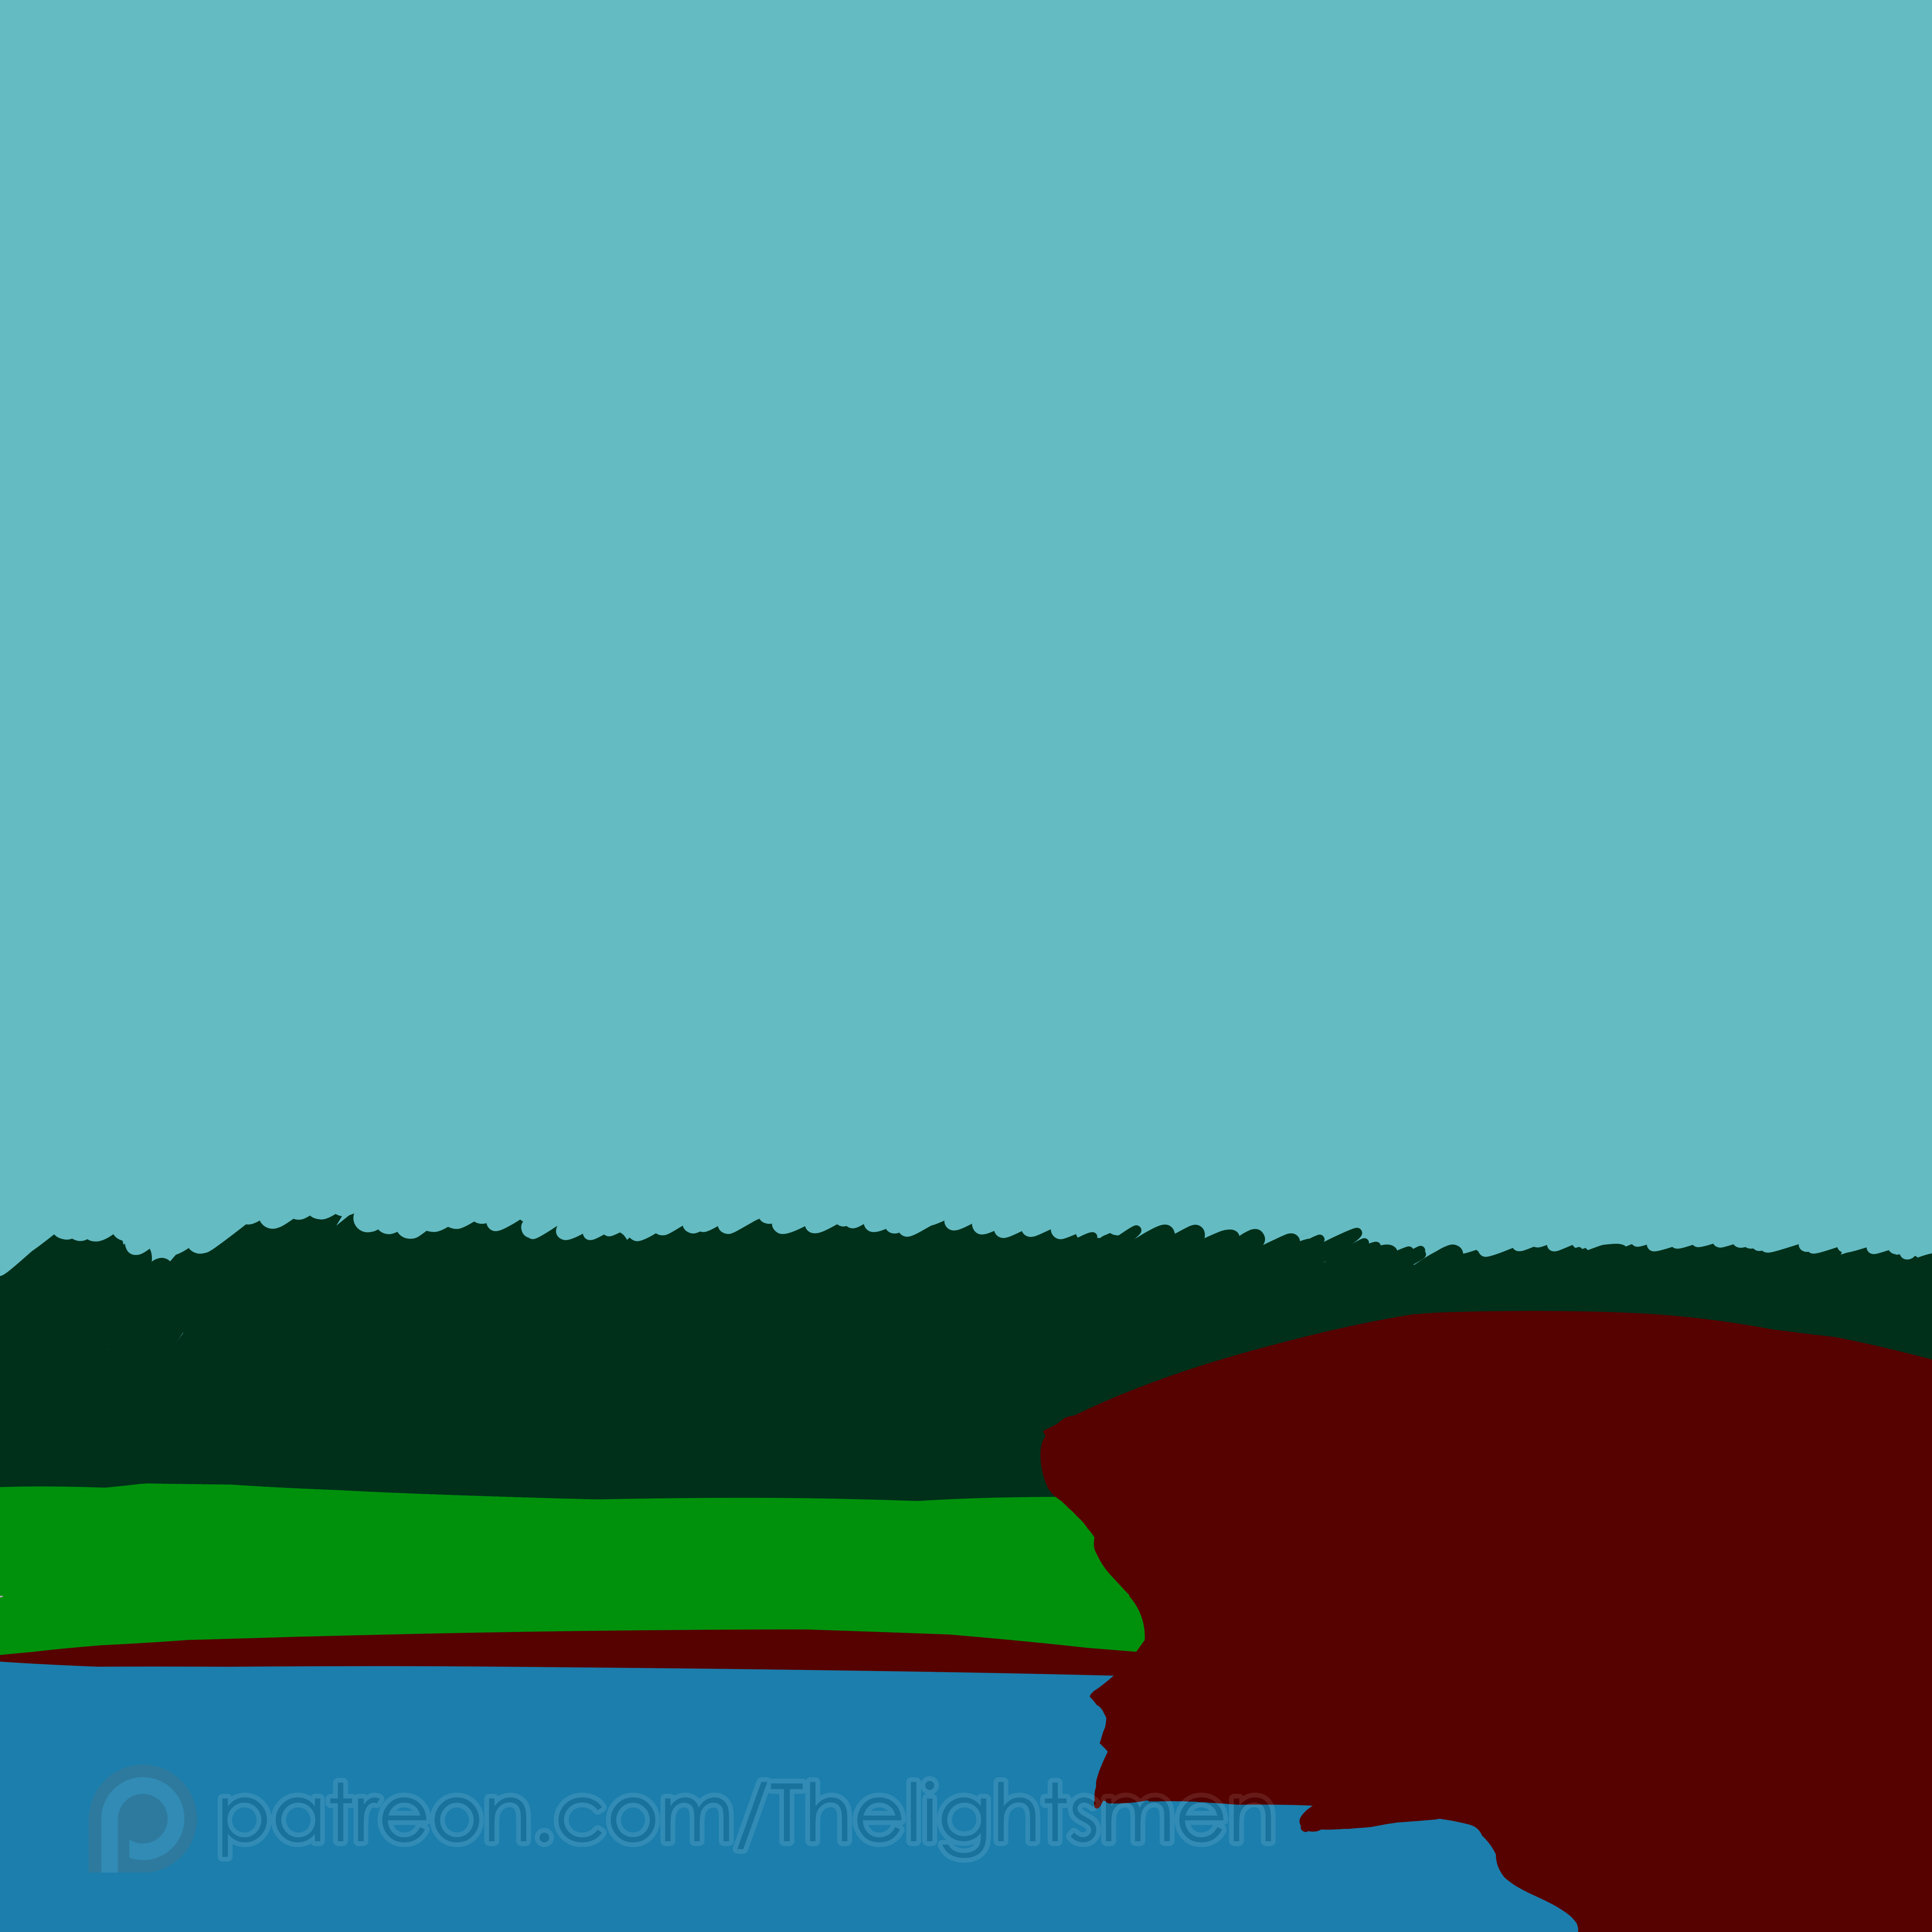
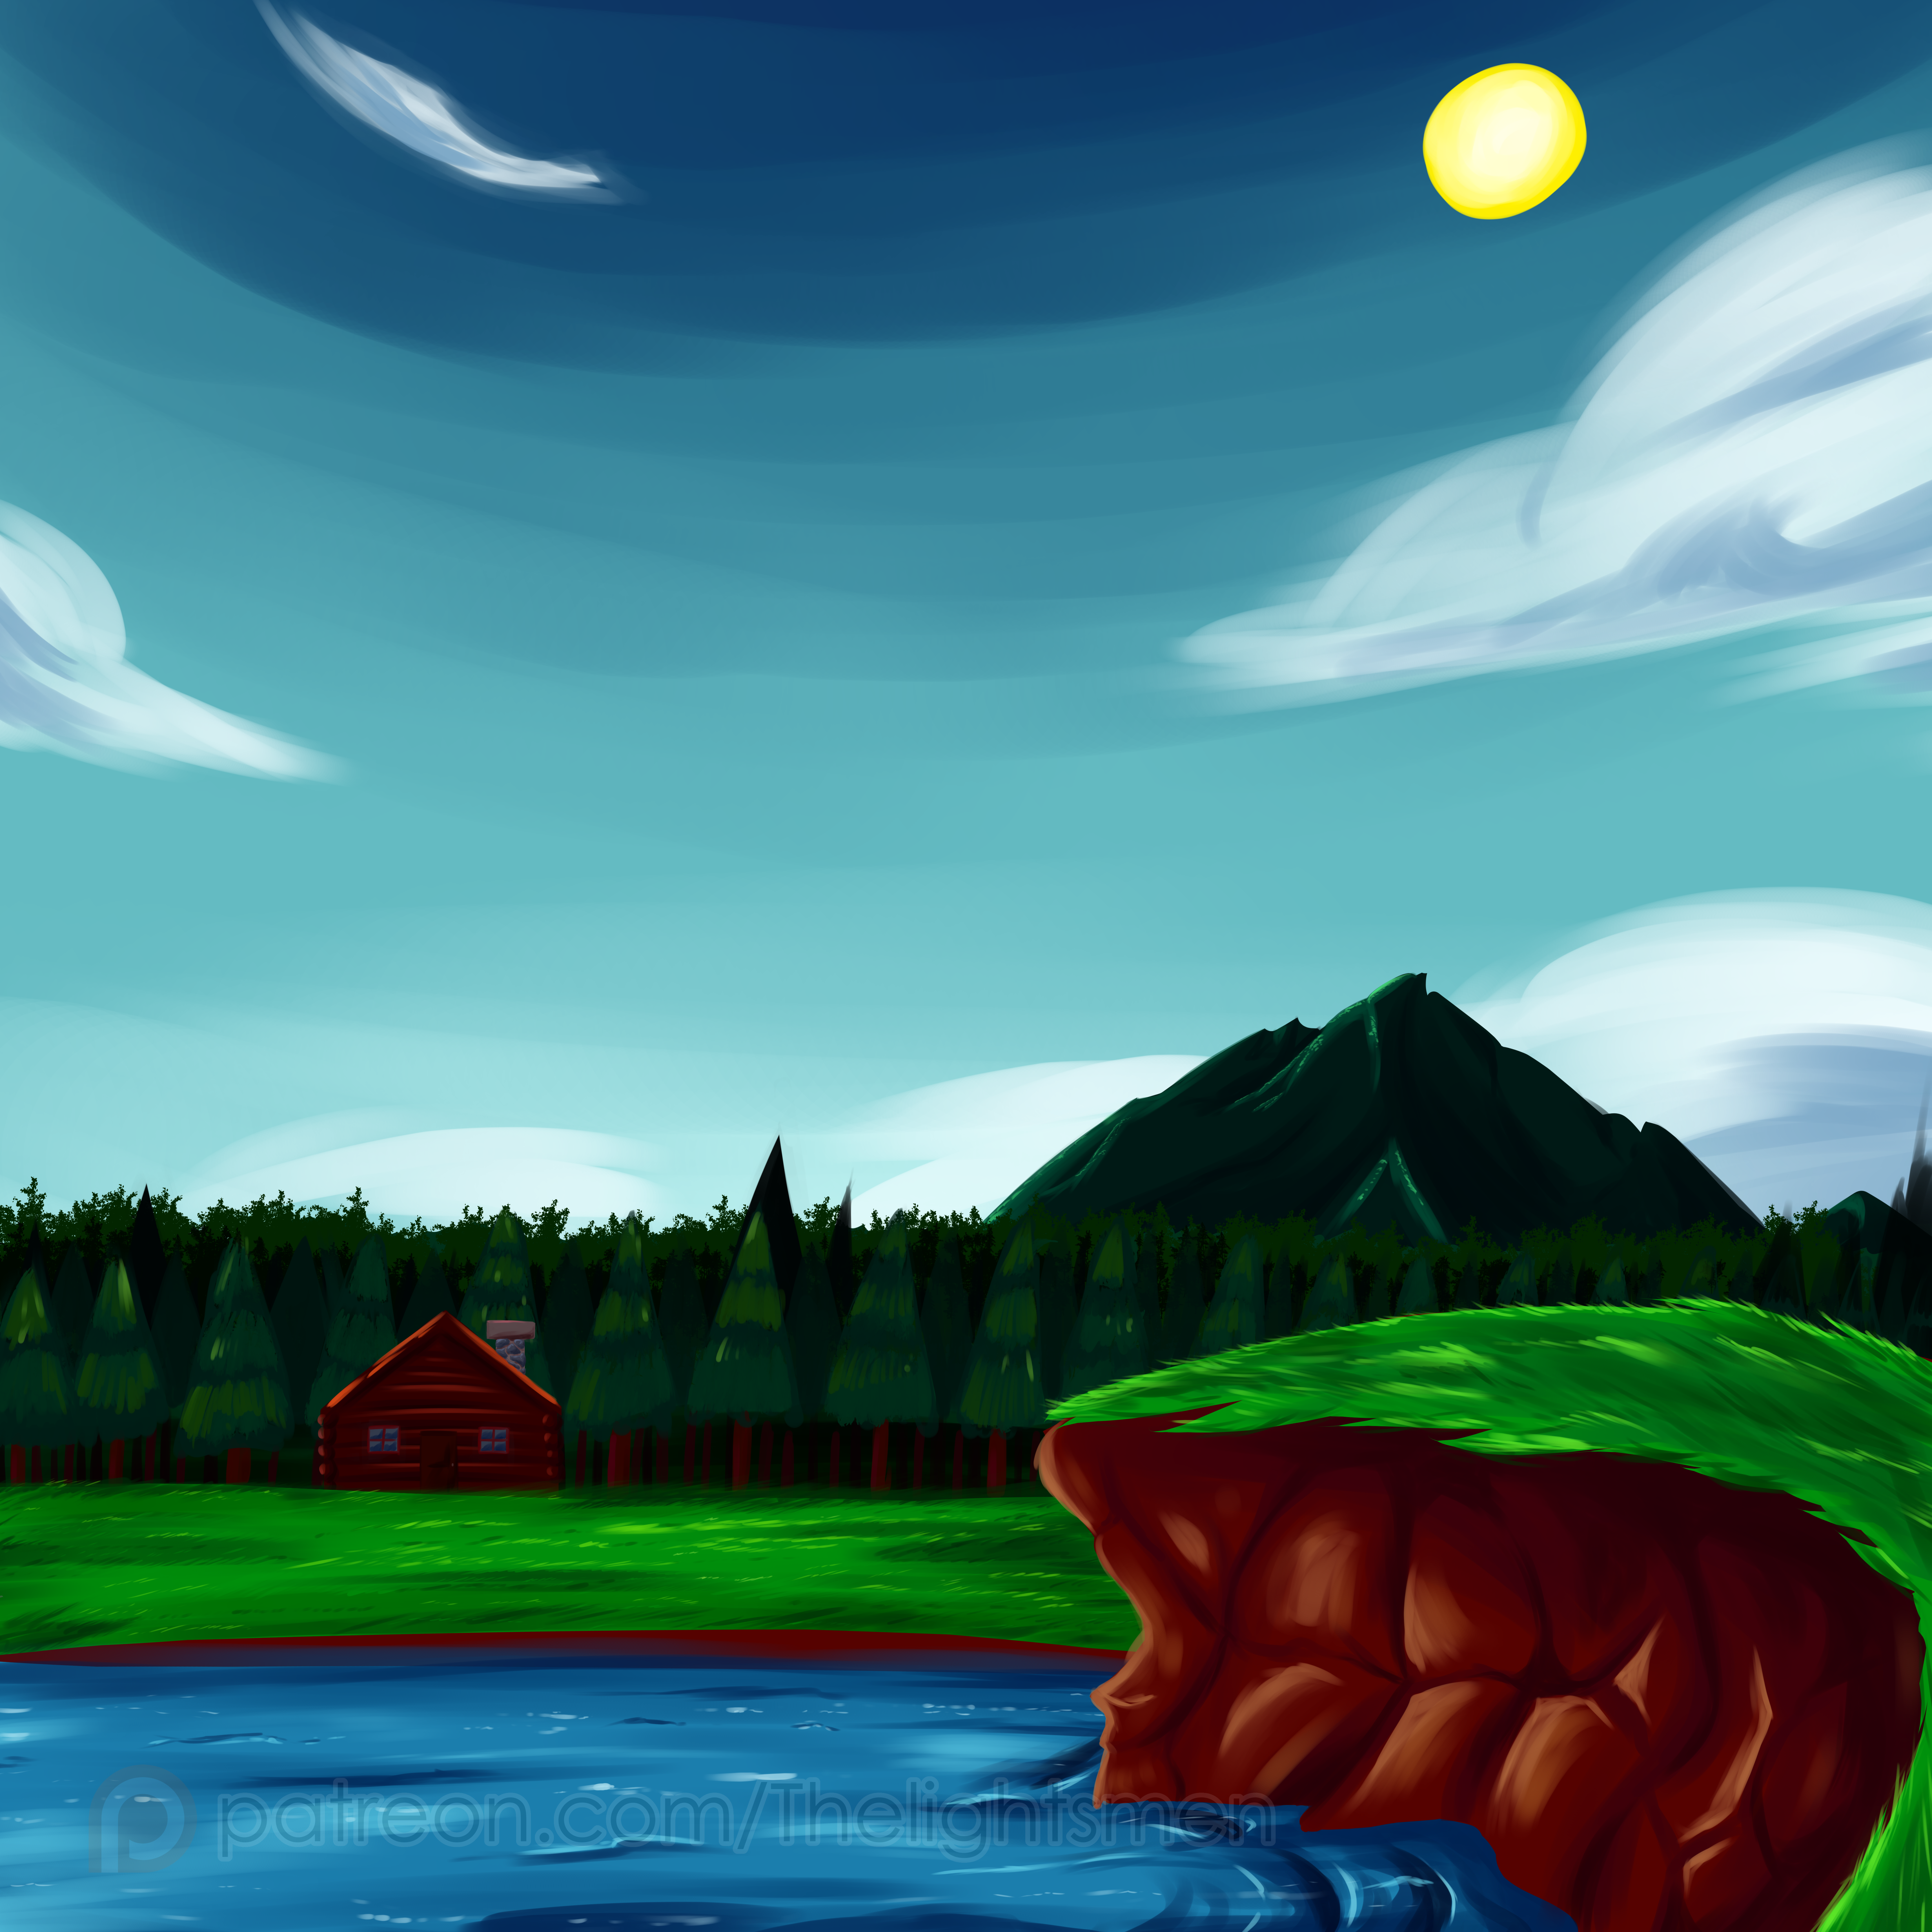
- 5- Background | Base 1: Now to start on the background, I do the bases on separate layers (priority from back to front) using a sharp pen and flat color tools to define all the proper shapes in order to work on them later.
- 6- Background | Base 2: Then I move on to the rest of the elements of the bg, like the mountain, the grass on the lil hill, and the cabin in the woods.
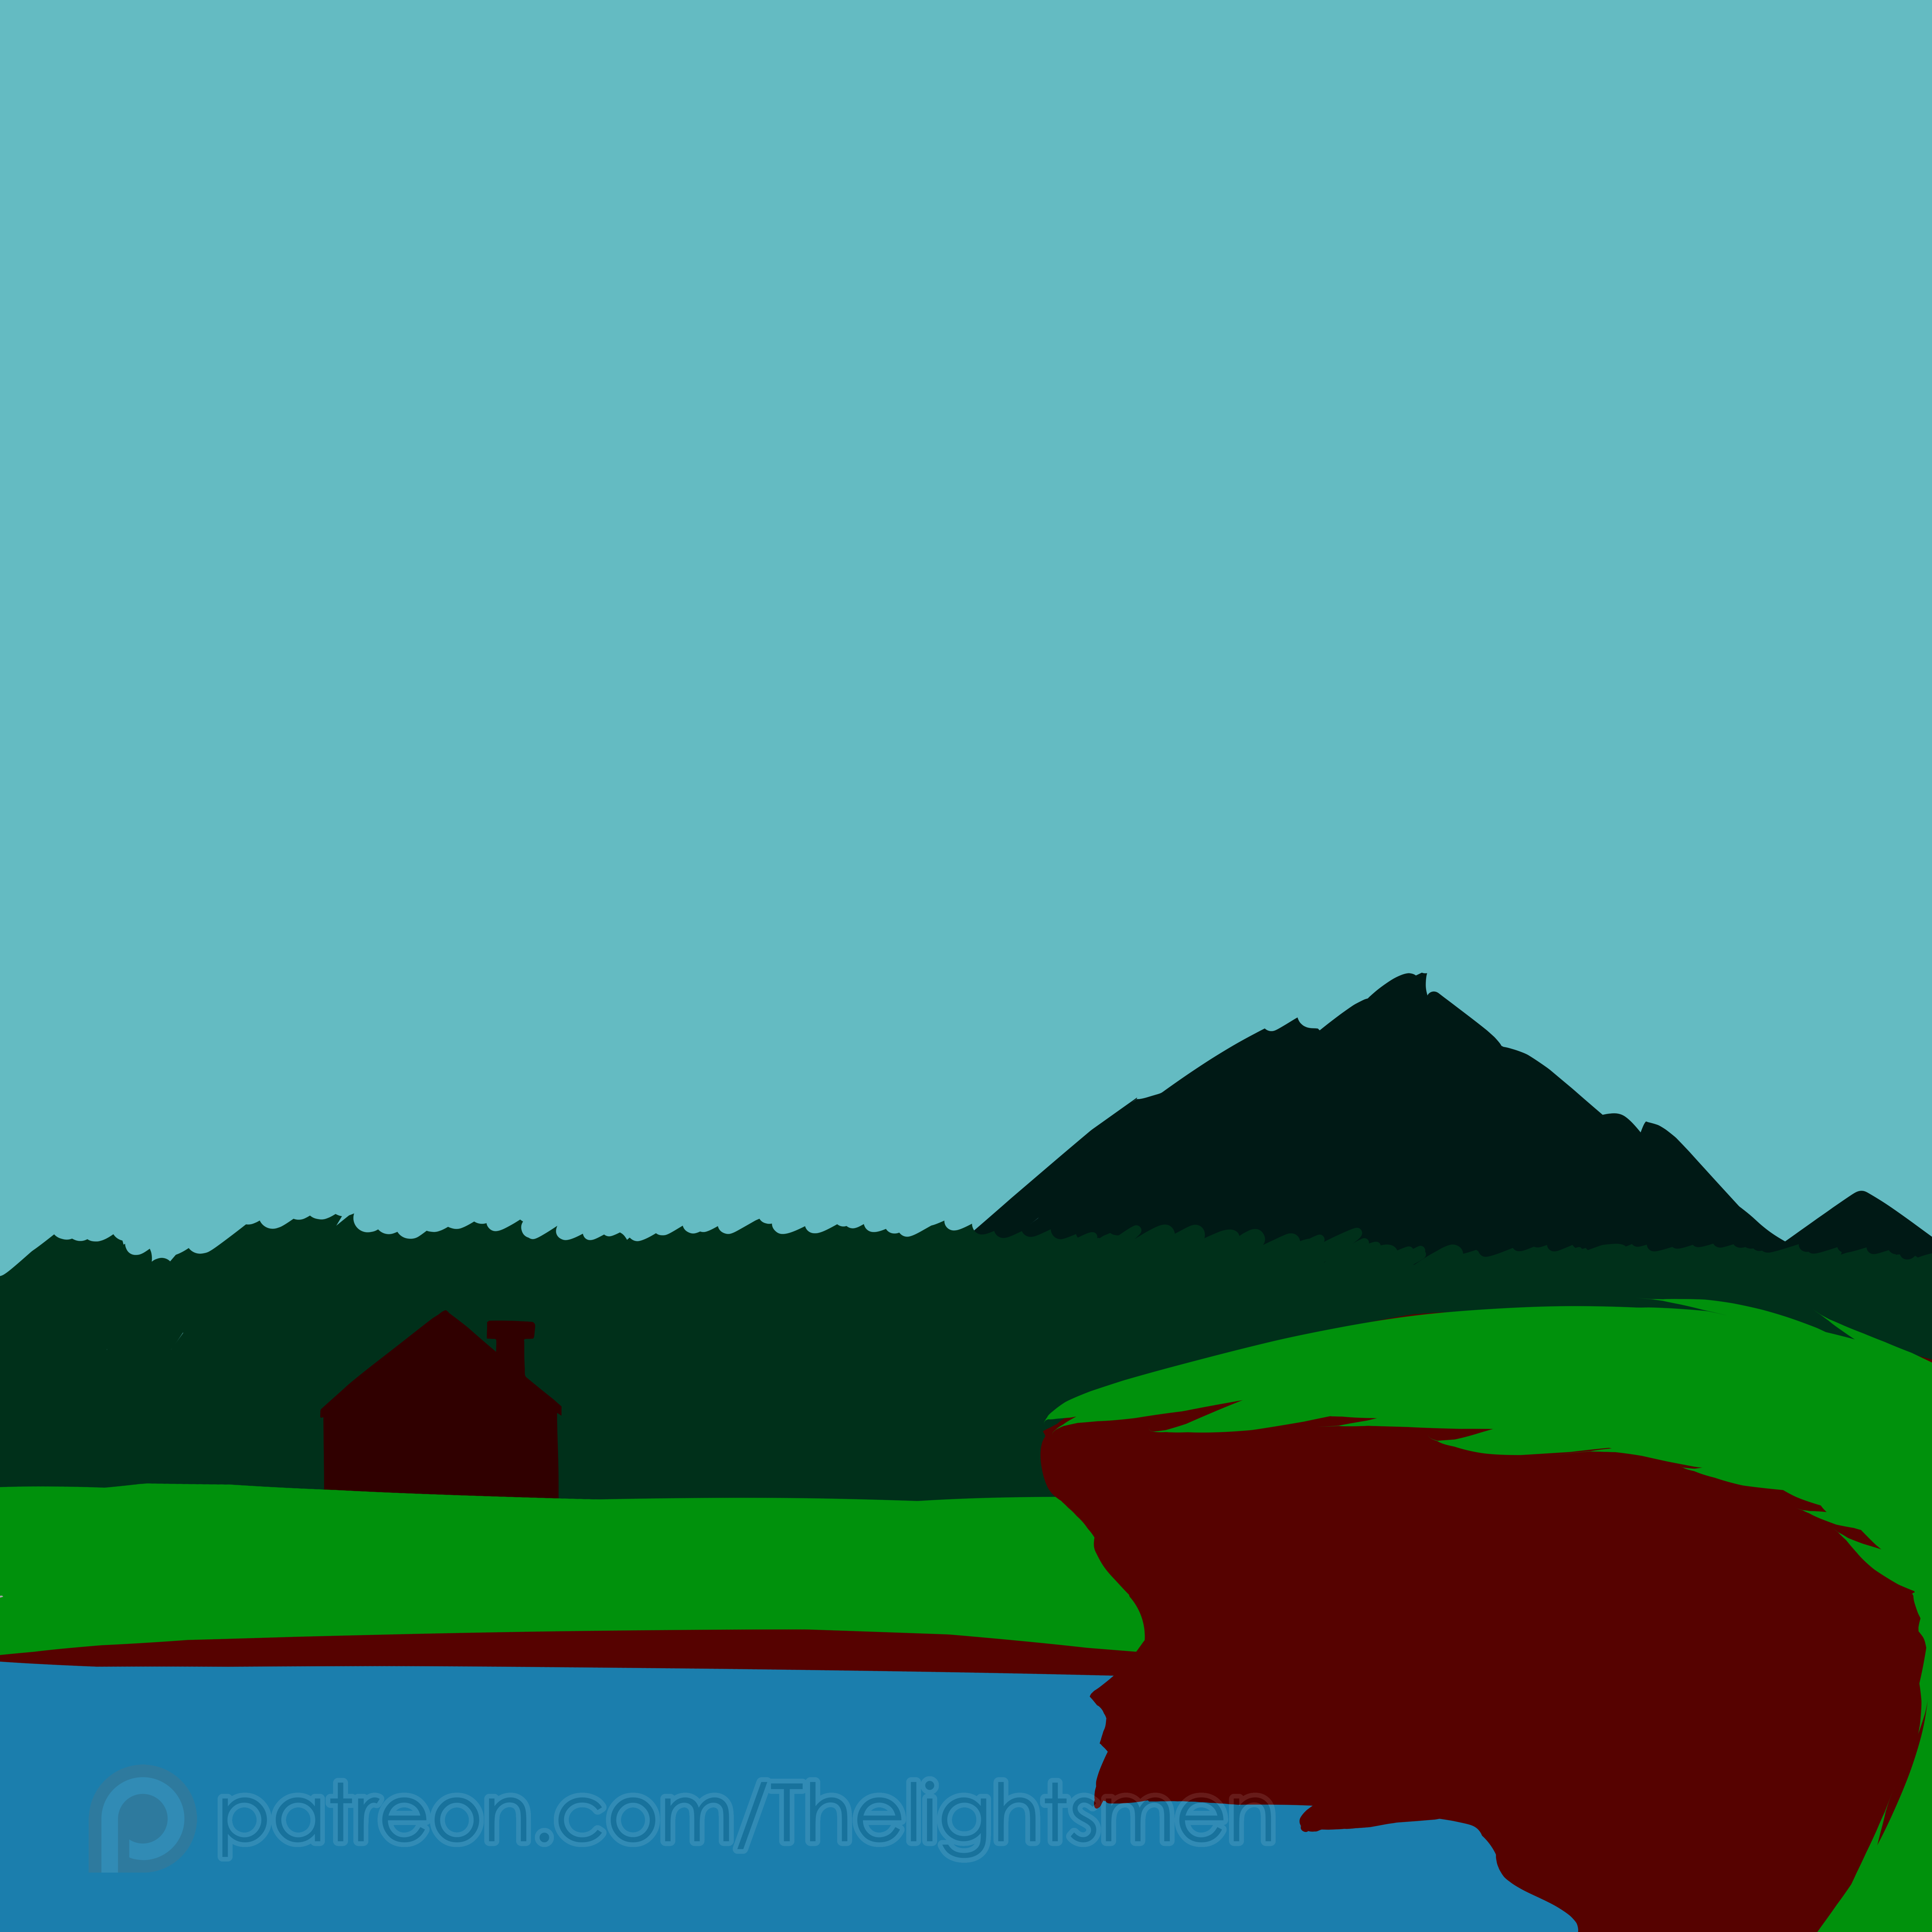
- 7- Bg | Details 1: Then I start adding all the details with all the sections over their respective flat color bases, for this I add several layers (Grouped within a folder) with shadows and highlights corresponding to the texture'/shape that the element in itself has, featuring different strokes depending on the thing I'm trying to shade. (But the process is basically the same)
- 8- Bg | Details 2: I repeat the process with all the other elements, it's worth noting the forest took a while to make compared to the pond, and I had to use a premade brush for the trees in the far back, and for the pond I must say I had some fun drawing the waves! The cabin in itself was pretty straight forward.
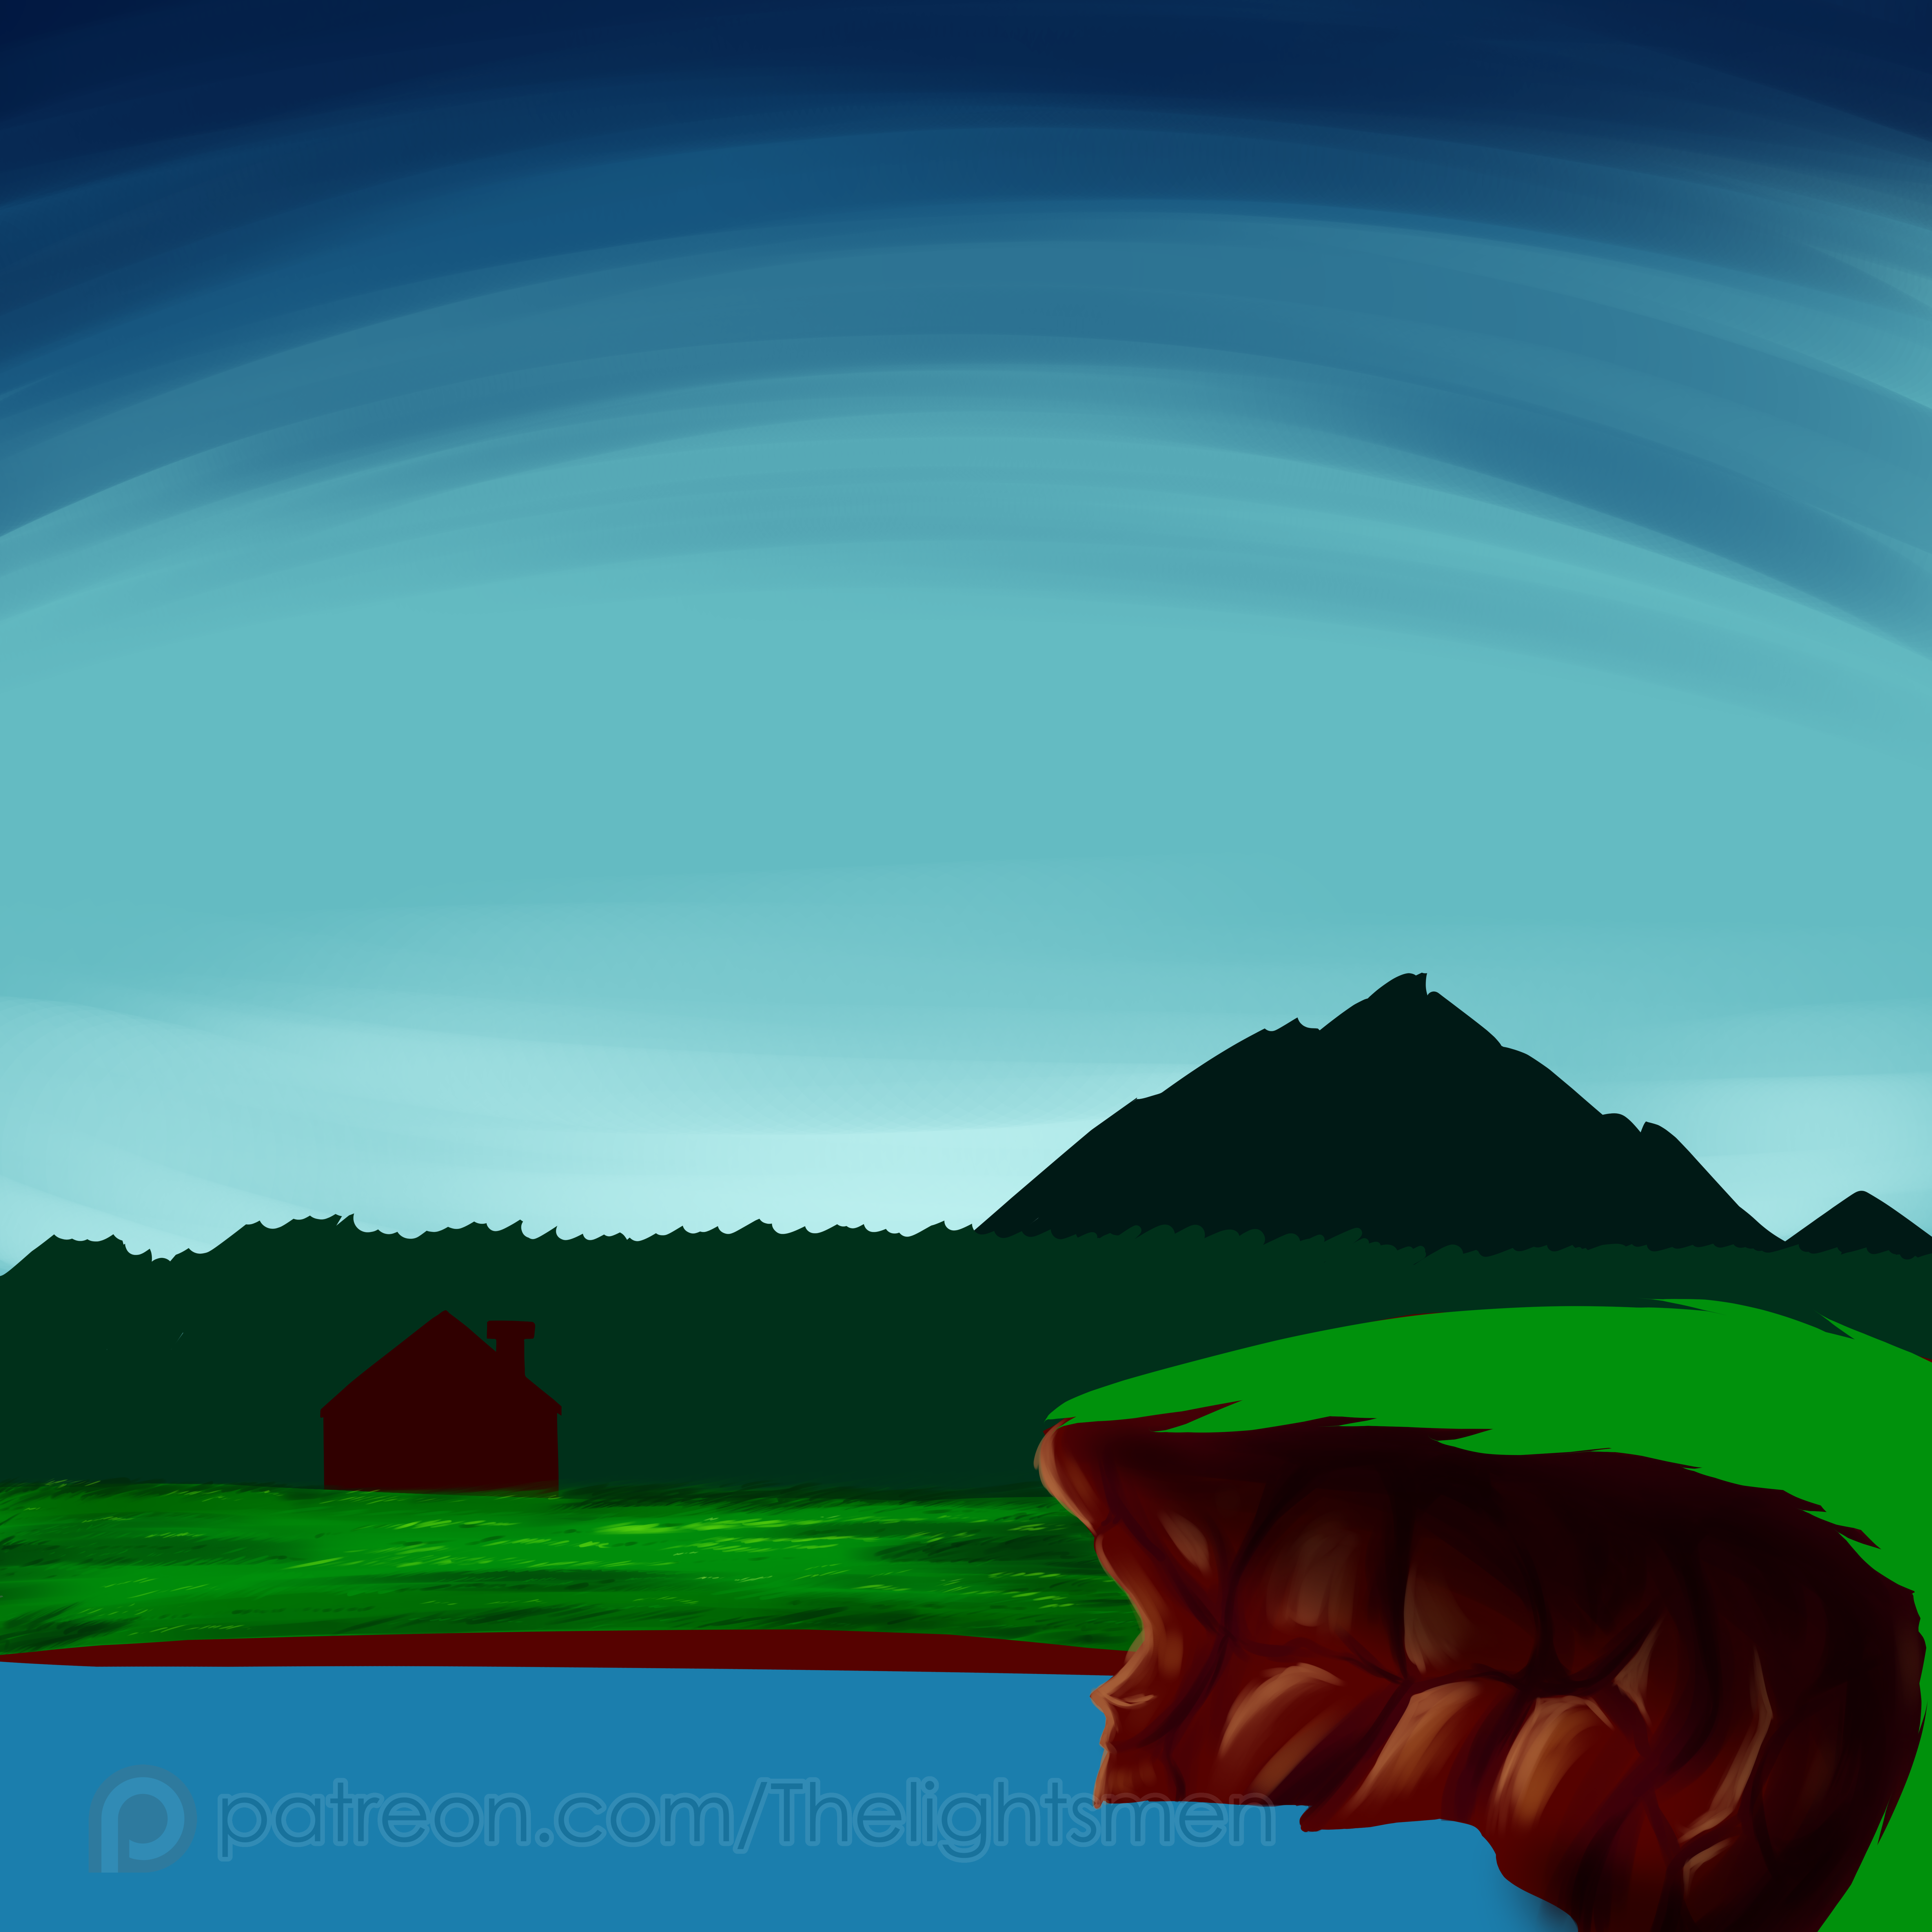
- 9- Bg | Details 3 + Sky Fix: In this stage I redid the shading of the sky to fit better my original view shown on the sketch (I made the original without taking it into account) and added extra layers for the clouds and their shadings along with the sun.
- 10- Bg/Char integration: I put both the characters and the BG together to start the proper integration between the two.
- 11- Character Shading: I add 3 different layers (separate for each character) with cell shaded shadows and hightlights, which are custom colored depending on their color palettes and position.
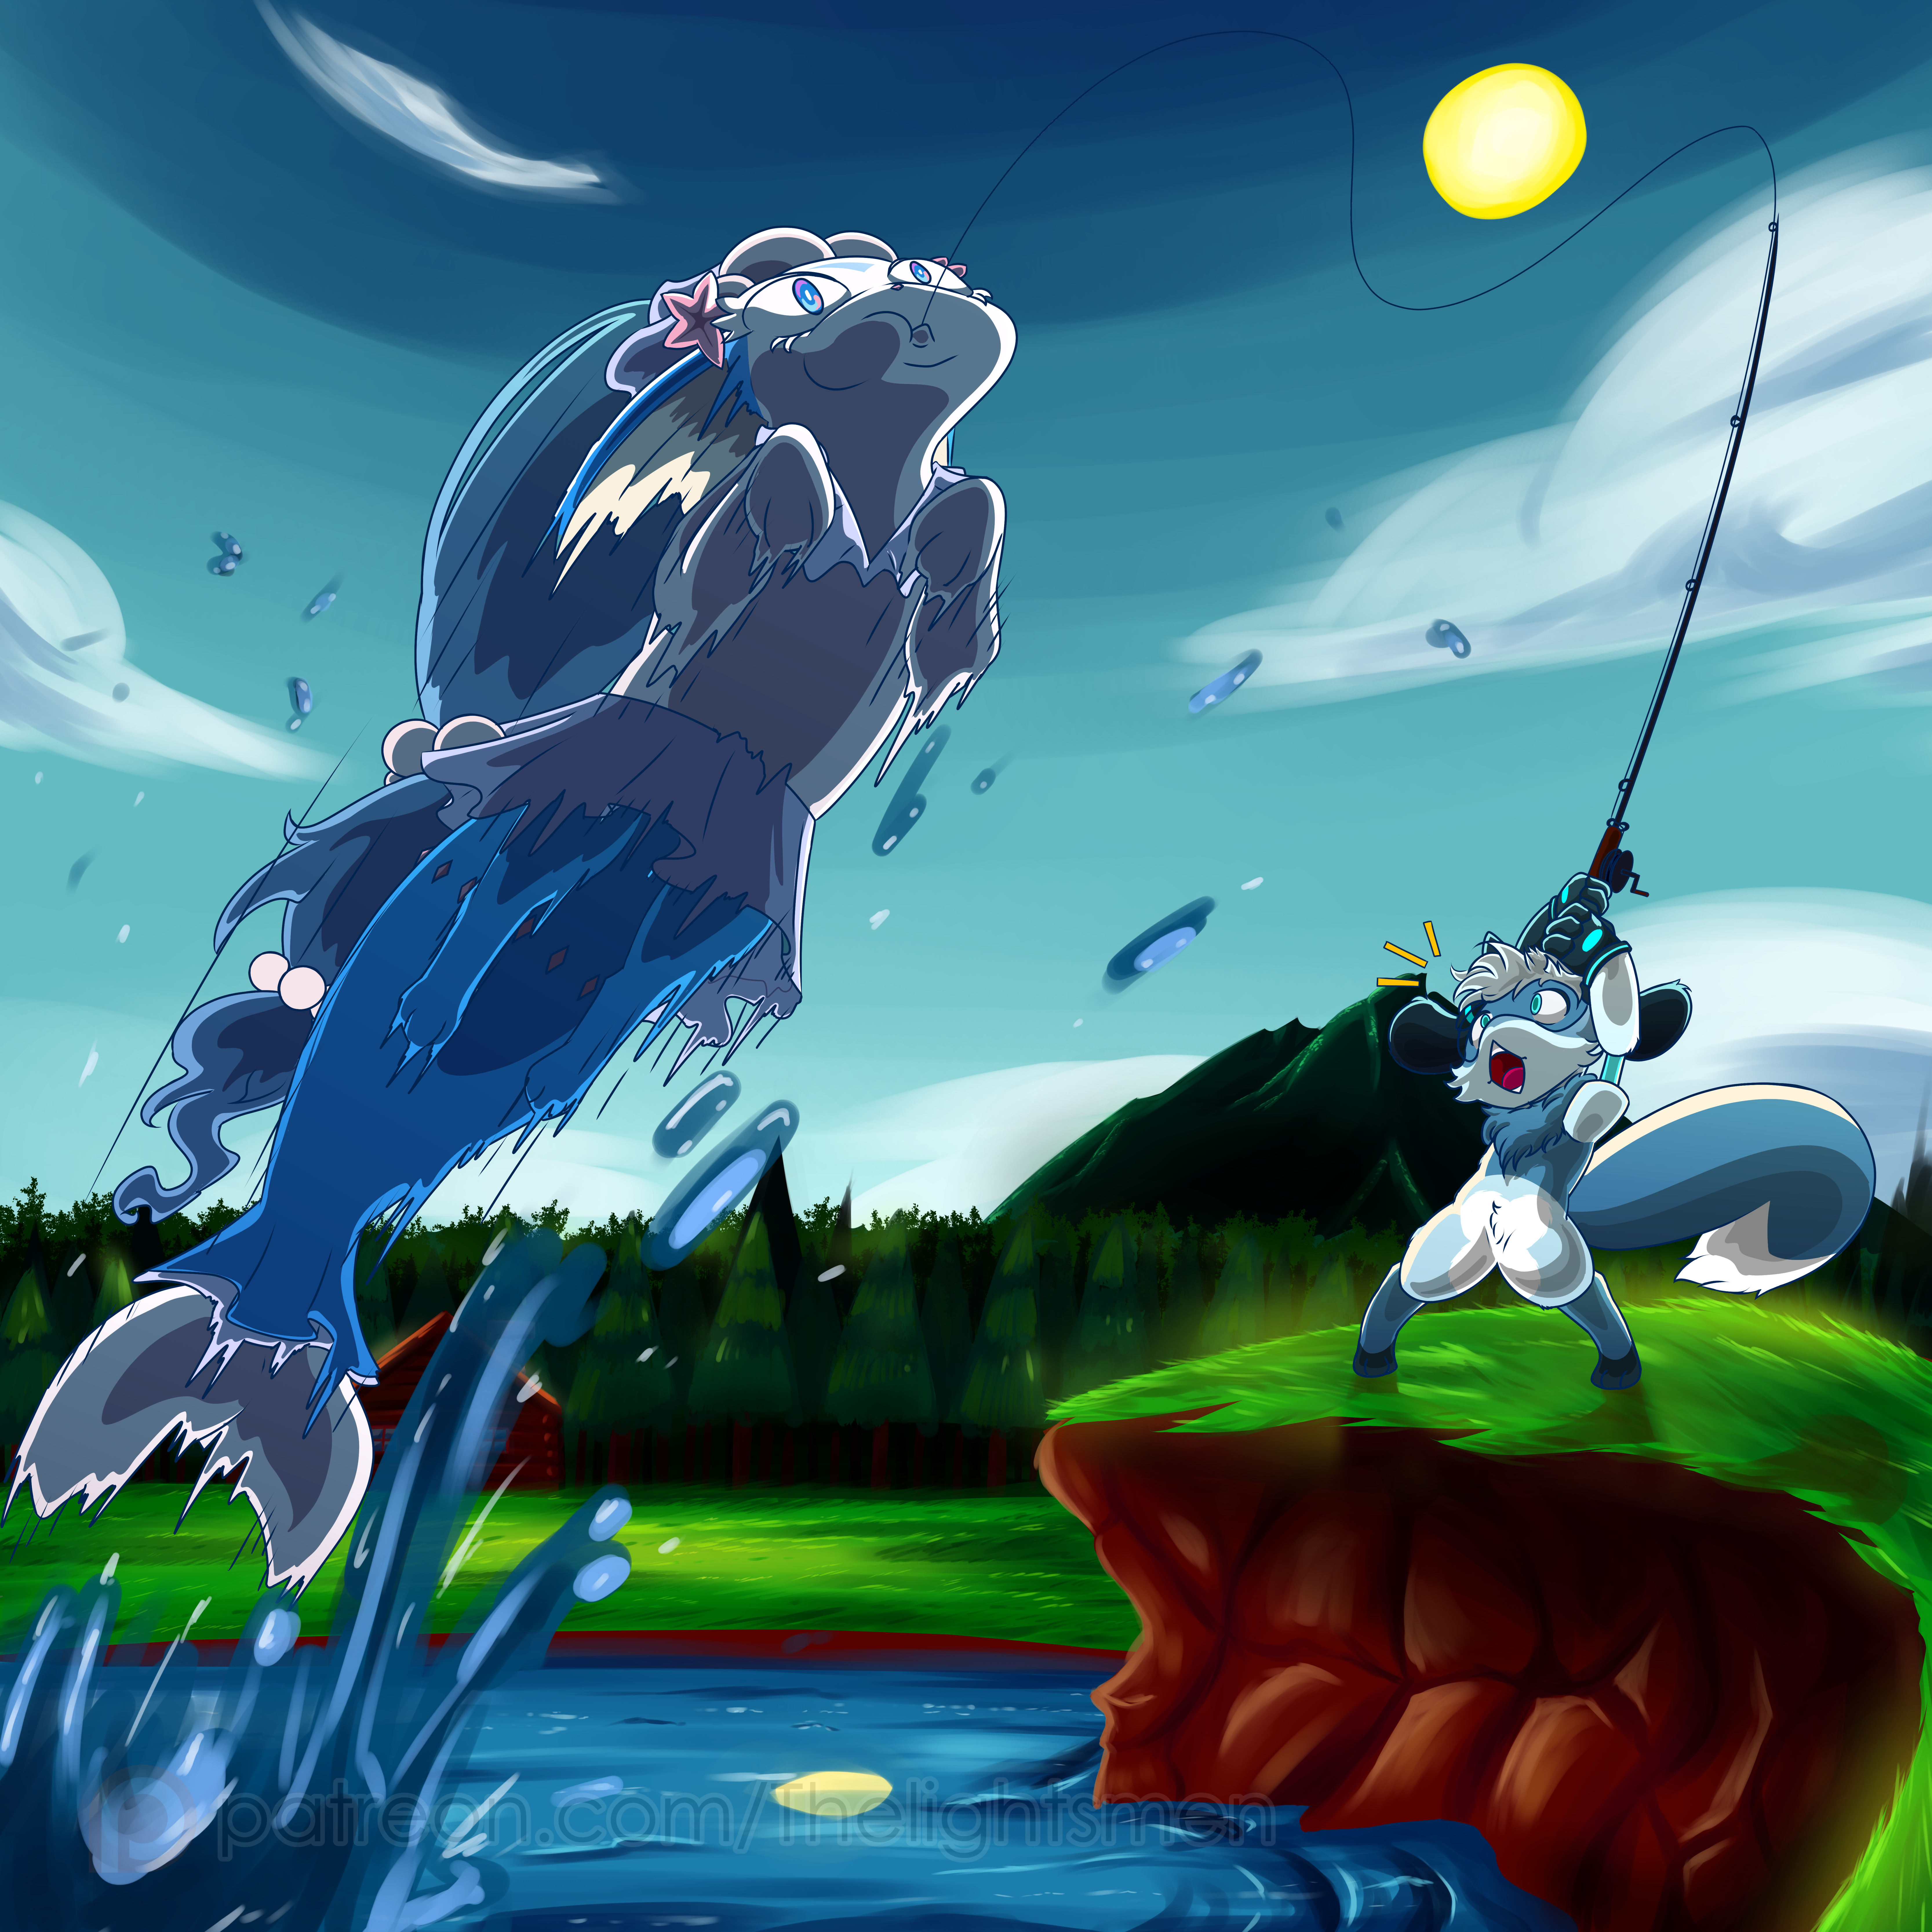
- 12- Water splash Foreground: I add a very important piece of the bg for the environment which is the water going up because of the intended movement featured in the pic.
- 13- Bg | Extra effects: After everything is in place, I add some extra visual effects to the background (in different layers found in each corresponding folder for each section) such as glow and some color correction, and also some reflection of the sky in the water.
- 14- Extra visual effects: I add several extra effects needed to make the picture pop out properly, like godrays, some sparkles (always found in water drops when hit by sunrays directly) and of course the proper colors for the visor on the Riolu.
- 15- Final touches and Signature: Last but not least, I add two more layers meant to convey the strong light from the sun and the shadow produced by the left character, and of course the final signature I always put on my drawings ^^
Files