Home
Home

 Artists
 Search
 Recent
 Random
 Posts
Posts
 DMs
DMs
 Tags
Tags
 Random
 Importer
 Import
 FAQ
FAQ
 Account
 Register
 Favorites
 Login
Login

Asuna Bunny ver. (sculpted by Tomogomafu) wip part2 (Patreon)
Content
◗ Dry fitting
After sanding the entire piece, temporarily assemble it (dry fitting). First, consider how to ground the base and high heels.
You could use geta parts as they are, but the whole hair part is heavy and the axis of the foot is made of resin, so it is a little too heavy...so I changed to a stainless steel round bar.

This clear geta was made by molding geta parts on oyumaru and making it by myself using UV resin. Although I made it for the sake of appearance, I don't think there was much point in making it clear because it would have been a waste of time. But the change from a resin axis to a stainless steel axis should be effective in preventing tipping.
The stainless steel round bar was cut to the required size using a high-speed cutting machine. However, it is faster to buy dowel pins that are cut to the specified size from the beginning.
The hair can be assembled without fail by following the instructions. There are a few places where you may need to add pins, so please add them as you see fit.

There is a resin pin part, but you should think of it as a guide only. Thin pins usually break, so it is safe to replace them with brass pins.

As written in the instruction manual, the part indicated by the arrow and red frame must be removed to get a tight fit.
Note that it is easy to dry fitting without realizing it.
Once the left, center, and right tassels are assembled, it is a simple matter to match them up.


The resin pin of this arm is also prone to breakage and should be replaced with a brass pin. Or, you can put a brass pin through the center.
I thought it would be OK, but it broke normally, so you should not trust the resin pins too much...

When these resin pins break, they are usually completely buried in the concave side.
It is very difficult and almost impossible to pull it out. So it is easier to re-carve them with a drill instead of trying to pull them out, and then replace them with brass pin, which are stronger.
When built Halo, it is better to assemble it so that all the rings are parallel. If they are not parallel, it will happen if you insert them upside down.

Since the transparency can be maintained by gluing and fixing with UV resin after painting, it is safer not to do any processing when temporarily assembling the model.

◗ mold release agent removal

To remove the mold release agent, simply put the solvent for painting in a zipper bag or Tupperware and let it sit for about 5 to 10 minutes. If you have sanded the entire surface to some extent with #600 or so, you should have no trouble with that.
I feel the importance of sanding the entire area, because if sanding is insufficient, paint may come off with masking even after solvent soaking.
One thing to keep in mind when sanding the entire piece is that kits made with the easiest way to cast resin may contain air bubbles throughout the entire piece.
Therefore, if in doubt, it may be safer to use #600 or higher, or to use the conventional mold release agent remover: neutral detergent, lukewarm water, and cleanser.
The degree of air bubbles can be clearly seen by looking through the part near the light.

Oh no..
This part is from another kit with the bubbles already filled. It is easy to see how much air bubbles are present when you look through it with light like this, so you might want to try it at least once with the kit you have.
The presence or absence of air bubbles is not a matter of good or bad, but rather a matter of convenience in the casting method.
Consider yourself lucky if there are no air bubbles!
This Asna bunny was duplicated by a casting specialist and was virtually free of air bubbles, so I just sanded the entire piece plus the solvent for painting.
When soaking parts in thinner to remove mold release agent, be sure to ventilate the area, and if there are sharp parts, double bag them or put them in Tupperware. Remember to wear solvent-resistant gloves and glasses when pulling up parts.
◗ Painting
The number of colors used for Asuna bunny is small, and once the color mixing is perfect, all you have to do is paint it, so do your best to mix colors.
I used the same colors I used when I painted Hose-san's Asuna Bunny. So I think it is easier to understand the color mixing if you refer to the color mixing page.
▶ [Asuna Bunny wip 3] Color mixing and painting, eye painting process - to completion
This color (per color code 0090A8) is close to the key color for bunny clothing and other items.

I use this for hair. I toned this color myself, but a ready-made color that comes close is Sinai Gray.

If I want to get closer to the official version, I feel that the bunny clothes should be blue-greenish, and the hair should be brownish with low lightness and saturation. The hair coloring in particular is unusually difficult, but I did my best to get close.
In my case, the base color in the photo above is made with a white-surfacer base, with brown, red, yellow, and a little bit of black added. I recommend making a lot, because if you make a half-assed amount, you will have trouble when you run out. The colors are safe, so they seem to be very versatile, and even if you have a surplus, it won't be a problem.
Apply a solid coat of this base color, which is fine, and then apply a thin overcoat of black for shade to the tips of the hair.

The color may seem brighter than expected while painting. In this case, use a shade of black (CMY mixed with a trace of pure violet to neutralize the greenness of the color) as the base color, while reducing the saturation.
I think it is enough to paint like this. The shade at the ends of the hair was too much, so I used a base color to soften it later.

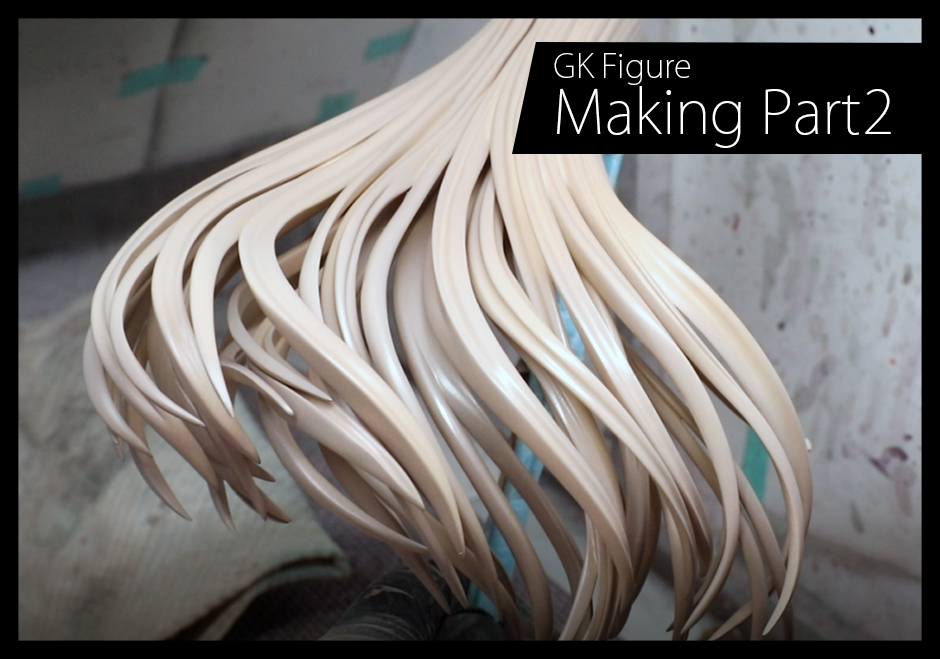
It is easy to see the shade in the forelock.

A slight gradation of shaded black is used toward the ends of the hair.
The difficult thing about Asuna's hair is that it is difficult to use drastic highlights and shades because of her hair color, as well as the color mixing.
The base hair color itself is low in both brightness and saturation, so it is difficult to add highlights. So I had to go with a safe shade.
As for the tights, there is no need to paint from the skin tone, so I alternated between lighter brown and purple.

It's a brownish color, not skin tone (just to be clear).

Apply a small top coat of violet color to the shadow areas. Do it alternately to get the state below.

Files