Home
Home

 Artists
 Search
 Recent
 Random
 Posts
Posts
 DMs
DMs
 Tags
Tags
 Random
 Importer
 Import
 FAQ
FAQ
 Account
 Register
 Favorites
 Login
Login

Moar wood... now with some paints! (Patreon)
Content
My friends, I've been on a bit of a painting frenzy over the past couple of days. To make a long story short, I've applied a base coat to almost everything (except the metal details, really).
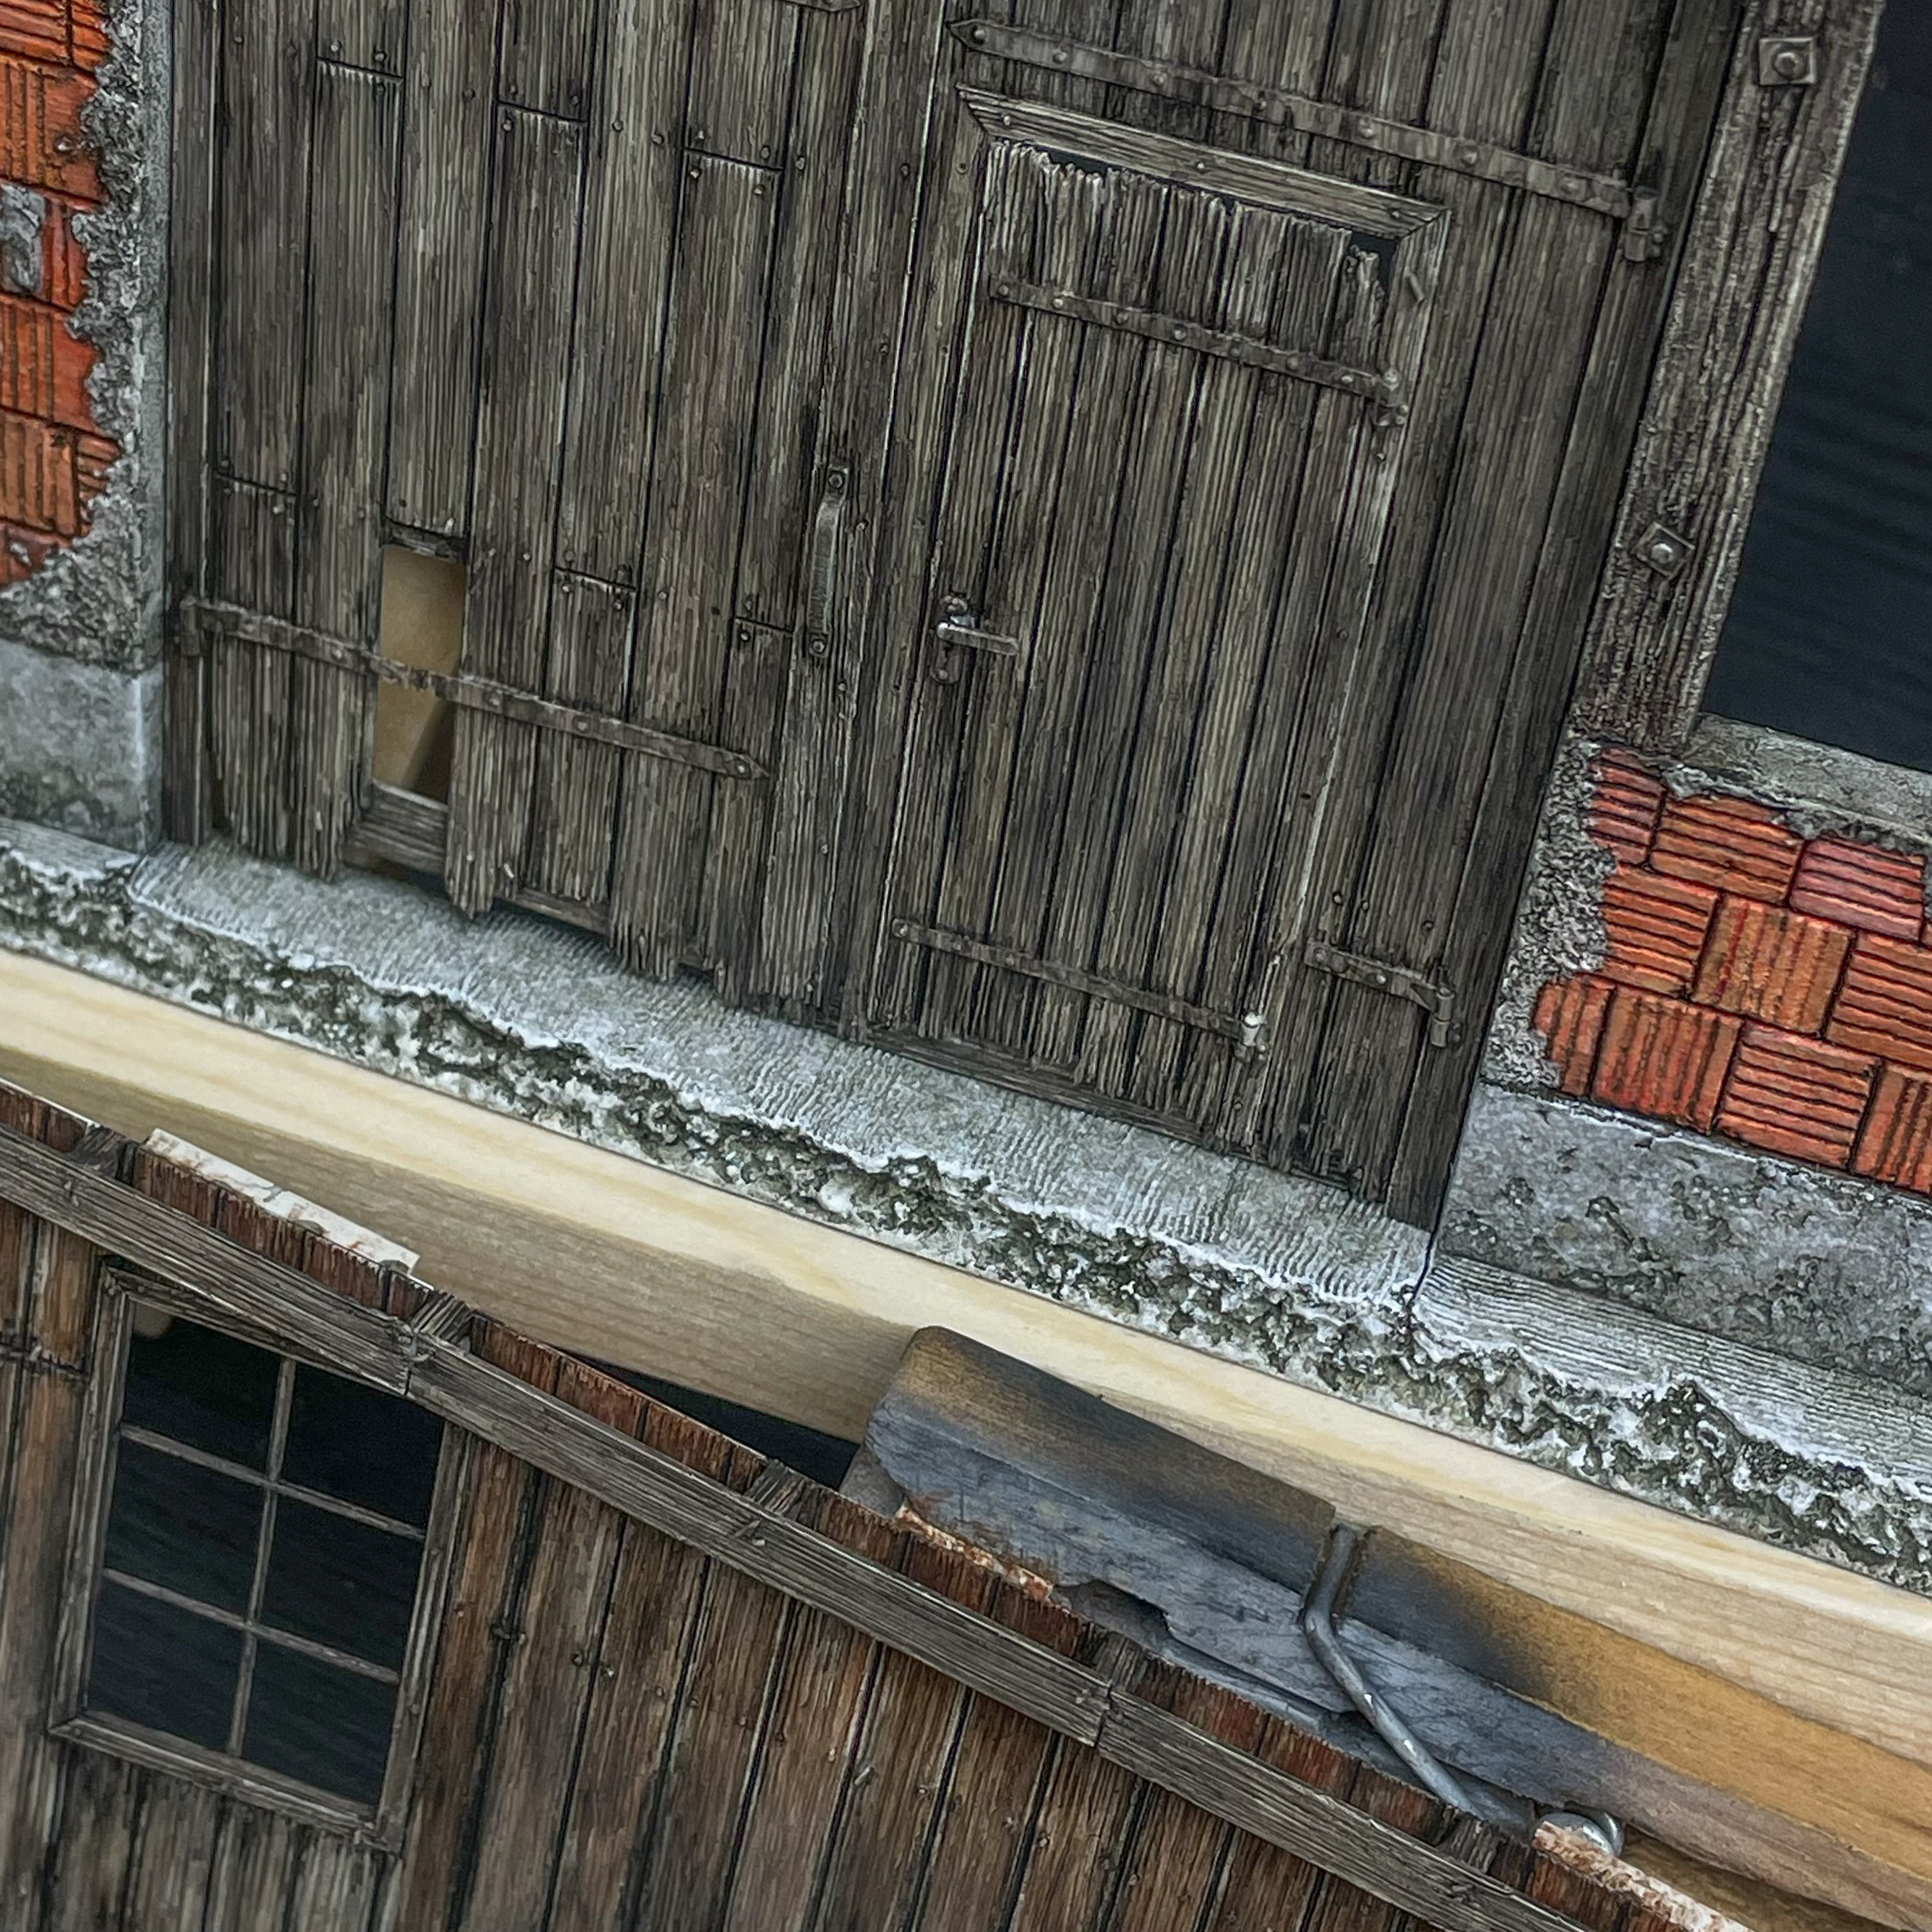
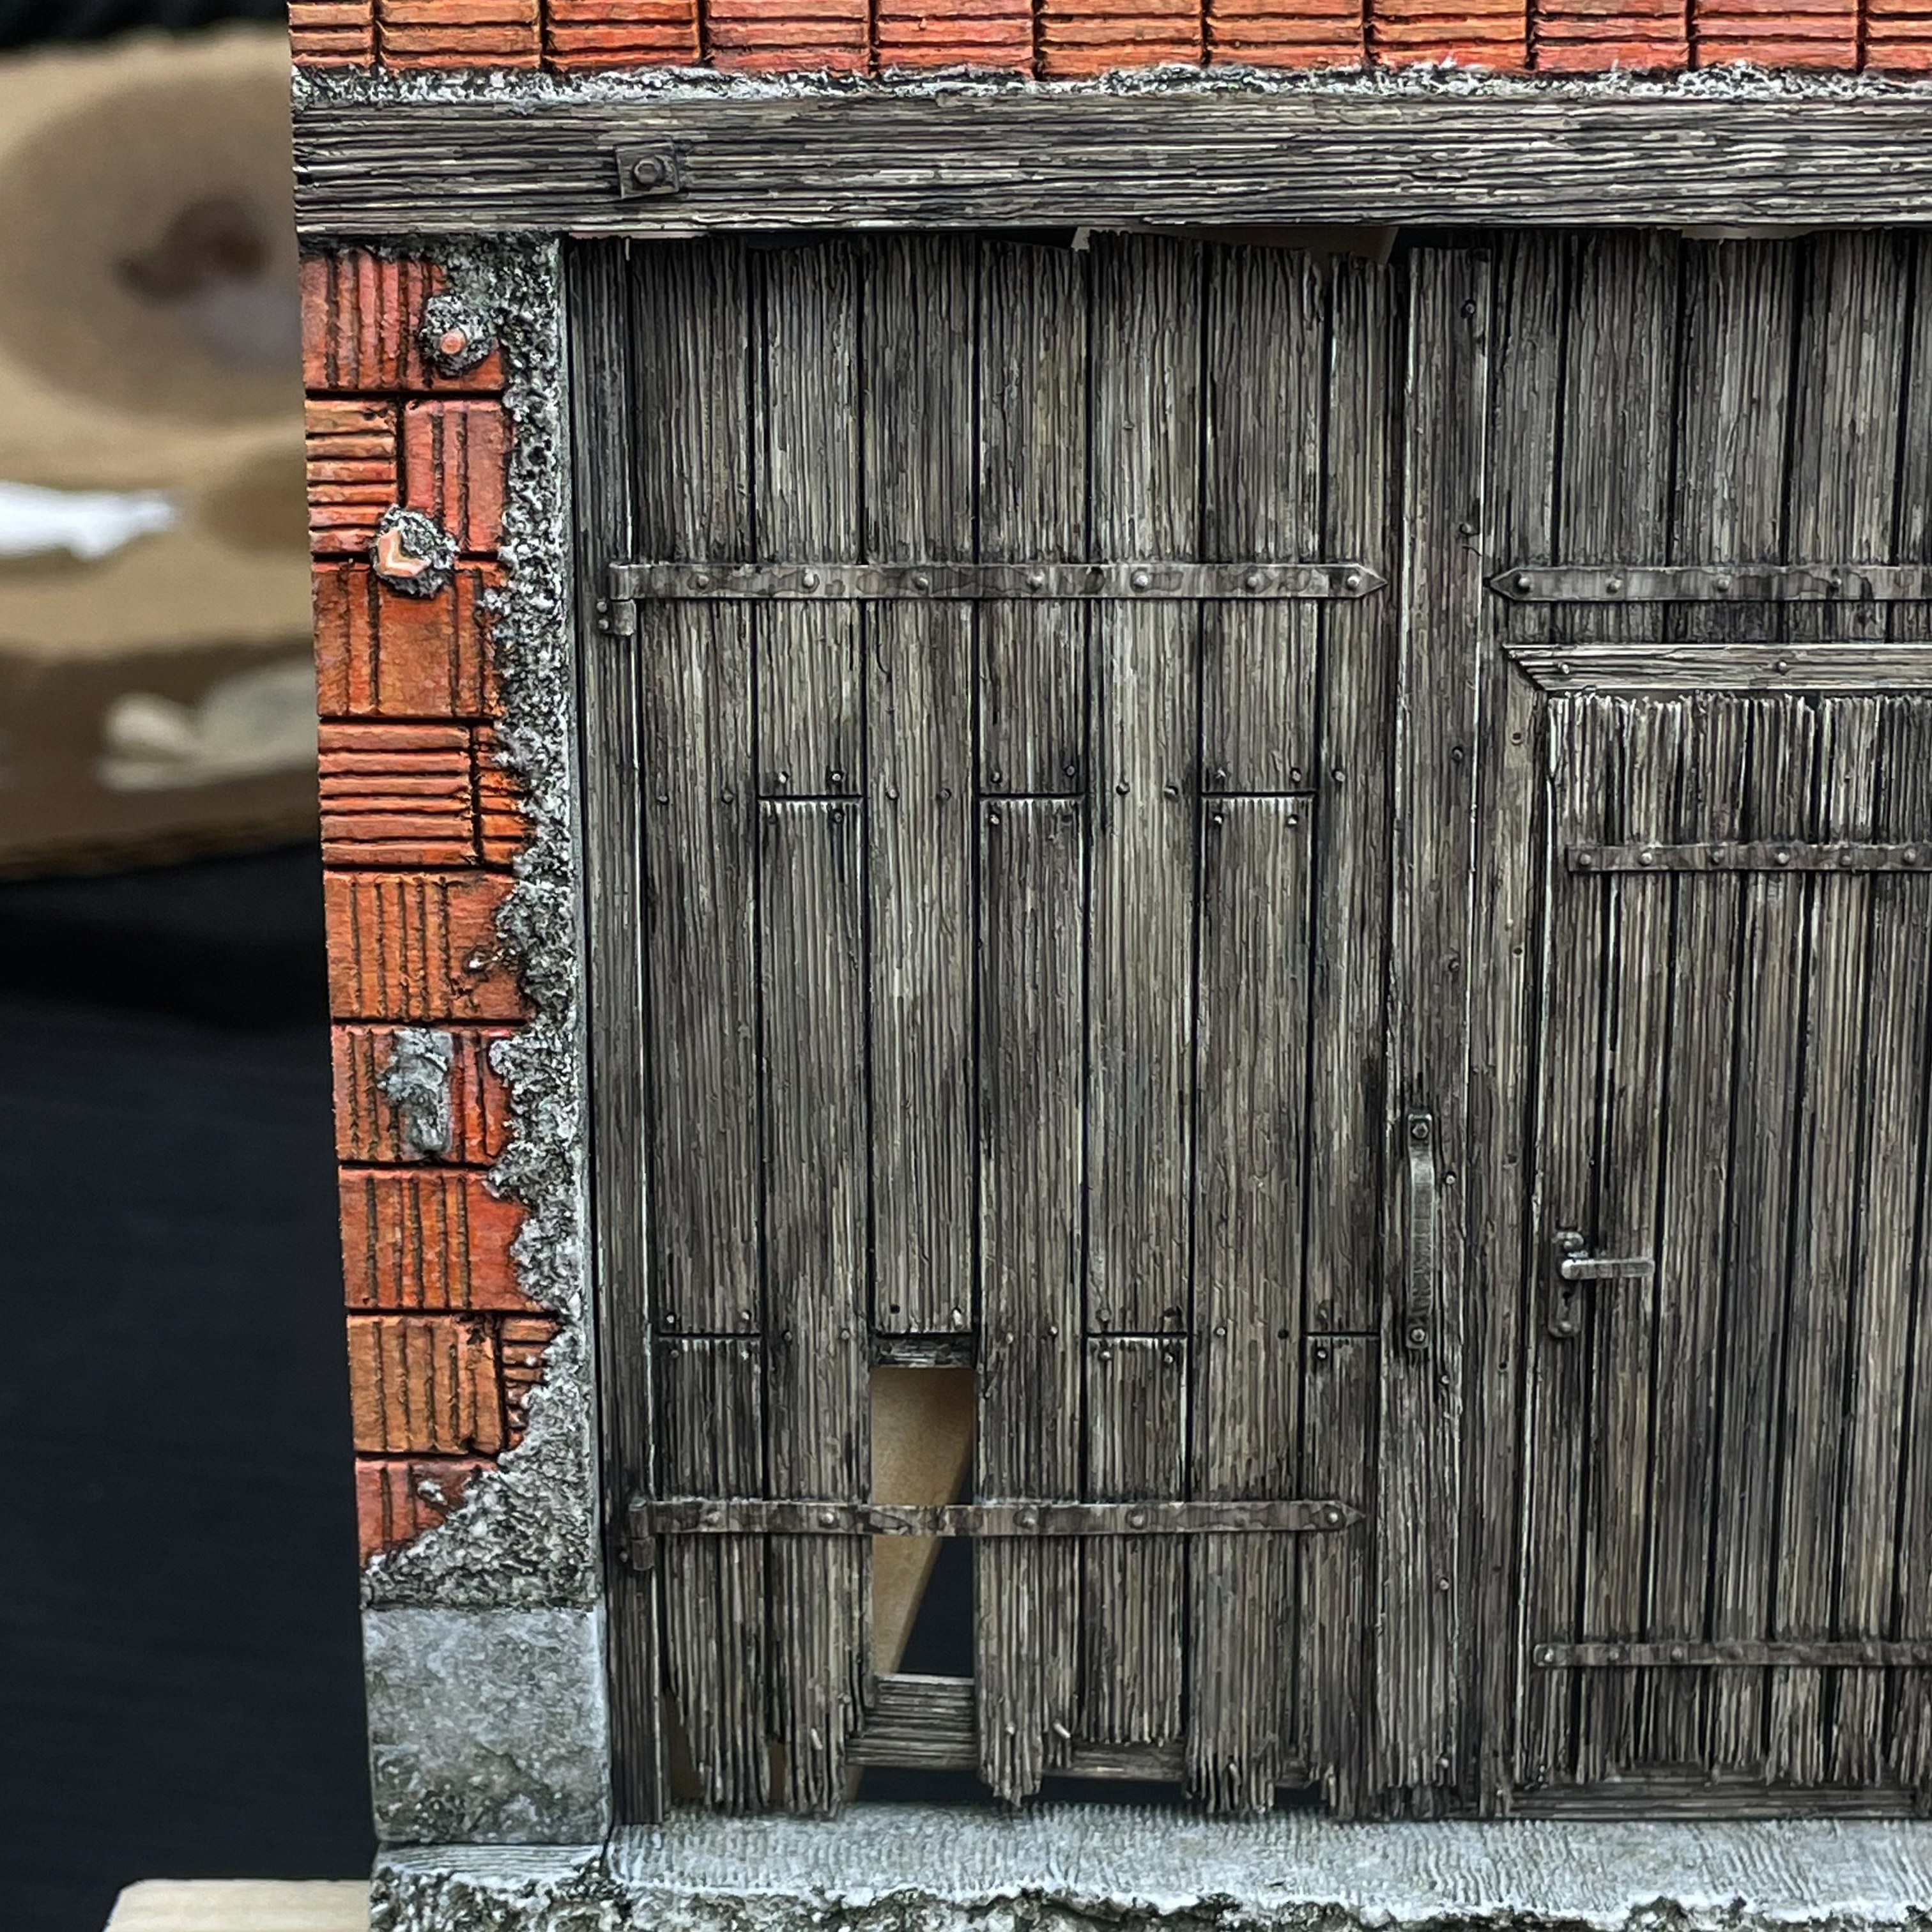
Now, how about a different wood painting technique... in all the previous cases, I started with acrylics over a white base coat, and then continued with inks. What if I told you that this method is much easier than that? And it's done with oils!
It's basically the same thing as an oil dot filter on armor models... but heavier, messier, and pretty cool! Of course, there's a lot of upcoming effects and this is just a base layer. It's basically just a layer of blended oils, and a quick wash with diluted black acrylic paint. The only wooden part that's finished is the large panel that's gonna be propped against the wall. And the small planks, too :)
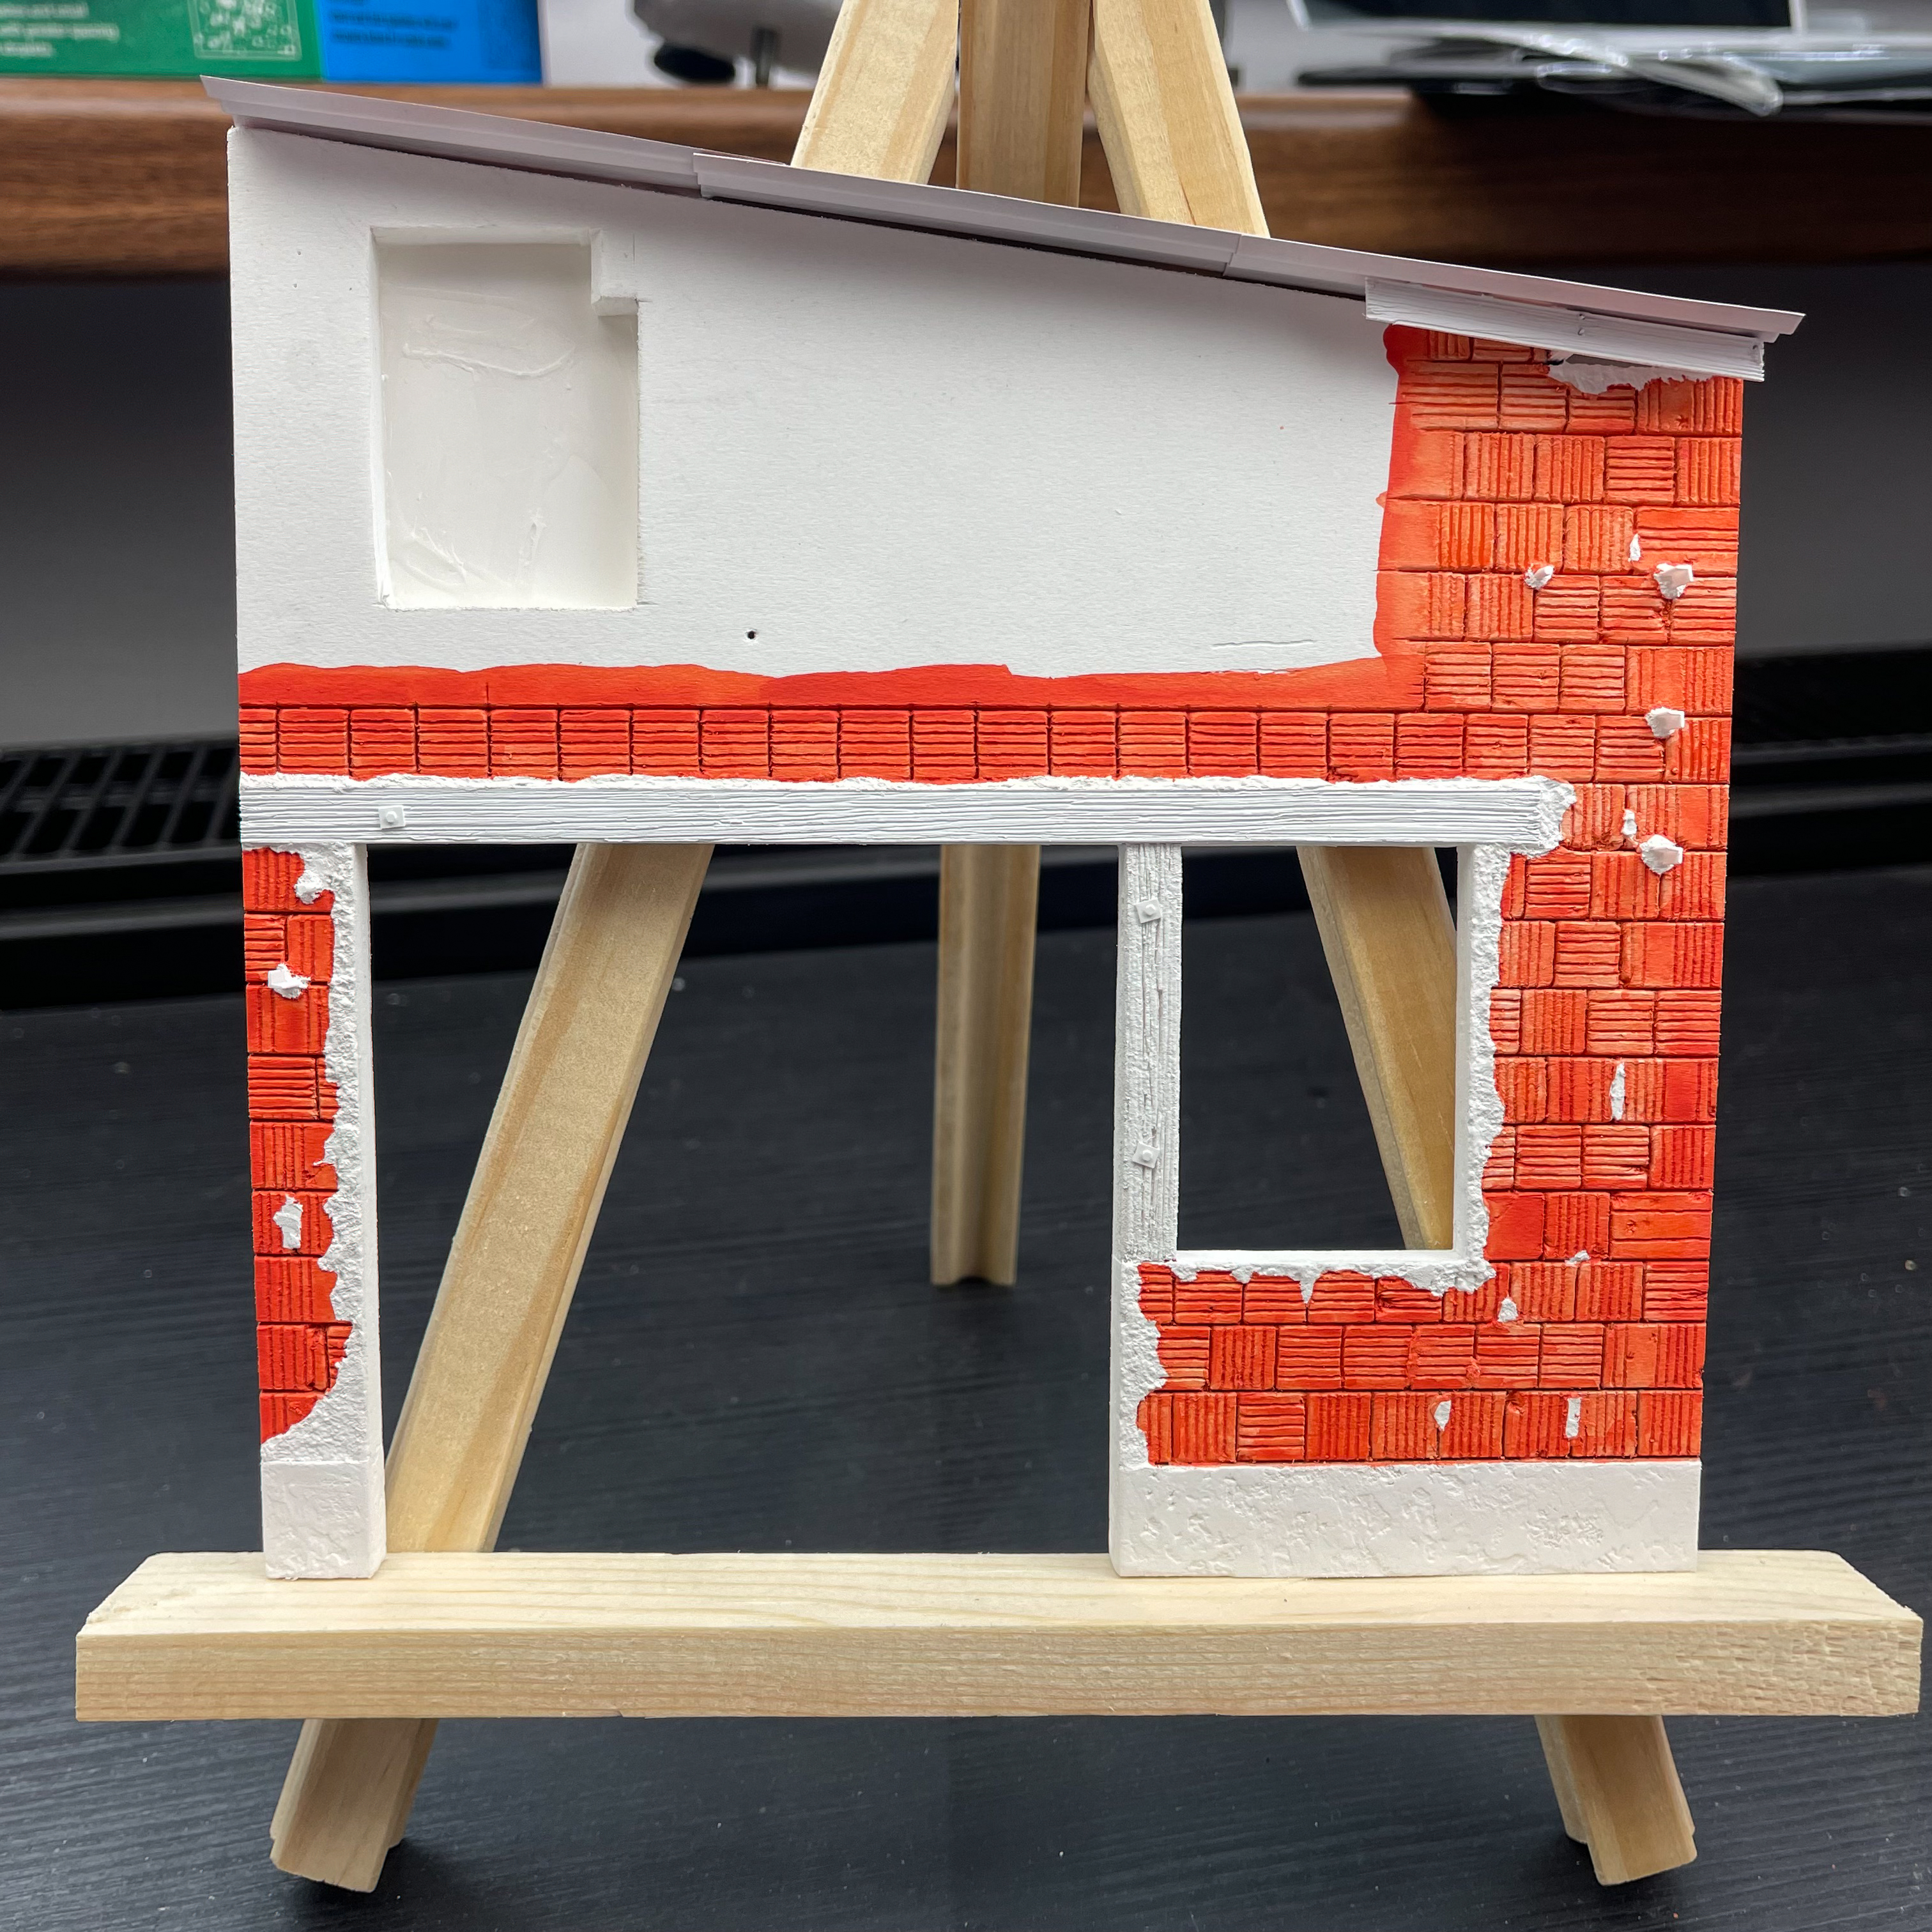
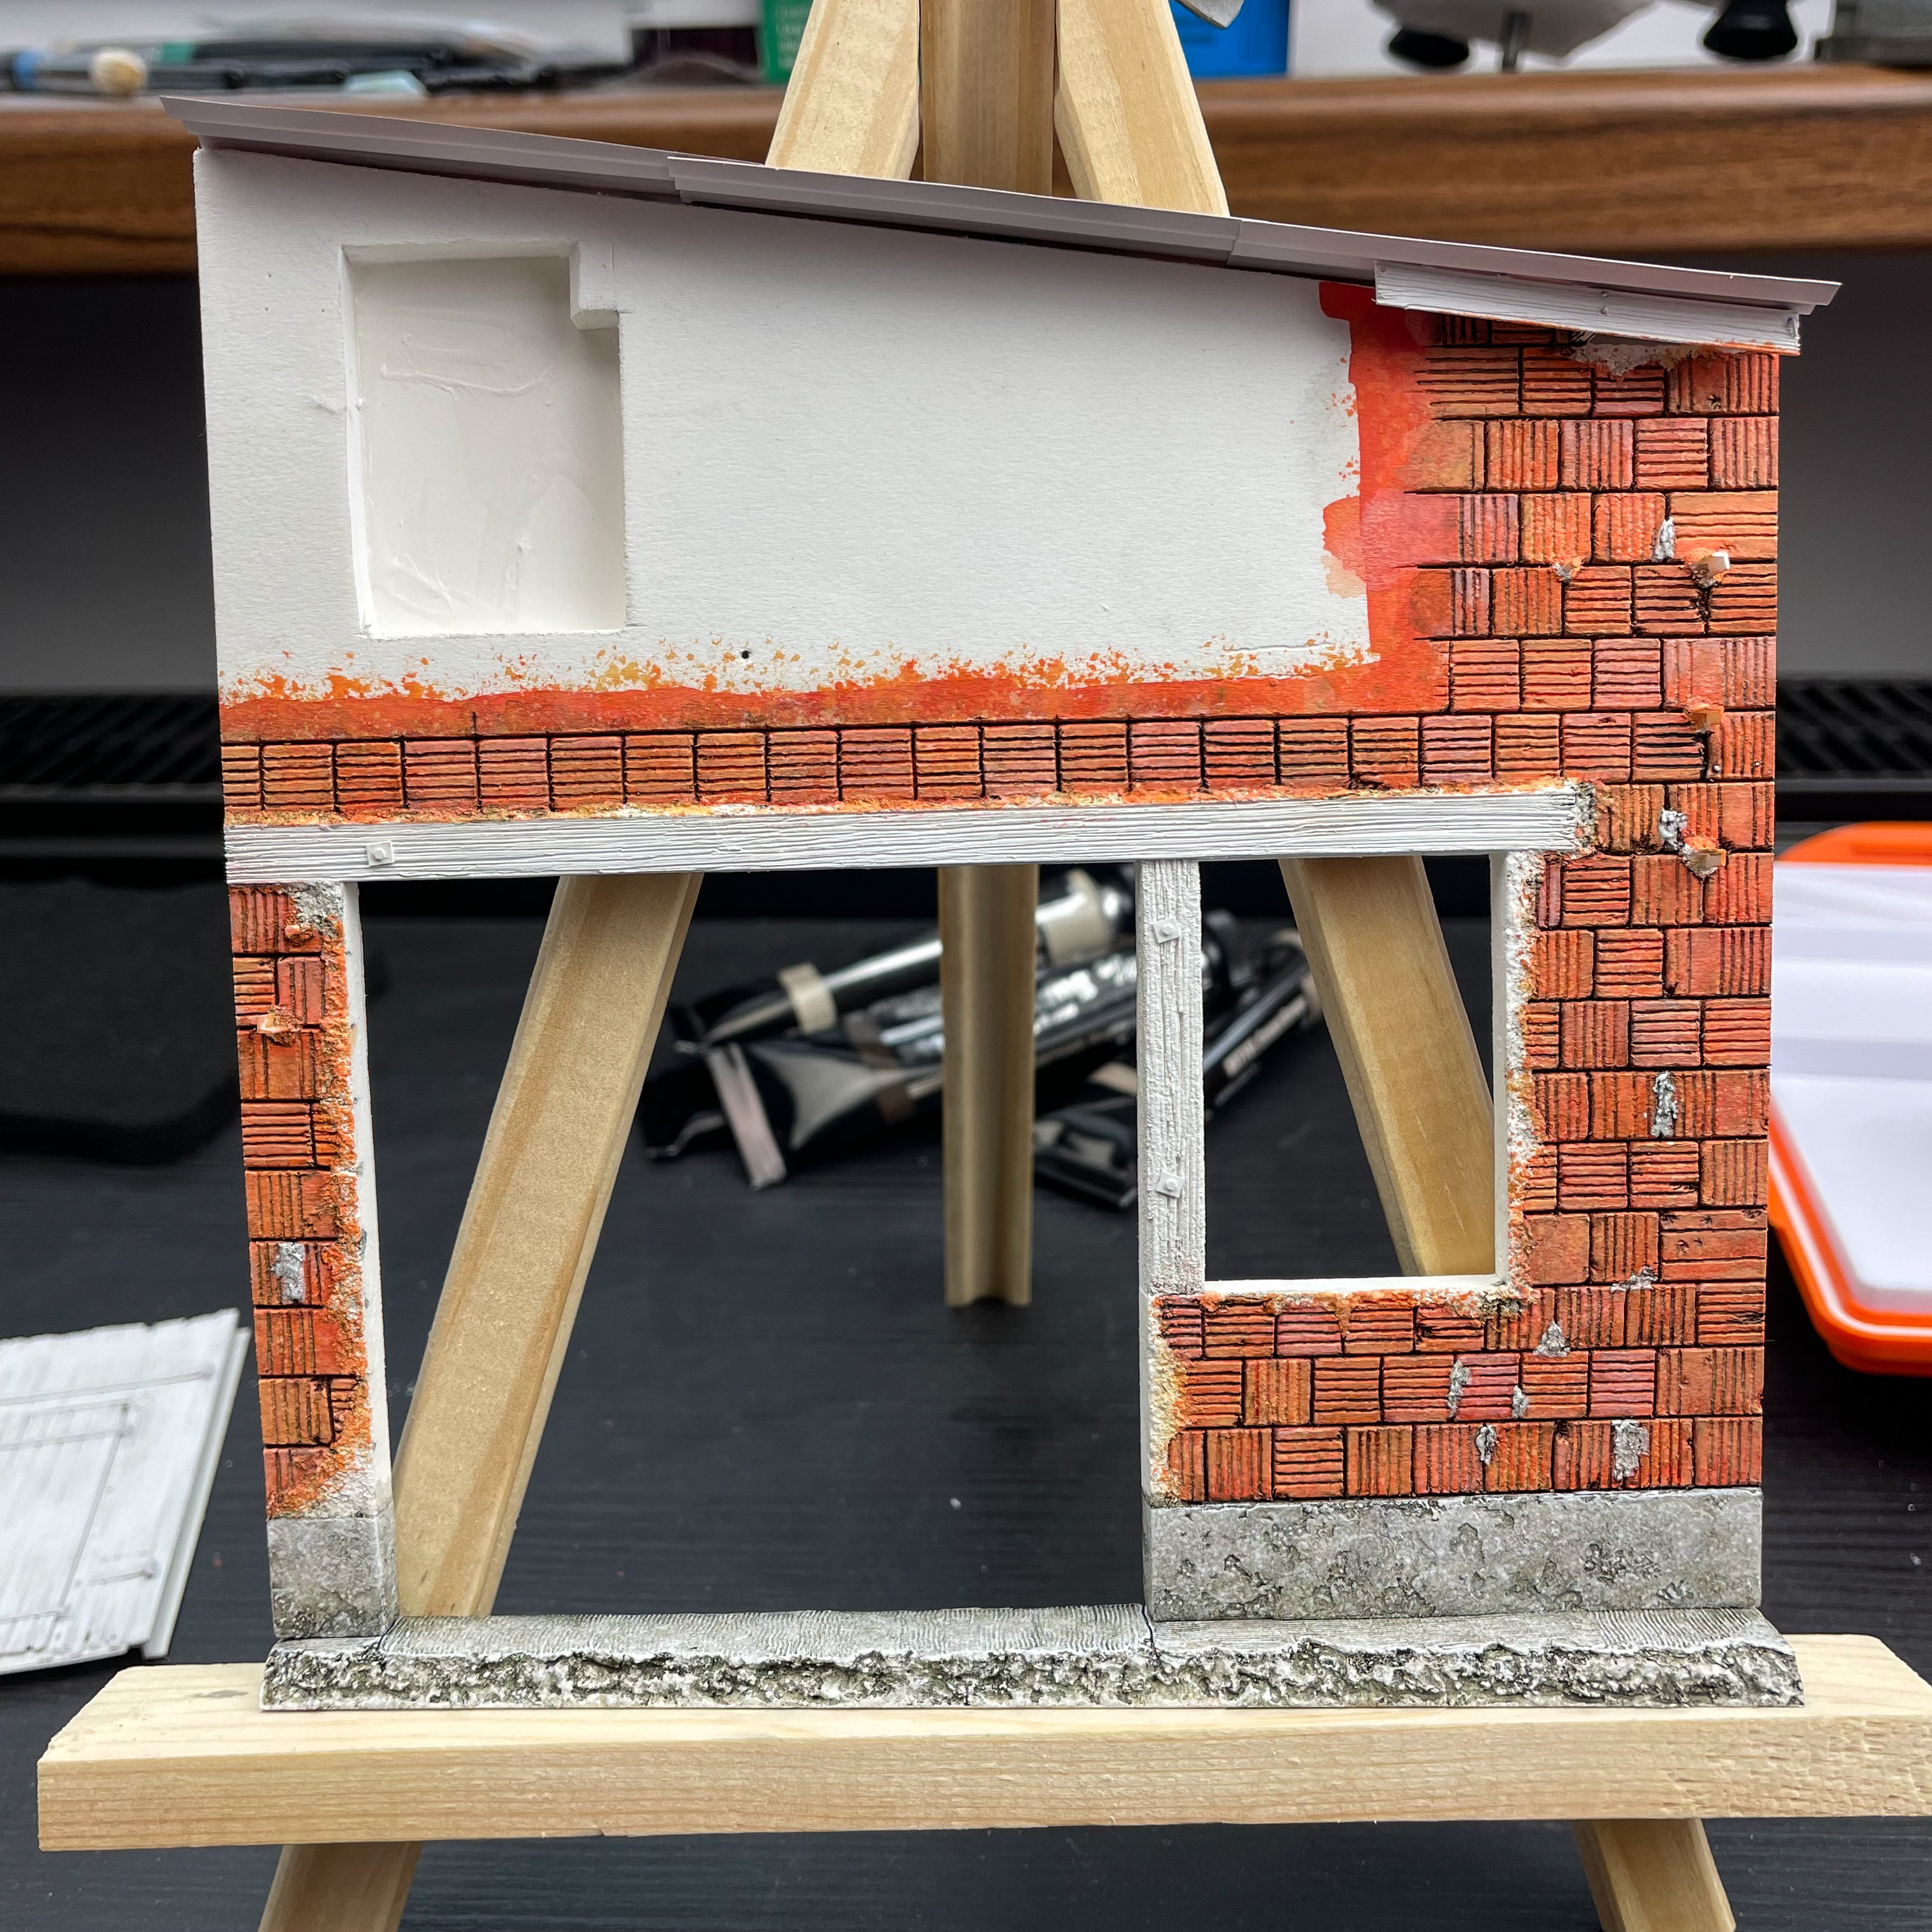
The wall itself has just some basic things applied. The only part that's more or less finished is the concrete terrain and the foundation. The bricks, cemented jambs, and wooden beams are just base coated.
Now, this has been so much fun, mainly because the material is so resilient. It was such a joy to finally treat a facade with enamel washes! Also, because the bricks are quite large, I painted them with sponges for some extra variety and texture. We'll see how they turn out after I add the mortar lines!
To sum it up, I wanted to prepare the basic colors on every surface and give them some time to dry. Next I'll probably focus on the wall and let the wooden oils to fully cure, because it's not too advisable to slap enamel washes on top of them immediately!
Files