Home
Home

 Artists
 Search
 Recent
 Random
 Posts
Posts
 DMs
DMs
 Tags
Tags
 Random
 Importer
 Import
 FAQ
FAQ
 Account
 Register
 Favorites
 Login
Login

Dev Blog 12 - Behind the Scenes of Pixel Art (Patreon)
Content
Helo Everyone and Welcome Back to another Dev Blog Session.
Now that the finished animation was uploaded, here is some backstory.
This is not really a tutorial and I'm not a pro teaching you. I'm merely sharing my experiences and excitement with new tools I tried out.
I'd love to hear your thoughts and experiences too, so feel free to comment below.
----------------------------------------------
IMPORTANT: I have pasted moving GIF images. These are not playing on the Patreon app correctly. Either view this in a desktop version (you can do it on your phone too in the browser --> Switch to Desktop Mode), or you can watch those by opening them from the attachments.
I was reluctant first to use Aseprite, because I didn't want to learn a new program, if I'm not even that pro with others either. I didn't want my knowledge to spread thin, I would rather have a solid foundation.
So, first I tried the programs I already knew. Manga Studio, which was OK, but couldn't animate and was missing some tools and needed too much setup to work barely good.
Then I tried Toon Boom, because that's what I usually use for animations, but it has a built in anti-aliasing engine, which makes it impossible to MAKE pixel art. I can turn off the AA for the render view, but that only imitates a pixel art. So whatever I drew was actually a very smooth shape/line, converted to pixelated-style. In theory it works, but in practice I often didn't know which part to color so that my rendered view would color my desired pixel.
Again, with some practice, this can work, and it's possible to make still images this way, but because the actual drawings are smooth and the render view only calculates from their average position a pixelated view. So basically, I could draw a shaky smooth line, which would turn into a sharp pixelated line. But once I move anything, the calculation will be off, because the shaky parts are not necessarily in the middle of the "virtual pixel", so the color disappears.

Here is an example, same drawing, just with a rendering filter.
Long story short, for still images or slideshows it's good, but nothing else.
If you know Mabit on Twitter (@im_mabit), you know that he is making gorgeous pixel animations and he uses Aseprite too, which is a very simple and intuitive program, designed for pixel art.
First I ported the first frame of the original animation from Toom Boom to Aseprite. Which was just a total mess, taking Screenshots of every layer (because exporting makes them smooth again), and chopping everything to the necessary parts and pieces again.

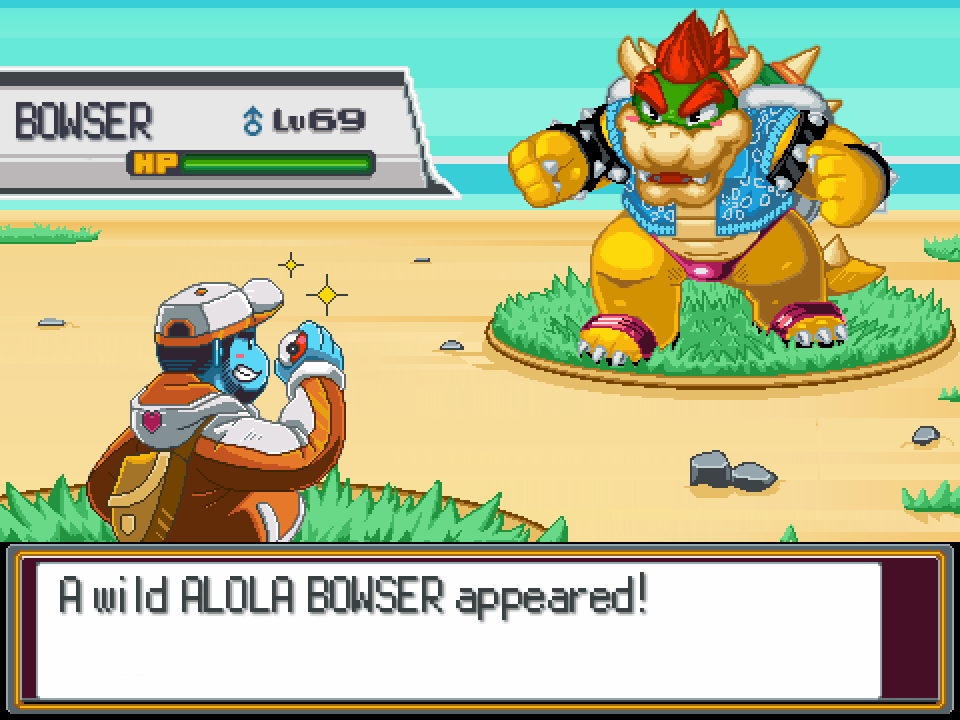
(Attachment: ALOLABOWSER.gif)
(Because Toon Boom has no tools to handle pixel art, I used tweening and sprite manipulation which looked very artificial but I had no better idea at first.)
I removed the original poke trainer but first I was only testing out the tools, didn't know yet I would redraw him too. At this point I already had a vague concept of what I WANT to draw. Another question was what I actually could draw. XD
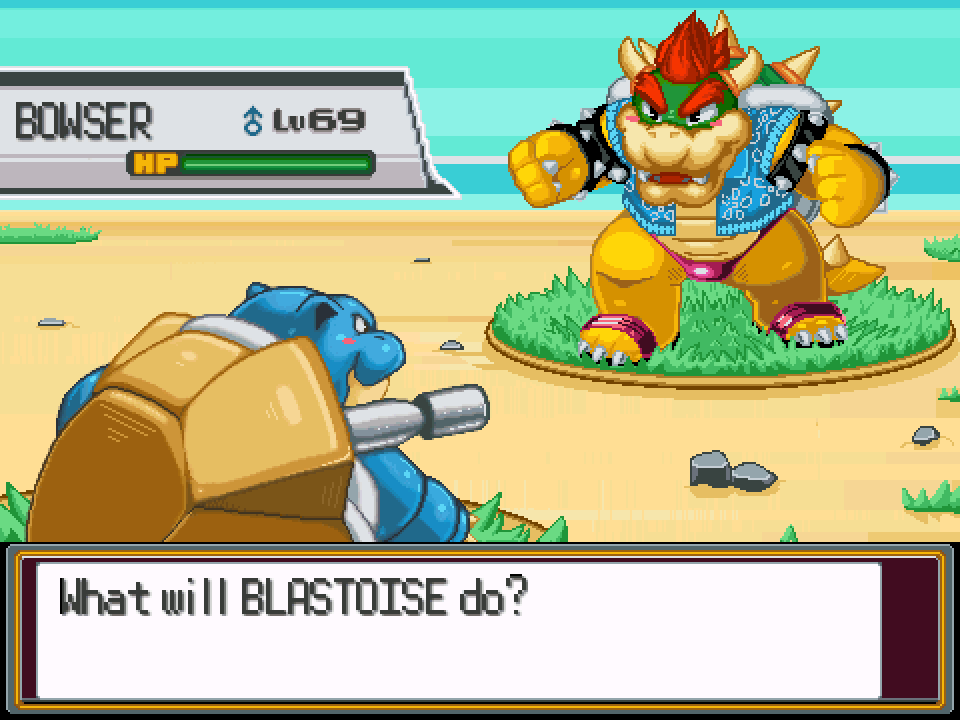
So I looked at a bunch of Blastoise references and made a rough colored base image.

I was happy with the head but not the shell, so I redraw that part and started to use the "blur tool", which is a very cool tool for making pixelated lines less jagged.

Which at first was a really big help, but I made everything look too soft and mushy, so I had to clean up the whole sprite afterwards and leave only the most necessary softenings. Basically how I interpret is: If a line is too steep, is needs 1 inbetween pixel to be softened. but if it's a standard 45-degree line, where only single pixels make the line, it's not needed. Otherwise the line will look too thick and mushy. Those lines are just fine without any "AA"

So, with that knowledge, I drew Blastoise... but on one layer, so I couldn't animate him at all. Then I cut the body parts apart, added some extra color to the parts where would show empty, if nothing was overlapping them in the animation and created several layers.
Bowser has around 7 layers, Blastoise 3. There were more, but I noticed I can merge some. At the beginning it's ok to have many layers, as long as I can keep track on what's what.
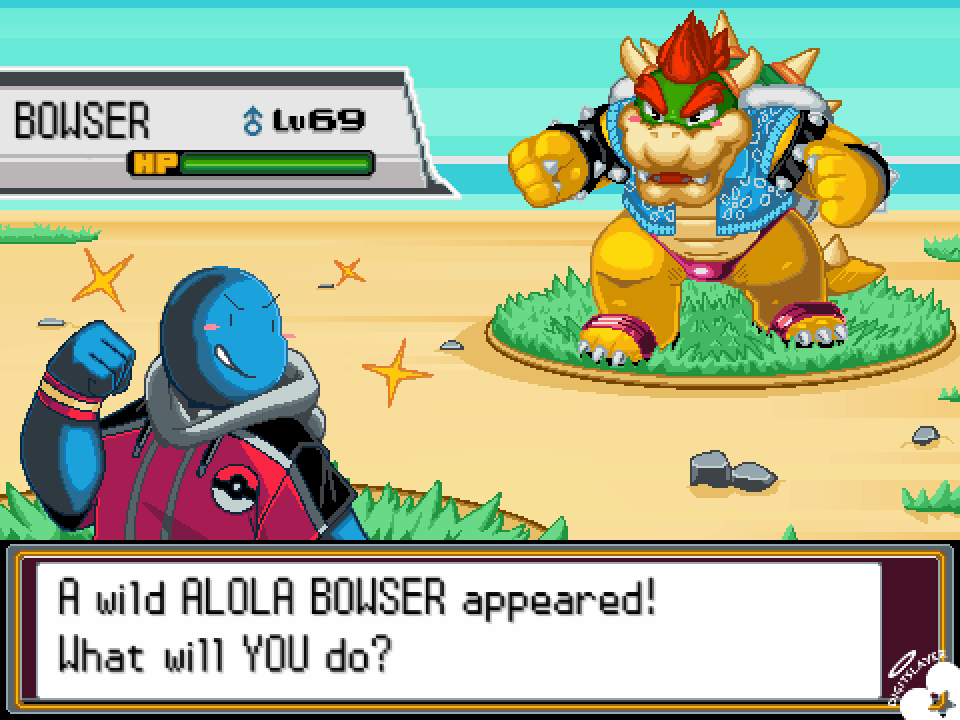
Then I used simple pixel animating, and created this loop.

(Attachment: WIP_LOOP.gif)
GREAT! Finally something to work with. :)
From that point I was progressing a lot faster. First I made a small concept about how to make Bowser fall. The first frame of him, standing on 1 leg was just an alteration of the standing animation. But the 2nd frame was a completely new sprite.
I did first a basic sketch for the pose, which looked like this:

It was 2am and I just wanted to put in something I could work with on the next day :X
But I also added the shaking effect.

(Attachment: WIP4.gif)
After that, I spent the whole day with looking at references, and rebuilding the sprite... It was a really really long day XD And my biggest problem was, that even the 5th sketch, which I used later, looked weird, my eyes were simply not used to pixel art. then I added the colors, still weird... but once I added shading, it finally started to look good and I was super happy. ^^
This was the end product:

After this I fine tuned the effects but wanted to add an opening sequence too.
So I redrew the pokemon trainer from scratch. I did it on a different file, and didn't think about the size... usually when I resize something (vectors for instance), it stays sharp. But pixel art gets jagged and chunky, or even if I use pixel resize, it's a bitmap image and not a vector, so all the lines will be very thick.
Therefore, I redrew him again, that was V2. added him to the scene, but he was too pixelated. At this time I was a bit more accustomed to the blur tool, but instead of that, I used the brush tool and added my colors. it's not as fast, but with practice it's almost as fast and the result is better (blur makes semi-transparent pixels, which can be a real pain when exporting, es GIFs don't support that, only completely transparent or visible pixels.)

Which resulted in V2.5. This was the last sprite I did for the animation so at this time I was a lot faster and was more confident about what I was doing.
I readded him to the scene and I was almost done. BUT he was the only character not moving at all. So I invested a bit more time and made him move a bit, same way I did with the other.
Then I added the necessary text, panel, some effects and I set up the framerate.
I use a variable framerate, because some parts need to be more fluid, I used 10ms for those (like the fade-in part), and some parts use 50ms (half a second - like the idle animation, I didn't want the character look like they just ran a marathon :) ), Of course I could've raised the framerate in general, but I wanted the animation to have a bit of a retro feeling. I had other speeds too, but I tried to keep it in unity and only used these 2 in the end.
Files