Home
Home

 Artists
 Search
 Recent
 Random
 Posts
Posts
 DMs
DMs
 Tags
Tags
 Random
 Importer
 Import
 FAQ
FAQ
 Account
 Register
 Favorites
 Login
Login

Slant Caddy (Patreon)
Content
Howdy, wonderful people!
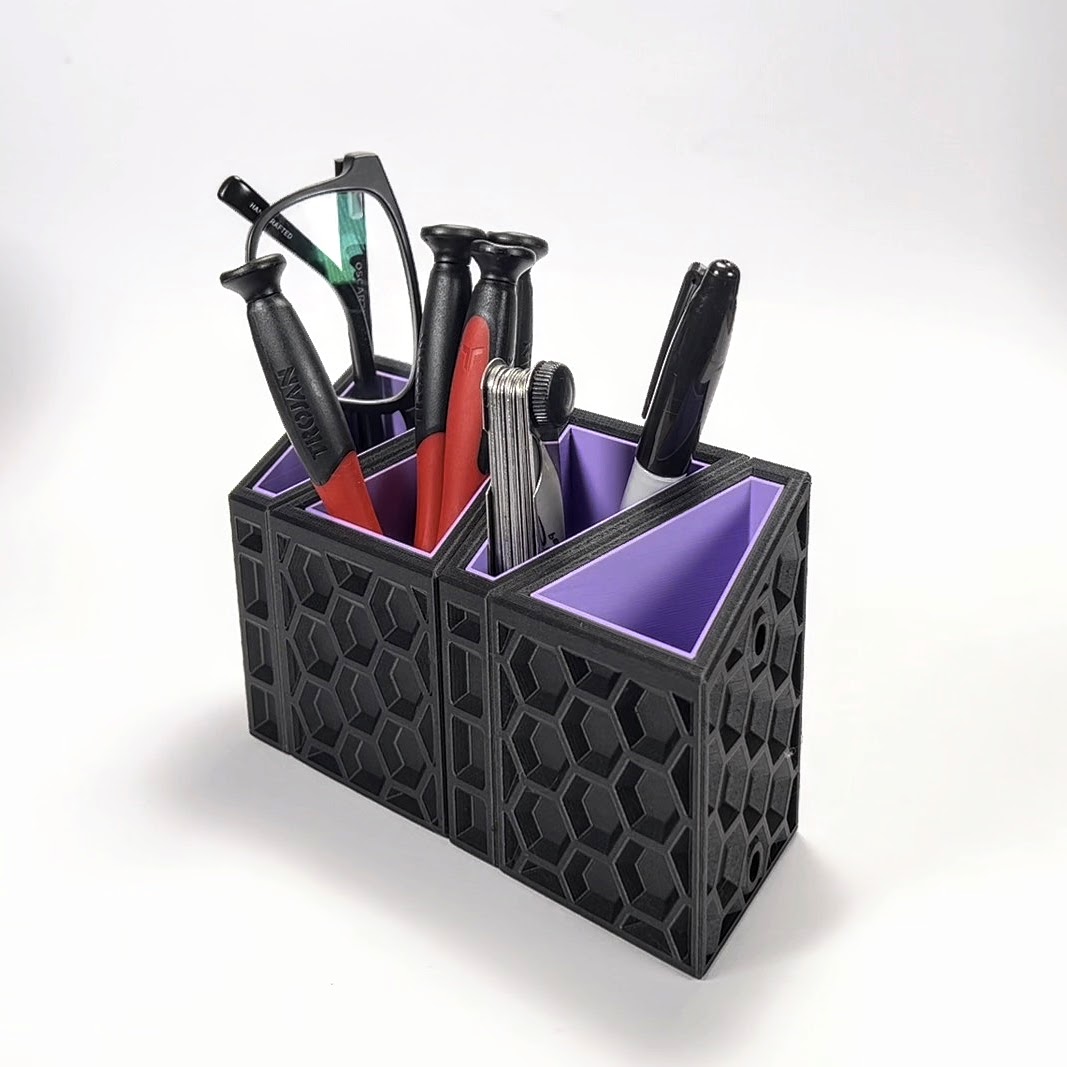
I needed a desk caddy to organise cables and bits of stationery, and obviously I couldn't just pull out one of the boxes or caddies I'd made in the past. No, no, that just wouldn't do - every need is an excuse to design something new!
Besides, I wanted to play with triangles and magnets! So, what I ended up with here is a pair of truncated triangles that are sliced off on an angle to sweep downwards to the front. Actually, that's the difference between the two parts: the slice goes the opposite way so that they can neatly sit next to each other and be connected magnetically (if you really want to ).

Just for the sake of fanciness, the caddies also have optional inserts to colour the insides. It's just a thin-walled box that slides neatly into the main caddy part, and there are two versions of it to suit the two caddies.
Printing Tips
Nothing tricky here - the insert has a reasonably generous clearance for fitting into the main caddy.
Both the main caddy and the insert print right-way-up, like so:

Print Dimensions
The main caddy models each occupy 71mm x 58mm on the print bed and is 90mm tall.
Optional Magnets
As usual, this one's intended for 6x3mm cylindrical magnets, but they're entirely optional.
File Locations
You'll find this one on dropbox under 715 Slant Caddy
Link to dropbox post: https://www.patreon.com/posts/31697592
Further Thoughts
Ah, hexagons, I couldn't not put hexagons all over these, right?
One other thought I did have was to provide an alternative to the magnets for joining the parts together, but it occurred to me that I was completely overthinking that, and that doesn't require a 3D printing solution. Double-sided tape, PVA glue, and probably lots of other things could provide a good alternative to the magnets. The magnets are still just plain fun, though :)
Either way, may your things always be organised!
xoxo
Sven.
Files