Home Artists Posts Import Register
Join the new SimpleX Chat Group!

Content

Hey there, wonderful people!

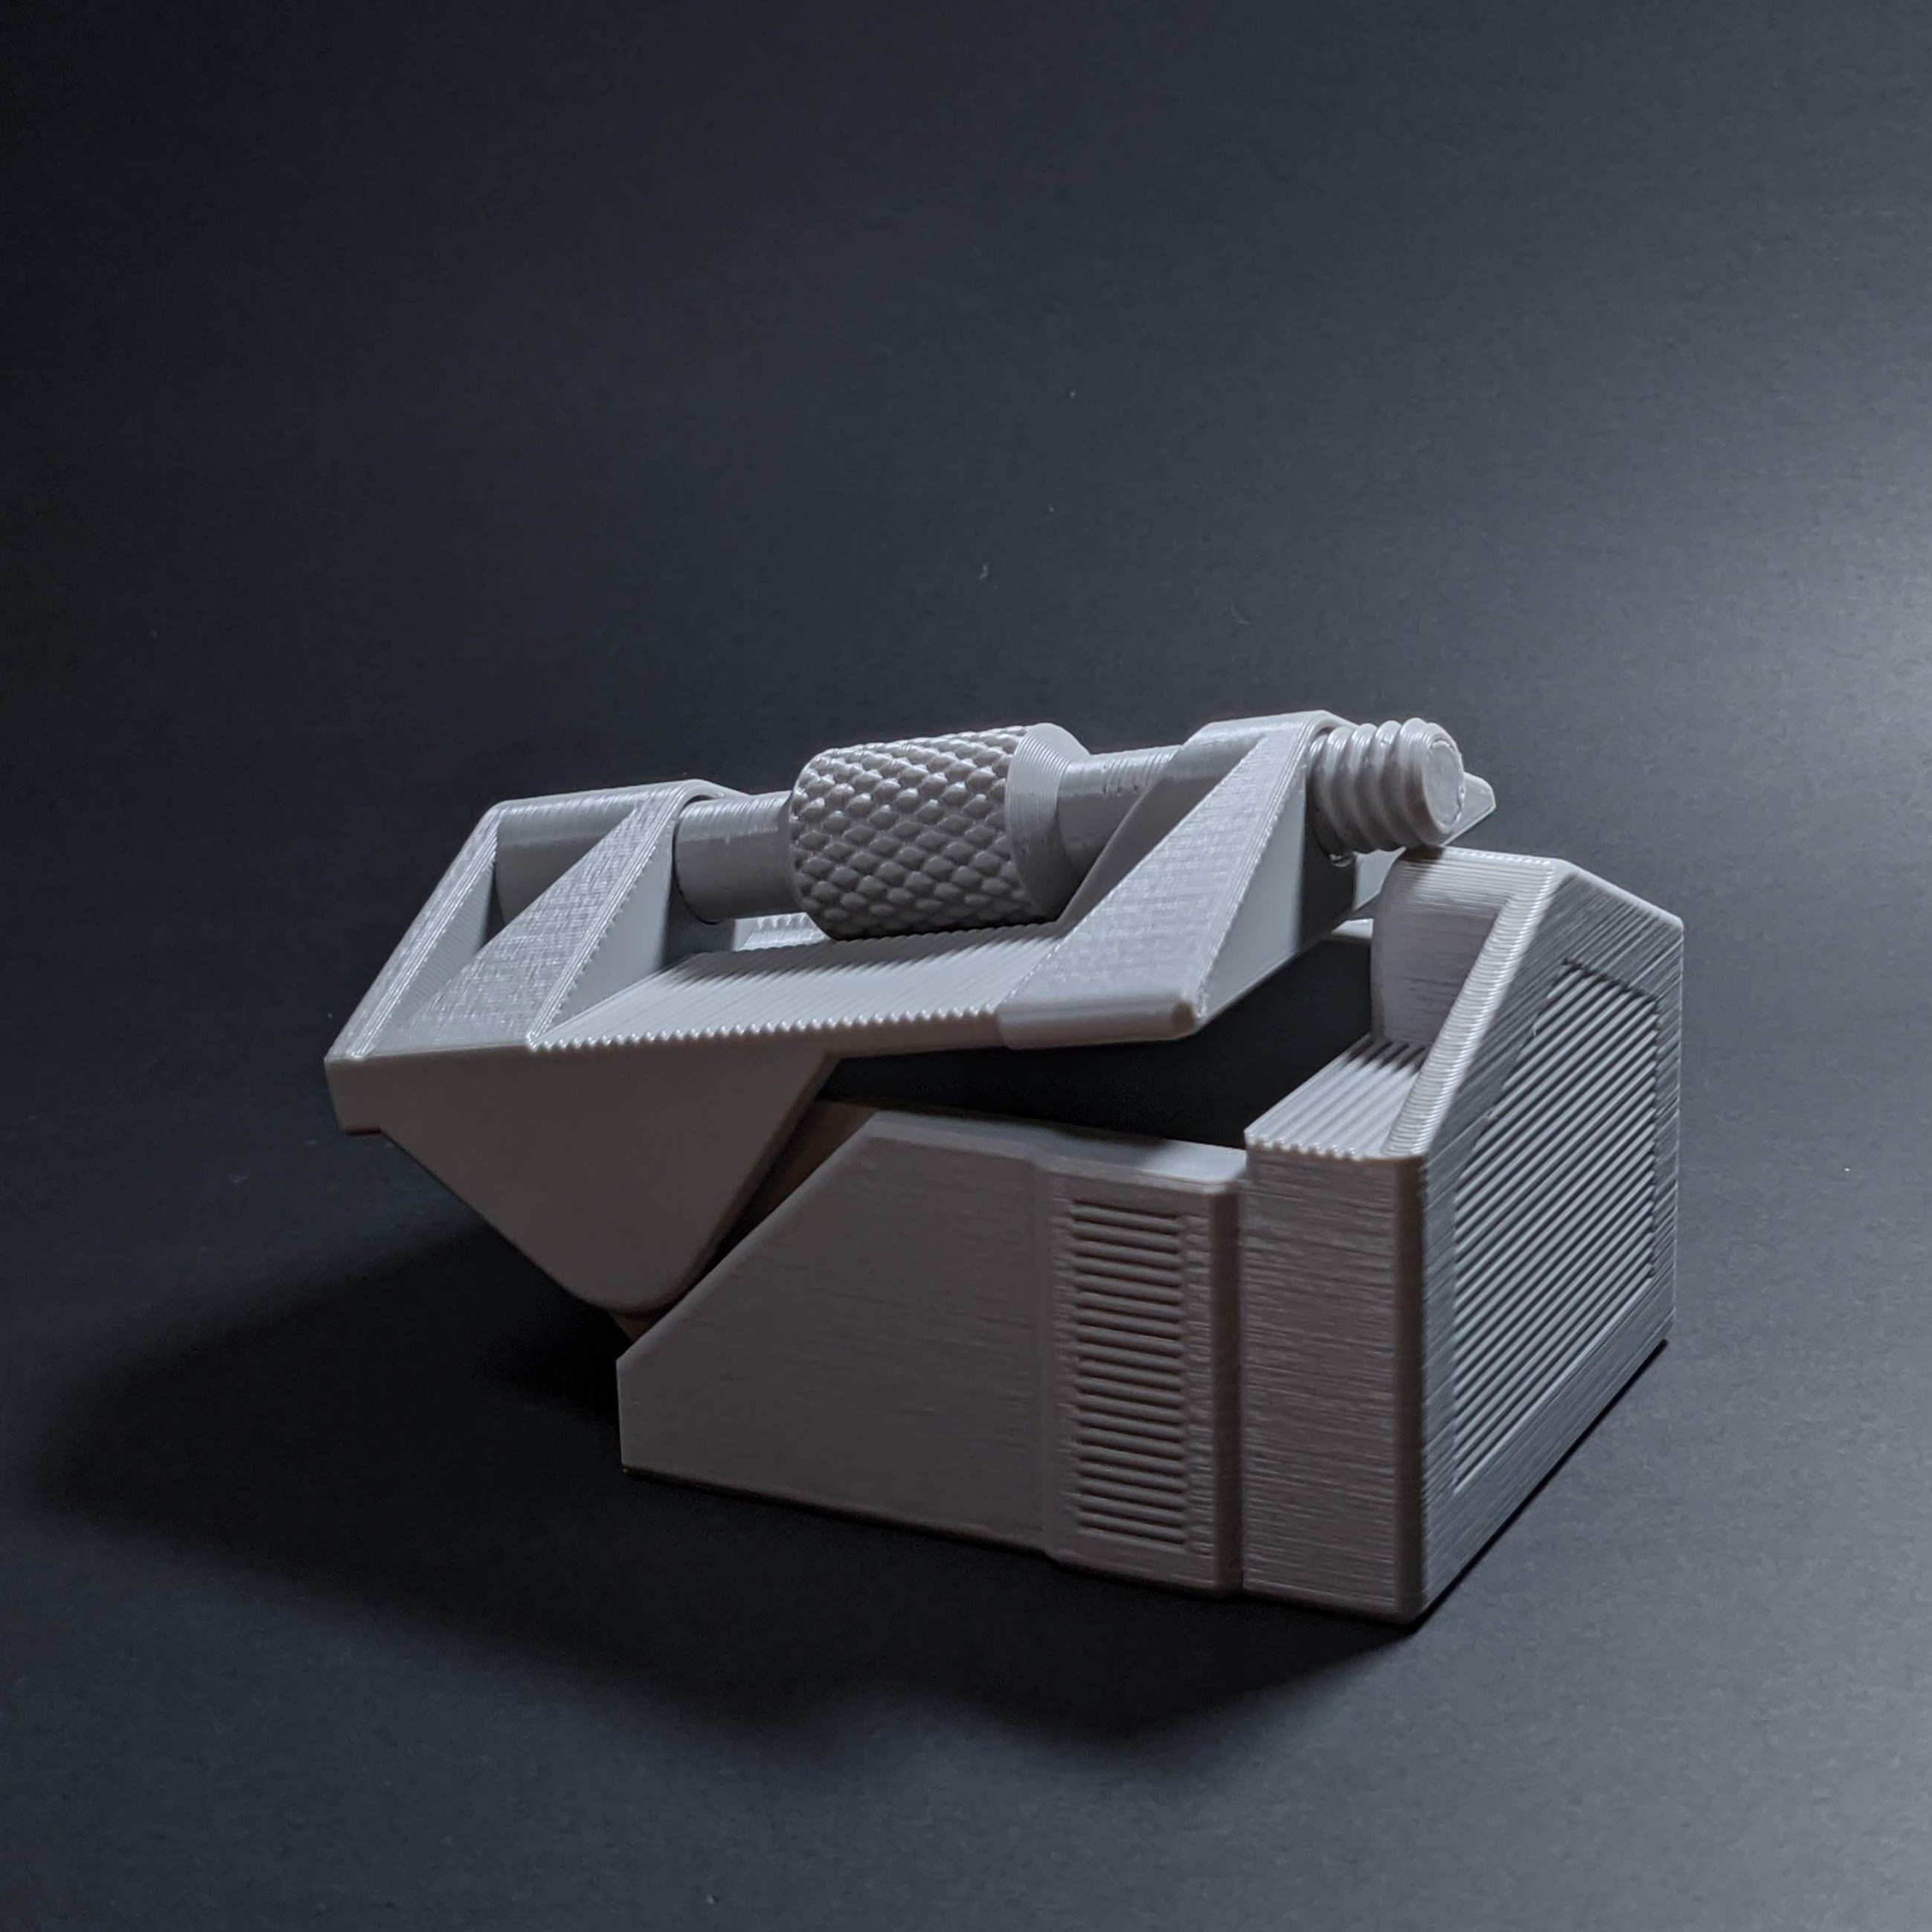
The Jupiter Box was inspired in a way by the Operator Box in that I really like the way the screw closure locks it securely.  The screw part on that container is a separately printed part, though, and I wondered if I could come up with a similarly-secure mechanism that was completely print-in-place.  Since you're reading this, it was a success! 

 The Jupiter Box incorporates a threaded bolt that is captive within the lid, but it can both slide back and forth as well as rotate, allowing it to screw into the box body itself to fasten things securely. 

The fact that there's a print-in-place hinge barely rates a mention these days, but that's clearly a key part of the design.  The first pass of this box had a lid that flipped right over, with a bolt that only went part-way along it.  However, a change to the current setup meant that the bolt could be larger in all dimensions, which made it much easier to print. 

The lid, not surprisingly, prints in the open position, so that both it and the bolt are in contact with the bed, which is a prerequisite for this kind of support-free print-in-place stuff!

Dimensions

The interior dimensions are 72mm wide, 92mm long and 45mm deep, though there are some protrusions into that volume!

Printing Tips

The Jupiter box prints sitting on its base, with the lid open, like so:

As always with articulated designs you'll want to make sure your first layer is neat and that there isn't anything like stringing that might bind moving parts together!  

It shouldn't matter overly much what direction the box is facing.

The rotating bolt is fairly tall, but in test printing on an Ender 3 and a Prusa MK3S it came out just fine.  I did pay attention to my first layers, though ;)  

File Location

You'll find this on Dropbox under 812 Jupiter Box

Final Thoughts 

Threaded closure mechanisms are something I've been using a lot recently, because they work so reliably even in the face of slicing and printing variability.  Their very nature means that any looseness can be taken up in the process of tightening, which solves so many problems. 

By contrast, friction-based approaches very easily become either impossible to close or just overly loose when subjected to the variability of different printing processes.  They also potentially get looser over time as surfaces wear.  However, what those approaches lose in robustness they gain in simplicity.

Either way, there are so many options to work with, and that's a great thing!  Where we might be headed next with these, though, I have no idea... time will tell! :)

xoxo

Sven.

Files

Comments

Anonymous

Oleee!!!👌🏻👌🏻👌🏻🤩🤩🤩

Anonymous

Oh my lord. I need to call in sick to work

Anonymous

OMG!!! How cool is that?! It makes so much sense and the stuf inside will surely not break loose from the Jupiter box! I love the supersized screw to keep Jupiter neatly closed and secured. Just brillant!

Anonymous

How about a version with a removable screw? In that way, you can change the color of the screw and make it even cooler.

clockspring3D

Yep, I think I'll do a similar box with a separate bolt! For this one I was determined to have the whole thing print-in-place as one unit, but I agree, it would be cool to have a separate bolt. It'll let me redesign the idea a bit, too, and avoid some of the compromises that are needed for a print-in-place bolt :)

Anonymous

I'm going to try this on my new Flsun QQ-S. I'll post results

Anonymous

It hasn't shown up for me yet in the dropbox folder. The lowest # I have is 815. Is there something I need to do to see it?

clockspring3D

Very strange! Nope, you shouldn't have to do anything other than ensure you're using the current dropbox link! Any older link shouldn't work at all, anyway. Could it be a local browser caching issue? Could you please try ctrl+shift+R on the dropbox page to force a proper reload and see if that sorts things out? Good luck! :)

Anonymous

So I printed this and it worked good. But I have an idea for this and maybe the rook. Like this one put like a 1/4 hex key hole at end of thread part so you could use a hex key to free it. I hope that makes sense. On the end that's on the bed

Anonymous

I sent you a message with pic in IG just because I wasn't sure how else to do so for my idea.

clockspring3D

That's a great idea! There would need to be a balance with surface area for adhesion, but that's easily solved with a bigger bolt 😁. Instagram tens to be flooded with stuff, so email is better - clockspring3d at gmail :)

Anonymous

Ok I just sent email with pic

Dan Crandell

Cool print. Pics on discord of overture PETG on Ender 3 pro

Anonymous

I did mine in PLA at 1.8 and it turned out great but I mucked it up twice, first time I was an idiot and was looking at the nut and it not spinning and I panicked trying to get it to turn mid print which obviously ruined it because duh it was adhered to the build plate not locked up. Second time I let it finish and applied pressure on the wrong spot and split the lid slightly getting the hinge to close, then today I noticed my nut broke in half practically. I will be running a 3rd and hopefully final one that I will not mess up, with higher infill I believe the fault in the 2nd run was me being too conservative and going for something like a 15-20% gyroid, will probably go overkill at 50% gyroid and add a 4th wall to make it properly sturdy. The trials and tribulations of a new 3d printer owner. Brilliant design though, all user error on my part, it's just the learning process.

Anonymous

that's crazy because I nut also broke right under the big knurled part towards the bottom.

Anonymous

I saw a print an YouTube (Wildrosebuilds), was fascinated and became a patreon just to test it. Now I did it. Used a Creality CR-6 SE with Sunlu PLA+. Layer height 0,2mm, Infill 20%. It took 18 hours. It was the best print I ever got - with CR-10, Genius or CR-6. Great design and, what is much more important: It works! :-)