Home
Home

 Artists
 Search
 Recent
 Random
 Posts
Posts
 DMs
DMs
 Tags
Tags
 Random
 Importer
 Import
 FAQ
FAQ
 Account
 Register
 Favorites
 Login
Login

Nurse Akali weapon tutorial (Patreon)
Content
Here is the rest of this month's tutorial.
Materials needed:
* insulation foam
* 1mm EVA foam
* 5mm EVA foam
* Gesso
* Sand paper
* hot glue
* pvc glue
* Pvc pipe
* water bottle
* gray and red fabric
* silver, black and red dye
* craft knife
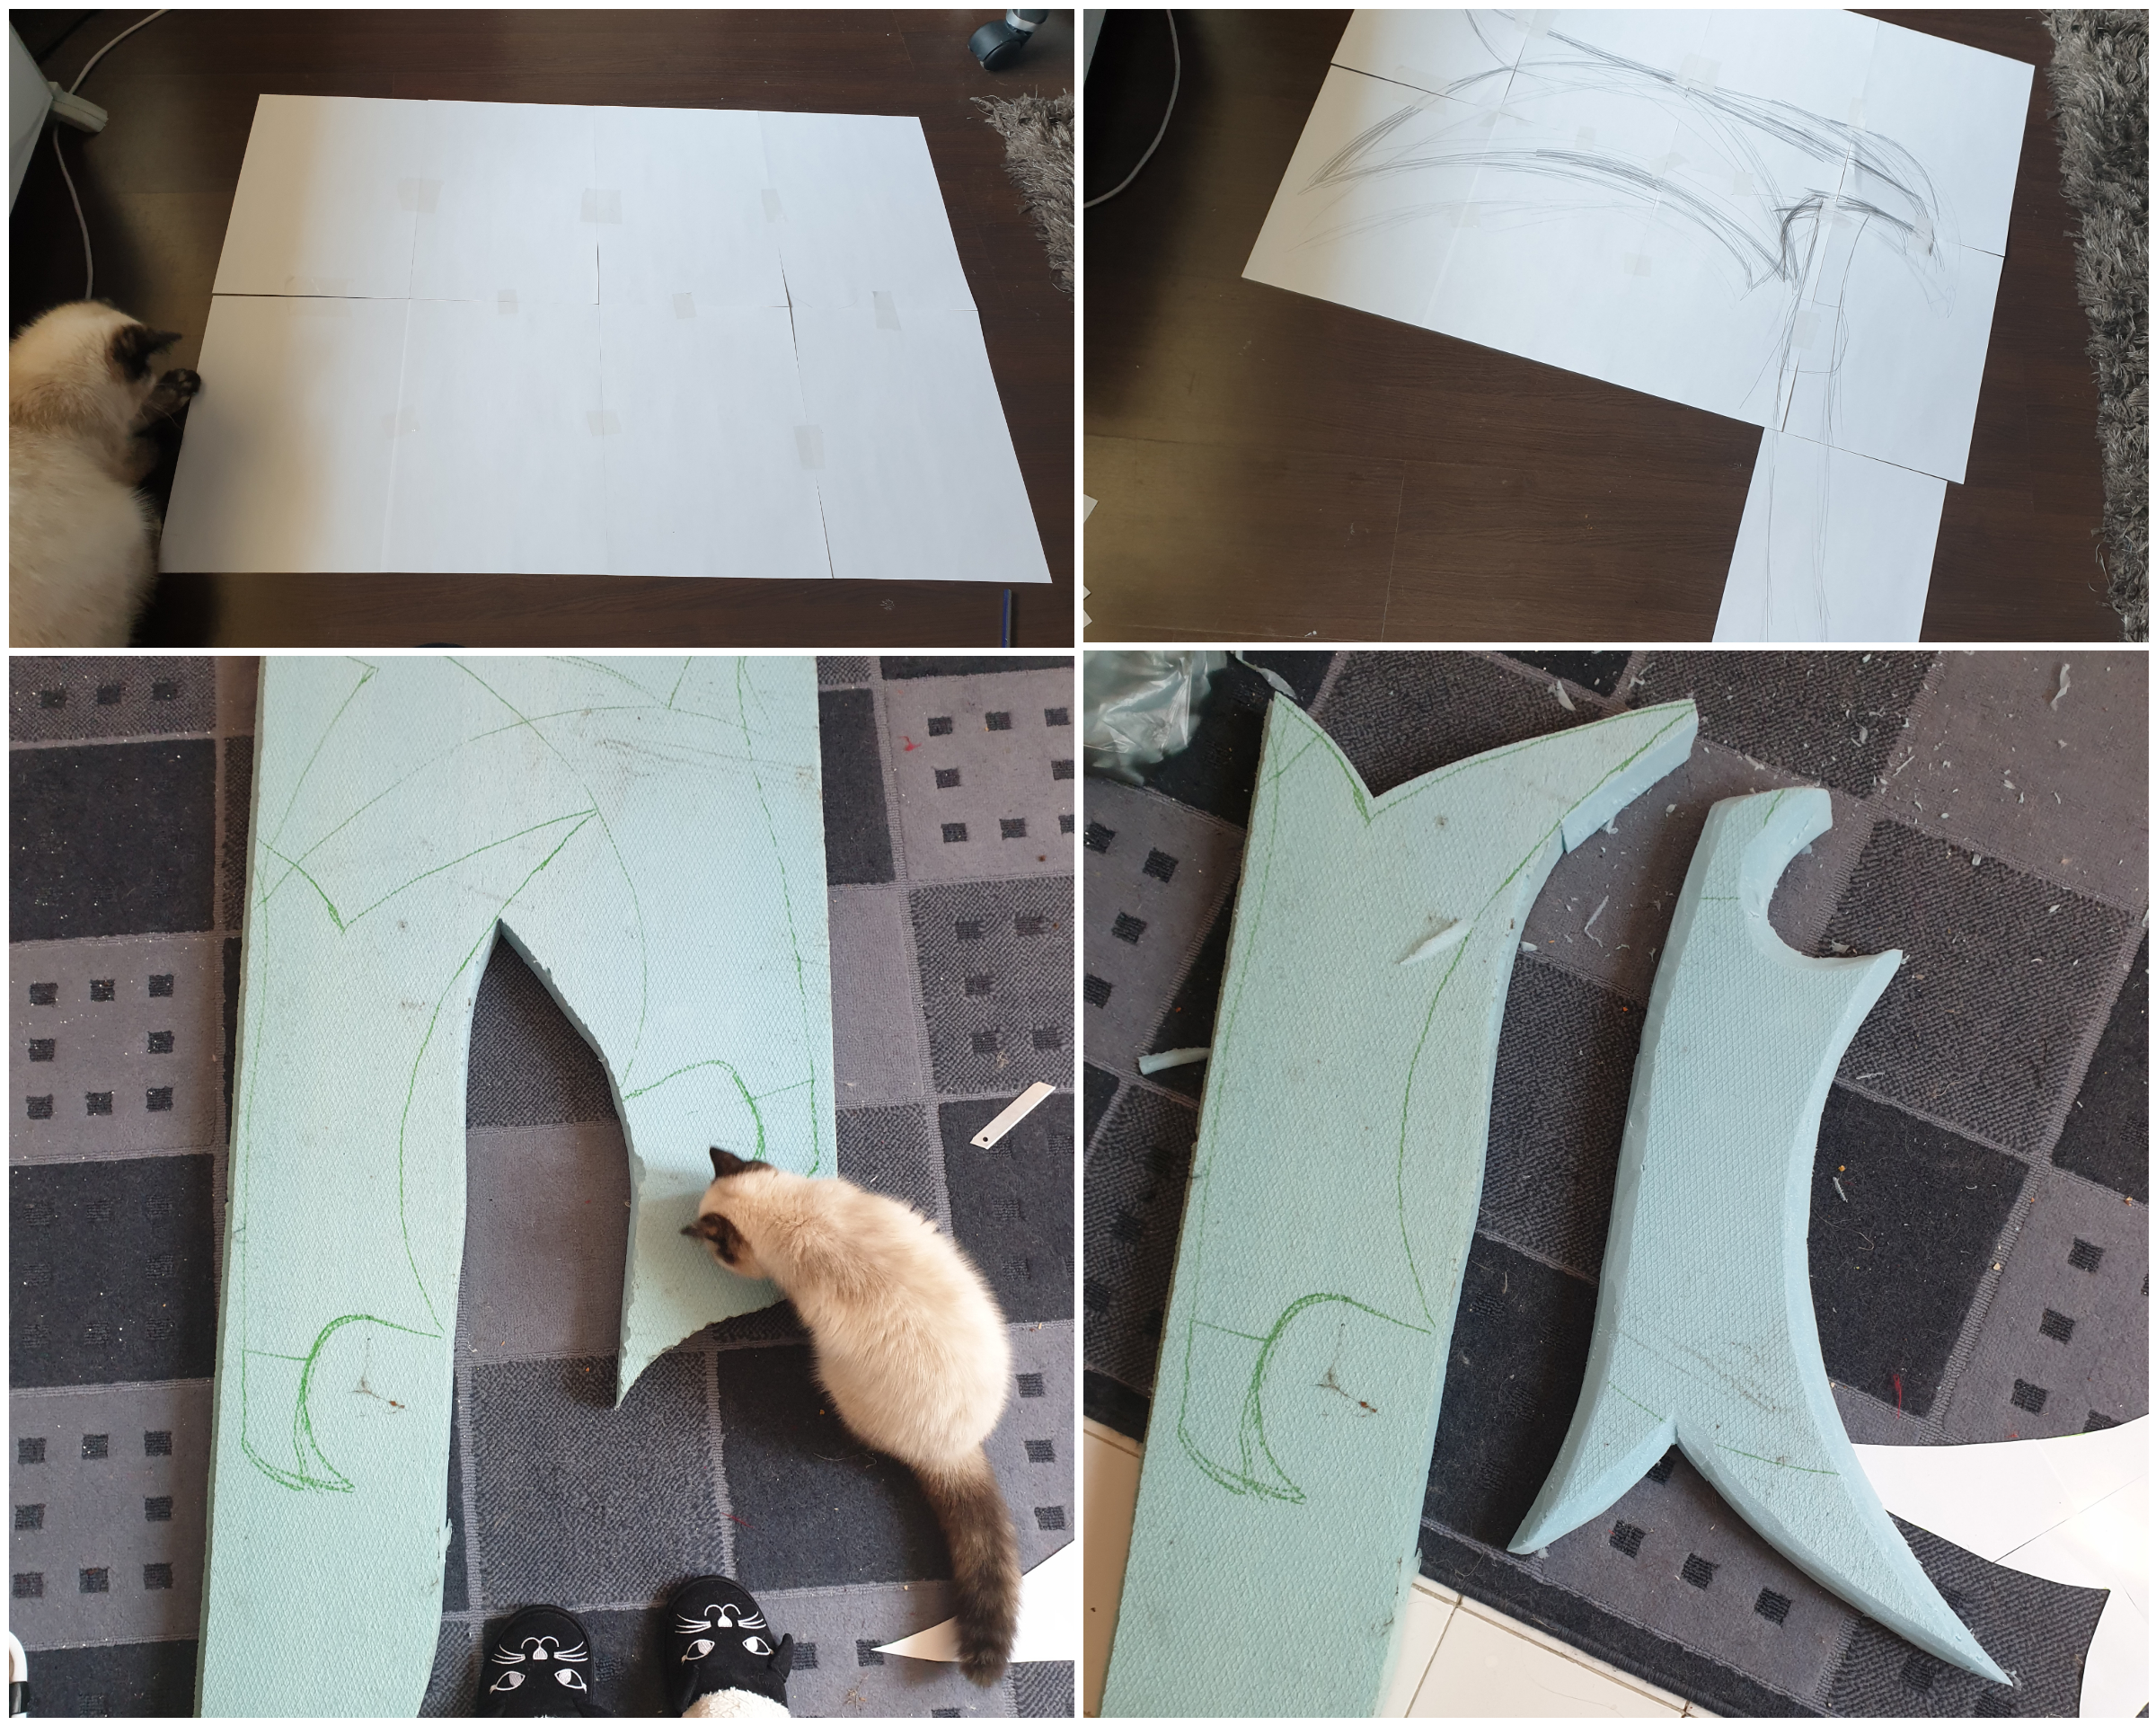
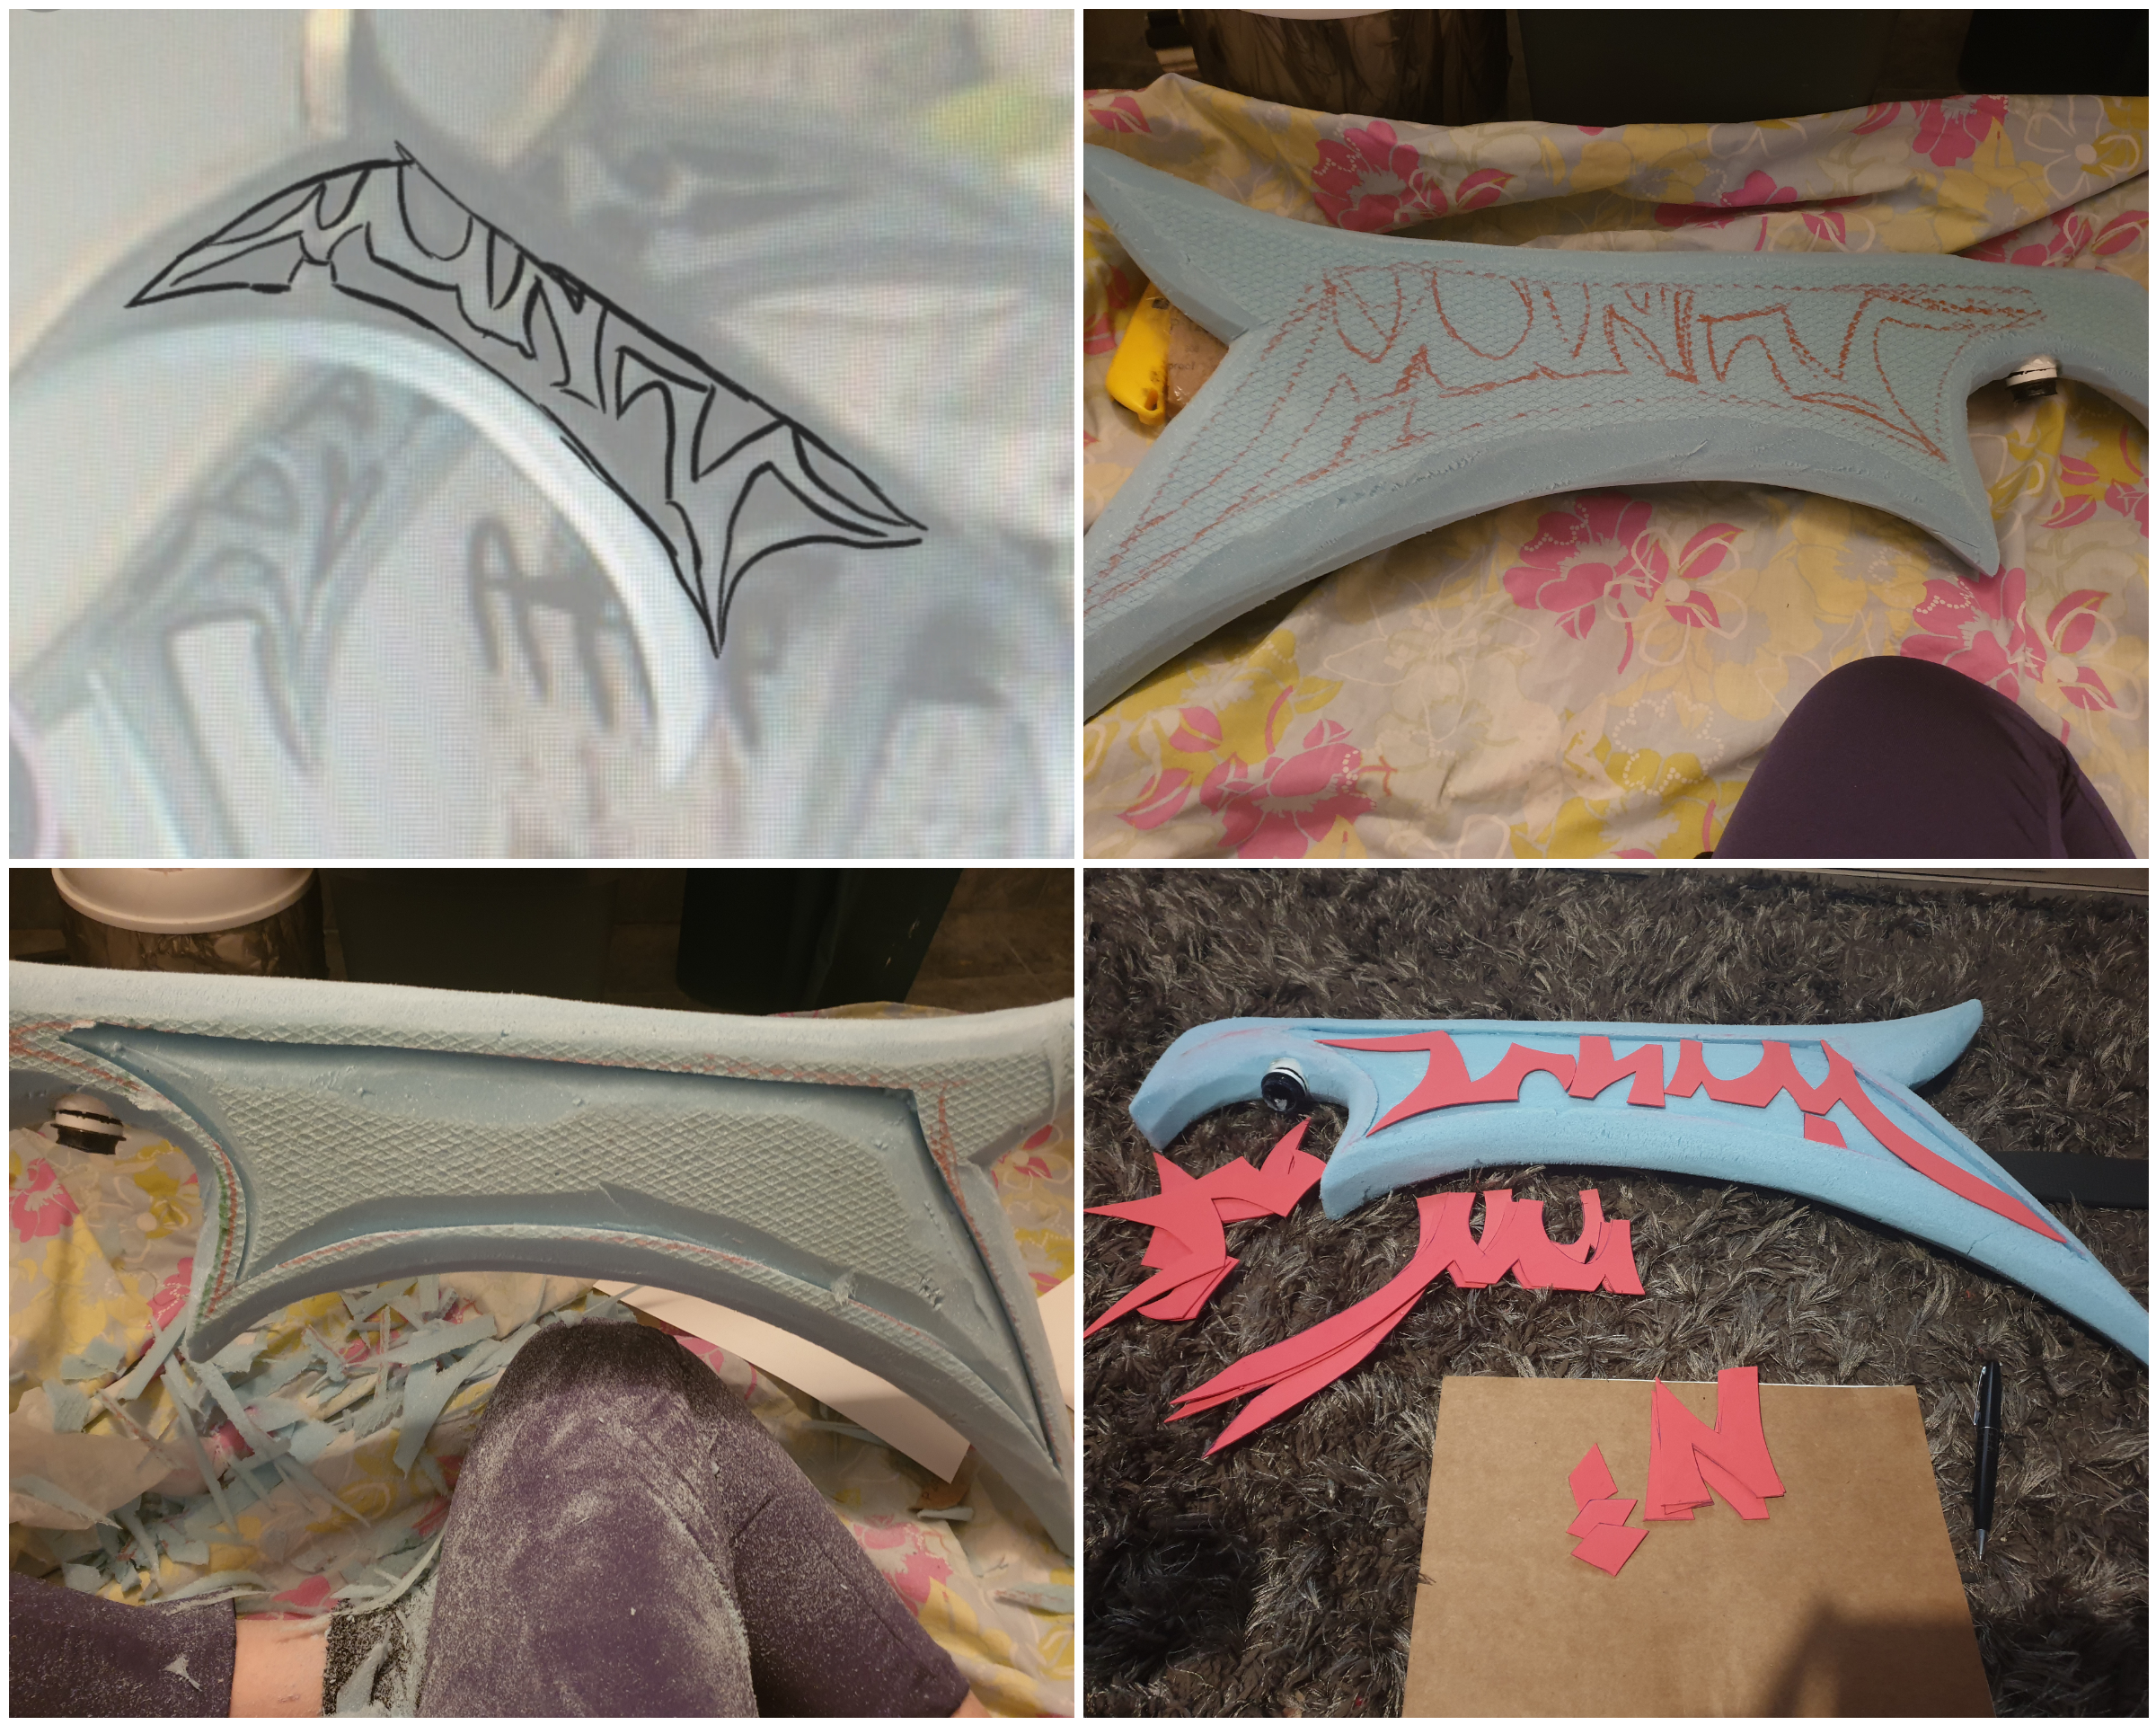
I started by making a paper scetch of the weapon itself. It was difficult to find a clear source, because the model is old, and most of the files left are low quality.
When I was satisified with the scetch, I cut out the shape, and transfered it onto the insulation foam piece and proceeded cutting with the craft knife. This step is dangerous and I advice you to take extra caution, while cutting the insulation foam.
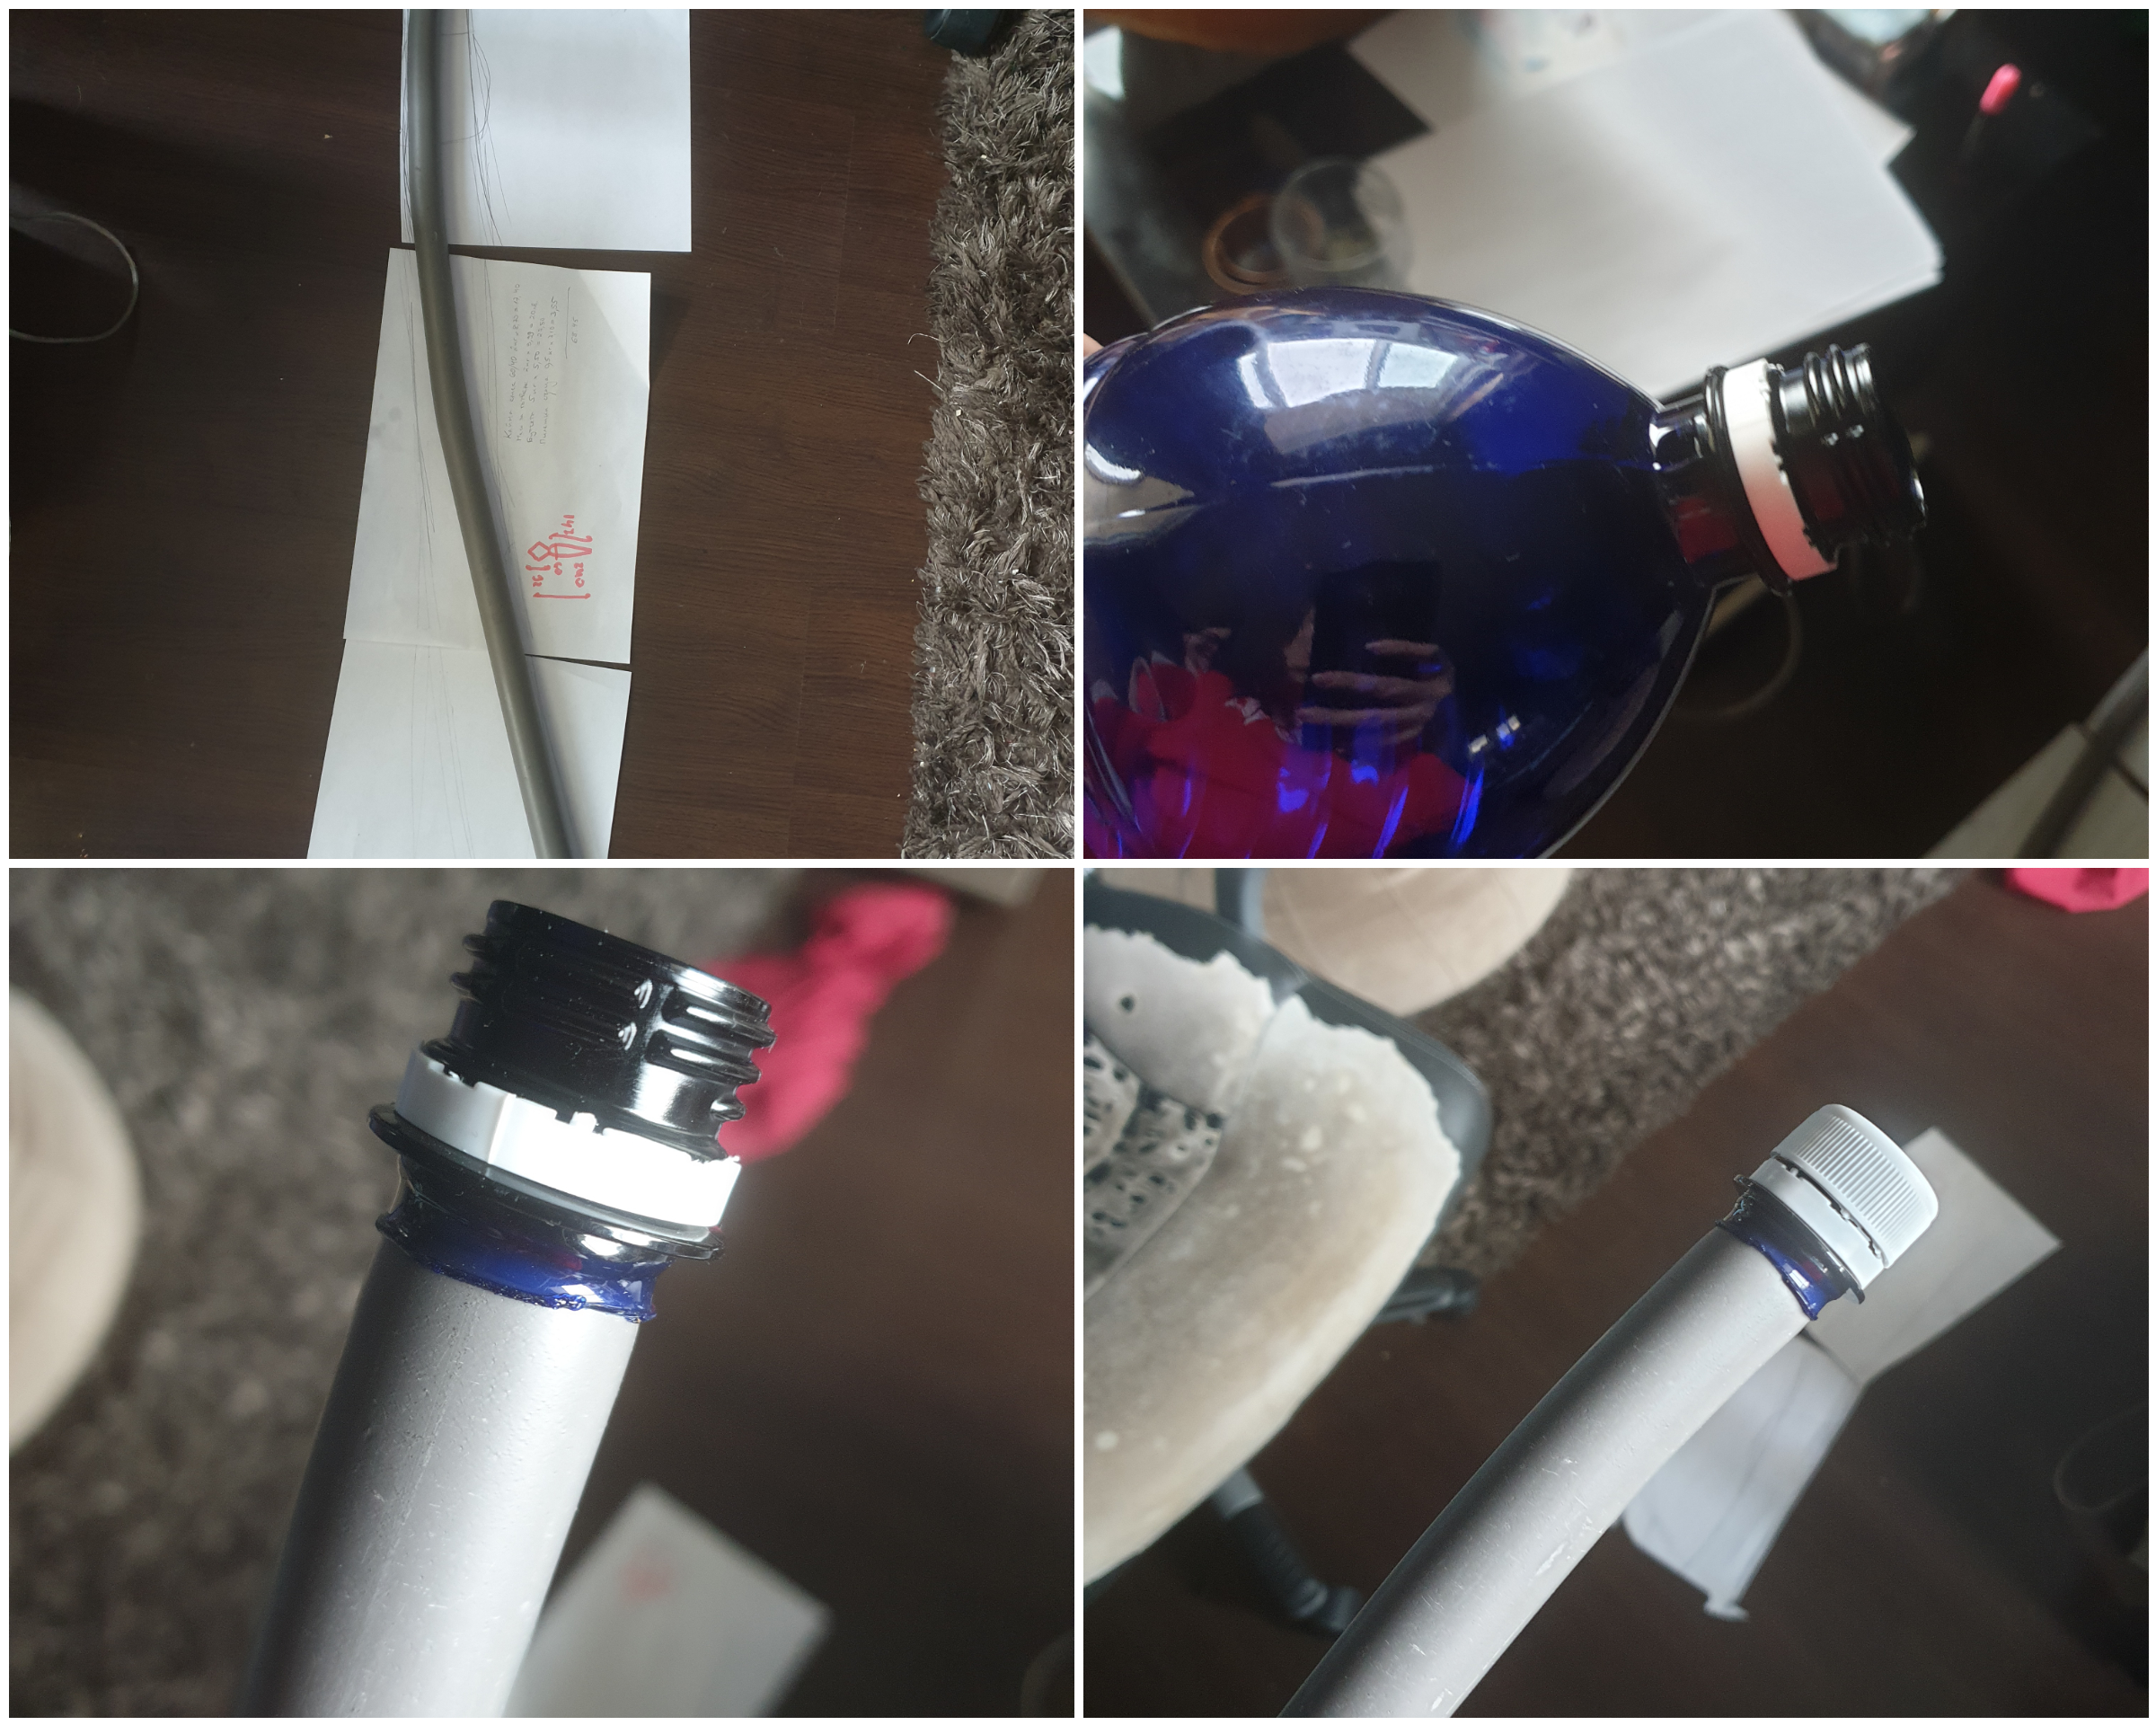
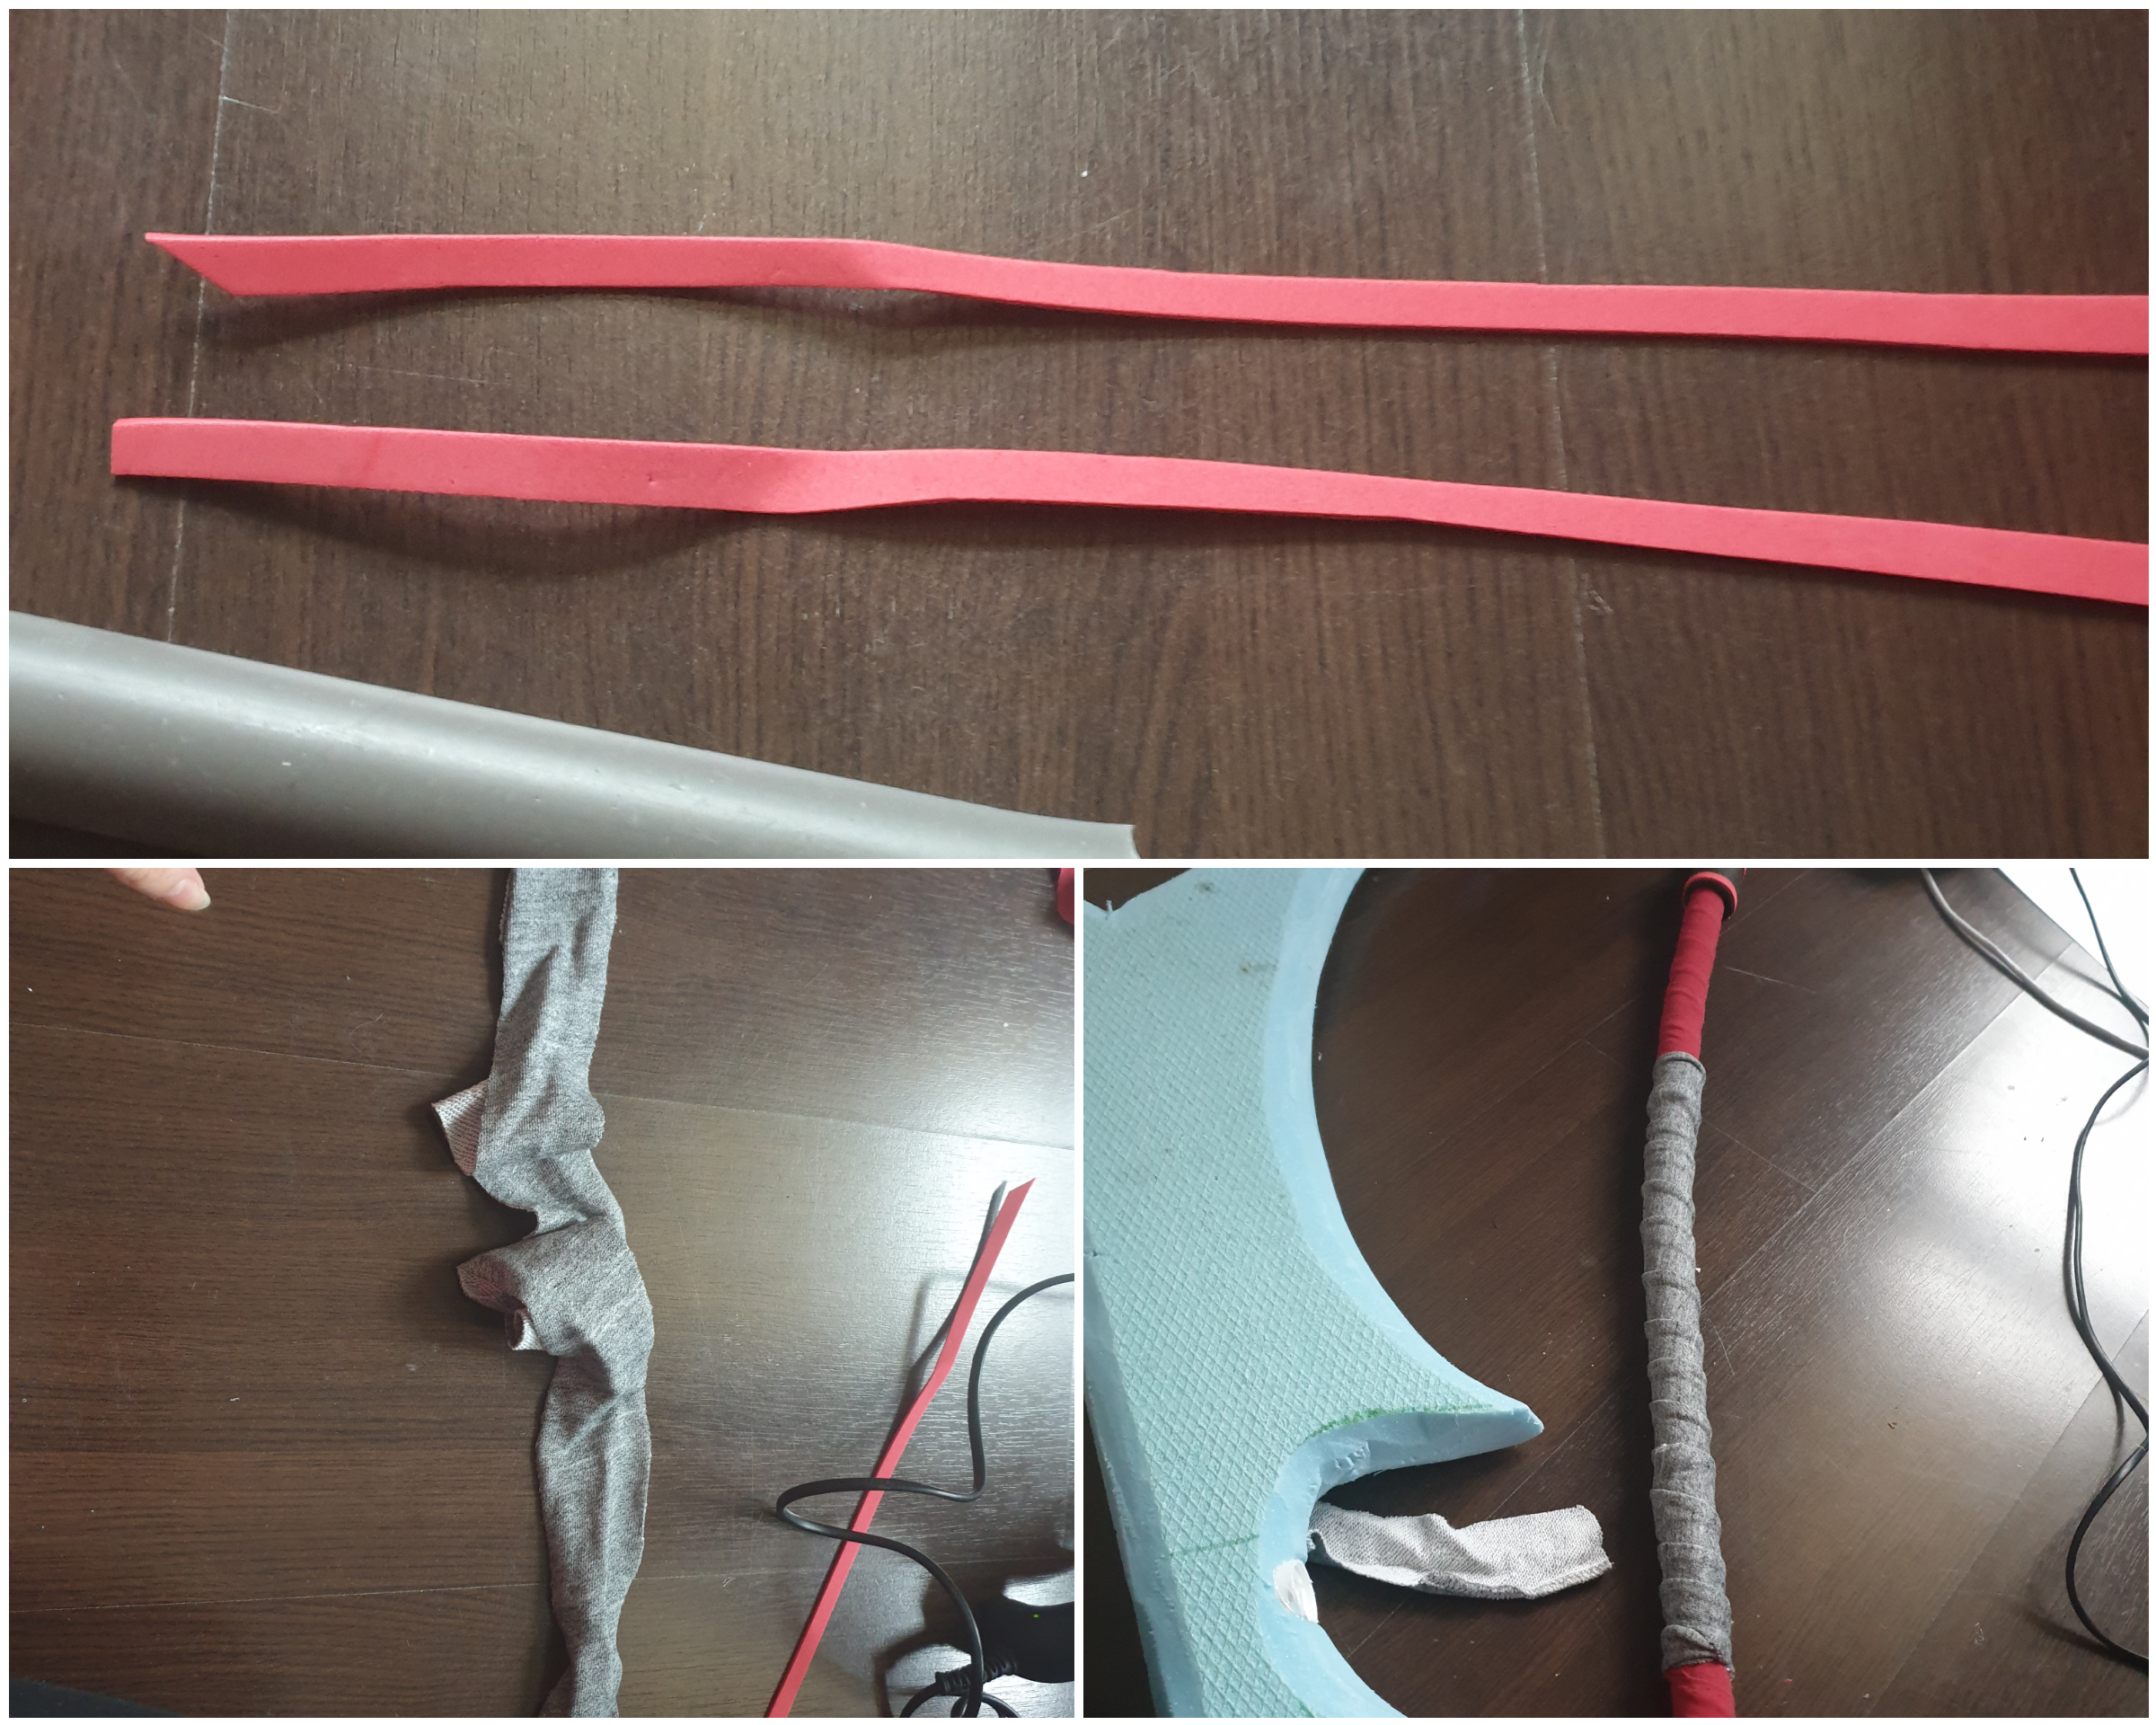
Then I separated the bottleneck from the water bottle, which will be combined with the pvc pipe. If your pvc pipe is not bent, you will need to heat it up and ajust it in the right shape. Leave it to rest for several minutes, and after it has cooled off, attach the bottle neck and caps with several drops of glue.
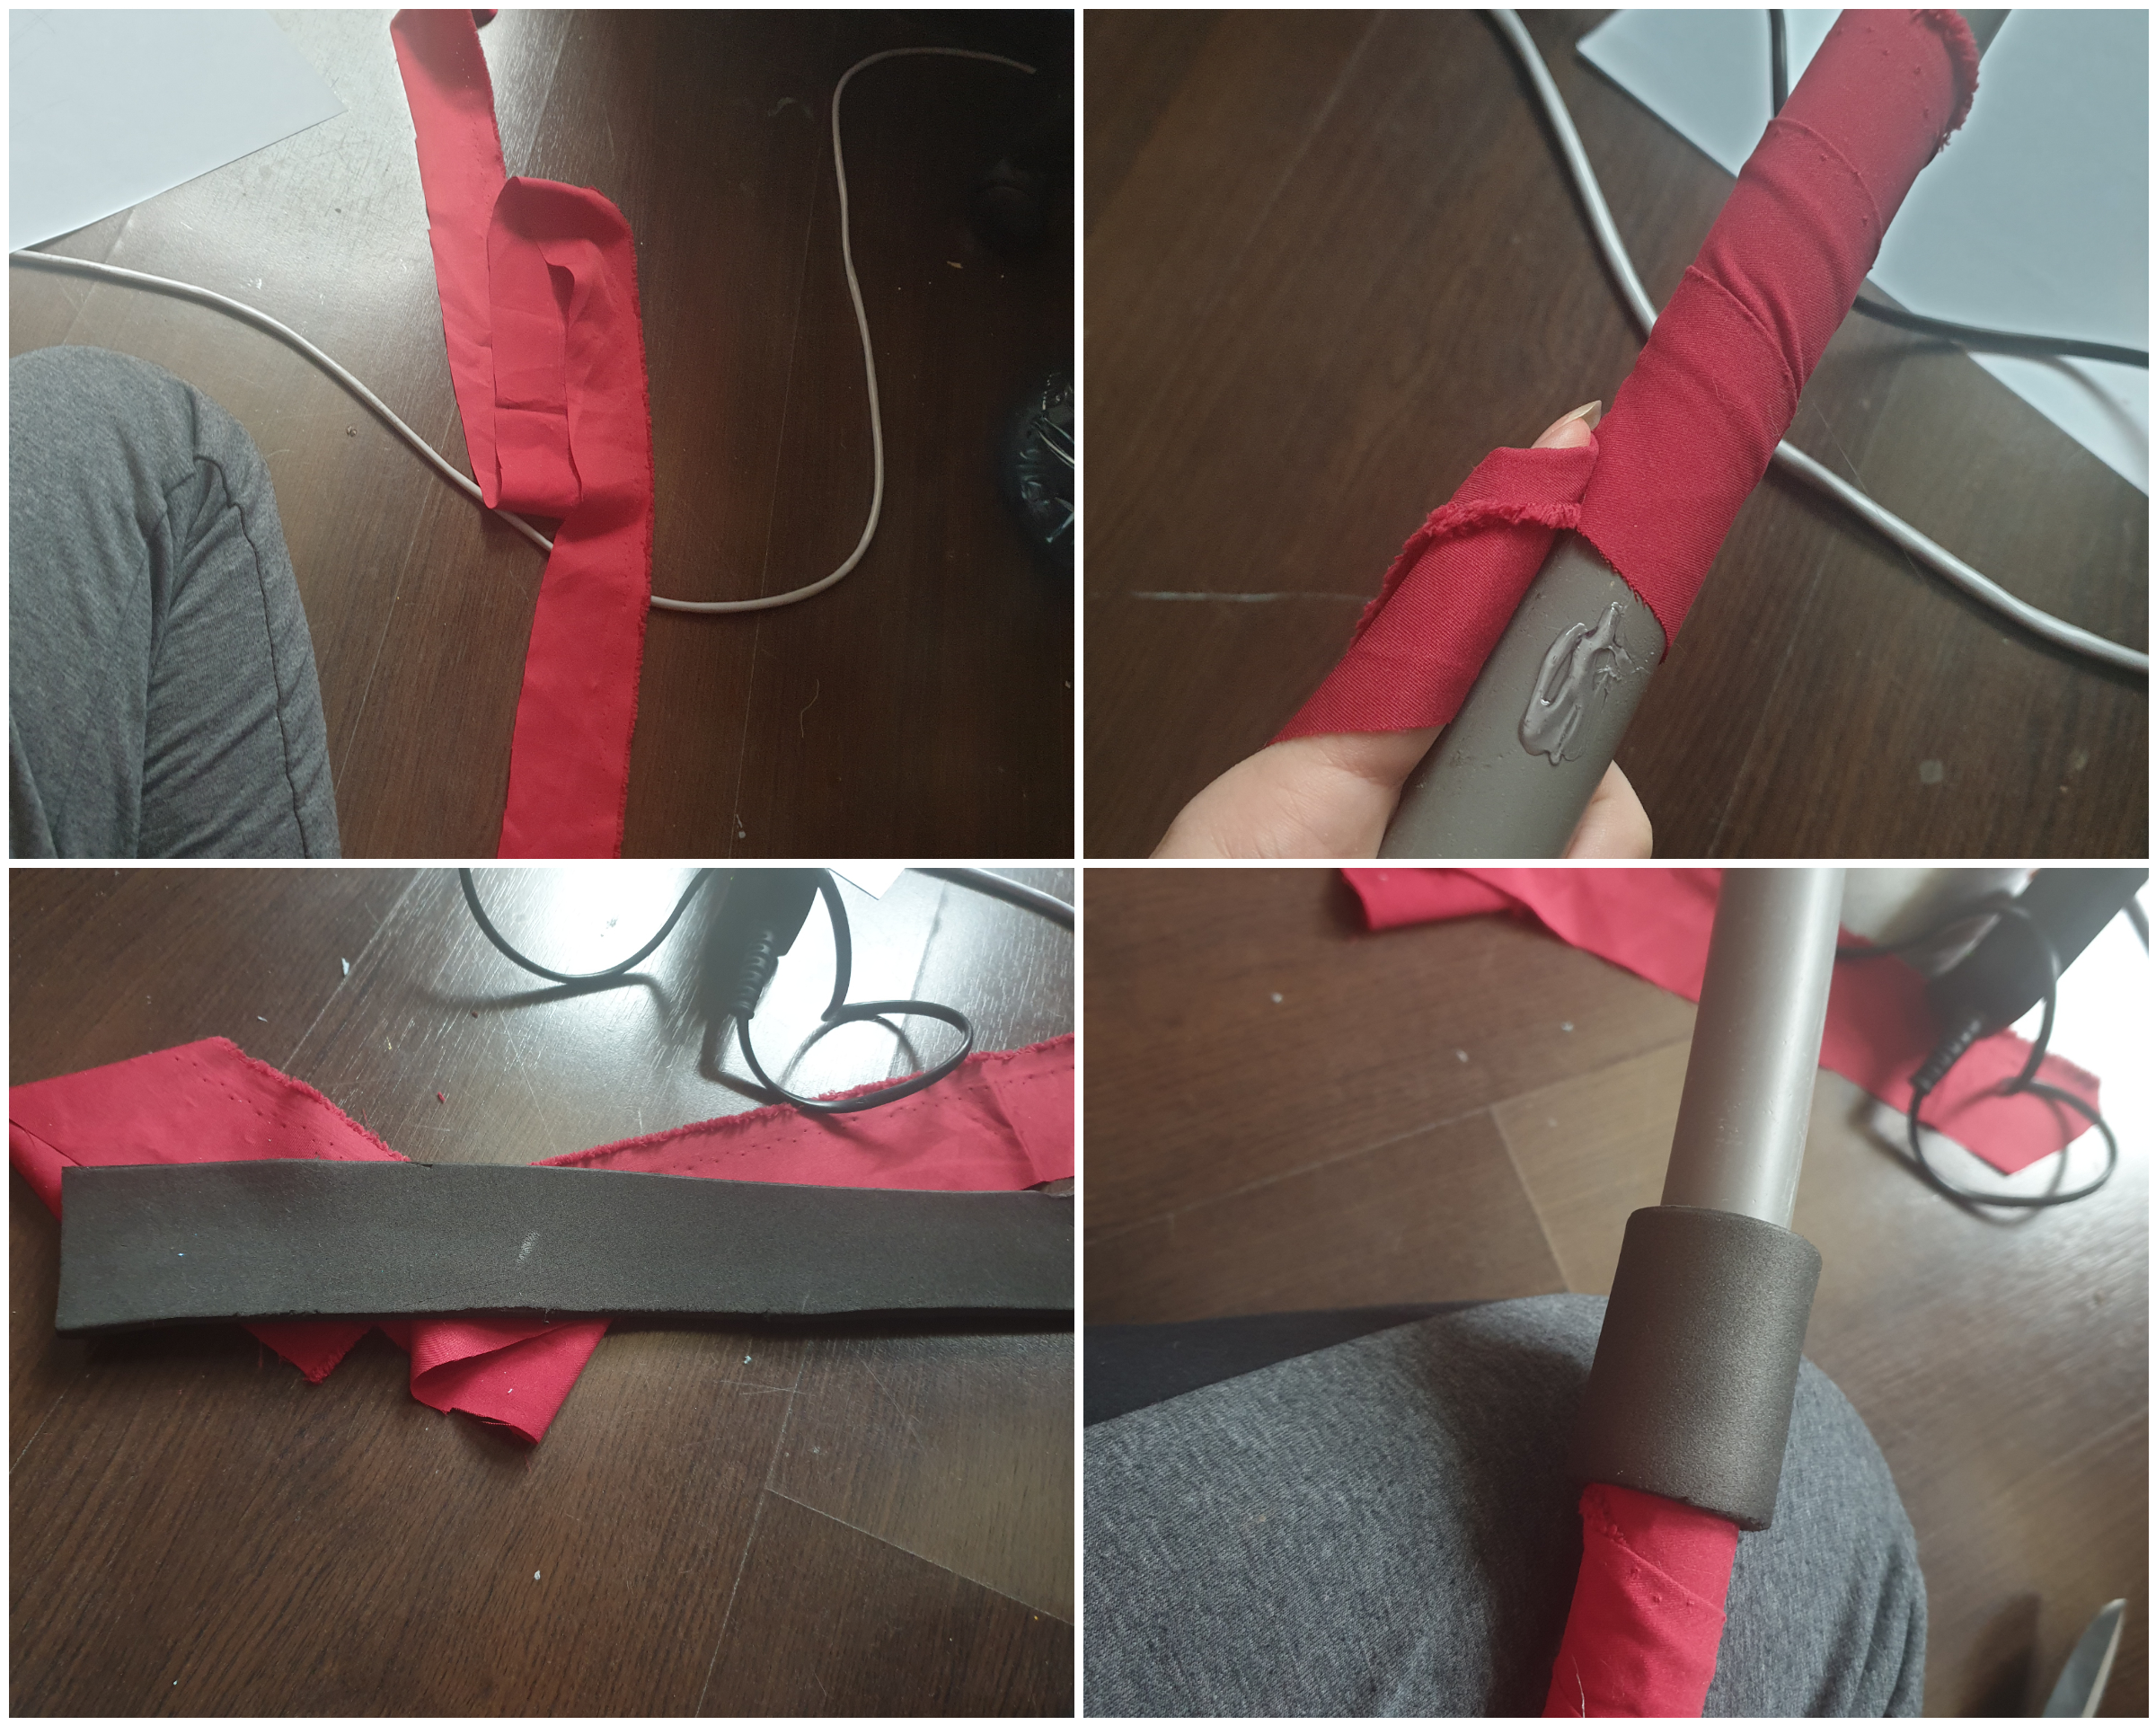
I found a red piece of fabric from another costume, lying around in my workshop. Unfortunatelly, I didn't have any grey faric left, so I decided to recylce an old pair of sweatpants that had their time.
Cut long pieces from you fabric and start wrapping them around the pvc pipe. Make sure to secure them. Personally, I like to use hot glue, when it comes to securing wrapped fabric.
After your wrapping is done, it's time to add the EVA foam details.
You will need a small piece of EVA in a rectangular shape. Wrap it on top of the red fabric and cut any excess material. Then glue it onto the fabric. Paint your base foam in vermillion red, and the decorative parts - silver.
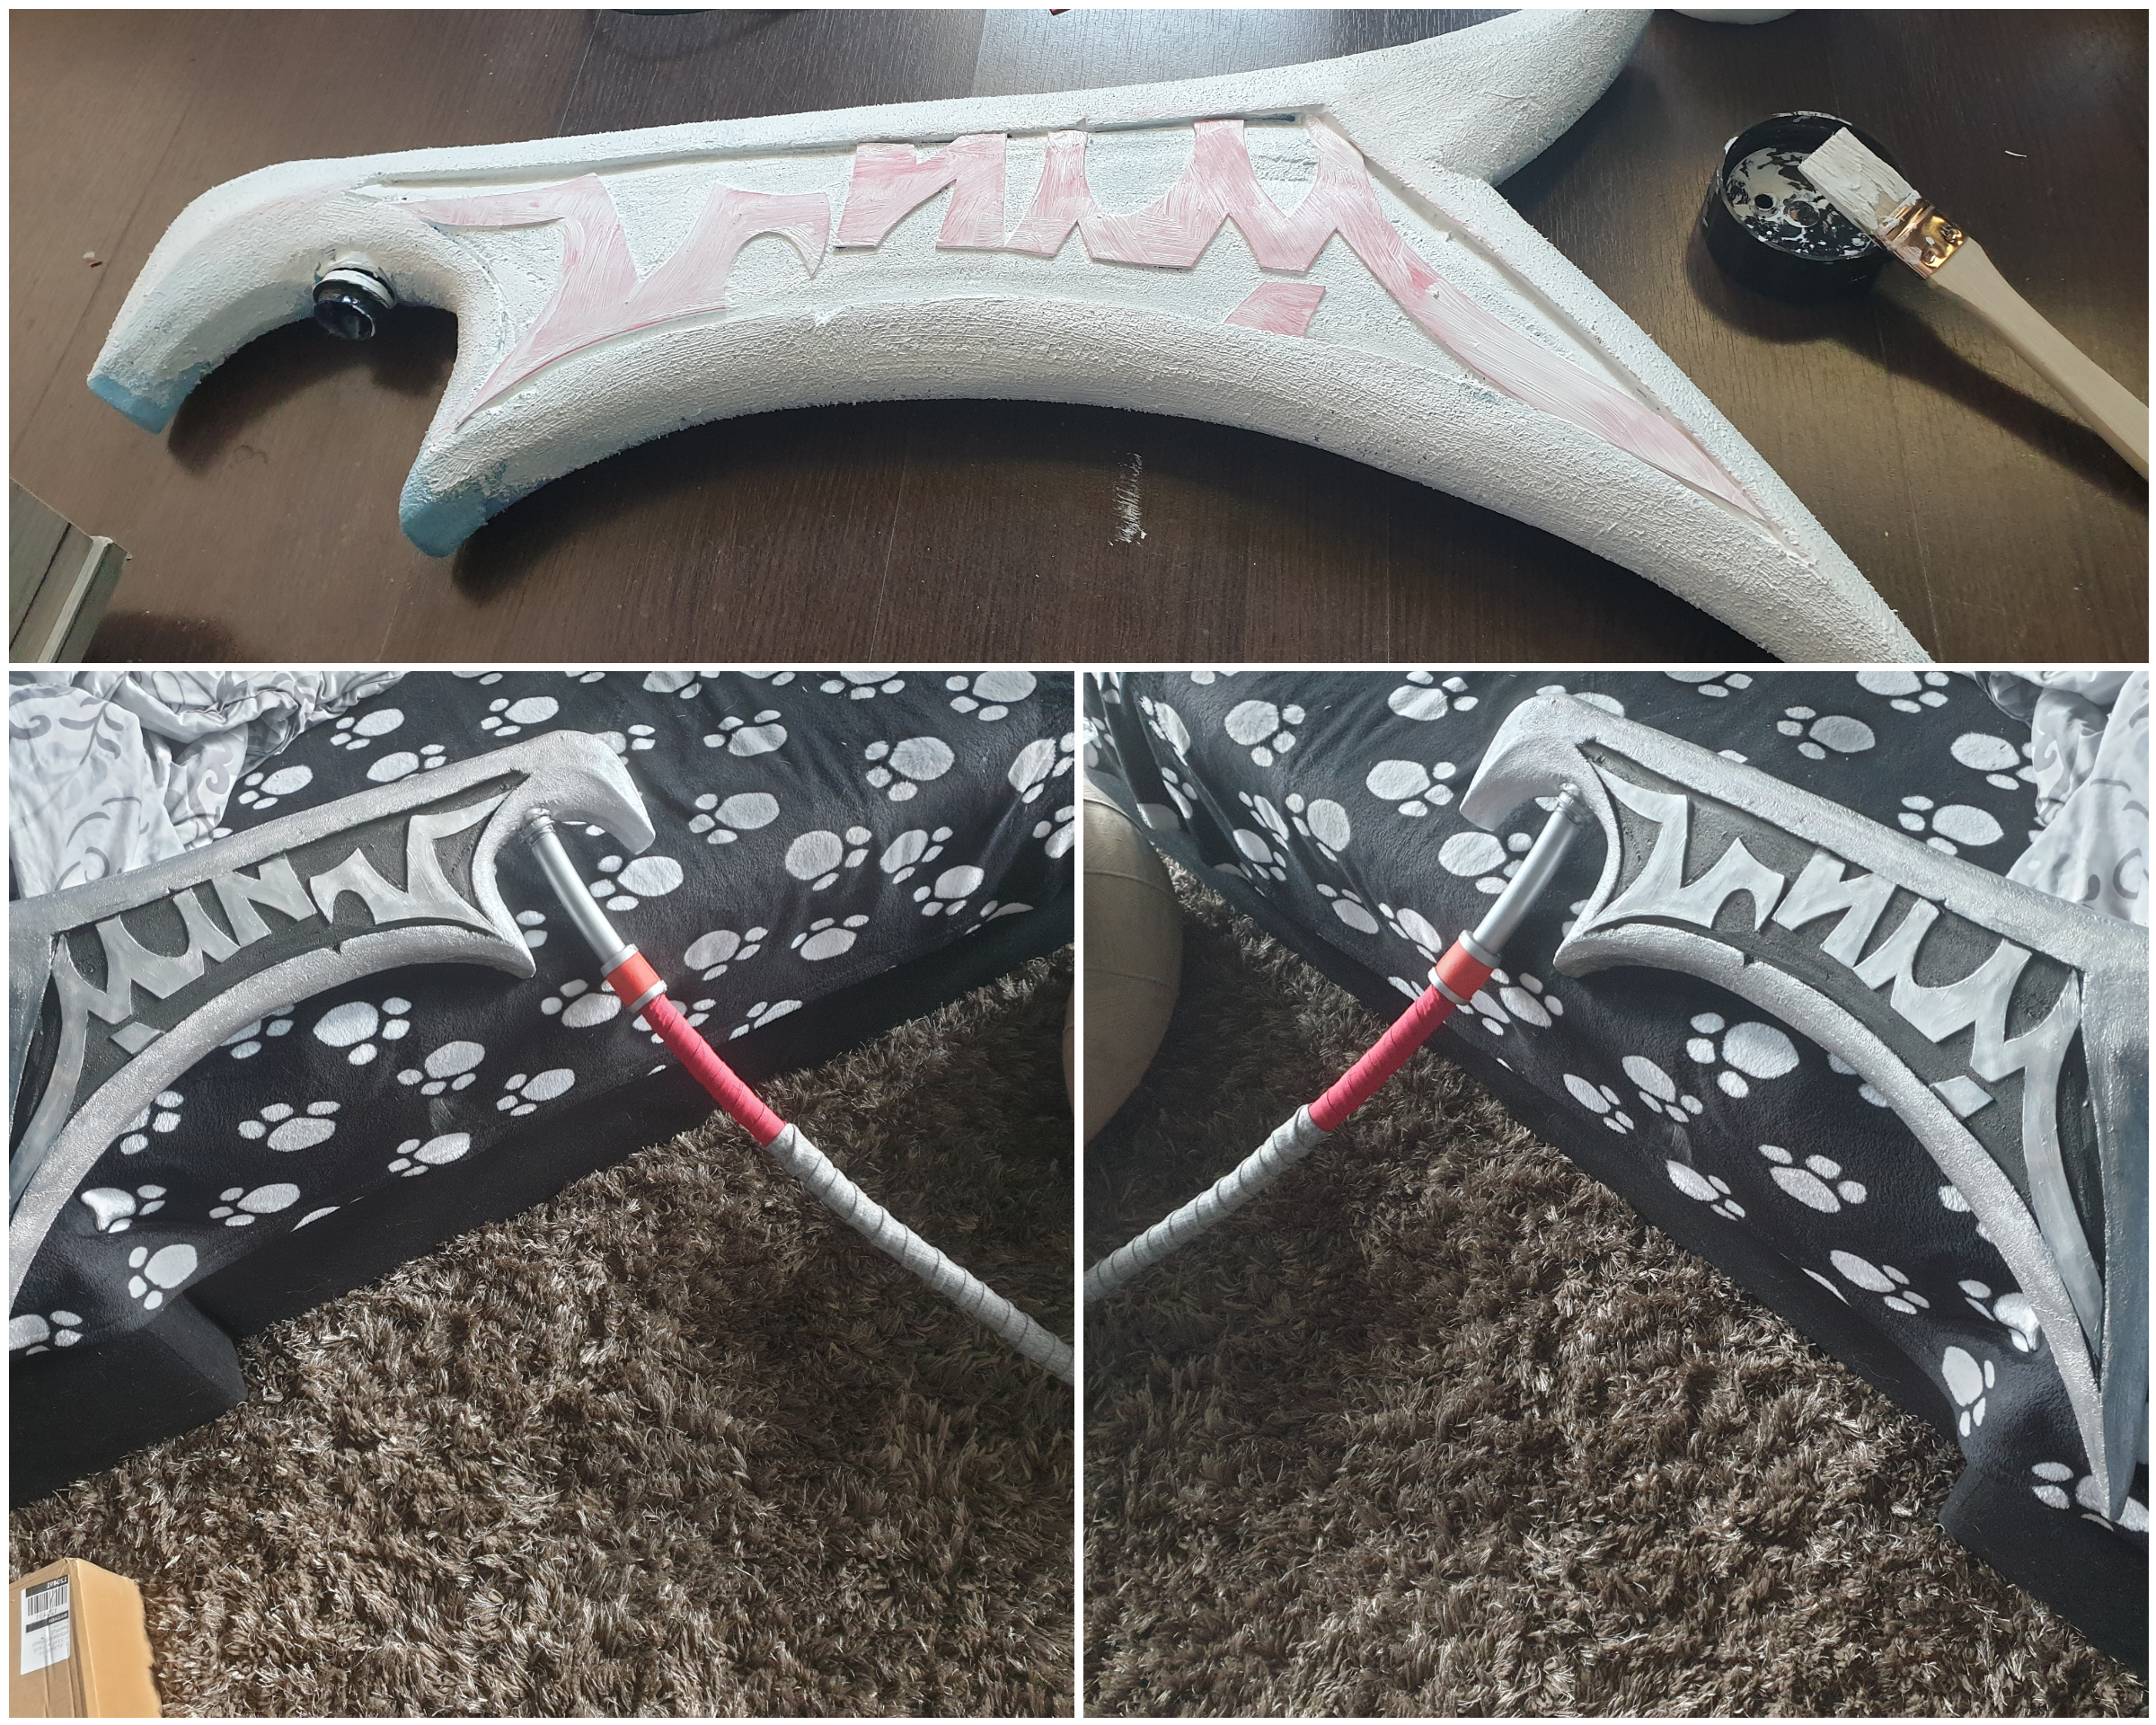
Take the bottle cap, and mark it onto the insulation foam blade. Then you can use the tip of your hot glue gun to melt the insulation foam, and create a small hole in which your bottle cap will be placed. Make sure to securely install the bottle cap into the foam! I used warm silicone glue, and I was super careful not to melt the insulation foam any further.
Then I moved onto the blade.
I love carving my foam to make these round shapes happen. The key to carving is applying minimum pressure onto your blade, and aim to cut only thin pieces at an angle. After that you need to sand the whole piece to make the surface as smooth as possible. Glue on your details and apply 2 layers of Gesso. When your Gesso dries, it will make the foam super rough and bumpy. Use a fine sand paper to remove any imperfections on the surface. This is the step that takes the most time, but is essential to make your prop crispy clean and cool-looking.
Next step is painting the blade.
I prefer working with acrylics, but you can use oils too. You will probably need to apply two layers of paint to fill any holes or patches left from the first one. Leave the paint to dry, and apply some shades and highlights.
And this is pretty much it!
Files