Home
Home

 Artists
 Search
 Recent
 Random
 Posts
Posts
 DMs
DMs
 Tags
Tags
 Random
 Importer
 Import
 FAQ
FAQ
 Account
 Register
 Favorites
 Login
Login

[Process] Late Night Fraternizing with the Guards (Patreon)
Content
This particular piece started from the Patron Suggestion:
a mind controlled Zelda trying to make advances on Brello-Link?
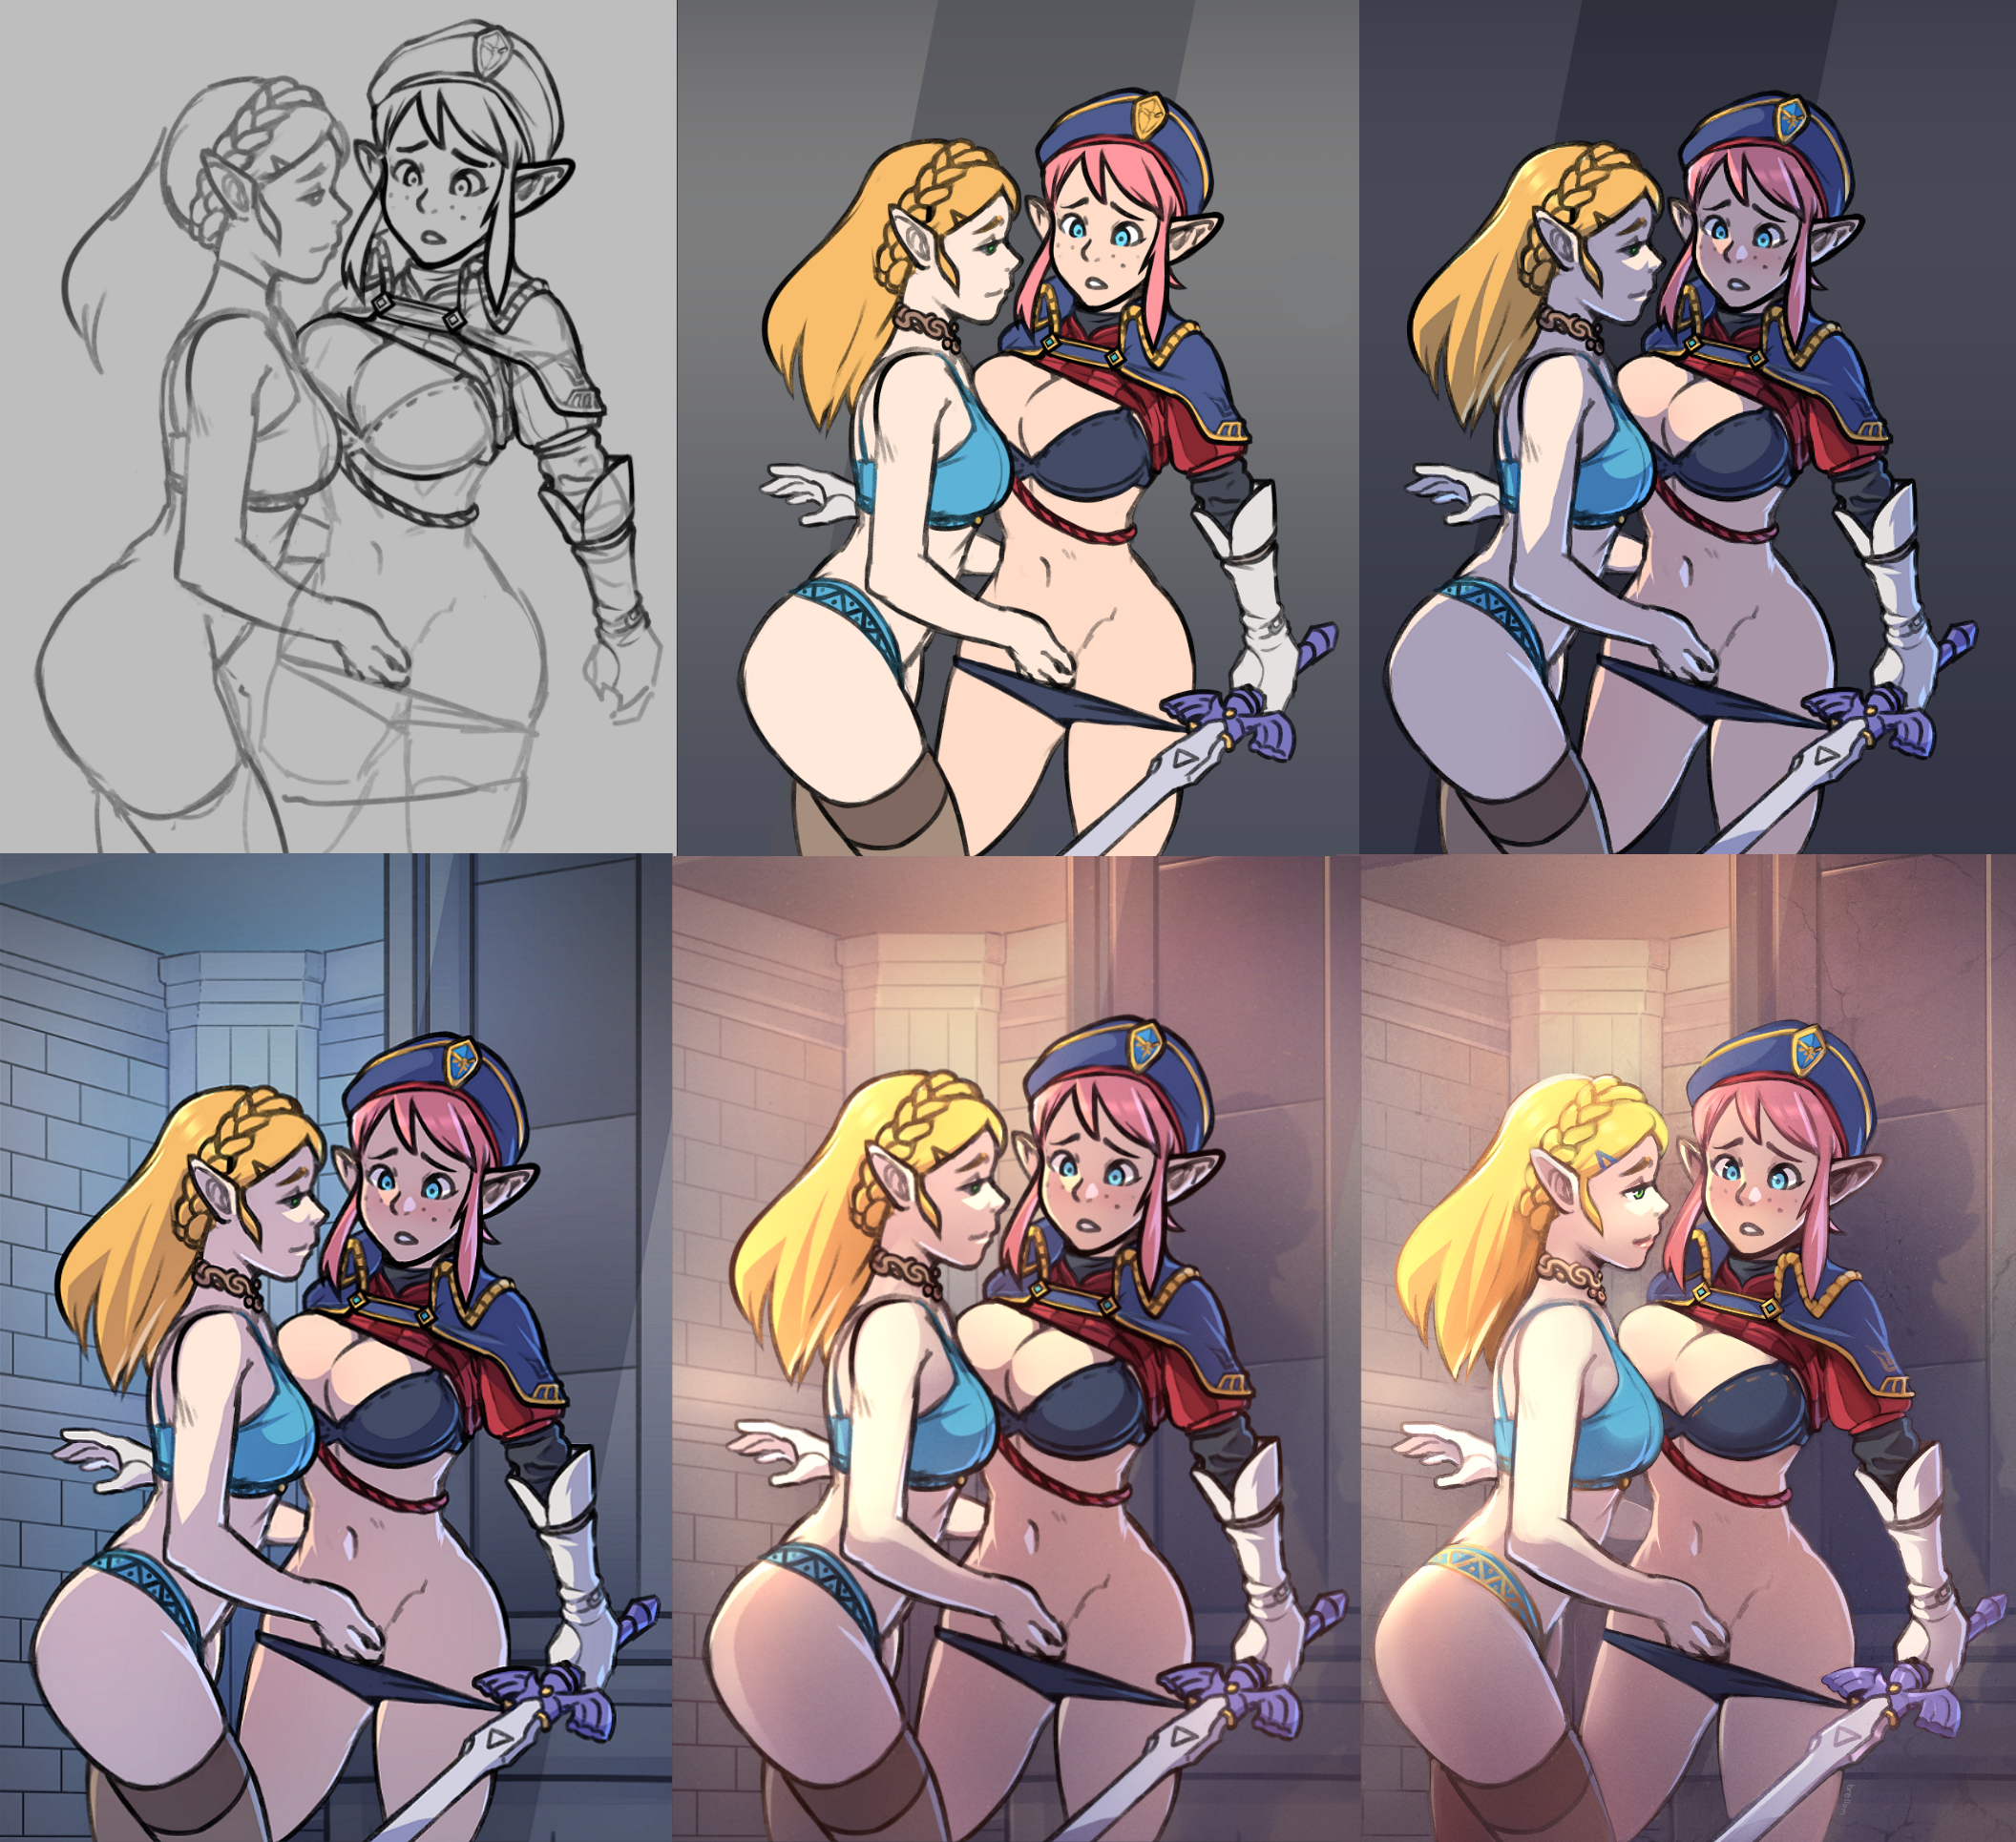
1. Rough Sketch
Much of the lines made early on were kept throughout development. Inks on a separate layer take very long to do. Interestingly, Link had pants before I removed them in the next stage.
2. Colours
The drawing was finished. I added the sword, as well as a necklace & panties for Zelda. I originally planned for it to be a Zora necklace, implying that Mipha was controlling Zelda. However, I decided to use corrupted Sheikah tech, which made much more sense without additional context.
A hypno variant is accessible in the Dropbox Archive.
Each character had their own layer, which all of the base colours were put on. This is much less modular than every object on a different layer, but I was certain of my colour choices. There is a strip in the background to suggest the characters pressed up against a wall of some sort.
3. Shadows & Lighting
Further along, I applied shadows. My shadows were done with a single [Multiply] layer using a pale blue. I don't usually make shadows this way, as [Multiply] often results in muddy colours. I generally manually pick my colours, but I was trying to shade quickly, and I was okay with the colour expression being less vibrant. It's dark.
In the next stage, you'll see I introduced a bit more red into the shadows. It's subtle, but look as Link's belly.
Some additional light effects were applied. Some highlights on the hair, coming from a light source on the left. Additionally, in the darker parts of the figure, coming from the right, is some pale blue bounce light. This bounce light isn't technically coming from a real source, and is a design decision to create contrast between the figures & background. Both of these lights were done on separate [Add (Glow)] layers.
Much of the body is in shadow, as I wanted the breasts to be the focal points. I eventually changed this, however, as the faces were too dark.
4. Background
After referencing Hyrule Castle's rooms in Breath of the Wild, I decided to have the characters pressed against a pillar. You can see some ambient occlusion in the background, like the pillar having brighter & darker areas on the same plane.
I had initially planned for a much cooler (blue) & dark atmosphere. Zelda was making advances on Link in secrecy, so the corridor behind them was made brighter to suggest they were in a darker part of the castle.
5. A Shift in Direction
I found myself not liking the cool background and made efforts to shift towards a warmer interior. In-game, the Castle's interior is more red and it also suggests warmth (which you usually want in sexy art). Blue is cold & unfeeling, whereas red is sensuous.
The piece was still flat, however, so I decided to introduce softer lighting. The lines in the background were made subtler so that they didn't demand the same level of attention as the characters.
Now that the scene's lighting has changed, I added more light on the left side of the characters. You can see that Zelda's backside is much more lit, as if brightened by a torch. At this point, the faces were also made slightly brighter, and the characters' colour temperature was moved closer to red. It's very subtle, but it makes a big difference.
6. Completion
The piece is now even more soft. I began painting ON TOP of the previous layers (a step you should save until you know the modular parts of the work are done). I painted over the edges of the characters, so now much of the work feel almost line-less. Many parts feel much softer than before primarily because of the reduction of the lineart, such as Zelda's face, and much of Link's apparel and hair.
Some more finishing touches were made, like Zelda's eye being redrawn to actually show her iris, cracks along the surface of the pillar, and with some subtle highlights on the Master Sword.
I hope you enjoyed this look into the process of my recent piece.
Files