Home
Home

 Artists
 Search
 Recent
 Random
 Posts
Posts
 DMs
DMs
 Tags
Tags
 Random
 Importer
 Import
 FAQ
FAQ
 Account
 Register
 Favorites
 Login
Login

Early Nightwalker Process (Patreon)
Content
Hello Patrons!
I had some people ask what exactly I'd be posting on my other Patreon focused on 3D modeling. This is a post I made today, and I figured I'd share it here to give you a sample and to show you the early stages of the Nightwalker! ^_^
Want to know what my 3D Modeling Patreon is about? Click here.
Other Notes!
- After several boring days off, the tendons in my wrist have healed a lot so I'm cleared for light work! Yay! Thanks for all the kind words ^_^ I'll be careful not to overdo it!
- I am blown away by how many of you switched to the annual membership! Thank you! Not sure what I'm talking about? Read yesterday's post here.
---------------------------------------------------------------------------------------------------
Hello students!
I know the early stages are the most intimidating so I wanted to show the first three stages of my Nightwalker and talk about it! This model is about 50% done, so I thought this would be perfect to review.
BRUSHES USED
+ Move
+ Claybuild up
+ Damstandard
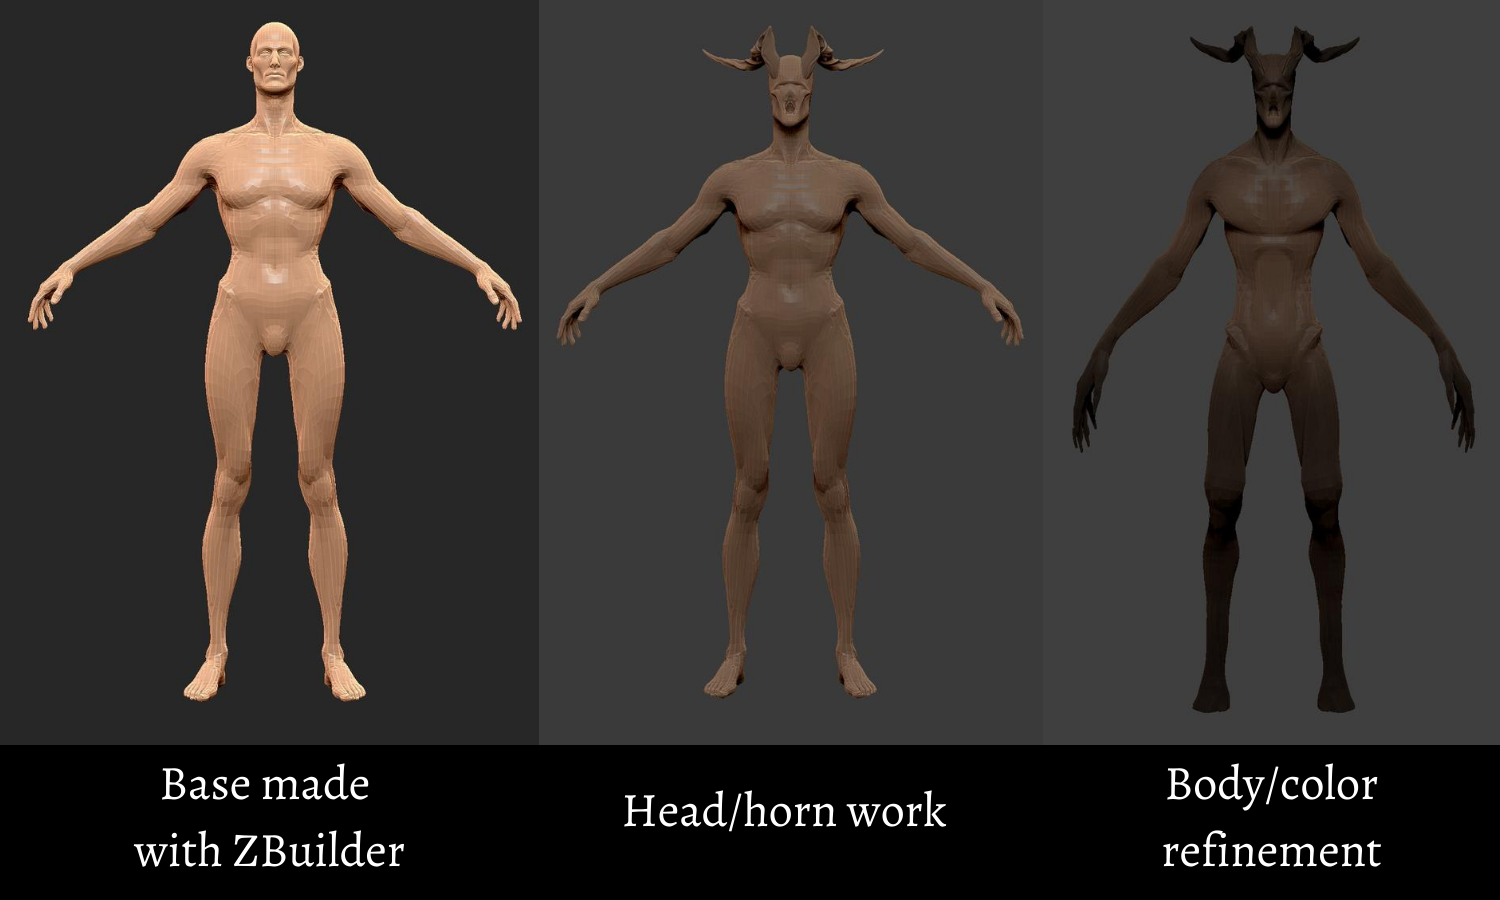
STAGE ONE : Base made with ZBuilder
You can get ZBuilder here . It helps you make base meshes rapidly. This took 5 minutes just by pushing around some sliders. It looks ridiculous, but it gave me an elongated figure to start from that would more closely resemble my Nightwalker
STAGE TWO: Head/horn work
I I like to start with the focus of the model. The best part of this monster is it's head and horns. The elongated figure complements the head/horns, not the other way around. So it is important that the head/horns really look good! Another example is if this was a princess, it'd probably be her long flowing hair that I started with. Pro tip, the vast majority of the time the focus is the head. We instinctively look for faces so it is where we tend to look first. This isn't always true though, for my peacock griffin the focus is definitely the wings.
*IMPORTANT NOTE* See that the head/horns aren't finished? It is just blocked out. If you finish parts of your model without touching the rest, you risk the design not flowing together. It'll look like separate pieces tacked on. Get the general idea, move on. Refine later.
STAGE THREE: Body/color refinement
I want the body to match the head/horns so I begin working on it to be that level of "complete". I'm not worried about muscles, scars, or texture at all. I'm concerned with big picture stuff. How long the arms should be, how thin the body should be, that kind of deal.
WHAT'S NEXT?
Back to Stage 2! I'll refine the head/horns a bit till it is 80% finished. Then I'll get the body to match. Finally, I'll finish the head/horns and then finish the body. The last step will be posing.
ANATOMY BOOKS
This figure has no clothes or weapons to distract from bad anatomy. These books are what helped me the most. These links are affiliated to me, so if you use them I get a small commission. Note that I can create these links for *anything* on Amazon. I picked these books because I liked them ^_^
$30 : Anatomy for 3D Artists https://amzn.to/3gddV0R
$60 : Anatomy for Sculptors https://amzn.to/2Q5top0
Want to know what my 3D Modeling Patreon is about? Click here.
Hope this was helpful!
Mia Kay
Files