Home
Home

 Artists
 Search
 Recent
 Random
 Posts
Posts
 DMs
DMs
 Tags
Tags
 Random
 Importer
 Import
 FAQ
FAQ
 Account
 Register
 Favorites
 Login
Login

BTR - Let there be water (Pixiv Fanbox)
Content
Let's get to it! As in let's discuss how two water-y sets were done. Both had to have some creation part that is (I think) fun to talk about.
Let's start with:
fanbox post: creator/16218616/post/2469239
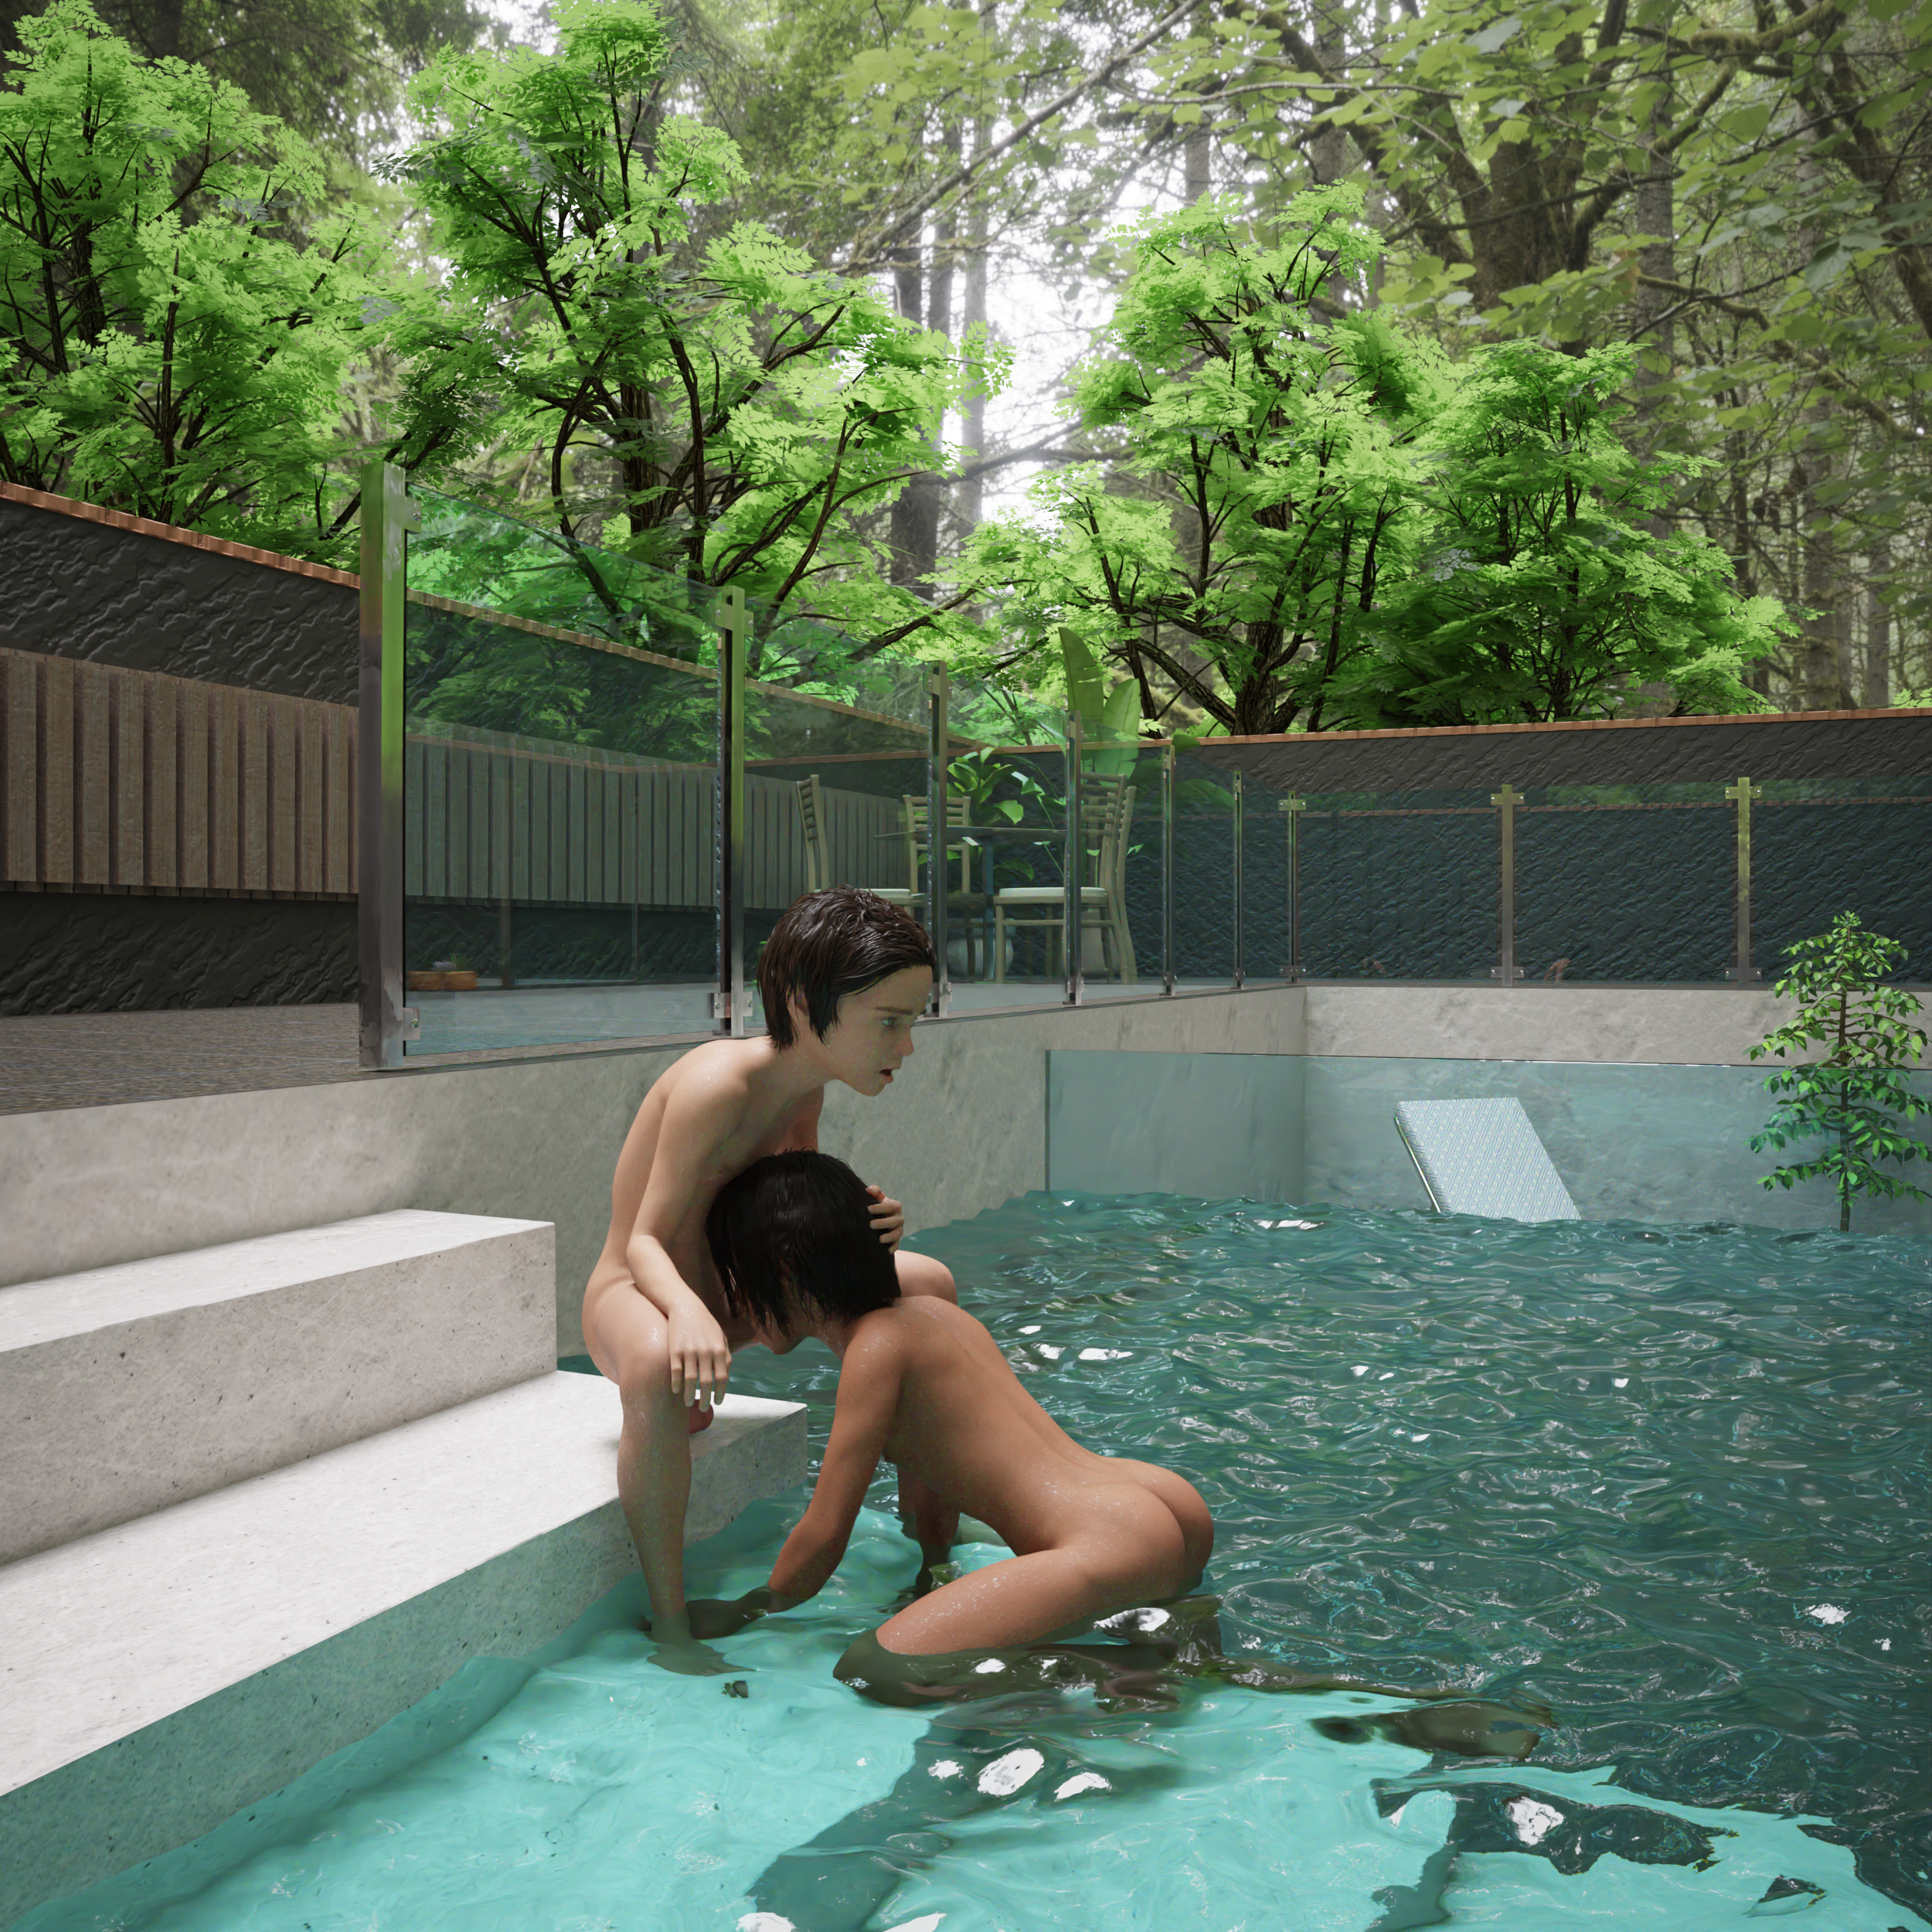
A little set done by simple request of pairing: Raul and Ed. I always liked doing "half underwater" images and making them is always somewhat a problem. It's almost impossible to position camera in such a way that it shows both underwater and over water without bluring everything out. You can cut part of the water and place camera there but you will end up with having light going through that little cutout. So that's not a perfect solution unless you do photoshop masking. My solution in both of the sets was "how about glass pool/hot tub?"
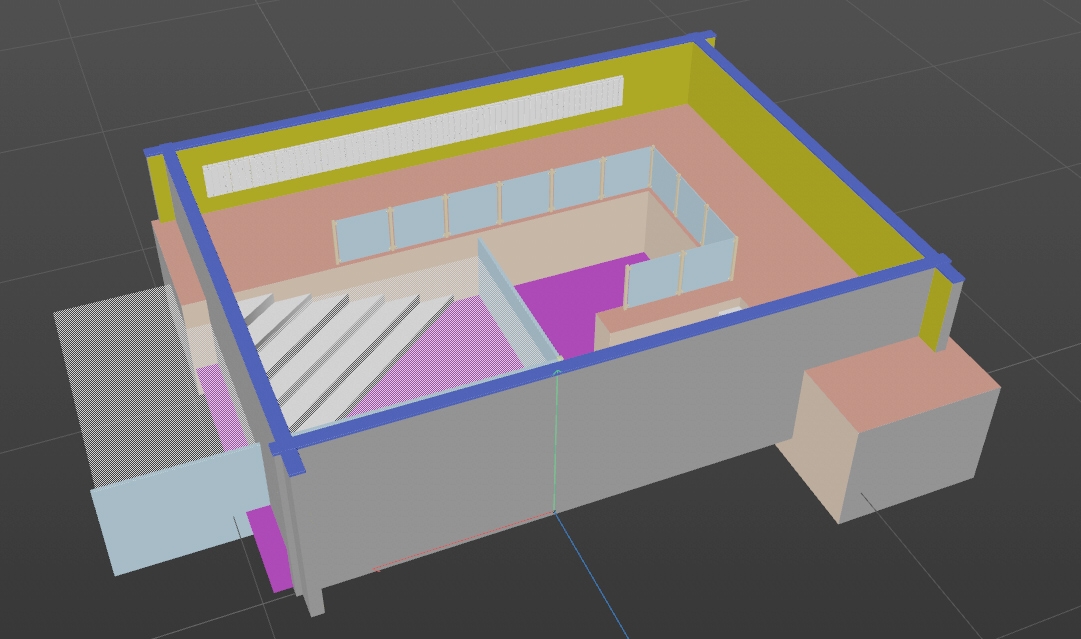
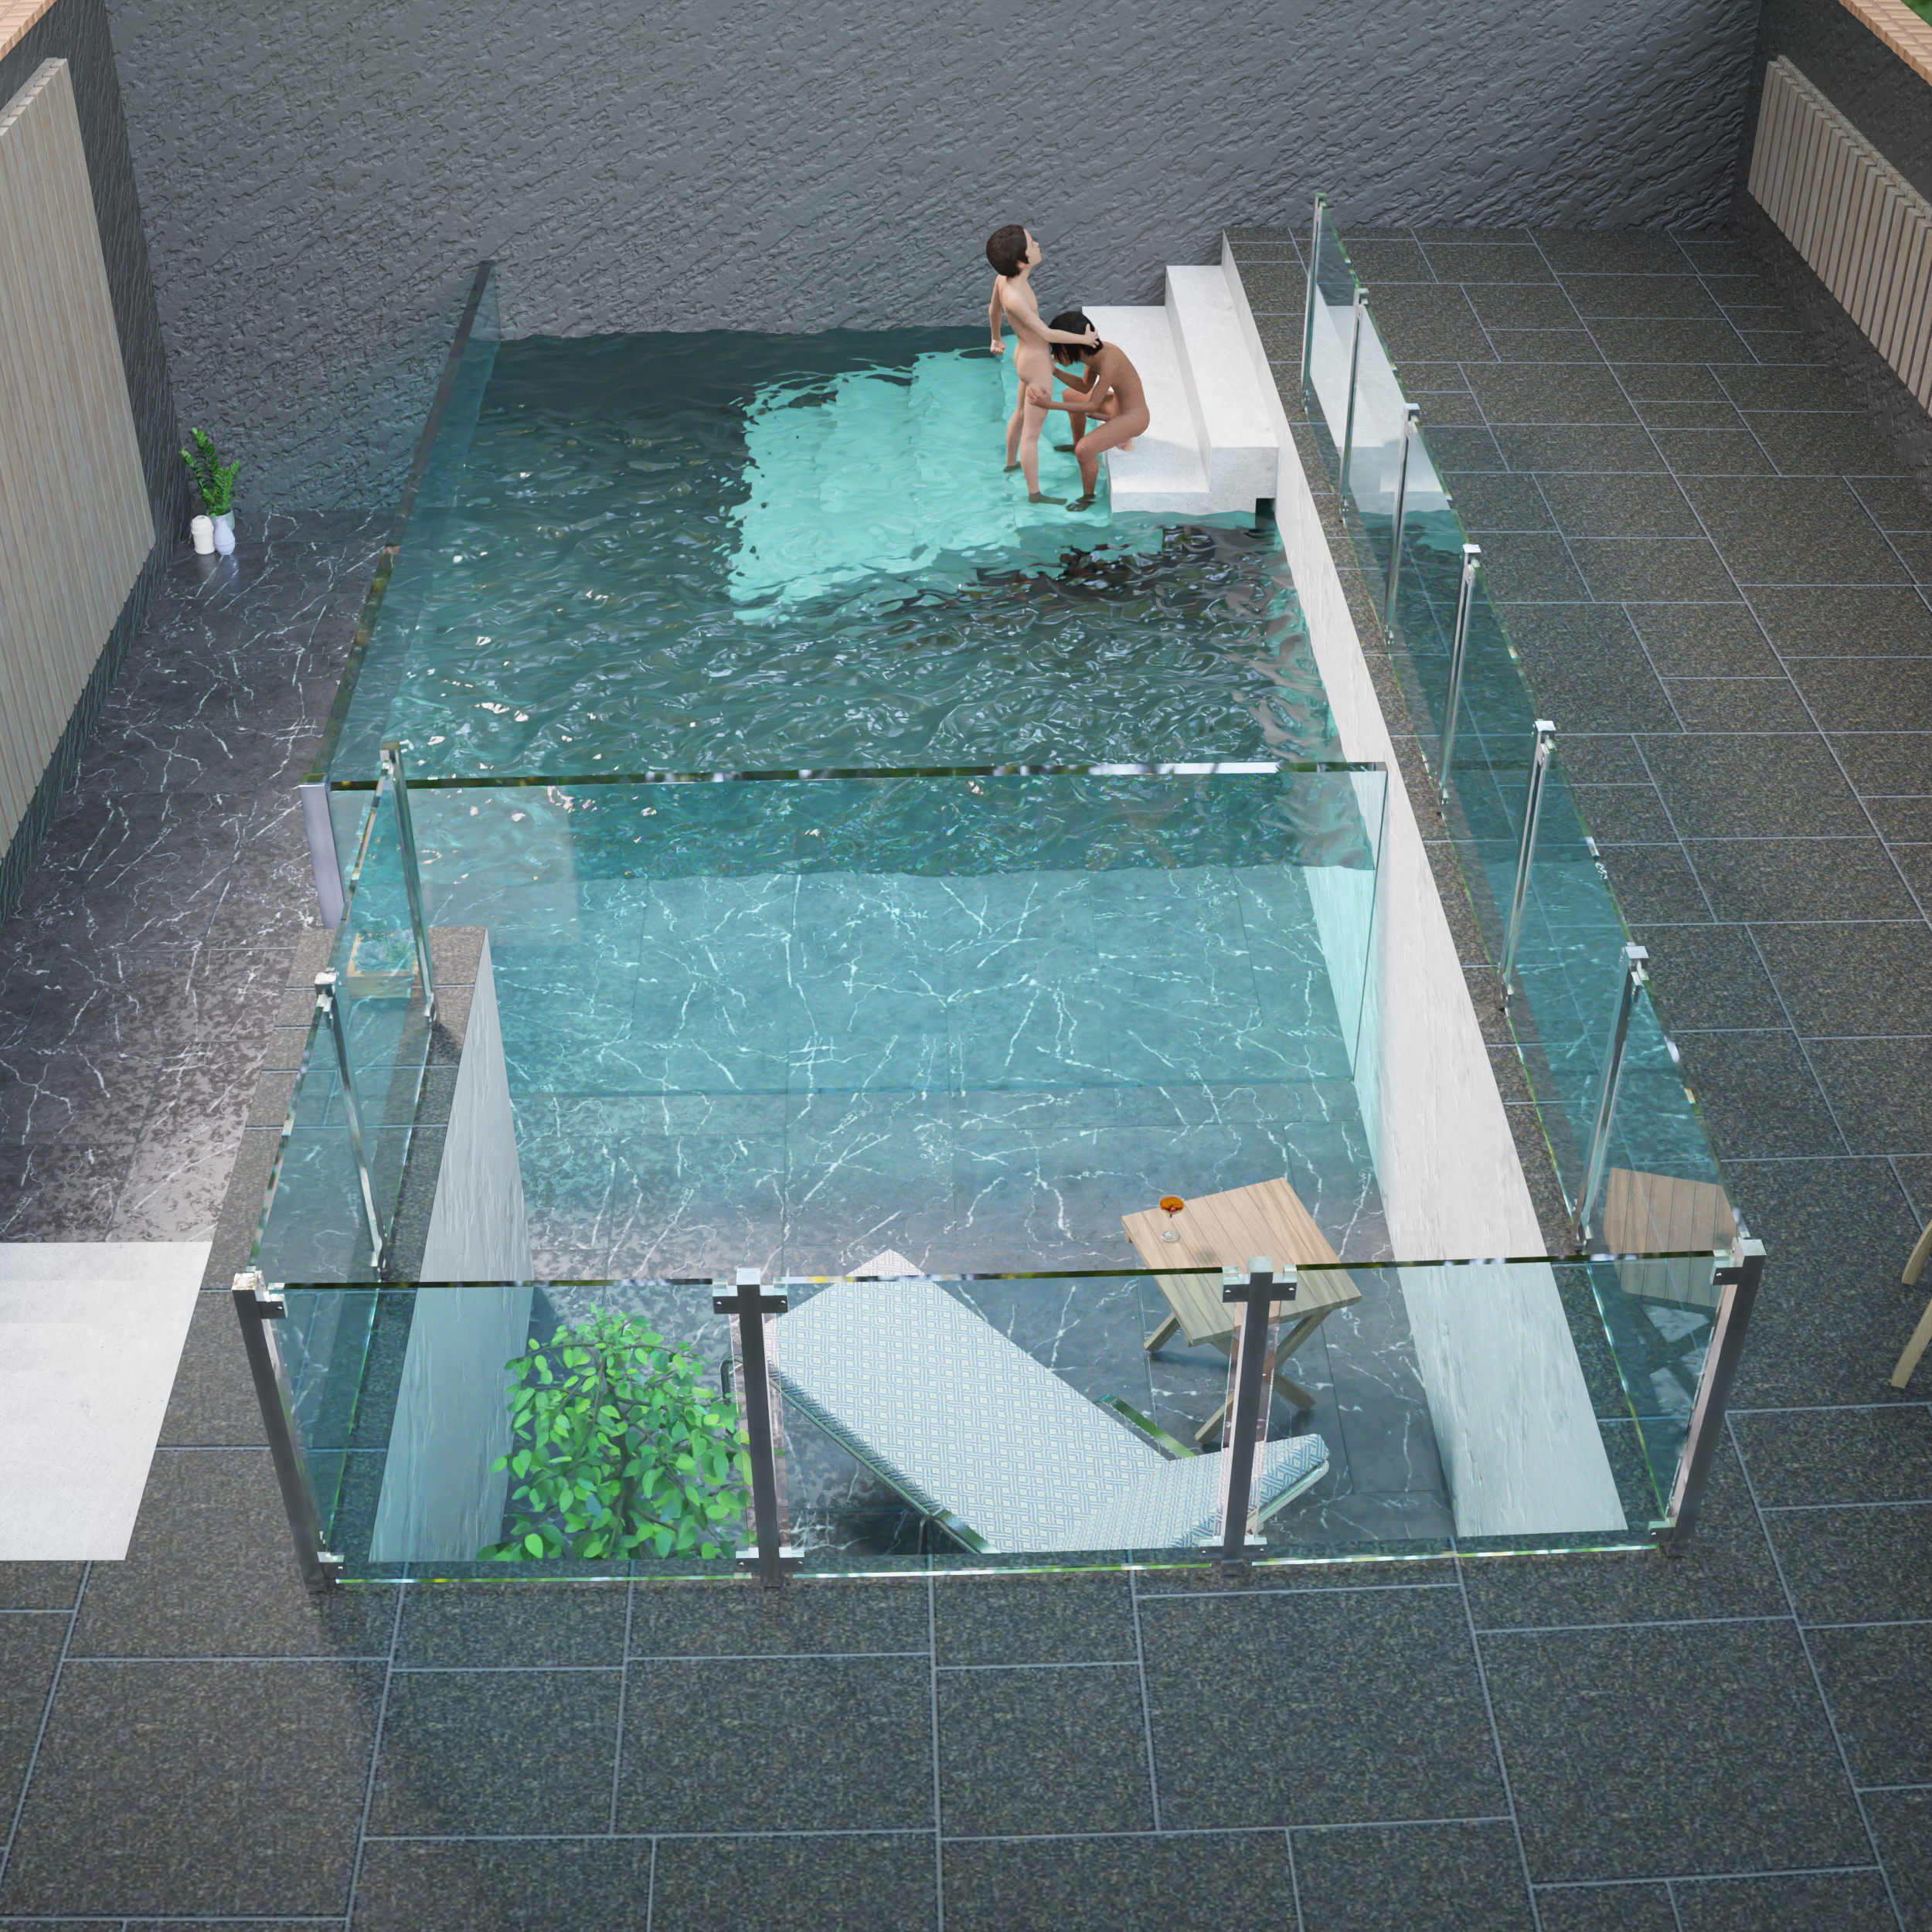
So I modelled this little patio/garden thing:
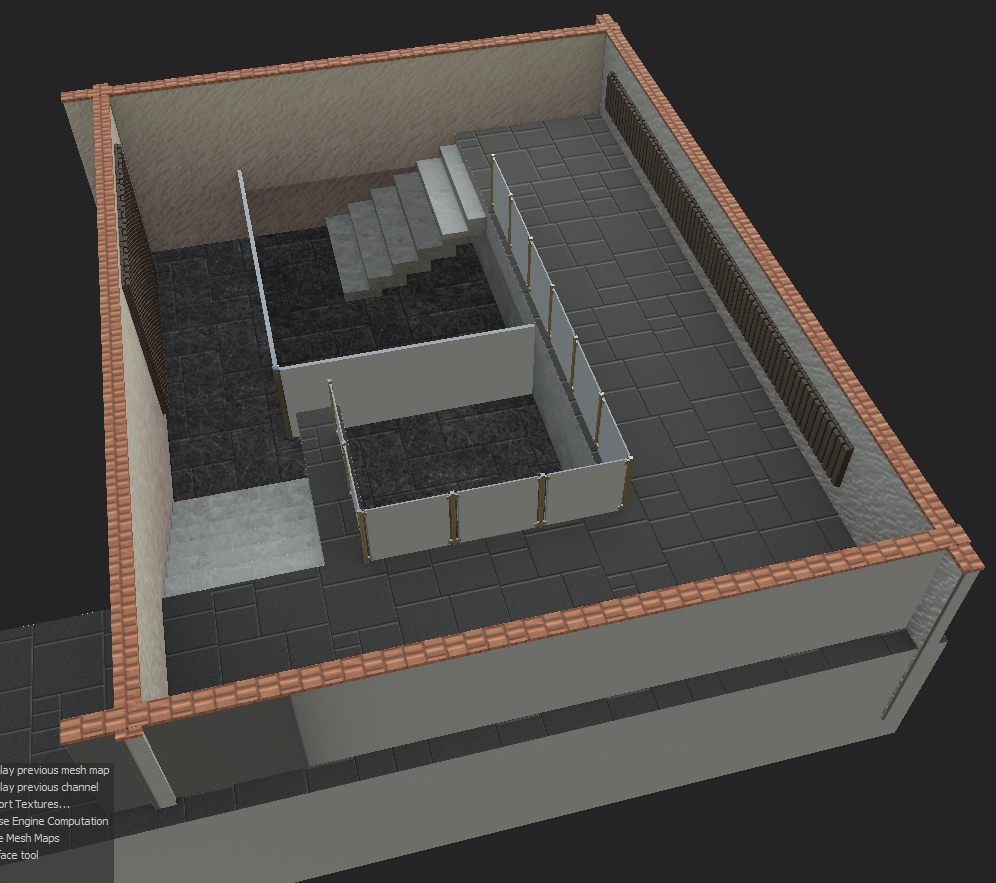
The angled staircase seemed silly in retrospect and it produced some weird polygon issues, so I just made it straight instead. And then dropped it to Substance Painter:
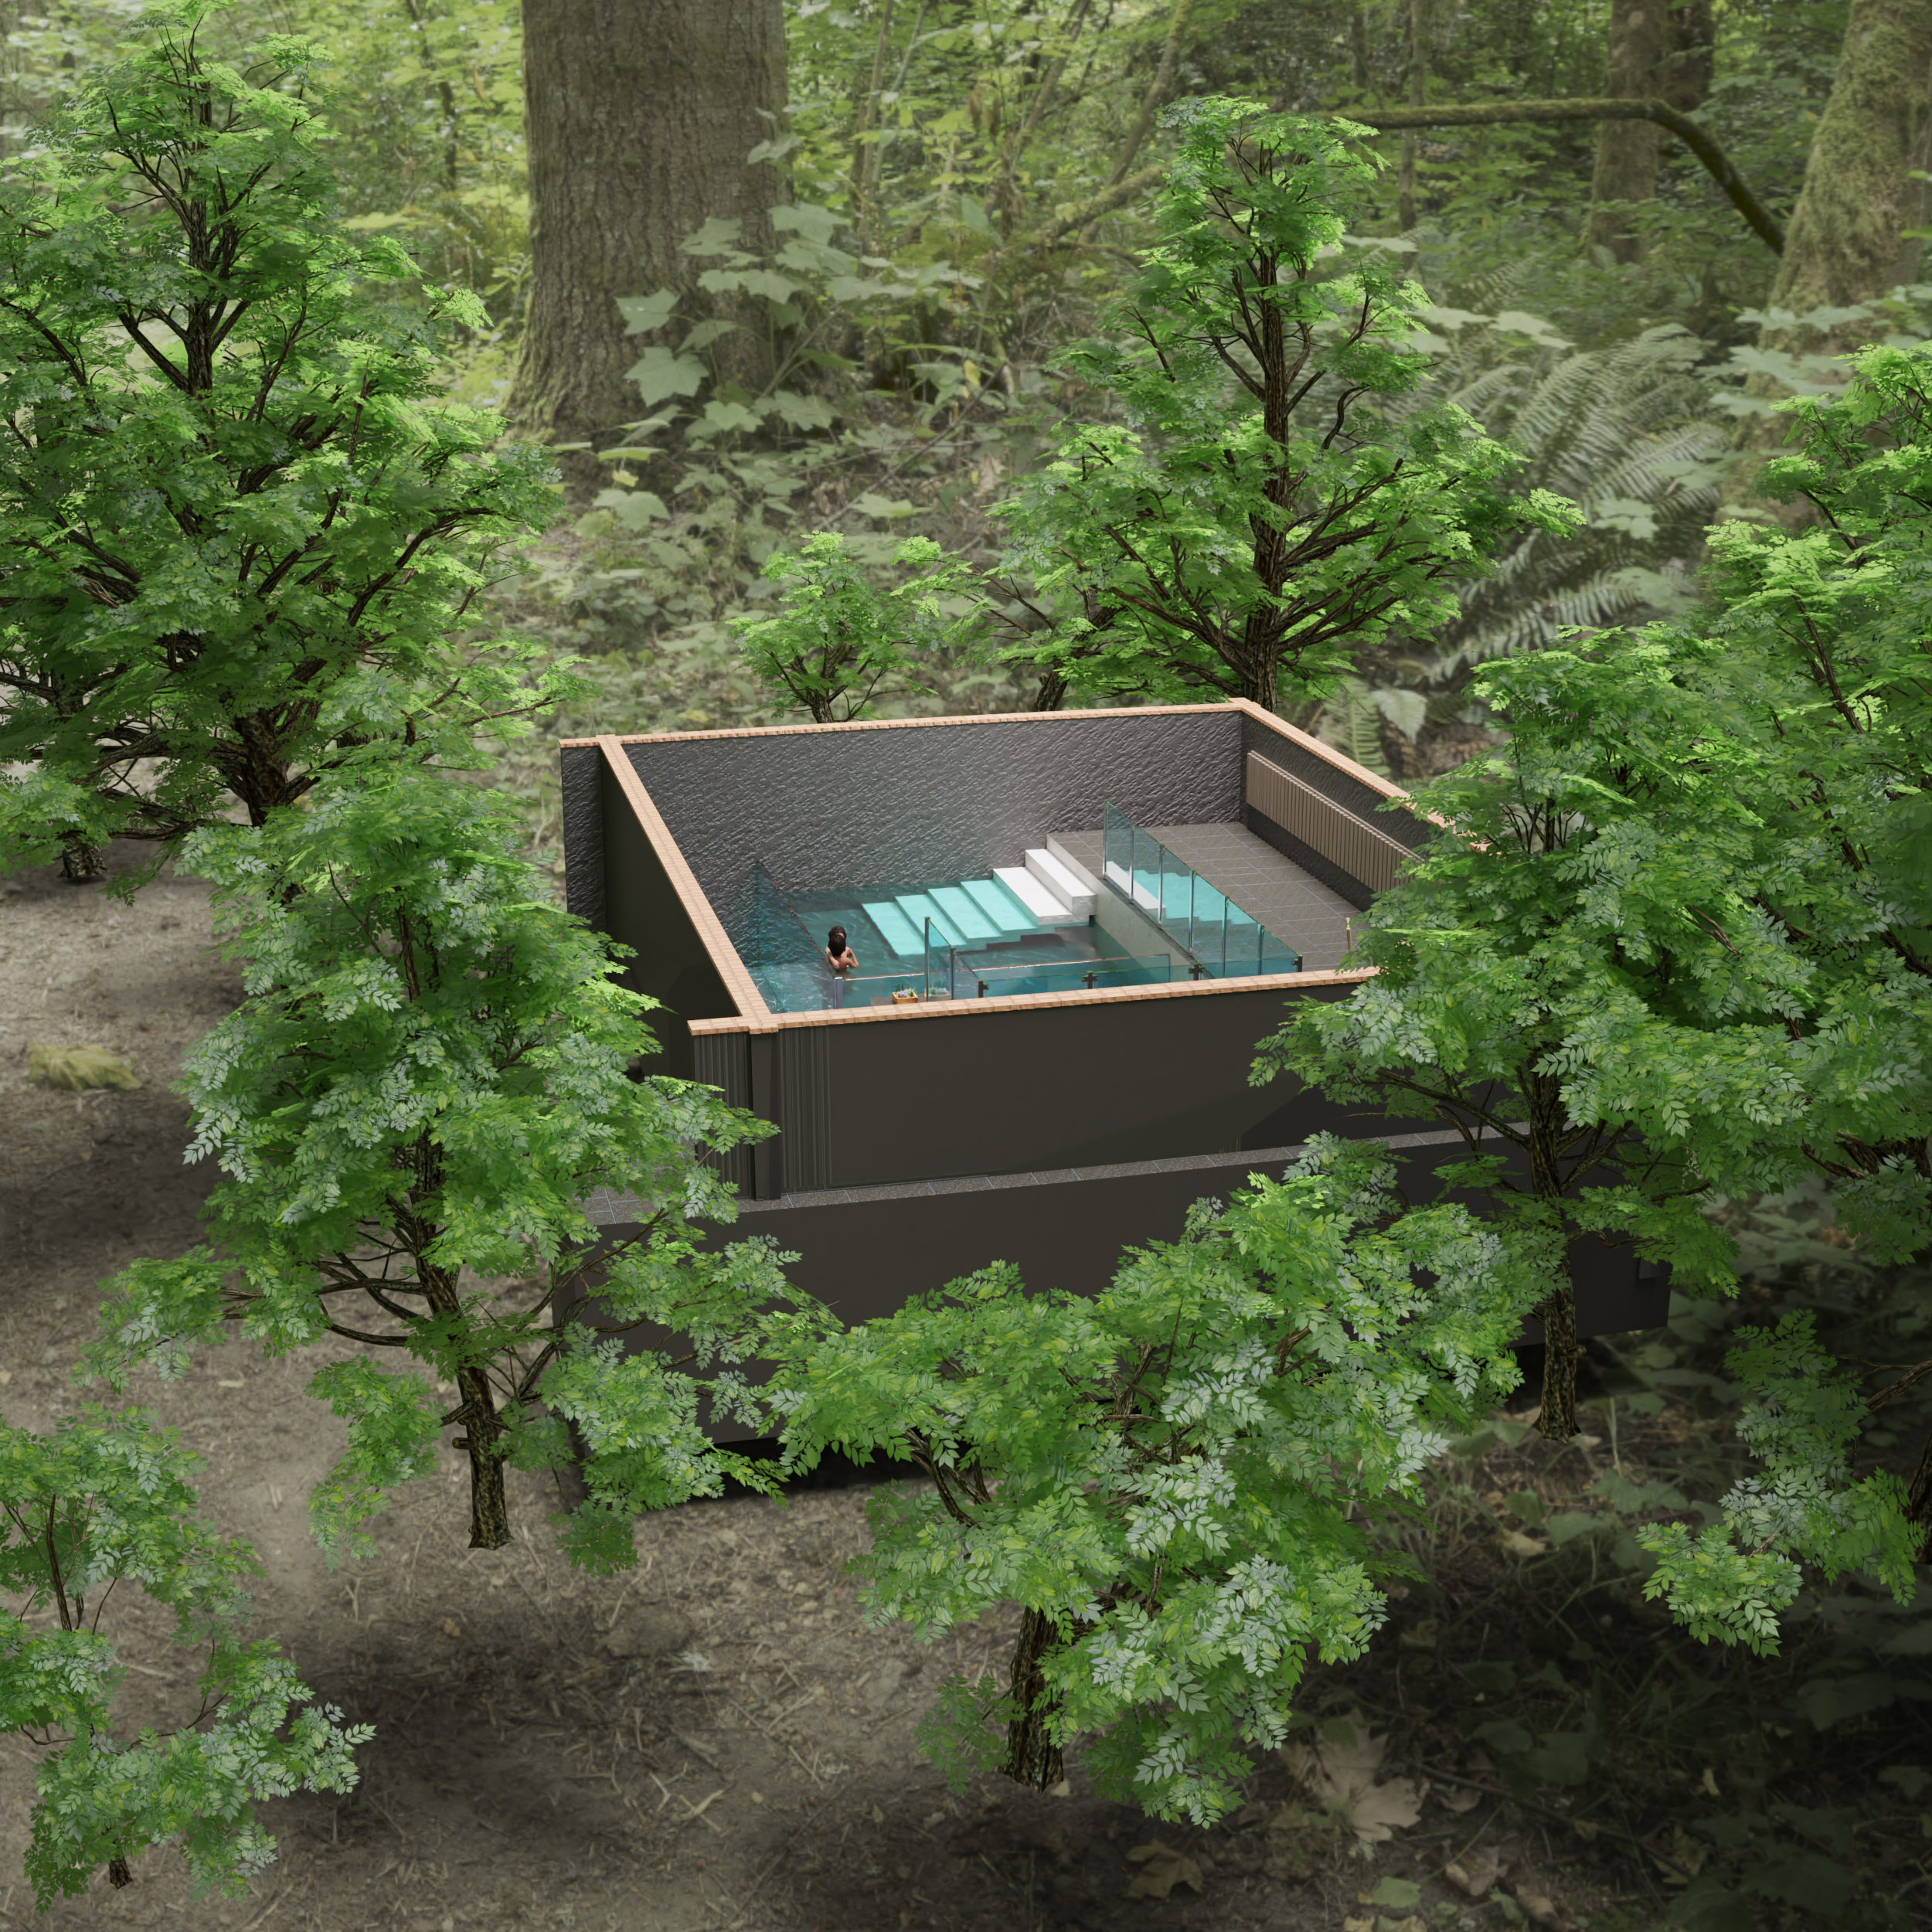
Nothing complicated done here really and in retrospect I would texture it a little better with more detail, but that wasn't the focus of the render anyways. In DAZ I added some big trees around it to add a feel of being out in the nature, forest. Basically to add color to otherwise pretty gray scene.
As you can see here I used a forest hdri (got from hdrihaven) and made sure trees I added blended well with it. As you can see here glass and water are also tinted a bit - just to not end up with gray boring background to otherwise hot scene.
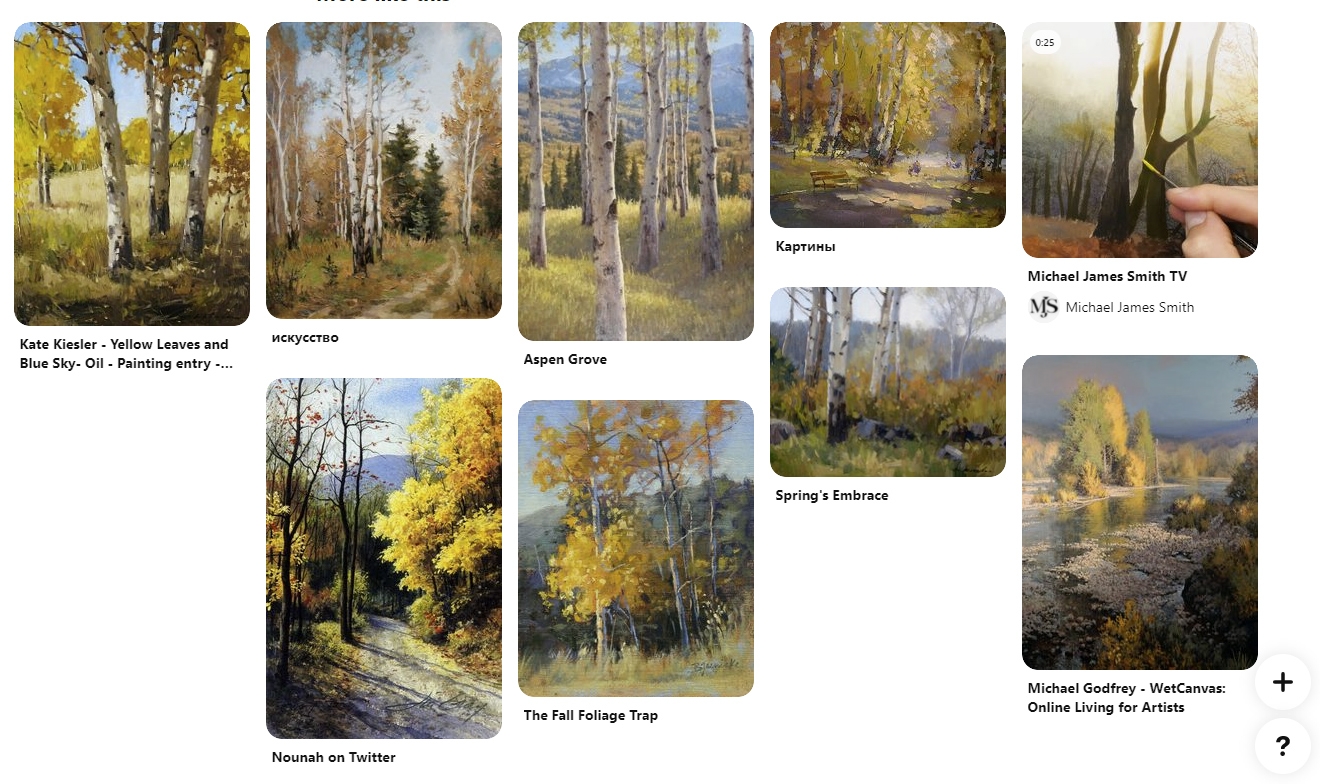
The blend of added trees and background isn't perfect - those added as models are a bit more saturated than further hdri background. In the end I knwe they both will get out of focus of the camera and shots weren't intended to be fully sharp all across the depth. So it worked out in the end. And it's a regular practice in painting - to make closer objects more saturated and further ones more faded.
Impressionist paintings take that to the extreme - while there is always some dust and water particles in the air that do that little fog effect even if air is clear, unless we have heavy fog or rainy day it's not as visible.
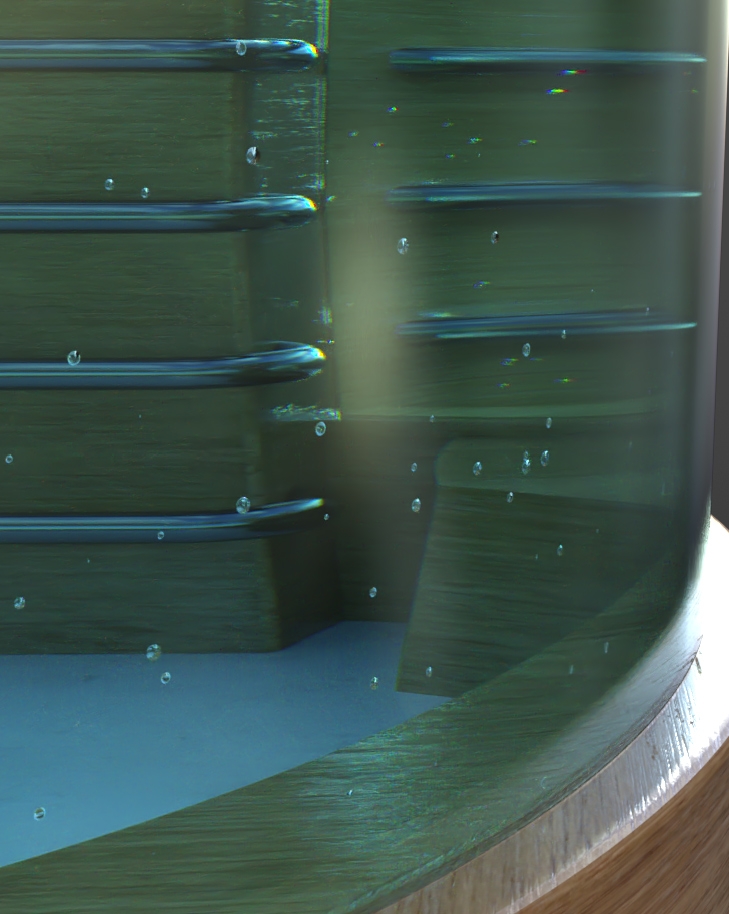
Here we can see some props I added to the scene so if camera catches them - the background won't be just plain walls and glass. That was also a reason behind those wooden planks on the walls, just to make it less uniform. I think I am repeating mentioning that every BTR: "put random stuff in background so it's not boring". I should stop talking over and over about it. So let's get to the water part.
It didn't end up as good as I hoped. In modelling scene process I only created a plane on top of the pool, without the sides. That was learning experience for sure. As you can see in the image above, water plane makes stuff under it a bit darker. But it doesn't happen on the sides. That was a thing I tried to avoid in next set. Because it made positioning lights a little tricky. Couldn't make lower light to create more harsh shadows, had to keep lights either pointing straight down or be very delicate blurred ones.
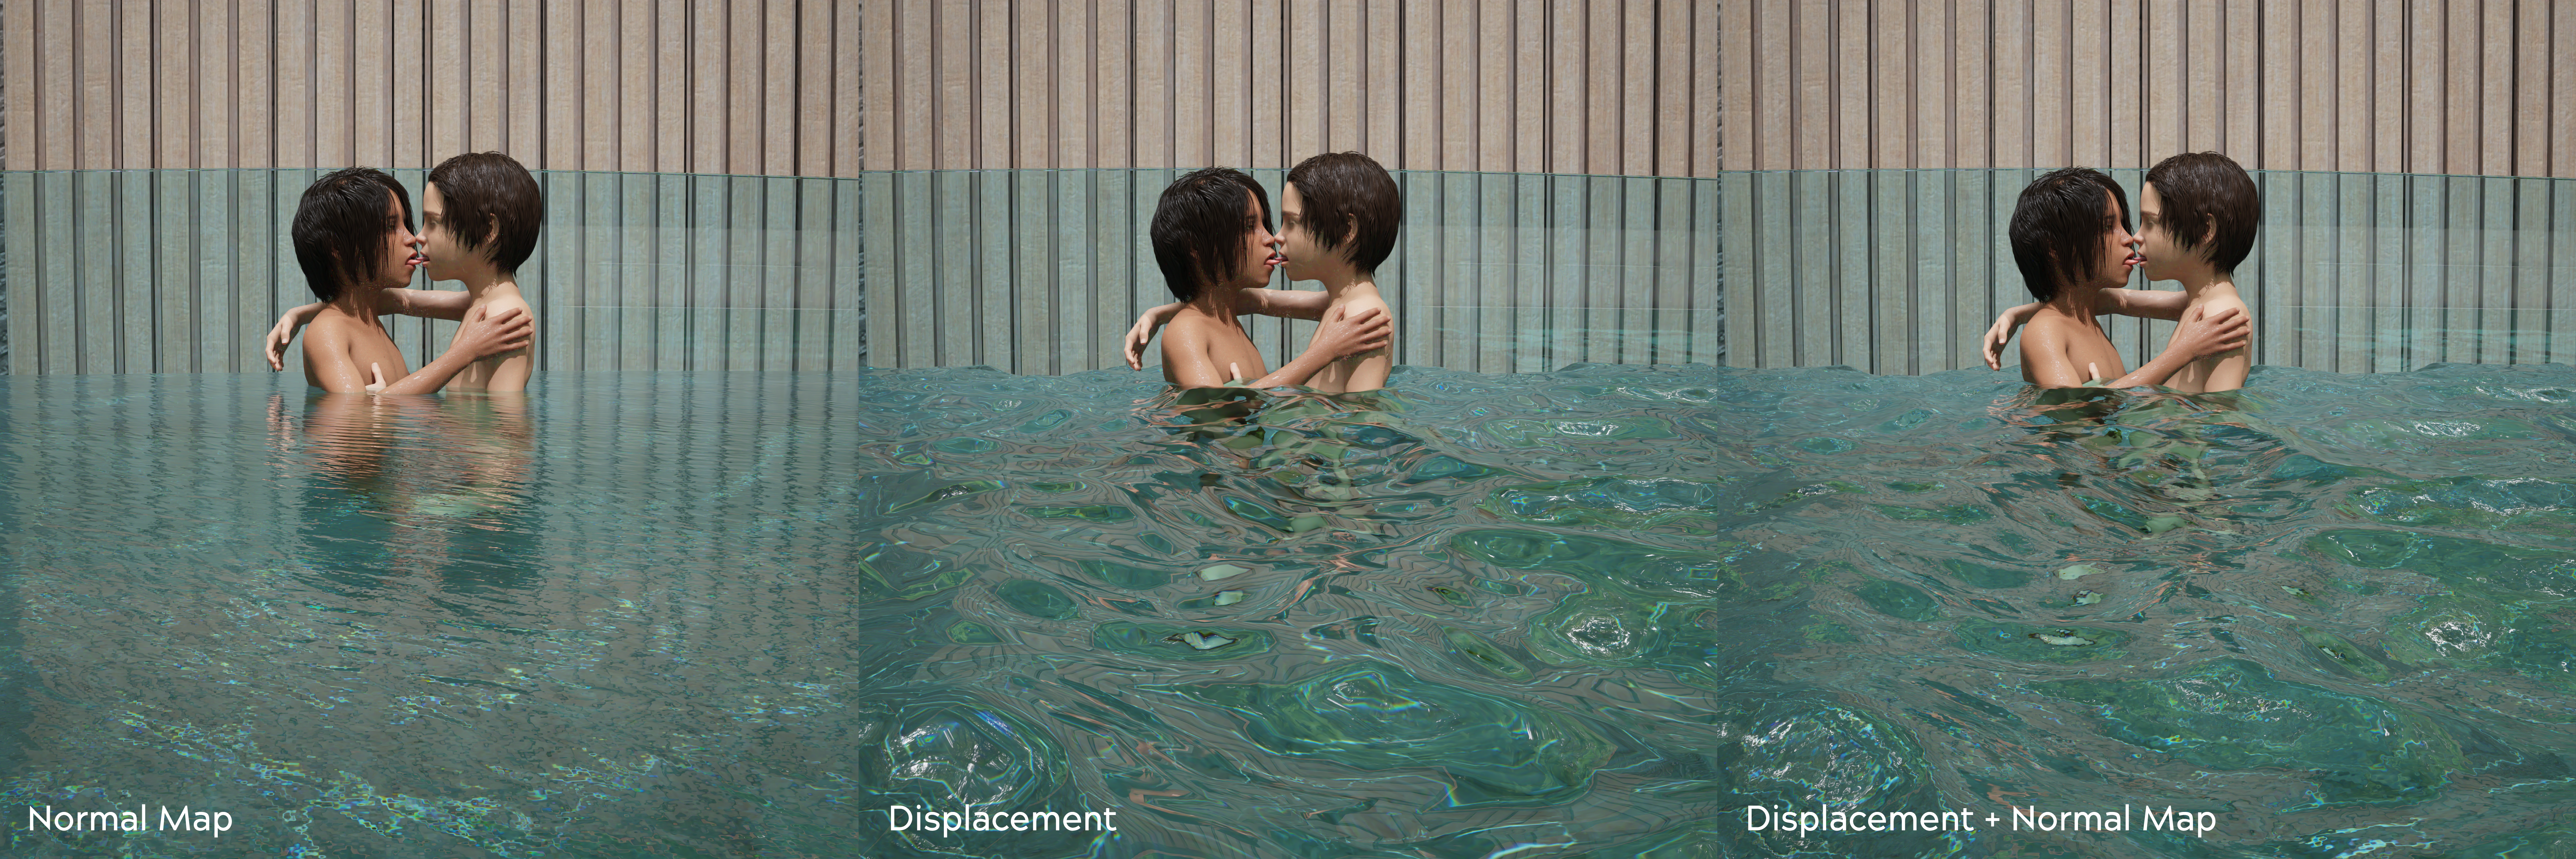
The water plane was... plain on itself so it had to have more definition.
After looking at glass pools on google images search I noticed a lot of them have bubblers which made the water surface more ruffled. And while I didn't add them here (they wouldn't worked since water wasn't a closed off space) I still wanted water surface to be uneven. And the solution to that was Displacement + Normal Map. Displacement for change in geometry and Normal to add more definition. Both of them wouldn't work as well alone.
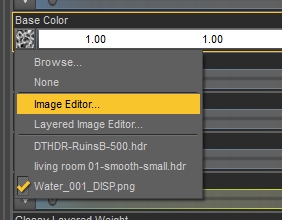
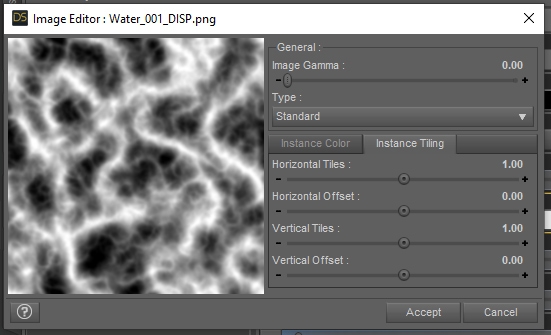
Okay - a little tip for you who want to create nice water planes. You can have different tiling for every texture you apply on the surface. It's not an obvious thing in DAZ and can be overlooked.
If you click on assigned texture and go to Image Editor - a window will pop up:
Where you can change amount of tiling per texture - so if you want to have for example 5x5 tiling of displacement and 20x20 tiling for normal map at the same surface. That way you can have more detail-oriented normal map and less so with displacement. When you look around environments you downloaded from DAZ Store you can steal ummm... BORROW some texture maps. For example Stonemason's works usually have very detailed normal map while others might use displacement which like in example above is not as detailed. Then different tiling for both will make more sense in those situations. Same goes with walls - if you want stucco texture over a gradient on wall ... etc. etc. I think you get the gist.
That was a long one... oof. But! Let's have a looksie on the second set:
fanbox post: creator/16218616/post/2514791
I learned my lesson with water being closed off and this time I made it right. Instead going for full patio with a big pool, this time I decided to model a hot tub with glass walls. But first - where do we place it? Somewhere sunny would be nice, so I used this little environment from the store:
I didn't like texturing on it at all. I mean it's not bad, but it didn't give me enough contrast and white bricks weren't something I would like to look at. So... Substance Painter awaaaaay.....
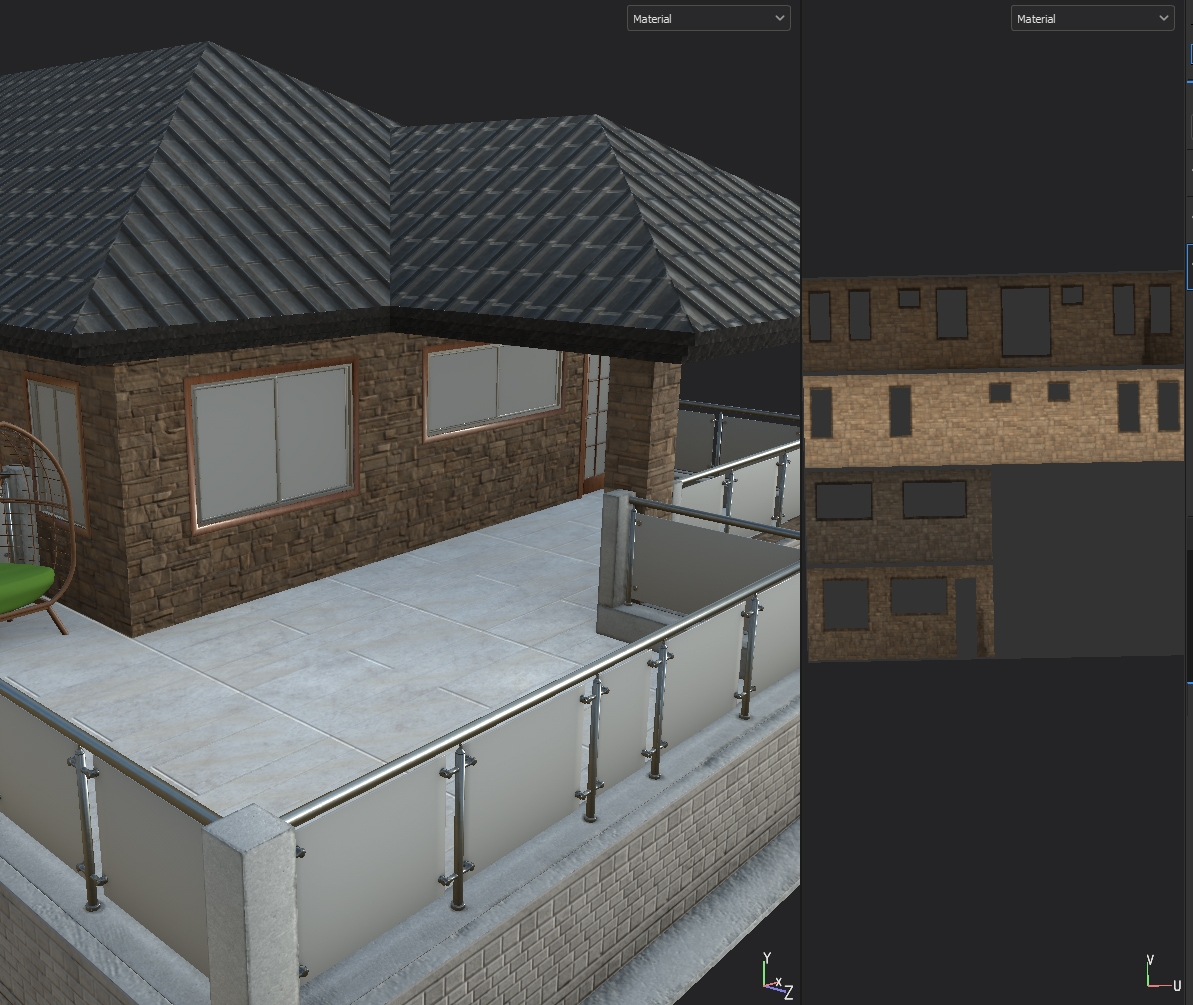
The main problem I encountered at first - this little house model was made for tiling textures, which I didn't want in this case - I wanted to be able to apply stuff like color gradienting to the walls and other parts, add some details here and there and not rely on tiling. So I had to change UVs entirely, which took a while.
Results weren't the best for details though. But! it was just background, so 2-8K texture sizes were enough. I wanted to focus on something on the patio, patio itself wasn't focus here.
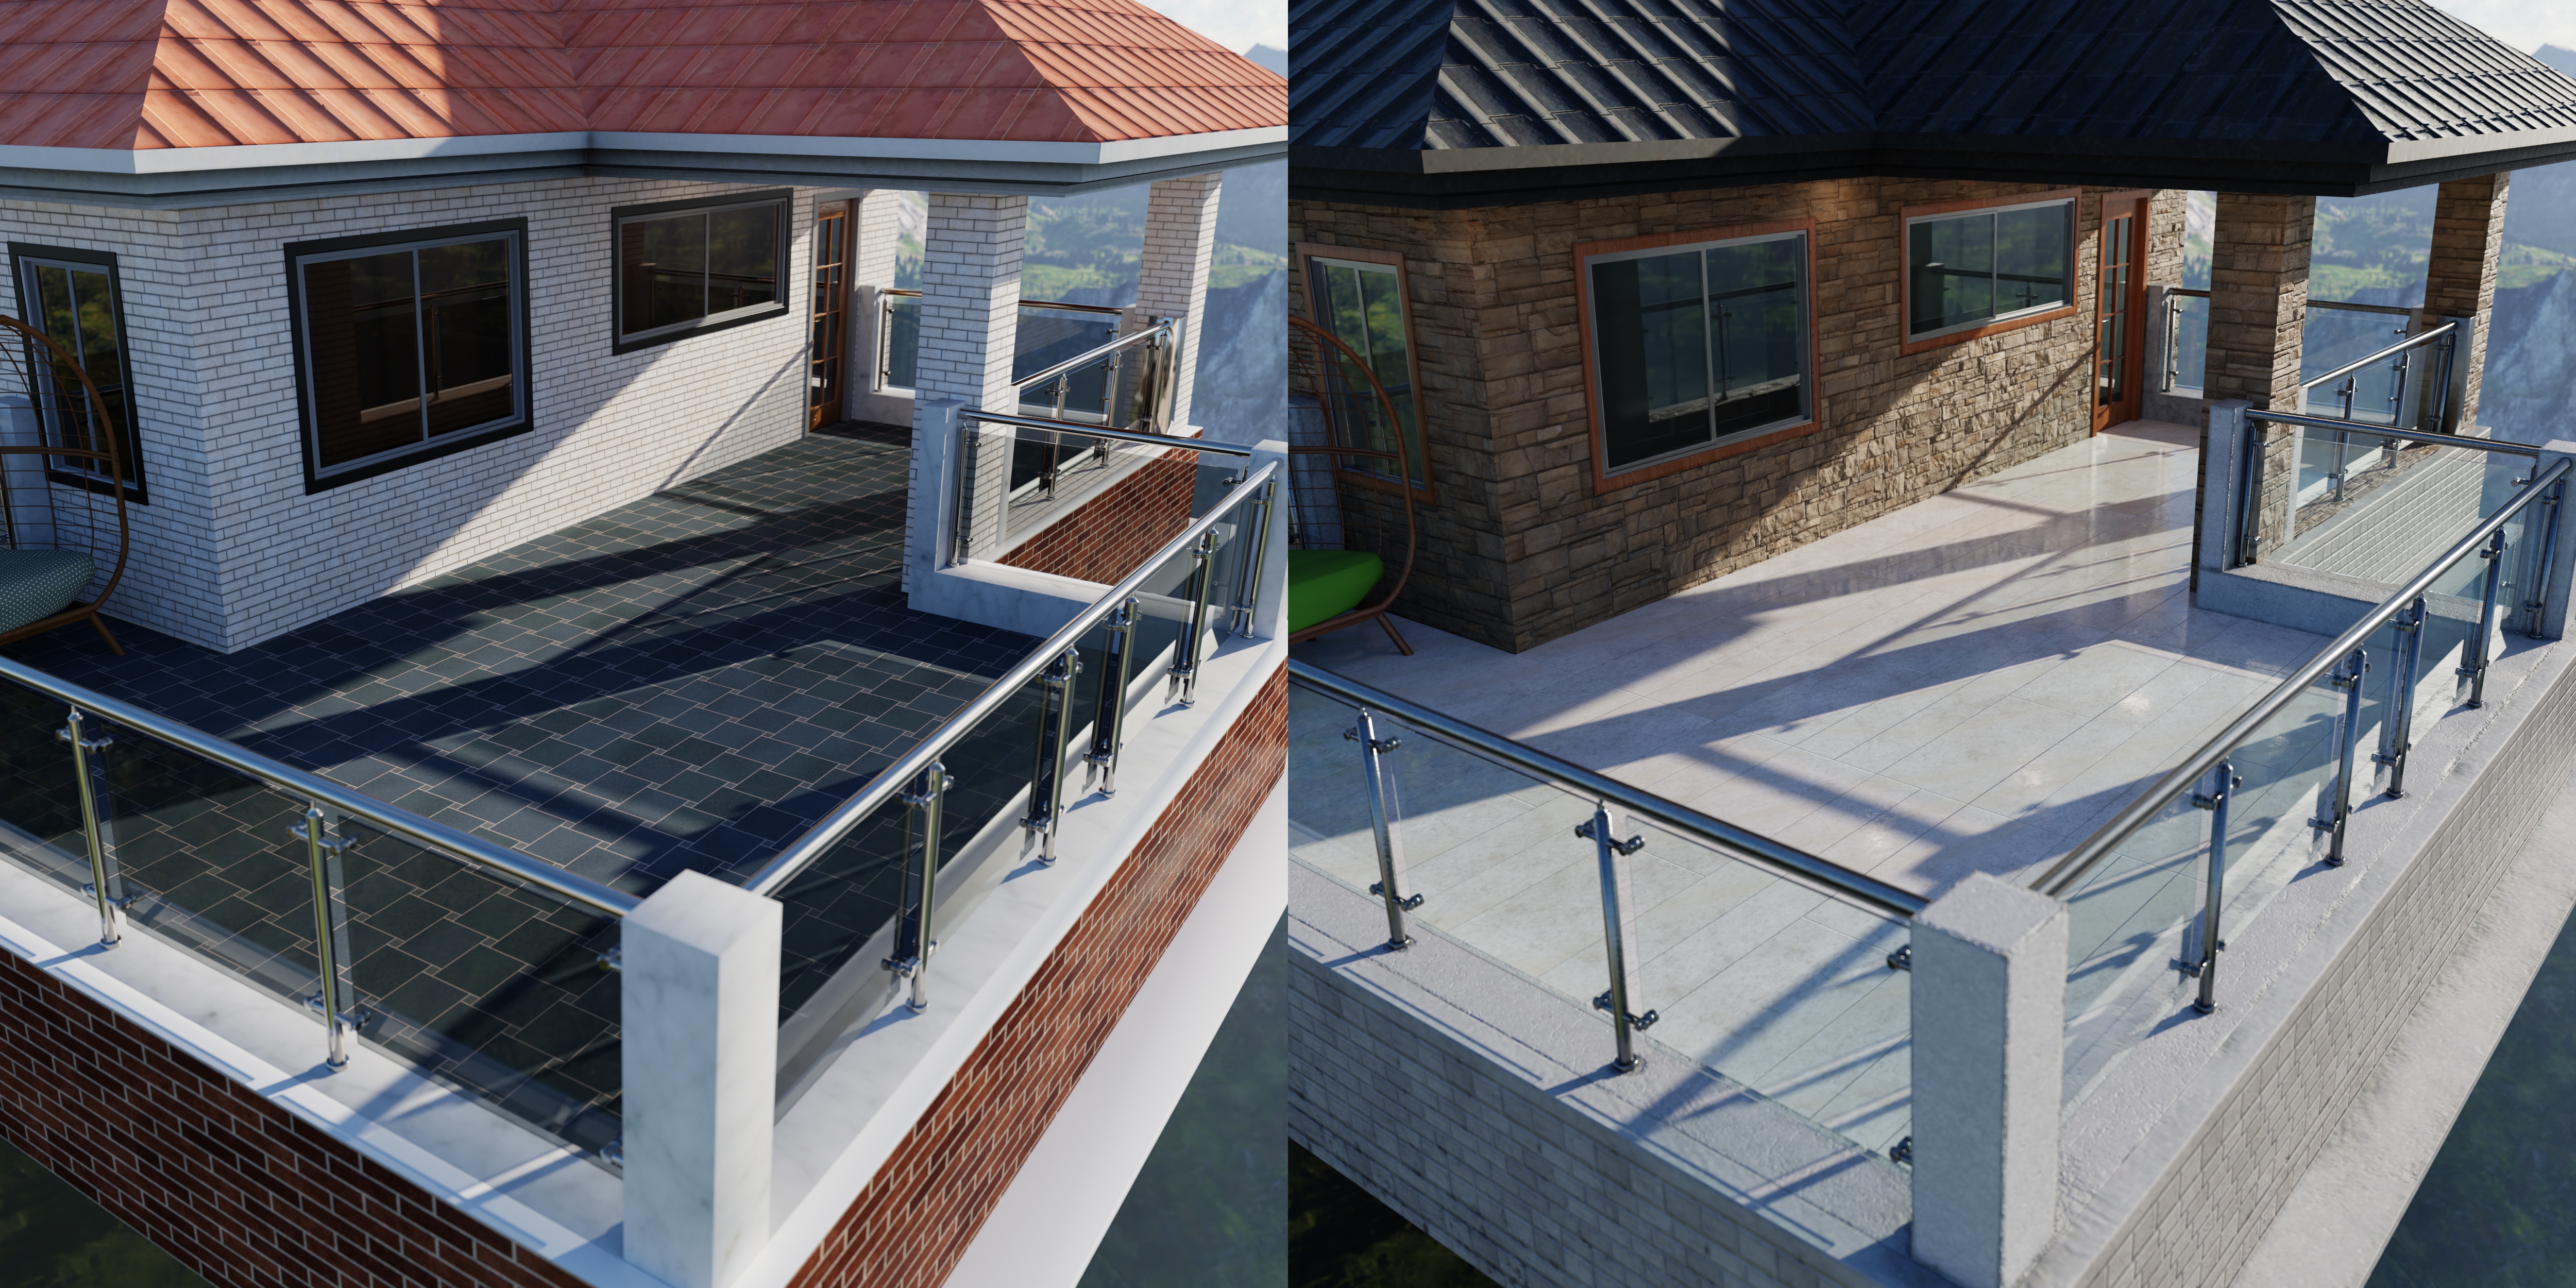
That's how it ended up. There's little reapeats seen here, making whole thing more natural-looking. If you look closer:
you will notice edges on concrete having irregularities, same goes for other elements, even chrome posts are not just simple metal - it has its own definition, which makes it look less like it's just polished metal that just came out of factory. I certainly didn't do well with windows but.... let me show you something:
There was just so much of it and I didn't want to spend multiple days on it so I wavehanded some parts of it and focused on parts that mattered to me the most.
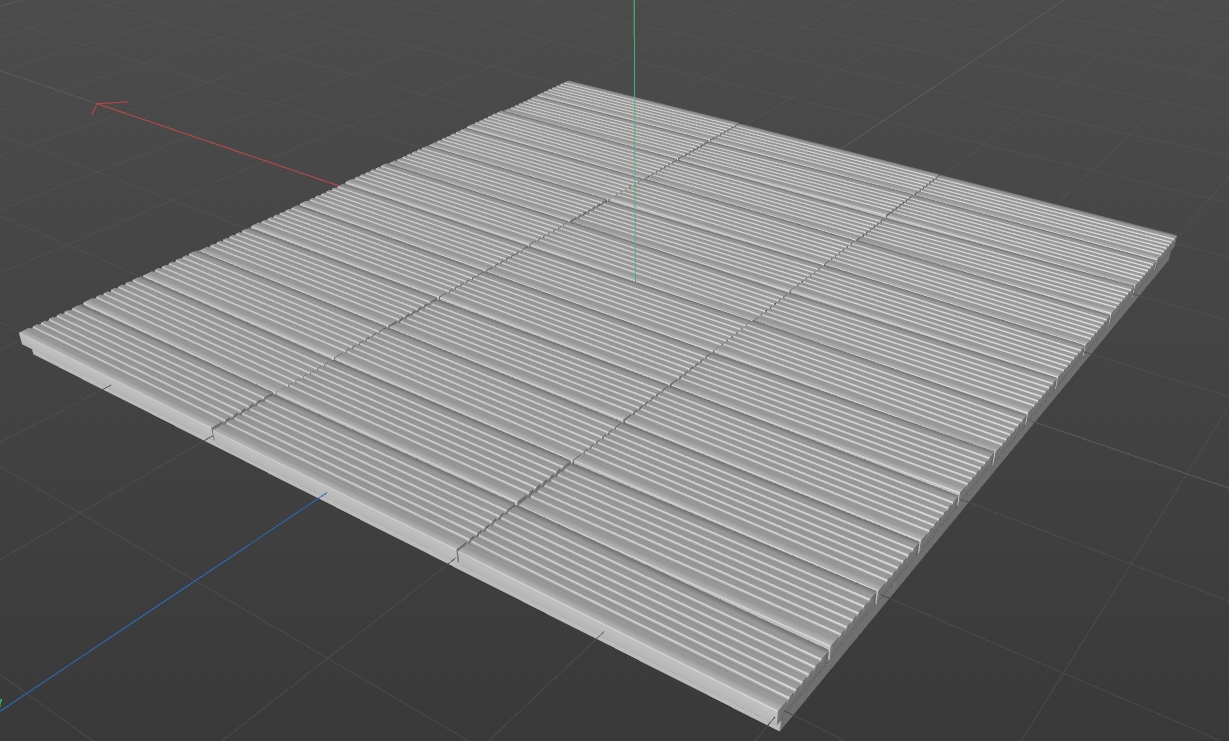
Next thing would be .... you wouldn't just put jacuzzi outside on bare floor. Usually those are put on deck boards which will help with drying water that gets splushed outside of the tub. So that was next step:
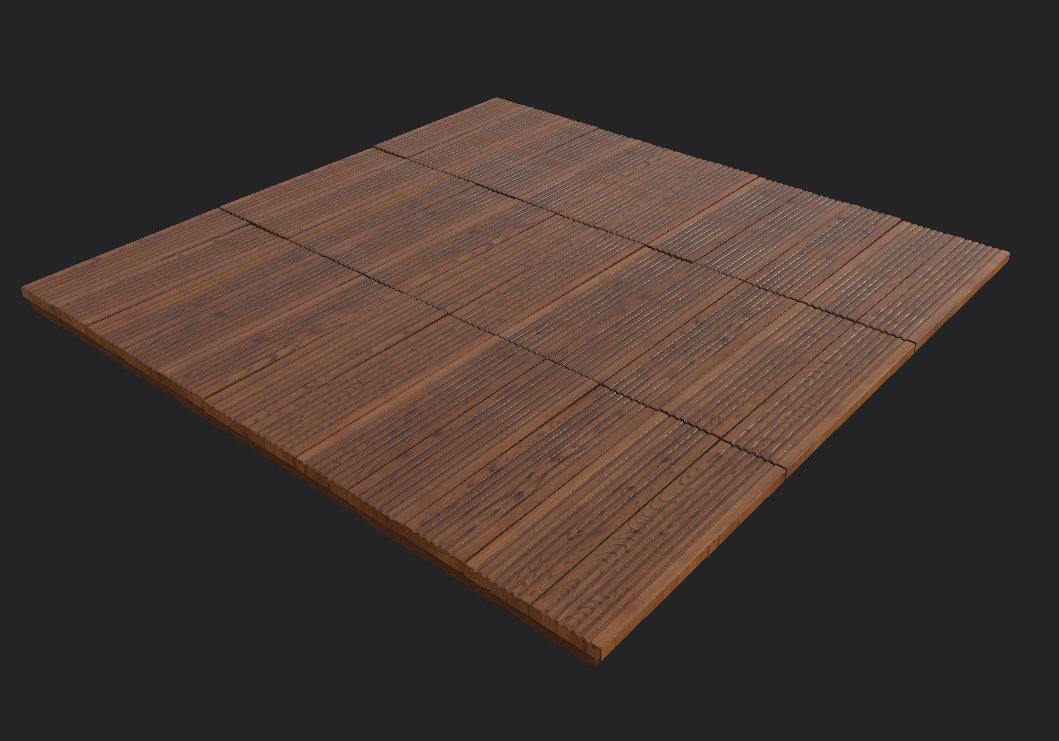
which was of course textured:
In retrospect I maybe made it too shiny for being just deck boards, as they tend to be matte. But in the end I don't know if they really show up in finished renders. Well that was work wasted haha But all good - I can reuse it somewhere.
Well now let's go to the main portion of this part - hot tub! I took every lesson I learned in previous set and applied it here to make a tub that I will love to use. Thankfully I took some screenshots of creation and asked around how others see it, so let's have some of those here:
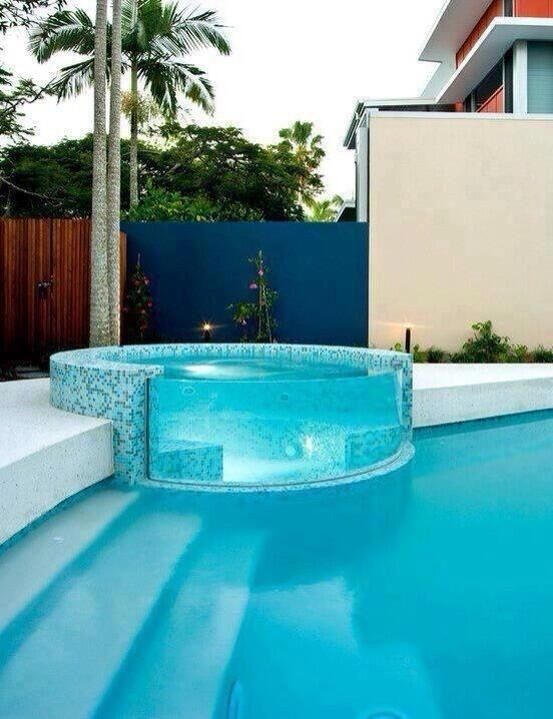
This google images search was my main source of inspiration - to have a round tube, but not embeded into pool like here, but "portable". And with more wood - those tiles look ew. So modelling started like that:
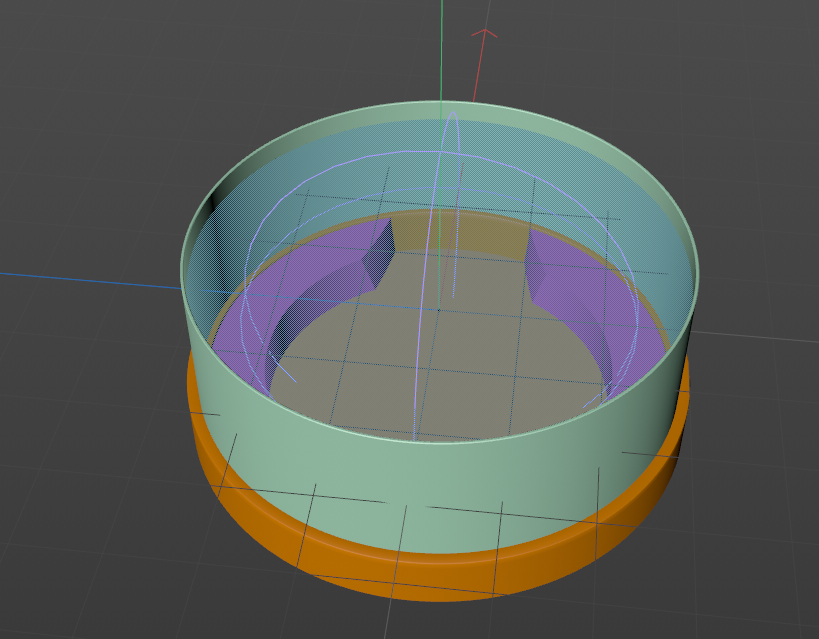
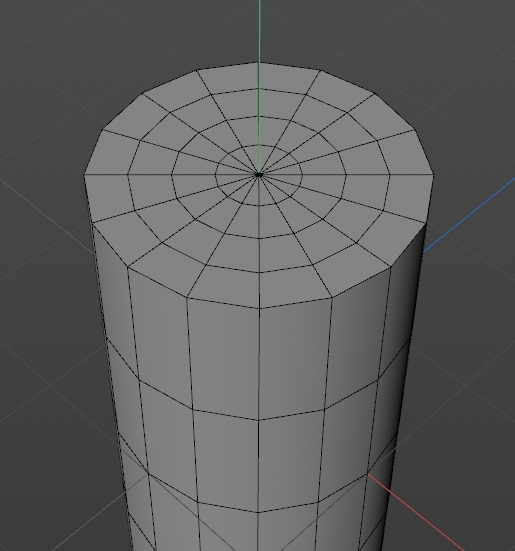
Basically just a lot od cylinders and some boole to cut them. I wanted to keep glass, water etc. as seperate objects so I can disable them/enable them when needed. And change it's height when needed. Water surface was something I specifically wanted to be... morph-able. And usually caps on cylinders will look like that:
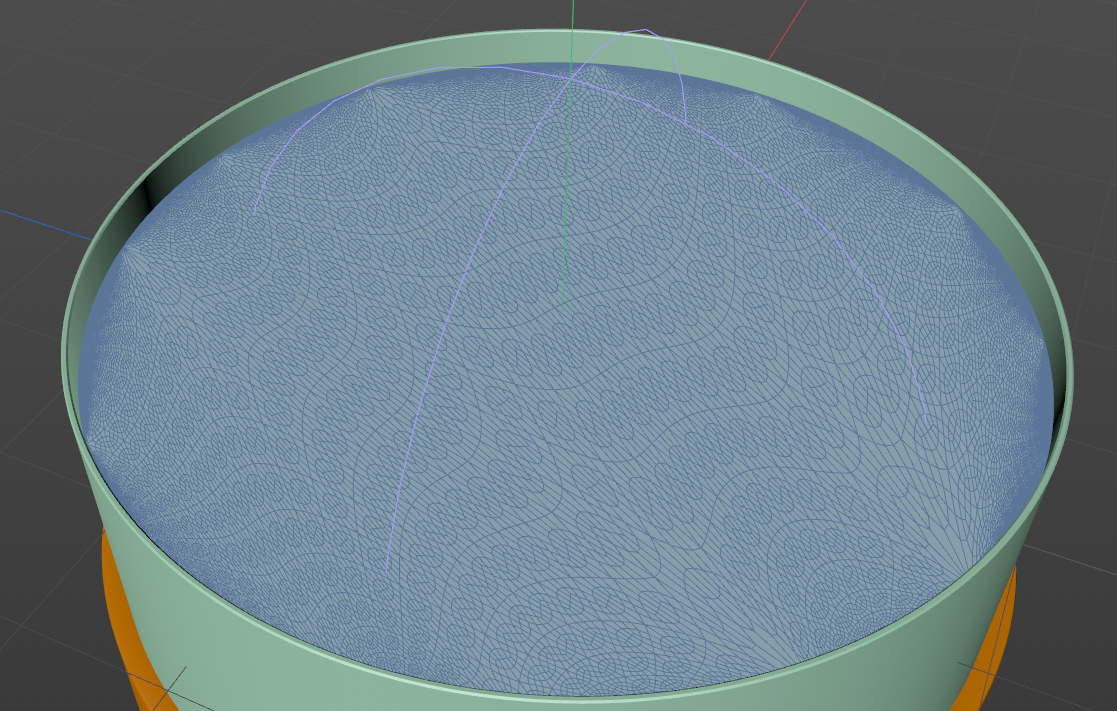
You cannot displace or morph water surface on it. it will look like weird cake. So I revamped water surface like that:
Which in itself has more natural looking water-y pattern. Perfect for displacing and morphing. Then I made a seperate laddder and textured it so I could see if it works as intended in Iray:
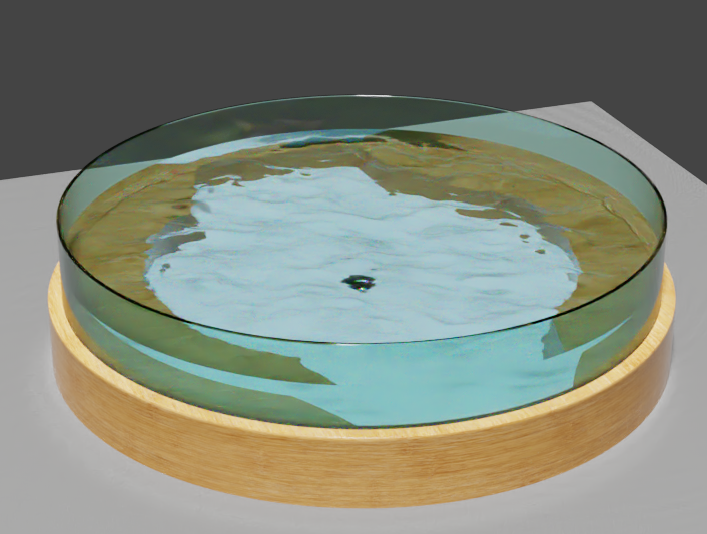
This time I didn't forget to make water walls. This is how it looks without the glass around it:
The refraction value of Glass is 1.5-ish and water is 1.33-ish. If you do both on top of each other the curving of what'ts inside will be different than just glass or just water.
Inside had a bubbler like you can see on the bottom. But no bubbles! And they way I figured it out was to make 3 kinds of bubbles - those that come from bubbler, those that glued themselves to the glass walls and those that went to the surface.
First - Bubbler Bubbles were a thing I wanted to experiment with particles. And the simulation looked like that:
Mesmerizing, isn't it? Wanted a little whirl on the bottom and then particles just going crazy. This is better view:
It's something I couldn't just model without a simulation. Then I rendered tham as spheres and used metaball feature so bubbles close to each other would merge into bigger bubbles. Took a while to get all values and sizes right, but results ... speak for themselves:
At first I had a brainfart - just applied water shader to bubbles and was like "WHY I CANNOT SEE THEM?!?!?!" But essentially I just put water into water - how would that be visible. So I changed IOR value of refraction to the air. And then it worked. For those who want to check how real life IOR for various substances look like, check out this useful site: https://pixelandpoly.com/ior.html
Secondly - bubbles that glued themselves to the glass. Those were easy, just simple cloner with random size and random placement. Nothing fancy:
And not as many - polygon count with other bubbles was through the roof already. And it could be done with normal map buuut. No need to spend another hours on that, it's not a big deal. I did so for...
Third - water surface bubbles. This one was a doozey. I looked around for good foam shader and while I found some, they were meant mostly for ocean surface. So after few tries with those I decided to clone sets of little bubble groups, put it on top of the surface and bake it in Substance Painter. Any other normal map baking app could work here as well. And the resulting normal map was:
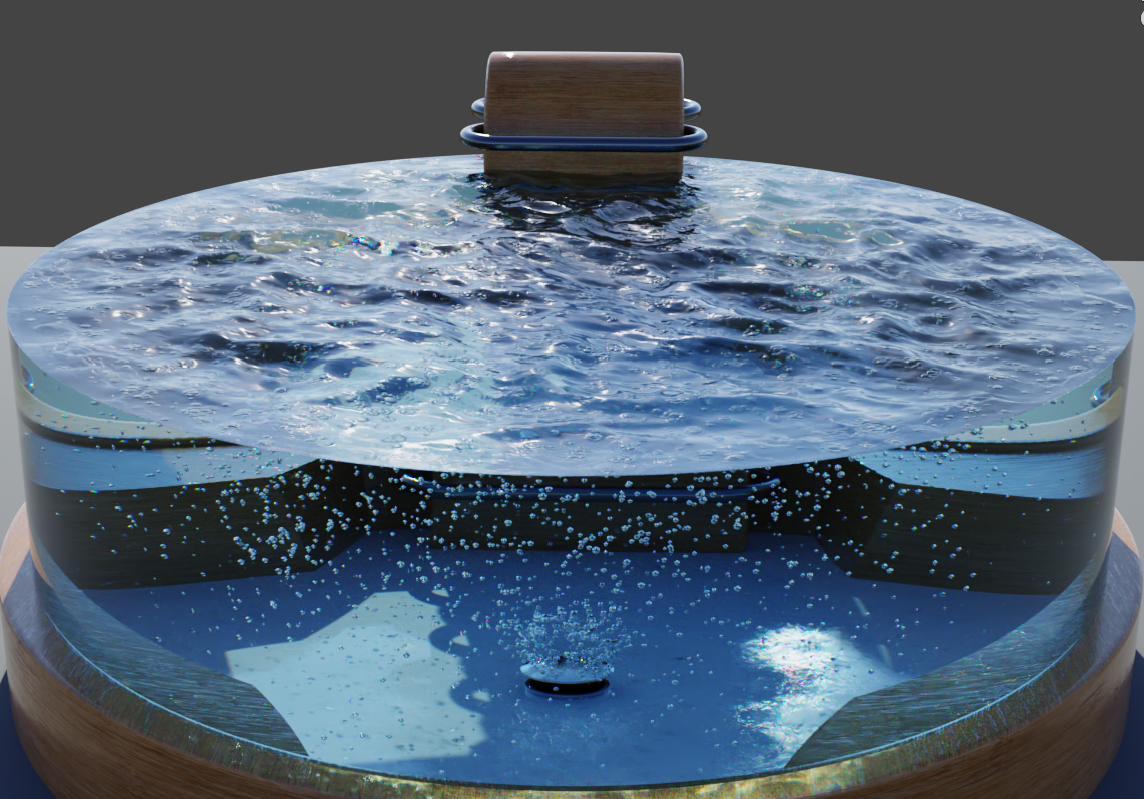
Which was what I wanted. Because in the render, it looks like:
(here without glass)
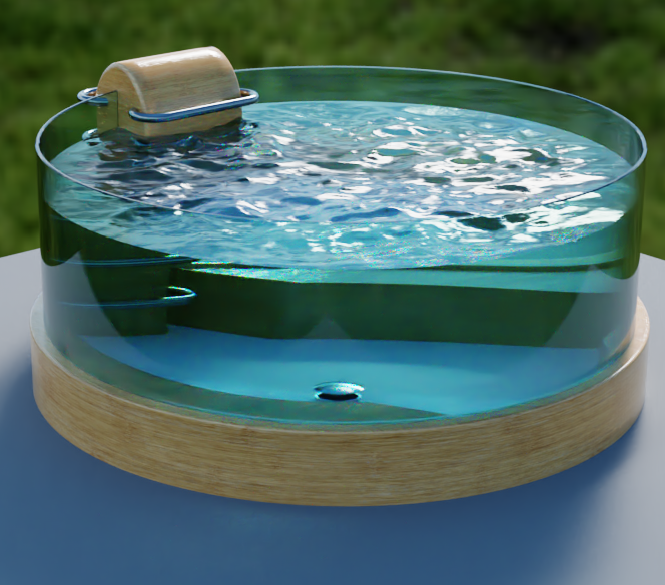
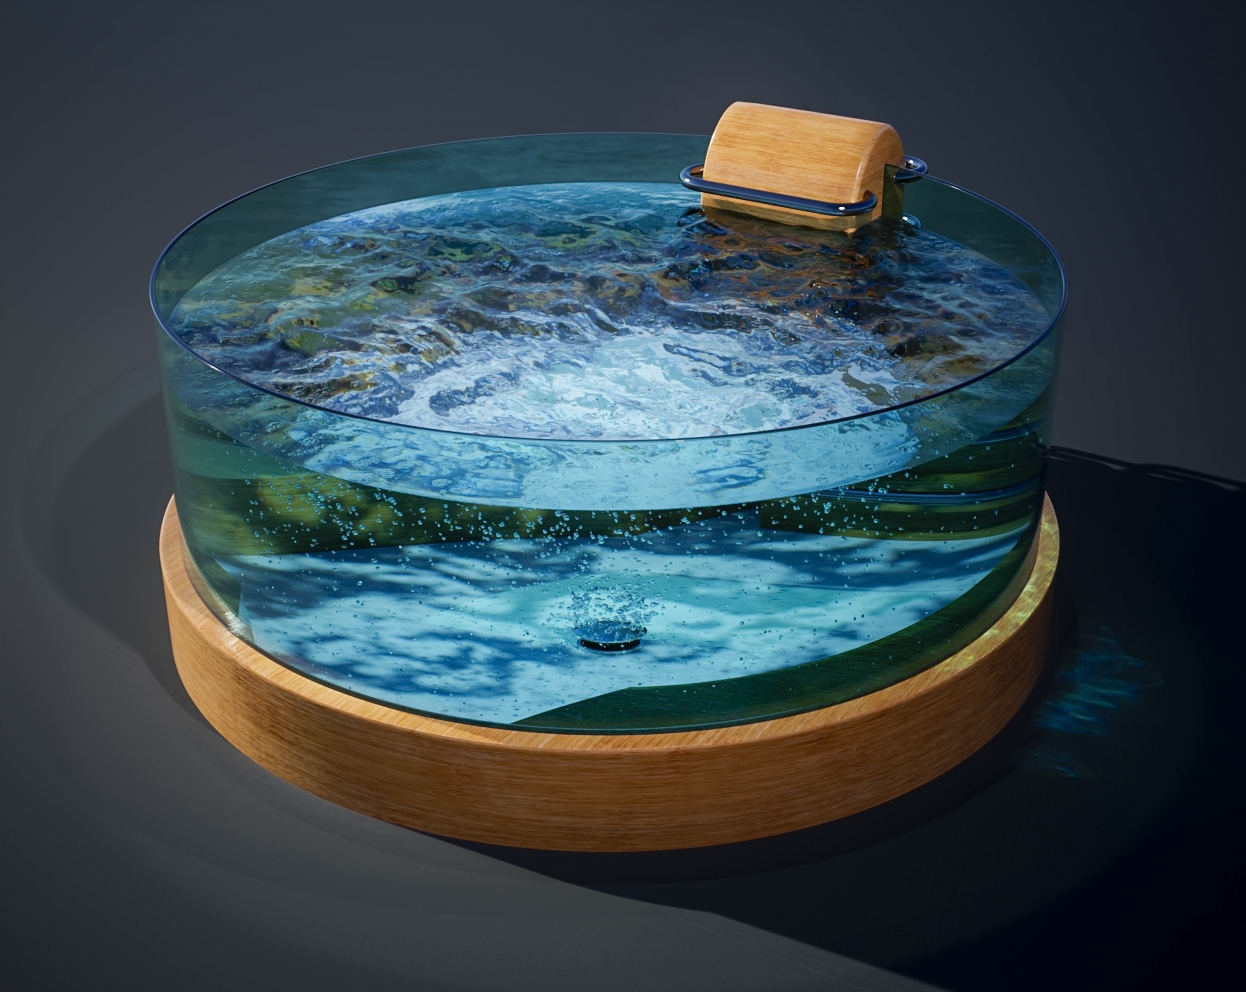
And this was basically it - the model itself was what I needed exactly and am very happy with it. Like I said it's also heavily modifiable. As seen here:
And this is how the model itself looks in its full "glory":
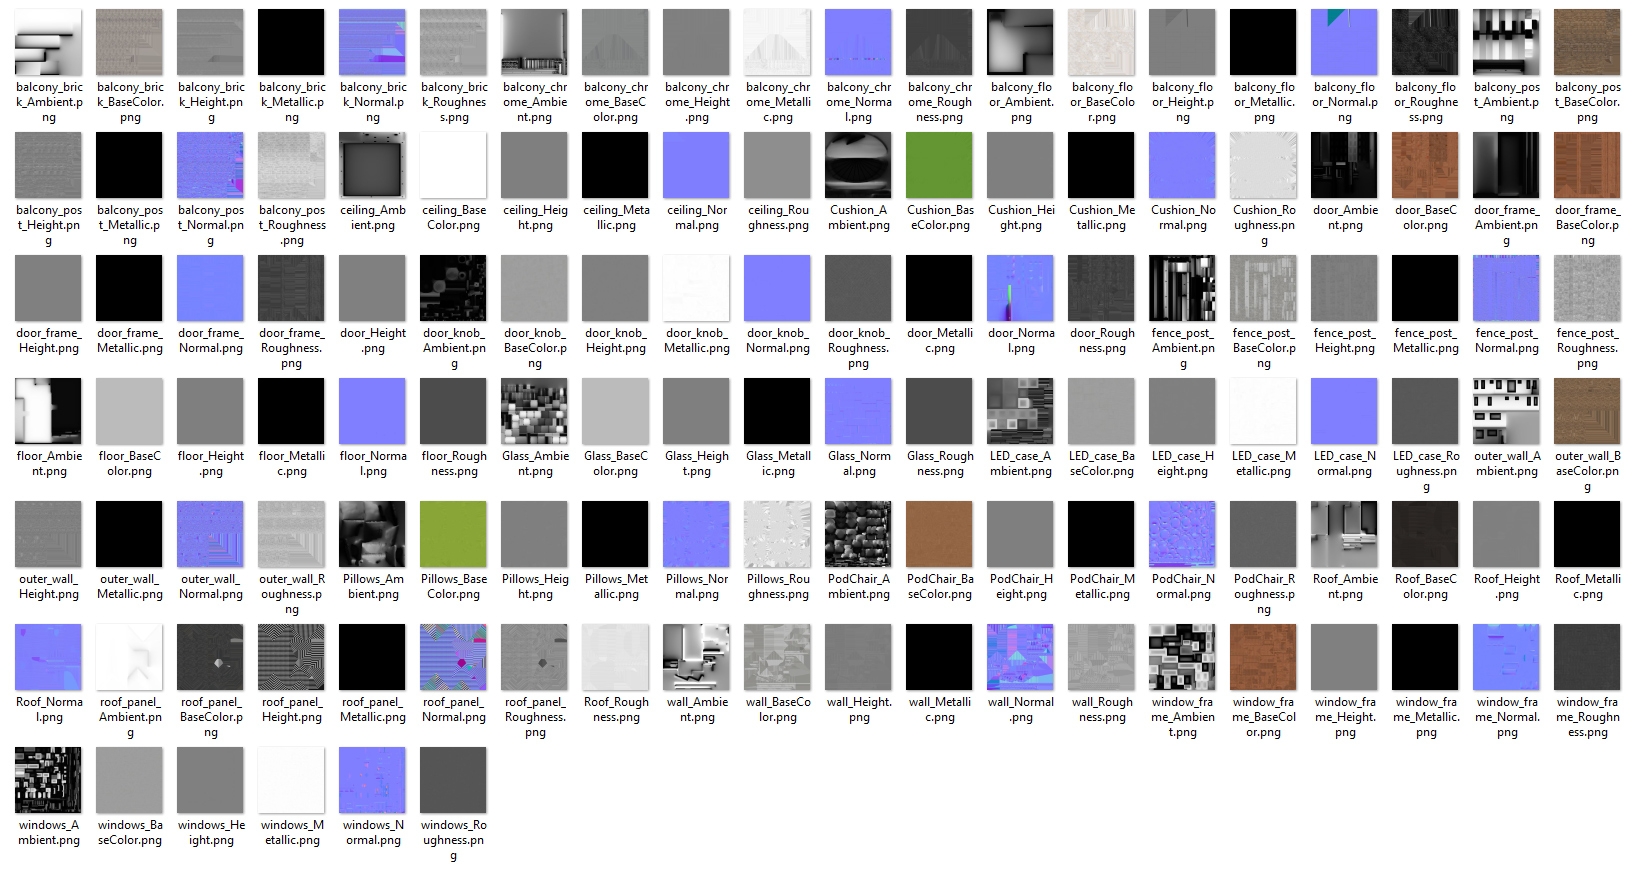
For the next post I will share whole prop - I need to gather all textures and put them in mylibrary (I tend to have them outside when creating). So you can test and use it yourself in your renders :)
So. That was a long one, huh? Like jfc. But also wanted to get into more detail in process of creating props for renders - it can be fun, but also can take a lot of time to get it just right. But results are worth it.
(Fanbox)
(Fanbox)
Files