Home
Home

 Artists
 Search
 Recent
 Random
 Posts
Posts
 DMs
DMs
 Tags
Tags
 Random
 Importer
 Import
 FAQ
FAQ
 Account
 Register
 Favorites
 Login
Login

Blinding Riders - Animation Loop Process 5 - Color Effect + Shadows Test (Patreon)
Content
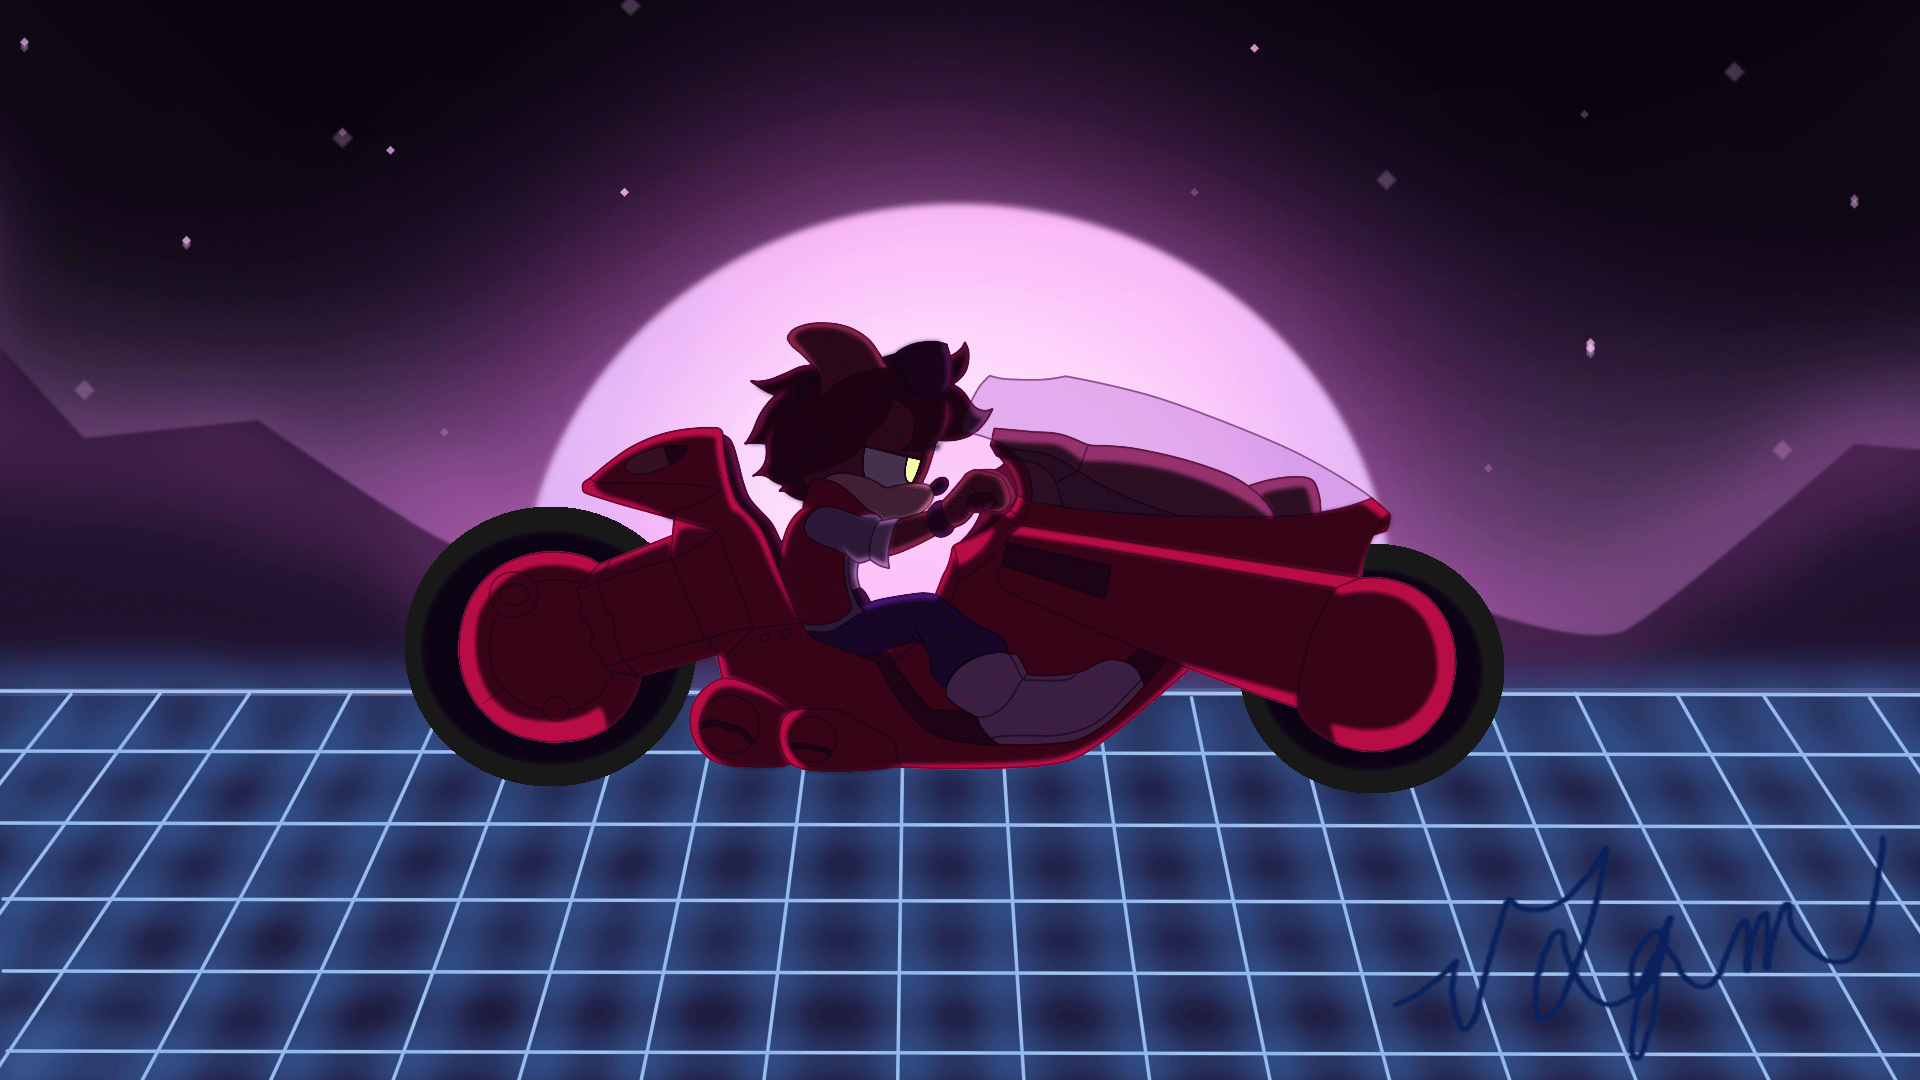
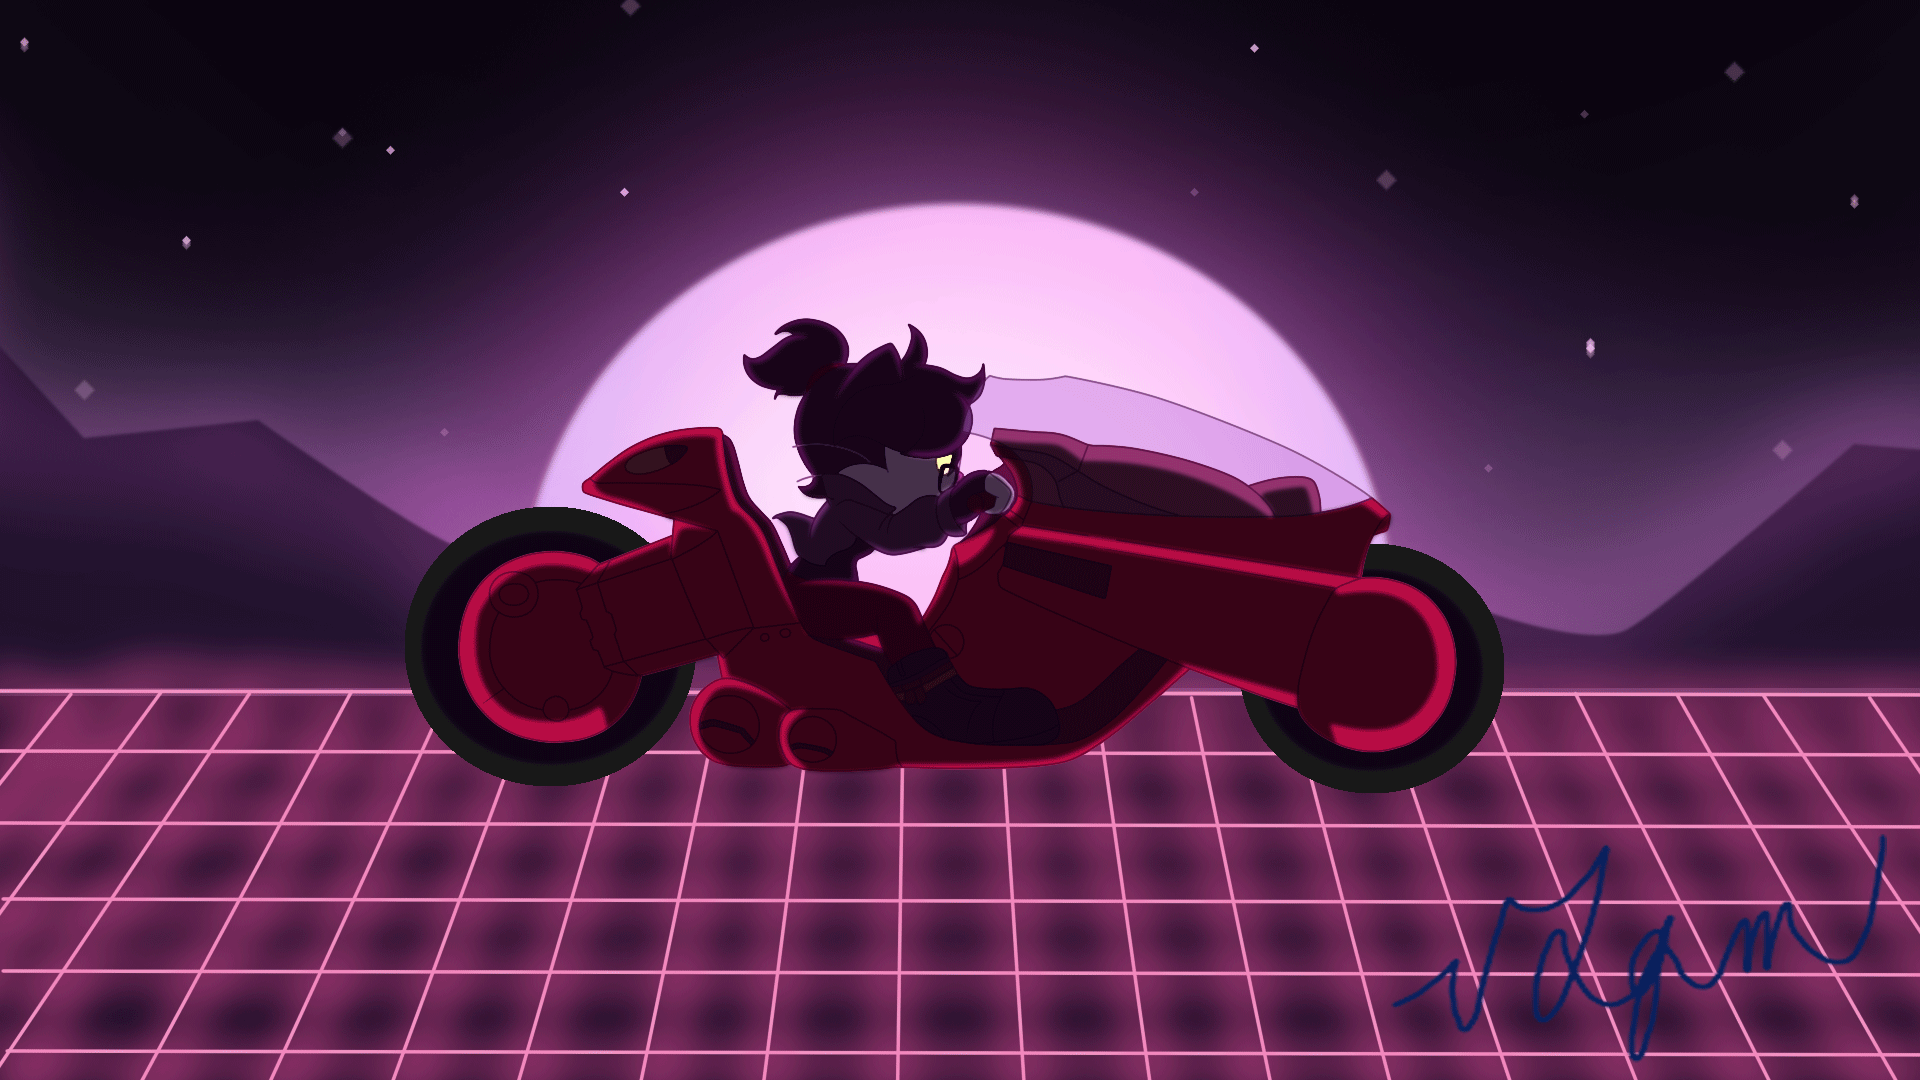
Here we'll balance the colors with a simple trick.
We have our coat with the colors we obtained in the last process.
We will create a new layer on top of it and paint it pink. Here it will be pink because it is the brightest color found in the background.
We'll return to the first layer and we'll select everything that is not the character and the motorcycle. From there we go to the new layer and erase the selected areas, leaving the pink silhouette of our character.
In the pink layer, we will change the fusion from Normal to Light Lines. This will make the character look saturated pink tones (Aww It's Pink Aro! Like Pink Steven!... oh wait... nevermind).
Finally, we'll lower the opacity of the pink layer until we have a tone that we want and that matches the background in which it is located.
I prefer to do this step before adding the shadow, to make sure how it will look.
Here are two examples of how the animation looks with the color effect that I explained, plus the shadow that was added.
The shadow is made in another layer, and the opacity is also lowered. In this case, I only lowered him a little, because the atmosphere is nocturnal.
Just a little more to finish.
Files